
Best Tools to Sharpen Tiller Blades to Buy in July 2026

Corona Sharpening Tool, Garden Tool Blade Sharpener, AC 8300
- SHARPENS ALL STRAIGHT BLADES EASILY-COMPACT AND PORTABLE!
- NON-SLIP GRIP ENSURES SAFE, EFFORTLESS SHARPENING EVERY TIME.
- DURABLE 5 SUPER CARBIDE FILE FOR LONG-LASTING PERFORMANCE.


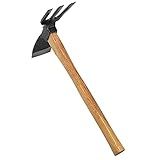
KAKURI Hoe Cultivator Combo Hand Tiller 14-3/4" Heavy Duty Hand Forged Japanese Steel Blade, Japanese Gardening Tool for Digging, Raking, Cultivating, Weeding, Made in Japan
- VERSATILE DESIGN: DIG, WEED, AND LEVEL SOIL WITH ONE TOOL!
- PREMIUM JAPANESE STEEL: HAND FORGED FOR LASTING SHARPNESS AND DURABILITY.
- COMFORTABLE GRIP: NATURAL WOOD HANDLE FITS PERFECTLY AS YOU GARDEN!
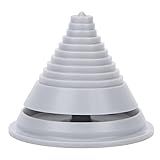
TOPINCN Blade Balancer Abs Material Practical Lawn Mower Blade Balancer Suitable for Grass Workmanship Sharpeners Drills Lawn Mowers Blade Cutters Tillers Hoes Garden Tool
- EFFORTLESS BLADE SHARPENING FOR A HEALTHIER LAWN MOWER!
- QUICK AND EASY BLADE BALANCE TESTING FOR OPTIMAL PERFORMANCE.
- DURABLE ABS MATERIAL ENSURES LONG-LASTING, RELIABLE USE.
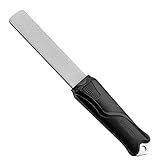
SHARPAL 121N Dual-Grit Diamond Sharpening Stone File Garden Tool Knife Sharpener with Angle Guide Coarse 325 / Extra Fine 1200 Grit for Lawn Mower Blade, Axe, Hatchet, Hedge Shears, Chisels, Drills
- DIAMOND-COATED STEEL SHARPENS TOOLS LIKE NEW-FAST AND EFFICIENT!
- DUAL GRIT SURFACES FOR QUICK EDGE SETTING AND PRECISE HONING.
- ERGONOMIC DESIGN WITH 20° GUIDES ENSURES EFFORTLESS SHARPENING.
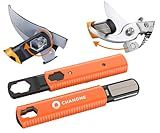
Multi Garden Tool Blade Sharpener - For Sharpening Lawn Mower Blades, Garden Pruners, Axe, Machete, Hedge Shears, Scissors, Hatchets, Pocket Knife Sharpener, speedy sharp sharpener
-
VERSATILE 5-IN-1 TOOL: SHARPENS VARIOUS BLADES FOR ALL YOUR GARDENING NEEDS!
-
COMPACT & RETRACTABLE: EASY TO STORE AND PROTECTS SHARPENING HEAD.
-
PREMIUM QUALITY GUARANTEED: BUILT TO LAST WITH TOP-NOTCH CUSTOMER SUPPORT!
AccuSharp Garden Tool Sharpener, Diamond-Honed Tungsten Carbide Blades, Restores, Repairs, Sharpens & Hones Lawnmower Blades, Secateurs, Limb Loppers, Hoes, Shovels, and Scythes
-
RESTORE ANY BLADE'S SHARPNESS IN JUST A FEW STROKES EFFORTLESSLY.
-
VERSATILE DESIGN SHARPENS A WIDE RANGE OF GARDEN TOOLS WITH EASE.
-
DURABLE CONSTRUCTION OFFERS 5-10 YEARS OF RELIABLE CLEANING PERFORMANCE.

Smith’s 50910 Edge Eater Sharpening Stone – Coarse Grit – Lawn & Garden Tools – Axes, Machetes, Mower Blades, Clippers, Shovels – Handheld Sharpening Puck
-
SHARPEN TOOLS QUICKLY: PERFECT FOR AXES, CLIPPERS, AND MOWER BLADES!
-
COMPACT & PORTABLE: EASILY FITS IN ANY TOOLBOX OR VEHICLE FOR ON-THE-GO!
-
COMFORTABLE GRIP: SAFE DESIGN WITH A GROVE GRIP FOR EASY, EFFICIENT USE!
To sharpen tiller blades, you will need a few tools and follow a step-by-step process. It is essential to maintain sharp blades to ensure effective tilling and prevent damage to your tiller. Here's a guide on how to sharpen tiller blades:
- Preparation: Disconnect the spark plug wire to prevent accidental engine starting. Put on safety goggles and gloves to protect yourself during the sharpening process.
- Remove the blades: Locate the bolts or fasteners holding the blades in place. Use a wrench or socket to loosen and remove the bolts. Carefully take out the blades from the tiller.
- Inspect the blades: Check the blades for any cracks, excessive wear, or damage. If they are severely damaged, it may be best to replace them. Clean off any dirt or debris from the blades using a brush or compressed air.
- Sharpening: Secure the blade in a vice to hold it steady during sharpening. Ensure it is properly clamped without damaging the blade. Use a metal file or a bench grinder to sharpen the blades. A metal file is safer if you're not experienced with a bench grinder. Maintain the original bevel angle of the blade while sharpening. Refer to the manufacturer's instructions or examine the existing bevel for reference. Use smooth, even strokes along the cutting edge of the blade. Start from the base of the blade, moving towards the tip, maintaining a consistent angle. Rotate the blade in the vice and repeat the process to sharpen the other side evenly.
- Balancing: After sharpening, it is crucial to check the balance of the blades to ensure optimal performance. Hang the blade horizontally on a nail or screwdriver using the center hole. If one side is significantly lower, file a little more material from that side until it balances evenly.
- Reinstall the blades: Clean the mounting area and bolts on the tiller. Place the blades back into position, ensuring they align correctly with the tiller. Tighten the bolts securely, following the manufacturer's recommended torque specifications.
- Final checks: Give the blades a final visual inspection to ensure they are properly installed. Reconnect the spark plug wire that was disconnected earlier.
Remember, it's essential to consult your tiller's user manual or contact the manufacturer for specific instructions, as sharpening methods may vary depending on the tiller model and type of blades used.
How to sharpen curved tiller blades?
To sharpen curved tiller blades, you will need the following tools:
- File: Choose a file with a length and width suitable for the size of the blade.
- Clamp: Use a clamp or vice to secure the blade in place during the sharpening process.
- Safety equipment: Wear safety gloves and goggles to protect yourself from any potential accidents.
Here are the steps to sharpen curved tiller blades:
- Secure the blade: Use the clamp or vice to hold the blade in a stable position. Make sure it is tightly secured, ensuring that it does not move during sharpening.
- Assess the blade: Inspect the blade for any visible damage or nicks. Use a wire brush or steel wool to remove any dirt or rust from the surface.
- Identify the beveled edge: Most curved tiller blades have a beveled edge. Identify the angle and direction of the bevel that needs to be sharpened.
- File the blade: Begin filing the beveled edge of the blade using long and smooth motions. Apply pressure evenly across the entire length of the blade. Maintain the angle of the bevel as you file.
- Check regularly: Periodically stop filing and check the blade's sharpness. Gently touch the edge with your finger or thumb to feel for a sharp edge. Alternatively, you can also visually inspect the blade for a shiny or reflective edge.
- Repeat as necessary: Continue filing until you achieve the desired sharpness. If there are any nicks or dents, focus on those areas and file them gradually until they are smoothed out.
- Remove burrs: After filing, use a sharpening stone or honing tool to remove any burrs or rough edges left by the filing process. Move the stone or honing tool along the blade edge, applying light and even pressure.
- Clean and lubricate: Once you are satisfied with the sharpness of the blade, clean off any debris or filings from the blade. Apply a light coat of lubricating oil to prevent rusting and ensure smooth operation.
Always exercise caution and follow safety guidelines when sharpening tiller blades. Additionally, refer to the manufacturer's instructions or consult a professional if needed.
How to safely remove tiller blades for sharpening?
To safely remove tiller blades for sharpening, follow these steps:
- Preparation: Ensure the tiller is switched off and the engine is completely cool. Disconnect the spark plug wire to prevent accidental engagement of the tiller during the process.
- Locate the blade attachment area: Identify the area where the tiller blades are attached to the tiller. This will typically be located underneath the machine and close to the tiller tines.
- Secure the tiller: Place cinder blocks or other sturdy objects in front of and behind the tires to prevent the tiller from rolling or accidentally engaging while you're working.
- Remove the blade guard: Some tillers have a blade guard that needs to be removed before accessing the blades. Remove any screws or bolts holding the blade guard in place and gently set it aside.
- Release the blade retaining nut or bolt: Locate the retention nut or bolt that holds the blade in place. Use an appropriately sized wrench or socket to loosen and remove the nut or bolt. Be sure to keep track of any washers or spacers that may come off with the blades or the retaining hardware.
- Carefully remove the blades: Gently slide or pull the blades out from their attachment point. Be cautious of any sharp edges or debris that may be present, and handle the blades with gloves to avoid any potential cuts.
- Inspect and clean the blades: Once the blades are removed, inspect them for any damage or excessive wear. If needed, clean them with a wire brush or scraper to remove any built-up debris or rust.
It's important to note that some tiller models may have slightly different procedures for blade removal. Consult your tiller's manual for any specific instructions or safety guidelines provided by the manufacturer.
What are the common mistakes to avoid while sharpening tiller blades?
When sharpening tiller blades, there are several common mistakes that should be avoided to ensure proper sharpening and to prevent damage to the blades. Some of these mistakes include:
- Over-sharpening: Sharpening the blade too much can weaken it and reduce its lifespan. It is important to maintain the original shape and angle of the blade while removing only the necessary amount of material.
- Inconsistent sharpening: Applying uneven pressure or uneven strokes while sharpening the blade can result in an uneven cutting edge. This can cause the tiller to vibrate, produce an uneven or rough texture on the tilled soil, and reduce overall efficiency.
- Improper use of tools: Using the wrong sharpening tools or using them incorrectly can lead to ineffective sharpening or even damage to the blade. It is crucial to use the appropriate tools for the specific type of tiller blade and follow the manufacturer's guidelines.
- Neglecting blade balance: When sharpening the blade, it is important to maintain its balance by removing an equal amount of material from both sides. Failing to do so can lead to vibrations, reduced performance, and potential damage to the tiller.
- Ignoring safety precautions: Working with tiller blades requires caution and safety measures. It is crucial to wear appropriate protective gear such as gloves and safety goggles to prevent injuries. Additionally, ensuring the engine is turned off and the tiller is disengaged before starting any maintenance or sharpening is essential.
To avoid these mistakes, it is beneficial to read the manufacturer's instructions or consult a professional for guidance on the proper sharpening techniques specific to your tiller model.
What are the benefits of regularly sharpening tiller blades?
Regularly sharpening tiller blades has several benefits:
- Improved Performance: Sharpened blades provide a cleaner and more precise cut, resulting in better overall performance. This allows the tiller to work more efficiently, as it can dig deeper into the soil and break it up more effectively. Smooth blades also reduce resistance, leading to less strain on the tiller's engine or motor.
- Enhanced Productivity: When tiller blades are sharp, they can complete their task more quickly. They require less effort to cut through the soil, which means you can cover a larger area in less time. This boosts productivity, allowing you to finish your gardening or farming tasks faster.
- Healthier Plants and Soil: Dull tiller blades can tear or shred the soil, which can damage the root systems of plants. On the other hand, properly sharpened blades provide a cleaner cut, causing less disruption to the soil and roots. This promotes healthier plant growth and minimizes the risk of disease or stress caused by improper tilling.
- Reduced Fuel Consumption: Sharpened blades reduce the resistance encountered during tilling, allowing the tiller to work more efficiently. This can lead to reduced fuel consumption, as the engine or motor doesn't need to exert as much energy to perform the desired tasks. Regular sharpening, therefore, helps to save money in the long run by decreasing fuel expenses.
- Longer Blade Lifespan: By regularly sharpening tiller blades, you can extend their lifespan. Dull blades tend to wear down faster due to increased friction and stress. Sharp blades experience less wear and tear, ensuring they last longer before needing replacement. This saves time and money spent on purchasing and installing new blades.
- Safer Operation: Dull tiller blades can be hazardous to use as they may bounce or skip over the soil surface. This can lead to loss of control and potential accidents. Properly sharpened blades provide smoother and more secure operation, reducing the risk of injury or damage to the tiller or surrounding objects.
It is important to note that, when sharpening tiller blades, one should follow proper safety procedures to avoid accidents. If unsure, it is recommended to consult the tiller's manufacturer or a professional for guidance.
What safety precautions should be taken while sharpening tiller blades?
Sharpening tiller blades can be a potentially dangerous task, so it is important to take several safety precautions to prevent accidents. Here are some key safety measures to follow while sharpening tiller blades:
- Wear protective gear: Use safety goggles or a face shield to protect your eyes from flying debris. Additionally, wear gloves to protect your hands from sharp edges and potential cuts.
- Disconnect power source: Before starting the sharpening process, disconnect the tiller from its power source, such as removing the spark plug wire or turning off the engine. This prevents accidental engagement of the machine while working on the blades.
- Secure the tiller: Ensure that the tiller is securely placed on a stable surface or workbench, enabling you to work on the blades without the machine moving or tipping over. This will prevent accidents and provide stability during the sharpening process.
- Follow manufacturer's guidelines: Always refer to the manufacturer's instructions or user manual for guidance specific to your tiller model. These instructions may include specific safety precautions or guidance on how to properly sharpen the blades.
- Use the right tools: Make sure to use the appropriate tools for blade sharpening, such as a sharpening stone, grinder, or file, as recommended by the manufacturer. Using incorrect tools can lead to accidents and damage to the blades.
- Maintain proper technique: Follow the correct technique for sharpening tiller blades, ensuring that you are sharpening at the correct angle and maintaining consistent pressure. A sloppy technique can result in an uneven blade surface or potential injury.
- Take breaks: Sharpening blades can be a physically demanding task. Take regular breaks to prevent fatigue, as tiredness can lead to accidents. Stay hydrated and listen to your body's cues to prevent overexertion.
- Keep others at a safe distance: Ensure that bystanders or children are kept at a safe distance from the sharpening area to avoid any accidental injuries.
By following these safety precautions, you can minimize the risk of accidents and injuries while sharpening tiller blades. Remember, if you are unsure about the process or lack experience, it is best to consult with a professional or refer to the manufacturer's guidelines for assistance.