Best Bulb Planters for Precise Patterns to Buy in July 2026
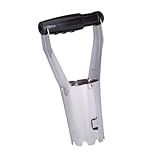
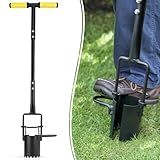
Edward Tools Bulb Planter - Bend Free Tool for Planting Bulbs, Depth Marker for More consistent Planting Tulips, Daffodils, Dahlias (Assorted)
- QUICK PLANTING WITH AUTOMATIC SOIL RELEASE MECHANISM.
- DURABLE REINFORCED STEEL FOR EASY DIGGING IN TOUGH SOILS.
- CONSISTENT PLANTING DEPTHS WITH BUILT-IN DEPTH MARKER.


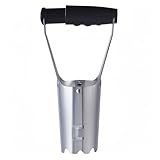
Toresano Bulb Planter, Bulbs Transplanter Designed for Automatic Soil Release with Depth Marker for Dgging Holes and Planting Tool for Tulips, Daffodils, Dahlias
- REINFORCED STEEL DESIGN: PREVENTS BENDING, EXCELS IN HEAVY SOIL.
- DURABLE MATERIALS: HIGH-HARDNESS CONSTRUCTION FOR LONG-LASTING USE.
- PRECISE DEPTH CONTROL: CLEAR SCALE GUARANTEES UNIFORM PLANTING DEPTH.
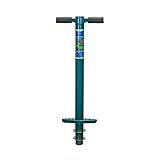
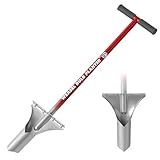
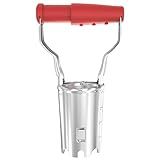
ProPlugger 5-in-1 Planting Tool - Sod Plugger, Bulb and Flower Planter
-
EFFORTLESS PLANTING: STAND WHILE DIGGING PERFECT HOLES UP TO 6 DEEP.
-
VERSATILE TOOL: IDEAL FOR BULBS, VEGGIES, WEEDING, AND SOIL SAMPLING.
-
ERGONOMIC DESIGN: PROTECTS YOUR BACK AND KNEES WITH COMFORTABLE GRIPS.
Colwelt Bulb Planter Tool Long Handle, Serrated Base Gardening Bulb Transplanter with Soft Grip, Heavy Duty Long Handled Bulb Planter Sod Plugger for Digging Holes to Plant Tulips, Iris, Daffodils
-
EFFORTLESSLY DIG PERFECT BULB HOLES-NO BACK PAIN, JUST SPRING BLOOMS!
-
QUICK SETUP & EASY TO USE: STEP, TWIST, PULL FOR FAST PLANTING!
-
DURABLE DESIGN & RUST-RESISTANT: BUILT TO LAST FOR YEARS OF PLANTING!
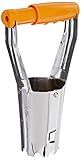
Fiskars Bulb Transplanter
- QUICKLY PLANT BULBS WITH OUR EASY-TO-USE SPRING-LOADED HANDLE.
- GRADATION MARKS ENSURE PERFECT PLANTING DEPTH EVERY TIME.
- ENJOY PEACE OF MIND WITH A LIFETIME WARRANTY ON YOUR PURCHASE!
Garden Weasel Bulb Planter - Long Handle | Annuals, Ground Cover, Vegetables, Spring and Fall Bulbs | Sod Cutter, Remover, and Plugger, Grass Planter, Bulb Planting Tool | 91350
- PLANT BULBS EASILY WITHOUT BENDING-JUST STEP, HOLE, AND GO!
- UNMATCHED PERFORMANCE, TRUSTED BY GARDENERS WORLDWIDE!
- LIFETIME GUARANTEE ENSURES QUALITY AND PEACE OF MIND!
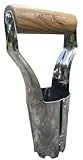
Garden Guru Eco Bulb Planter - 100% Recycled Stainless Steel - Rust Resistant - FSC Certified Wood Ergonomic Handle - Depth Marker for Consistent Planting Flowers Tulips, Daffodils, Dahlias
- EFFORTLESS PLANTING WITH COMFORT-CLASSIC DESIGN MEETS FUNCTIONALITY!
- DURABLE STAINLESS STEEL CONSTRUCTION ENSURES LONG-LASTING USE.
- ECO-FRIENDLY MATERIALS SUPPORT SUSTAINABILITY AND REDUCE WASTE!
FLORA GUARD Bulb Planter with Depth Markers - Automatic Soil Releasing Seed Bulb Transplanter for Planting/Digging Tulips, Daffodils, Dahlias and More
-
DURABLE & ERGONOMIC DESIGN: EASY TO USE, BUILT TO LAST FOR YEARS.
-
EFFICIENT TRANSPLANTING: SAVES ENERGY WHILE PLANTING YOUR FAVORITE BULBS.
-
AUTOMATIC SOIL RELEASE: QUICK SOIL EJECTION REDUCES STRAIN AND SPEEDS UP PLANTING.
Planting bulbs in a specific pattern using a bulb planter is a fairly simple process. Here's how you can do it:
- Choose an appropriate location: Select a suitable area in your garden or flower bed where you want to plant the bulbs. Consider factors such as sunlight, soil type, and drainage.
- Prepare the soil: Before planting, make sure the soil is well-drained and loose. Remove any weeds or debris from the planting area. You can also add compost or organic matter to improve the soil's fertility and drainage.
- Select your bulbs: Choose the type of bulbs you want to plant. Consider their bloom time, height, and color to create a visually pleasing pattern. It's a good idea to plan ahead by sketching out the desired design on paper before starting to plant.
- Determine the spacing: Depending on the specific bulb variety and pattern you want to achieve, determine the appropriate spacing between each bulb. This information is usually provided on the packaging of the bulbs or can be found through online resources or gardening books.
- Use a bulb planter: A bulb planter is a specialized gardening tool designed to make bulb planting easier. It typically consists of a metal cylinder with a handle and a mechanism to remove soil and create a hole for the bulb.
- Insert the bulb planter: Position the bulb planter at the desired location where you want to plant the bulb. Push the planter down into the soil using the handle. Apply steady pressure until the planter reaches the desired depth, which is typically indicated on the planter's scale.
- Remove soil and create a hole: Rotate the bulb planter gently while keeping it in the same position. This motion will help the planter dig deeper into the soil and remove the excess dirt from the hole. The removed soil will be contained within the planter.
- Place the bulb: Once the hole is created, lift the bulb planter out of the ground while still keeping it upright. Take a bulb and gently place it into the hole, ensuring it is positioned correctly (pointy side up for most bulbs). If necessary, adjust the bulb's depth by adding or removing soil from the hole.
- Repeat the process: Move on to the next planting location within your desired pattern, and repeat steps 6 to 8. Continue this process until all the bulbs are planted.
- Cover and water: Finally, use the soil in the bulb planter to cover the bulb's hole, gently pressing it down to ensure the bulb is securely placed. Water the newly planted bulbs thoroughly, providing enough moisture to encourage root growth.
By following these steps, you can easily plant bulbs in a specific pattern using a bulb planter, creating a beautiful and organized display in your garden.
How to prevent bulb rot or diseases while planting in the specific pattern with a bulb planter?
To prevent bulb rot or diseases while planting in a specific pattern with a bulb planter, follow these steps:
- Choose healthy bulbs: Select bulbs that are firm, plump, and free from any signs of disease or damage. Avoid bulbs that appear soft, moldy, or have brown spots.
- Prepare the soil: Ensure the planting area has well-draining soil to prevent waterlogging, which can lead to bulb rot. If the soil is heavy or clay-like, amend it with compost or organic matter to improve drainage.
- Clean and sanitize tools: Before using a bulb planter or any other gardening tools, clean and sanitize them properly. Disinfecting the tools helps prevent the transfer of diseases from one plant to another. Use a solution of bleach and water or rubbing alcohol to wipe down the tools.
- Plant at the correct depth: Follow the recommended planting depth for each type of bulb. Planting too shallow may expose the bulbs to fungal or bacterial diseases, while planting too deep can hinder their ability to establish roots and access water. The bulb planter can help ensure consistent and appropriate planting depth.
- Space bulbs properly: When using a bulb planter, make sure to follow the recommended spacing instructions for each type of bulb. Proper spacing allows for adequate air circulation, which helps prevent the spread of diseases between bulbs.
- Use quality soil: Fill the hole created by the bulb planter with a high-quality, well-draining soil mix. Avoid using heavy or compacted soil that retains excess moisture, as this can lead to bulb rot.
- Water appropriately: Water the newly planted bulbs gently but thoroughly after planting. Avoid overwatering, as it can contribute to bulb rot. Additionally, avoid watering overhead, as water droplets on leaves can encourage disease development. Instead, water at the base of the plants.
- Mulch to prevent diseases: After planting, apply a layer of organic mulch around the bulbs. Mulching helps retain soil moisture, suppresses weed growth, and moderates soil temperature, all of which contribute to healthier plants. However, ensure the mulch does not touch the base of the bulbs, as it may lead to rot.
- Monitor and maintain: Regularly inspect the bulbs for any signs of disease or rot, such as mold, decay, or discoloration. Remove any affected bulbs promptly to prevent the spread of diseases. Ensure the planting area is free from debris and remove any fallen leaves or plant debris that could harbor pests or diseases.
By following these preventive measures, you can minimize the risk of bulb rot or diseases and promote healthy growth for your planted bulbs.
How to identify and rectify common mistakes made when planting bulbs in the specific pattern with a bulb planter?
Planting bulbs in a specific pattern with a bulb planter can help create a more organized and visually appealing garden. However, it is common to make some mistakes. Here are some ways to identify and rectify these common mistakes:
- Depth inconsistency: The first mistake gardeners often make is not planting bulbs at a consistent depth. This can result in uneven growth or bulbs not sprouting at all. To rectify this, after planting a few bulbs, use a ruler or the measurement guide on the bulb planter to ensure all bulbs are planted at the same depth.
- Incorrect spacing: Another common mistake is not spacing the bulbs properly. This can lead to overcrowding or sparse growth. To identify this mistake, check the recommended spacing instructions for the specific bulbs you are planting. If the bulbs are too close together, carefully dig them up and replant them at the appropriate spacing.
- Wrong direction: Planting bulbs upside down or in the wrong direction is another error. This can impede growth or prevent bulbs from flowering altogether. To rectify this mistake, observe the bulbs closely after planting. If you notice that some bulbs are not showing signs of growth or are growing unusually, carefully dig them up and replant them in the correct direction.
- Inadequate soil preparation: Many gardeners forget to prepare the soil adequately before planting bulbs. This can affect their overall growth and success. To identify this mistake, monitor the bulbs' growth. If they seem weak, stunted, or lackluster, it may be due to poor soil preparation. Rectify this by incorporating organic matter into the soil, such as compost or well-rotted manure, to improve its fertility and drainage.
- Forgetting water and mulch: Neglecting to water bulbs properly after planting can also lead to issues. Dry or dehydrated bulbs may not bloom, and their overall health can be compromised. Additionally, failing to apply mulch after planting can cause soil erosion, temperature fluctuation, and weed growth. To rectify these mistakes, water bulbs immediately after planting, and provide regular irrigation as per the specific bulb's requirements. Additionally, apply a layer of organic mulch around the bulbs, ensuring it doesn't touch the stems, to help conserve moisture and regulate soil temperature.
By being mindful of these common mistakes and taking steps to rectify them, you can ensure a successful and beautiful display of bulbs in your garden.
How to protect bulbs from pests or animals after planting them in the specific pattern with a bulb planter?
After planting bulbs in a specific pattern with a bulb planter, it's important to protect them from pests or animals that may try to disturb or eat them. Here are a few methods to consider:
- Physical barriers: Place a wire mesh or hardware cloth over the area where the bulbs are planted. This will prevent animals like squirrels, rabbits, or raccoons from digging them up or disturbing them.
- Repellents: Use natural or commercial repellents around the planting area to make it less attractive to animals. For example, sprinkling cayenne pepper, blood meal, or garlic powder around the bulbs can deter many pests. You can also use commercial repellent sprays specifically designed to repel animals.
- Netting or fencing: Install a low fence or netting around the planting area. This can help keep larger animals out, such as deer or dogs, while allowing sunlight and rain to reach the bulbs.
- Companion planting: Consider planting bulbs alongside other plants that naturally repel pests, such as marigolds or alliums. These plants can act as a deterrent and help protect the bulbs.
- Scare tactics: Use scare devices like motion-activated sprinklers or wind chimes to startle and discourage animals from approaching the bulbs.
- Smells and tastes: Some animals dislike certain scents or tastes. For example, placing mothballs or using repellent sprays with strong odors can help keep pests away.
Remember to regularly inspect the area and take appropriate measures if you notice any signs of damage or disturbance.
What is the ideal watering schedule for bulbs planted in the specific pattern using a bulb planter?
The ideal watering schedule for bulbs planted in a specific pattern using a bulb planter can vary depending on several factors, including the type of bulbs, soil moisture levels, weather conditions, and the specific needs of the plants.
However, as a general guideline, here is a recommended watering schedule for bulbs planted in a specific pattern using a bulb planter:
- After planting: Water the bulbs immediately after planting. This helps settle the soil, removes air pockets, and ensures good soil-to-bulb contact. Give a thorough watering to moisten the soil around the bulbs.
- Initial establishment: For the first few weeks after planting, water the bulbs regularly to promote root establishment. The frequency may depend on factors such as temperature and rainfall. In general, water deeply whenever the top inch of soil feels dry, ensuring good soil moisture without waterlogging.
- Winter dormancy: Once the bulbs have entered their dormancy period (usually in winter for many bulb varieties), reduce watering significantly. Monitor the soil moisture levels and only water if the soil becomes excessively dry. Overwatering during dormancy can rot the bulbs.
- Spring awakening: As the bulbs start to emerge from dormancy and new growth appears, increase watering gradually. Ensure the soil around the bulbs remains consistently moist but not waterlogged. The watering frequency may depend on the specific bulb types and weather conditions.
- Flowering period: During the flowering period, continue to water the bulbs consistently to support healthy growth and vibrant blooms. Adequate moisture is particularly important during hot and dry weather. Water deeply whenever the top few inches of soil feels dry.
- After flowering: Once the flowers have faded and the foliage starts to yellow, gradually reduce watering. This allows the bulbs to dry out naturally and prepare for their dormant phase. However, avoid allowing the soil to dry out completely, as this can stress the bulbs.
Remember to regularly monitor the soil moisture levels and adjust the watering schedule accordingly. It is essential to strike a balance between providing adequate moisture for the bulbs' needs while avoiding overly soggy or dry conditions.
What is the recommended method for removing bulbs planted wrongly in the specific pattern using a bulb planter?
To remove bulbs that have been planted wrongly in a specific pattern using a bulb planter, here is the recommended method:
- First, ensure that the ground is moist to make bulb removal easier. Water the area if necessary.
- Identify the bulbs that need to be removed. Carefully mark or make a mental note of their location.
- Use a bulb planter with a narrow, cylindrical tube or a sharp spade to carefully dig around the bulb. Start digging from the outer edges to avoid damaging nearby bulbs.
- Insert the bulb planter beside the bulb and push it into the soil to the desired depth. Twist the planter gently to loosen the soil around the bulb. This technique works best for smaller bulbs.
- Carefully lift the bulb, keeping the roots intact, by holding the foliage or stem. Gently wiggle the bulb if it's stuck.
- Inspect the bulb for any damage or signs of disease. If it's still healthy, you can replant it in the correct location immediately. If necessary, trim any damaged or diseased parts before replanting.
- Make sure to fill the hole left by the removed bulb with soil and gently firm it down to eliminate any air pockets.
- Repeat the process for each incorrectly planted bulb, ensuring you replant them in the correct pattern and spacing.
- After all the bulbs have been removed and replanted, water the area thoroughly to help settle the soil and provide moisture to the bulbs.
Taking care not to damage other bulbs or nearby plants is important during the removal process. By following these steps, you should be able to correct any planting mistakes and ensure the health and proper placement of your bulbs.
How to prevent bulbs from drying out during the planting process in the specific pattern with a bulb planter?
To prevent bulbs from drying out during planting, you can follow these steps:
- Prepare the planting area: Make sure the soil is loose and well-drained. Remove any weeds or debris that may interfere with bulb growth.
- Choose a suitable planting location: Bulbs generally prefer full sun or partial shade, depending on the specific variety. Check the light requirements for the bulbs you are planting and select a location accordingly.
- Dig the planting holes: Use a bulb planter, which is specifically designed to create holes for bulbs. Push the bulb planter into the soil, twist it slightly to create a loose hole, and then lift it out.
- Maintain moisture in the holes: Fill each hole partially with water before placing the bulb to create a moist environment.
- Place the bulbs: Gently place the bulbs in the holes with the roots facing down and the pointed end up. Ensure they are positioned at the appropriate depth as specified on the packaging or as recommended for the specific bulb type.
- Cover the bulbs: Use the soil from the dug hole or additional soil to cover the bulbs. Firmly press the soil down to eliminate air pockets.
- Water the area: After planting, water the area thoroughly to help settle the soil and ensure the bulbs receive enough moisture. Make sure the soil is evenly moist but not waterlogged.
- Apply mulch: Apply a layer of organic mulch, such as shredded leaves or bark, around the newly planted bulbs. Mulch helps retain moisture, suppress weed growth, and insulate the bulbs from extreme temperatures.
- Monitor moisture levels: Regularly check the soil moisture around the bulbs. If the soil feels dry, water the area gently to provide additional moisture. Avoid overwatering, as bulbs may rot in excessively wet conditions.
Following these steps will help prevent bulbs from drying out during the planting process with a bulb planter, ensuring they have the necessary moisture to establish and grow successfully.