Best Bulb Planters to Buy in July 2026
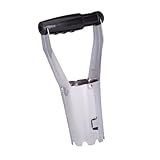
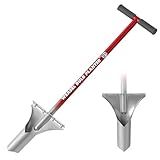
Edward Tools Bulb Planter - Bend Free Tool for Planting Bulbs - Automatic Soil Release for Digging/refilling Hole - Depth Marker for More consistent Planting Tulips, Daffodils, Dahlias
- QUICK PLANTING WITH AUTOMATIC SOIL RELEASE MECHANISM.
- DURABLE REINFORCED STEEL FOR EASIER DIGGING IN TOUGH SOILS.
- DEPTH MARKER ENSURES CONSISTENT PLANTING FOR ALL BULB TYPES.


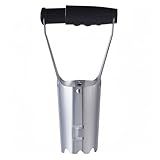
Toresano Bulb Planter, Bulbs Transplanter Designed for Automatic Soil Release with Depth Marker for Dgging Holes and Planting Tool for Tulips, Daffodils, Dahlias
-
DURABLE STEEL BUILD: REINFORCED DESIGN PREVENTS BENDING, IDEAL FOR TOUGH SOIL.
-
PRECISION PLANTING: CLEARLY MARKED DEPTH SCALE FOR UNIFORM RESULTS EVERY TIME.
-
EFFORTLESS DIGGING: AUTOMATIC SOIL RELEASE FOR QUICK, EASY PLANTING SESSIONS.
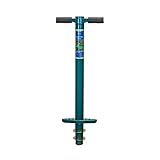
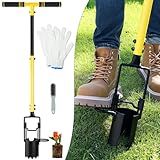
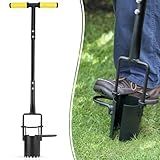
5-in-1 ProPlugger Bulb Planter - Long Handle, Sod Plugger, Weeding Tool - Made in USA
-
EFFORTLESS PLANTING: STEP, TWIST, PULL-NO BENDING NEEDED!
-
VERSATILE TOOL: USE IT FOR BULBS, VEGGIES, WEEDING, AND MORE!
-
BUILT TO LAST: MADE IN USA WITH DURABLE, RELIABLE CARBON STEEL!
Garden Weasel Bulb Planter - Long Handle | Annuals, Ground Cover, Vegetables, Spring and Fall Bulbs | Sod Cutter, Remover, and Plugger, Grass Planter, Bulb Planting Tool | 91350
- QUICK, EFFORTLESS PLANTING-NO BENDING OR KNEELING NEEDED!
- PROFESSIONAL-GRADE DESIGN ENSURES UNMATCHED PERFORMANCE.
- LIFETIME GUARANTEE FOR RELIABLE, LONG-LASTING USE.
Fabulas Bulb Planter Tool Long Handle, Plant Hole Digger with Soft Grip and Serrated Base, Heavy Duty 5-in-1 Sod Lawn Grass Plugger Tool Planting Digger Garden Transplanter for Tulips Iris Flower
- VERSATILE 5-IN-1 TOOL: PLANT, WEED, AND AERATE EFFORTLESSLY IN ONE TOOL.
- ERGONOMIC & EASY TO USE: PROTECTS YOUR BACK; SIMPLIFIES PLANTING FOR ALL.
- DURABLE CONSTRUCTION: HEAVY-DUTY METAL RESISTS RUST; BUILT FOR LONG-LASTING USE.
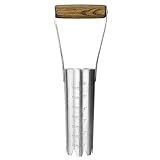
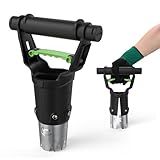
Haliaeetus Bulb Planter Tool, 6 inches Depth Mark Hand Bulb Planter, Non-Bending Stainless Steel Bulb Planter Digger, Garden Bulb Transplanter with Comfortable Wood Handle for Planting Tulip, Daffodil
-
10X EFFICIENCY: PLANT 150 BULBS PER HOUR WITH EASE!
-
EASY DEPTH CONTROL: BUILT-IN MARKINGS ENSURE PERFECT PLANTING!
-
DURABLE DESIGN: HIGH-QUALITY STEEL RESISTS BENDING AND CORROSION!
FLORA GUARD Bulb Planter with Depth Markers - Automatic Soil Releasing Seed Bulb Transplanter for Planting/Digging Tulips, Daffodils, Dahlias and More
- ERGONOMIC DESIGN REDUCES HAND STRAIN FOR EFFORTLESS PLANTING.
- AUTOMATIC SOIL RELEASE SPEEDS UP YOUR PLANTING PROCESS.
- LIFETIME WARRANTY GUARANTEES DURABILITY FOR ALL GARDENING NEEDS.
Colwelt Bulb Planter Tool Long Handle, Serrated Base Gardening Bulb Transplanter with Soft Grip, Heavy Duty Long Handled Bulb Planter Sod Plugger for Digging Holes to Plant Tulips, Iris, Daffodils
- EFFORTLESSLY PLANT BULBS FROM A STANDING POSITION!
- SERRATED BASE & TWO-PEDALS FOR EFFICIENT DIGGING!
- DURABLE, RUST-RESISTANT DESIGN FOR LONG-LASTING USE!
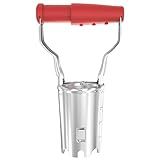
Gardtech Sturdy Bulb Planter, 5 inches Depth Hand Bulb Planting Tool, Heavt Duty Stainless Steel Garden Soil Release Tool & Transplanter for Plants Seeds and Digging Tulips
-
DURABLE STAINLESS STEEL CONSTRUCTION: RUST-RESISTANT, BUILT FOR TOUGH CONDITIONS.
-
ERGONOMIC NON-SLIP HANDLE: DESIGNED FOR COMFORT, REDUCES HAND STRAIN EFFORTLESSLY.
-
EFFICIENT ONE-STEP MECHANISM: CREATE PERFECT HOLES IN SECONDS, BOOST GARDEN PRODUCTIVITY.
Planting daffodil bulbs with a bulb planter is a straightforward process that can help ensure your bulbs are properly placed in the soil for optimal growth and blooming. Here's how you can do it:
- Choose the right bulb planter: Select a bulb planter tool that suits your needs. There are various types available, but most commonly, bulb planters feature a long metal tube with a handle at the top and a hollow cylinder at the bottom.
- Prepare the soil: Before planting, make sure the soil is well-prepared. Remove any weeds or rocks and loosen the soil with a garden fork or spade. Daffodils prefer well-draining soil, so consider adding organic matter such as compost to improve drainage.
- Dig the hole: Position the bulb planter where you want to plant the daffodil bulb. Push the cylinder into the soil, using your foot or applying gentle pressure on the handle, until it reaches the desired depth. Avoid forcing it too deep, as this could damage the bulb.
- Remove the soil plug: With the bulb planter still in the ground, twist it slightly back and forth to loosen the soil plug. Lift the planter out of the hole, bringing the soil plug along with it. Be careful not to dislodge the soil plug from the cylinder.
- Insert the bulb: Place the daffodil bulb inside the hole with the pointed side facing upwards. Check the planting depth guide on the bulb package for specific instructions regarding spacing and depth, as it may vary depending on the daffodil variety.
- Cover the bulb: Take the soil plug extracted with the planter and gently press it back into the hole, covering the bulb completely. Use your hands to ensure the soil is firmly packed around the bulb, but avoid compacting it too much.
- Repeat the process: If you have multiple daffodil bulbs to plant, repeat the previous steps with the bulb planter for each bulb. Maintain the recommended spacing between bulbs to allow for proper growth and expansion.
- Water and mulch: After planting, water the area thoroughly to help settle the soil around the bulbs. Adding a layer of mulch, like straw or wood chips, can help conserve moisture and regulate soil temperature.
- Clean and store the bulb planter: Once you've finished planting, clean the bulb planter by removing any remaining soil. Store it in a safe place until the next planting season, ensuring it is dry and free from any moisture that could cause rust or damage.
With proper planting and care, your daffodil bulbs should bloom beautifully in the next spring season, adding a delightful splash of color to your garden.
How deep should I plant daffodil bulbs with a bulb planter?
When using a bulb planter, it is generally recommended to plant daffodil bulbs at a depth of around 6-8 inches (15-20 cm).
What is the best way to protect daffodil bulbs from frost or extreme cold weather after planting with a bulb planter?
To protect daffodil bulbs from frost or extreme cold weather after planting with a bulb planter, you can follow these tips:
- Mulching: Apply a layer of mulch over the planted bulbs to insulate and protect them from the cold. Use organic materials such as straw, pine needles, or shredded leaves. This will help retain moisture, regulate temperature, and reduce the chances of freezing.
- Protective coverings: Create a physical barrier around the daffodil bed by using frost blankets, burlap, or cloth covers. These covers will shield the bulbs from frost and provide additional insulation. Ensure that the covering reaches the ground to trap the natural heat generated by the soil.
- Cold frames: Consider using a temporary cold frame over the daffodil bed. This can be a transparent shelter made of glass or plastic that traps heat and protects from frost. Make sure the frame is well-vented to prevent excessive condensation and humidity.
- Planting depth: Bulbs should be planted at the recommended depth, ensuring they are adequately covered by soil. Their depth allows them to be shielded from extreme temperature fluctuations.
- Good drainage: Ensure proper drainage for the daffodil bed to prevent waterlogging, which can lead to freezing and rotting of the bulbs. Avoid planting in low-lying areas prone to water accumulation.
- Overwinter indoors: If you live in an area with extremely severe winters, you can also consider digging up the bulbs after they have finished flowering and storing them indoors until spring. Place them in a cool and dark location like a garage or basement with good airflow.
Remember to monitor weather forecasts so you can take preventive measures when temperatures drop unexpectedly.
What is a bulb planter and how does it work?
A bulb planter is a gardening tool specifically designed for planting bulbs in the ground. It typically consists of a hollow metal cylinder with a handle attached to it.
The bulb planter works by creating a hole in the soil for the bulb to be placed in. Here's how it is used:
- Choose a suitable location in your garden or flower bed to plant the bulbs.
- Insert the bulb planter into the ground by pushing it down firmly using the handle. The depth can be adjusted depending on the size of the bulb being planted.
- With the planter in the ground, twist it slightly to create a hole in the soil.
- Remove the bulb planter from the hole and place the bulb into the hole, with its pointed end facing upwards.
- Gently press the soil around the bulb to secure it in place.
- Repeat the process for each bulb being planted, ensuring proper spacing between them.
The bulb planter helps in accurately placing the bulbs at the desired depth and location without disturbing the surrounding soil. It also prevents damage to the bulbs and reduces strain on the hands and wrists.