Best Bulb Planters to Buy in July 2026
XVBITOR Bulb Planter Tool, Bulb Planter with Depth Markers and Bend Free for Planting Bulbs and Digging, Designed Automatic Soil Releasing Seed for Tulips, Dahlias, Daffodils
- EFFORTLESS PLANTING WITH SMOOTH SOIL CLEARING FOR QUICK RESULTS.
- DURABLE REINFORCED STEEL DESIGN TACKLES TOUGH SOIL WITH EASE.
- CONSISTENT PLANTING DEPTH ENSURES UNIFORM GARDENS EVERY TIME.


ProPlugger 5-IN-1 Lawn Tool and Garden Tool, Bulb Planter, Weeder, Sod Plugger, Annual Planter, Soil Test
- WATCH THE PROPLUGGER IN ACTION – CLICK FOR VIDEO DEMO!
- EFFORTLESSLY DIG PERFECT HOLES – STAND, TWIST, PULL!
- VERSATILE 5-IN-1 TOOL – IDEAL FOR BULBS, VEGGIES, AND MORE!
FLORA GUARD Bulb Planter with Depth Markers - Automatic Soil Releasing Seed Bulb Transplanter for Planting/Digging Tulips, Daffodils, Dahlias and More
- ERGONOMIC DESIGN REDUCES HAND STRAIN FOR EFFORTLESS PLANTING.
- LIGHTWEIGHT AND DURABLE FOR EFFICIENT, LONG-LASTING USE.
- LIFETIME WARRANTY ENSURES QUALITY AND PEACE OF MIND FOR GARDENERS.
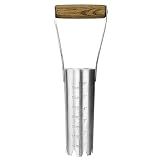
Haliaeetus Bulb Planter Tool, 6 inches Depth Mark Hand Bulb Planter, Non-Bending Stainless Steel Bulb Planter Digger, Garden Bulb Transplanter with Comfortable Wood Handle for Planting Tulip, Daffodil
- PLANT 150 BULBS IN AN HOUR-10X FASTER THAN TRADITIONAL SHOVELS!
- BUILT-IN DEPTH MARKERS ENSURE PERFECT PLANTING EVERY TIME.
- ERGONOMIC GRIP AND STURDY STEEL MAKE GARDENING COMFORTABLE AND EASY.
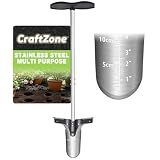
CRAFTZONE Bulb Planter Tool with Long Handle and Foot Pedal Heavy Duty High Carbon Steel Garden Dibber Sod Plugger Cutter for Planting Bulbs Tubers and Lawn Care for Digging Grass Plug Soil Tulips
-
ERGONOMIC COMFORT: REDUCES BACK STRAIN, MAKING GARDENING EFFORTLESS.
-
FAST, EFFICIENT PLANTING: STURDY PEDAL DOUBLES YOUR PLANTING SPEED!
-
VERSATILE & DURABLE: PERFECT FOR BULBS, WEEDING, AND TOUGH SOIL TASKS.
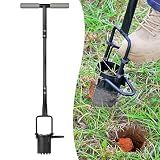
Omesata Sod Plugger, Bulb Planter with Long Handle and Serrated Base Garden Tool, Bulb Transplanter Also Grass Plug Tool for Digging Holes to Plant Tulips, Iris, Daffodils
- EFFORTLESSLY DIG IN ROCKY SOIL WITH OUR SHARP SERRATED BULB PLANTER!
- 5-IN-1 TOOL LETS YOU PLANT WHILE STANDING, PROTECTING YOUR BACK!
- DURABLE HIGH-QUALITY IRON DESIGN ENSURES LONG-LASTING GARDENING USE!
When it comes to planting bulbs at the correct depth using a bulb planter, there are a few important steps to follow.
Firstly, select the area in your garden where you want to plant the bulbs. Make sure it receives adequate sunlight and has well-drained soil.
To use a bulb planter, begin by pushing the planter's pointed end into the ground. Twist it slightly to make a hole. The depth to which you should insert the planter depends on the type of bulb you are planting.
Refer to the specific recommendations for the bulbs you have purchased. Usually, larger bulbs are planted deeper, while smaller ones are planted shallower.
Once the planter is at the correct depth, remove it from the ground. You should now have a hole ready for planting the bulb.
Take the bulb and carefully place it into the hole, ensuring the root side is facing down. Gently press the soil around the bulb to fill any gaps and provide stability.
Repeat this process for each bulb, leaving an appropriate distance between them based on the recommended spacing.
After planting the bulbs, water the area thoroughly. This will help settle the soil and provide necessary moisture for the bulbs to start growing.
In colder climates, it may be beneficial to apply a layer of mulch over the newly planted bulbs to protect them during winter.
Remember to keep track of the location and type of bulbs you have planted so you can monitor their progress and plan for future maintenance or care.
By following these steps, you can ensure that your bulbs are planted at the correct depth using a bulb planter, setting the stage for beautiful blooms in the future.
How to plant bulbs of different sizes with a bulb planter?
Planting bulbs of different sizes with a bulb planter can be done by following these steps:
- Choose the right bulb planter: Bulb planters come in different sizes, so make sure to select one that can accommodate the largest bulb you will be planting.
- Prepare the soil: Before using the bulb planter, prepare the soil by loosening it with a garden fork or shovel. Remove any weeds or debris, and work in some compost or organic matter to enrich the soil.
- Dig the holes: Using the bulb planter, position it at the desired planting location and push it down into the soil. Twist the bulb planter back and forth to create a round hole of the appropriate depth.
- Plant the bulbs: Place the largest bulb in the hole made by the bulb planter. If you're planting bulbs of different sizes in the same hole, layer them starting with the largest bulb on the bottom and add smaller bulbs on top. Make sure to follow the recommended planting depth for each type of bulb.
- Cover and firm the soil: After placing the bulbs in the hole, gently remove the bulb planter from the soil and cover the bulbs with the loosened soil. Press the soil firmly around the bulbs to eliminate any air pockets.
- Repeat for other bulbs: Continue using the bulb planter to dig holes and plant the remaining bulbs, ensuring that you plant them at the appropriate spacing and depth according to their sizes.
- Water the bulbs: Once all the bulbs are planted, water the area thoroughly to help settle the soil and provide moisture for the bulbs' root system.
- Mulch (optional): Consider adding a layer of organic mulch, such as straw or wood chips, to help conserve moisture, suppress weed growth, and regulate soil temperature.
Remember to refer to the specific planting instructions for each variety of bulb, as planting depths and spacing can vary. By properly using a bulb planter, you can efficiently plant bulbs of different sizes and enjoy a beautiful display of flowers when they bloom.
How to avoid accidentally damaging bulbs while using a bulb planter?
Here are some tips to avoid accidentally damaging bulbs while using a bulb planter:
- Choose the right size of bulb planter: Ensure you select a bulb planter that is suitable for the size of the bulbs you are planting. If the bulb planter is too small or too large, it may cause damage to the bulbs.
- Prepare the soil properly: Before using the bulb planter, make sure the soil is well-prepared and loose. If the soil is hard or compacted, it can cause the bulb planter to hit resistance and damage the bulbs.
- Insert the bulb planter at the correct depth: Insert the bulb planter into the soil at the correct depth according to the planting instructions for the specific bulbs you are using. Going too shallow or too deep can damage the bulbs or inhibit their growth.
- Use gentle pressure: While using the bulb planter, apply gentle and consistent pressure to penetrate the soil. Avoid using excessive force that could crush or break the bulbs.
- Avoid hitting obstacles: Be cautious of any underground obstacles like rocks or roots. Hitting them with the bulb planter can cause damage to the bulbs or even disrupt their growth.
- Remove the bulb planter carefully: When lifting the bulb planter from the soil after planting, do it gently and straight upward to avoid hitting the bulbs on the edges or sides of the hole.
- Inspect the bulbs: After using the bulb planter, carefully inspect the bulbs for any signs of damage. If any bulbs are damaged, consider replanting them or replacing them with new ones.
Remember to always follow the specific instructions provided by the bulb manufacturer for the best planting technique and depth based on the particular type of bulbs you are working with.
How to select the right bulb planter for planting bulbs at the correct depth?
To select the right bulb planter for planting bulbs at the correct depth, consider the following steps:
- Determine the type of bulb you are planting: Bulbs come in different sizes and shapes, so understanding the specific type of bulb will help you choose the appropriate bulb planter.
- Measure the depth: Consult the planting instructions for the specific type of bulb you are planting. It will typically indicate the recommended planting depth. Measure the depth you need to go to ensure it is planted correctly.
- Look for a bulb planter with depth markings: Choose a bulb planter that has depth markings on it. These markings will help you identify the exact depth you need to plant the bulb.
- Consider the size of the bulb: Bulb planters come in different sizes, so choose one that is suitable for the size of the bulb you are planting. It should be large enough to accommodate the bulb comfortably.
- Check the design features: Look for bulb planters with sharp, pointed tips that can penetrate the soil easily. It is essential for the planter to have a mechanism to extract the soil, such as a plunger or a core ejection system, so that the soil lifts out when you remove the planter from the ground.
- Test it out: Consider physically testing the bulb planter before purchasing it. Try plunging it into the soil to make sure it cuts through easily and extracts the soil properly.
- Read reviews: Before buying a bulb planter, check online reviews or ask for recommendations from experienced gardeners. This can give you insights into the effectiveness and quality of different models.
By following these steps, you will be able to select the appropriate bulb planter that allows you to plant bulbs at the correct depth, ensuring optimal growth and blooming.
What is the recommended bulb planting depth for naturalizing in lawns?
The recommended bulb planting depth for naturalizing in lawns is typically around 6-8 inches (15-20 cm) deep. This depth allows the bulbs to establish roots and ensures they are protected from extreme weather conditions. However, the exact planting depth may vary depending on the bulb species, so it is always recommended to check the specific instructions provided by the bulb supplier.