Best Bulb Planters to Buy in July 2026
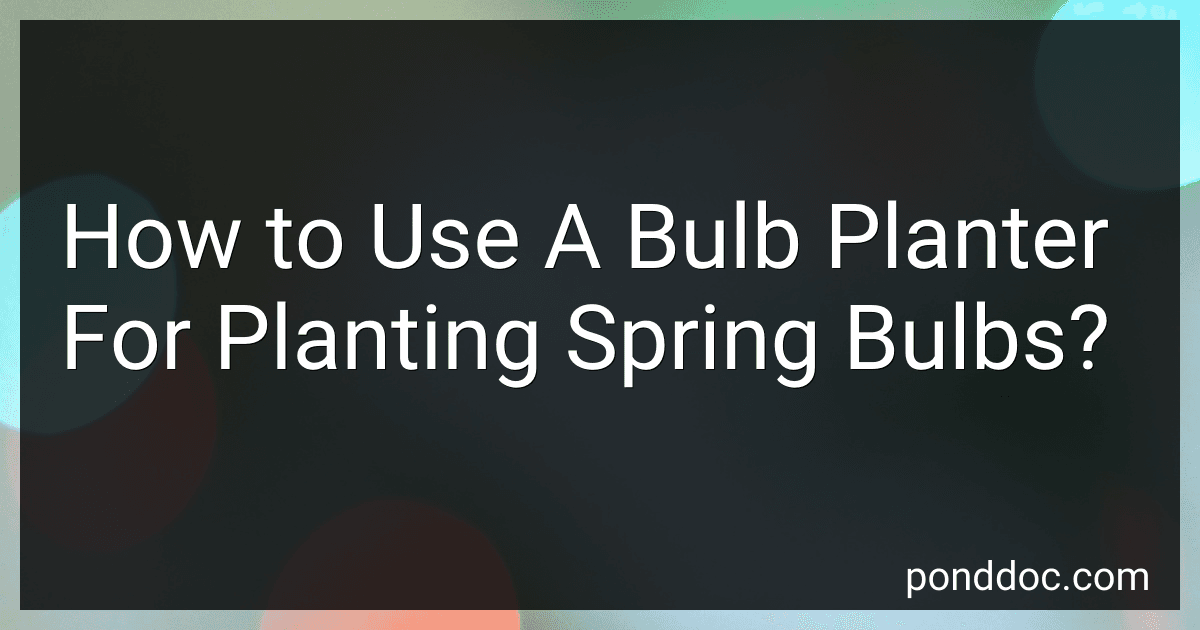
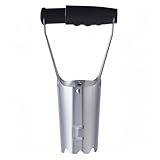
Edward Tools Bulb Planter - Bend Free Tool for Planting Bulbs, Depth Marker for More consistent Planting Tulips, Daffodils, Dahlias (Assorted)
- QUICK PLANTING WITH AUTOMATIC SOIL RELEASE MECHANISM!
- DURABLE REINFORCED STEEL FOR EFFORTLESS DIGGING IN TOUGH SOILS!
- DEPTH MARKER ENSURES CONSISTENT PLANTING FOR HEALTHY BLOOMS!


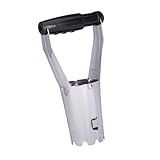
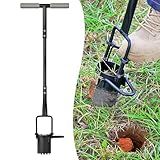
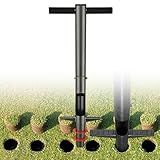
ProPlugger 5-in-1 Planting Tool - Sod Plugger, Bulb and Flower Planter
-
EFFORTLESSLY DIG PERFECT HOLES FROM A STANDING POSITION!
-
MULTI-USE TOOL FOR PLANTING, WEEDING, AND FERTILIZING WITH EASE!
-
DURABLE, USA-MADE DESIGN WITH A MONEY-BACK SATISFACTION GUARANTEE!
Colwelt Bulb Planter Tool Long Handle, Serrated Base Gardening Bulb Transplanter with Soft Grip, Heavy Duty Long Handled Bulb Planter Sod Plugger for Digging Holes to Plant Tulips, Iris, Daffodils
- ENJOY EASY PLANTING WITH OUR LONG-HANDLED BULB PLANTER TOOL!
- ERGONOMIC DESIGN LETS YOU PLANT WITHOUT BENDING OR BACK STRAIN.
- DURABLE, RUST-RESISTANT STEEL ENSURES LASTING PERFORMANCE.
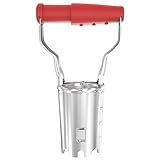
Toresano Bulb Planter, Bulbs Transplanter Designed for Automatic Soil Release with Depth Marker for Dgging Holes and Planting Tool for Tulips, Daffodils, Dahlias
- REINFORCED STEEL DESIGN FOR EASY DIGGING IN TOUGH SOIL.
- DURABLE CONSTRUCTION ENSURES LONG-LASTING PERFORMANCE AND RELIABILITY.
- ACCURATE DEPTH SCALE GUARANTEES PERFECT PLANTING EVERY TIME.
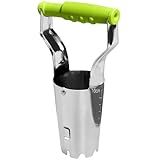
FLORA GUARD Bulb Planter with Depth Markers - Automatic Soil Releasing Seed Bulb Transplanter for Planting/Digging Tulips, Daffodils, Dahlias and More
- ERGONOMIC DESIGN: SPRING-LOADED HANDLES FOR EASY, STRAIN-FREE USE.
- EFFICIENT PLANTING: GEAR-TYPE BOTTOM SAVES ENERGY WHILE DIGGING.
- LIFETIME WARRANTY: DURABLE TOOL GUARANTEED TO LAST, ENSURING VALUE.
Omesata Sod Plugger, Bulb Planter with Long Handle and Serrated Base Garden Tool, Bulb Transplanter Also Grass Plug Tool for Digging Holes to Plant Tulips, Iris, Daffodils
- EFFORTLESSLY PLANT BULBS IN MOIST, ROCKY SOIL WITH OUR SHARP DIGGER.
- 5-IN-1 DESIGN LETS YOU PLANT WHILE STANDING-PROTECT YOUR BACK!
- DURABLE, HIGH-QUALITY IRON CONSTRUCTION FOR LONG-LASTING PERFORMANCE.
GREBSTK Sturdy Stainless Steel Gardening Bulb Transplanter Tool with Depth Mark and Soil Release Handle for Planting Bulbs
- TIME-SAVING AUTOMATIC SOIL RELEASE FOR QUICK PLANTING
- DURABLE MIRROR POLISHED STAINLESS STEEL FOR LONGEVITY
- VERSATILE TOOL FOR YEAR-ROUND BULB PLANTING AND GARDENING
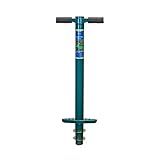
Bulb Planter Tool, 33.5 inch Long Handle Garden Sod Plugger to Dig Hole, Heavy Duty Metal Garden Tools for Soil Test Planting or Weeding Spring Flowers Bulbs,Bedding Plants,Tulips, Lilies, Potato
- ERGONOMIC DESIGN CUTS FATIGUE, PERFECT FOR LONG PLANTING SESSIONS.
- BOOST EFFICIENCY WITH FOOT PEDAL FOR FAST, UNIFORM PLANTING PITS.
- DURABLE, VERSATILE TOOL ADAPTS TO ANY GARDENING OR FARMING NEED.
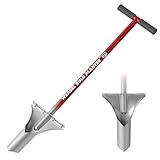
Garden Weasel Bulb Planter - Long Handle | Annuals, Ground Cover, Vegetables, Spring and Fall Bulbs | Sod Cutter, Remover, and Plugger, Grass Planter, Bulb Planting Tool | 91350
- EFFORTLESS PLANTING: STEP, CREATE, AND PLANT-NO BENDING REQUIRED!
- TRUSTED QUALITY: PROFESSIONAL-GRADE TOOL USED BY SATISFIED GARDENERS WORLDWIDE.
- LIFETIME GUARANTEE: ENJOY PEACE OF MIND WITH OUR NO HASSLE POLICY!
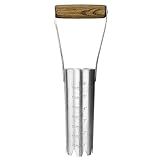
Haliaeetus Bulb Planter Tool, 6 inches Depth Mark Hand Bulb Planter, Non-Bending Stainless Steel Bulb Planter Digger, Garden Bulb Transplanter with Comfortable Wood Handle for Planting Tulip, Daffodil
-
PLANT 150 BULBS/HOUR-10X FASTER THAN A SHOVEL!
-
CONSISTENT DEPTH WITH EASY-TO-READ 1-6 INCH MARKINGS.
-
DURABLE STAINLESS STEEL CONSTRUCTION FOR LONG-LASTING USE.
Using a bulb planter is a convenient and efficient tool for planting spring bulbs. Here is a step-by-step guide on how to use a bulb planter effectively:
- Choose the right bulb planter: Select a bulb planter that suits the size of your spring bulbs. They come in various designs, but most commonly, they feature a long metal tube with a sharpened tip and a handle.
- Find the planting location: Determine where you want to plant your spring bulbs. Consider the sunlight exposure, soil condition, and spacing requirements of the specific bulbs you are planting.
- Prepare the soil: Prior to using the bulb planter, ensure the soil is well-prepared. Remove any weeds or rocks that may hinder the planter's ability to penetrate the ground smoothly.
- Insert the bulb planter: Firmly grip the handle and place the sharpened tip of the bulb planter on the chosen planting location. Push it into the ground using moderate force. The depth should be appropriate for the type of bulb you are planting, typically about two to three times the bulb's height.
- Remove the core: Twist the bulb planter gently while keeping it in the ground. This motion will create a cylindrical soil core. You can then lift the planter out of the hole, carefully retaining the core inside the planter.
- Place the bulb: With the soil core still inside the bulb planter, drop the spring bulb into the hole, ensuring it is positioned correctly. The flat or basal plate of the bulb should be facing downwards.
- Release the soil core: Lower the bulb planter back into the hole and carefully press it down. This action will release the soil core back into the hole, covering the bulb and securing it in place.
- Repeat the process: Repeat steps 4 to 7 for each additional bulb you want to plant. Maintain the appropriate spacing between bulbs to allow for optimal growth and prevent overcrowding.
- Protect and water: Once all the bulbs are in place, cover the planted area with a layer of mulch or organic matter to provide insulation and retain moisture. Water the newly planted bulbs thoroughly to help them settle and promote root development.
Remember to follow the specific planting instructions provided for the particular spring bulbs you are using, as different bulbs may have slightly different planting requirements.
What are the different types of bulb planters available in the market?
There are several different types of bulb planters available in the market. Here are a few examples:
- Handheld Bulb Planter: This is a basic and common type of bulb planter that consists of a long handle with a specialized end to dig holes for planting bulbs. It usually has a depth marking to ensure proper planting depth.
- Stand-Up Bulb Planter: This type of bulb planter is designed to be used while standing, eliminating the need to kneel or bend over during planting. It typically has a long handle with a foot plate, allowing for easier digging and planting of bulbs.
- Drill-Powered Bulb Planter: This type of planter attaches to a standard drill, which rotates the planting mechanism and drills holes for bulb planting. It provides quick and effortless planting in large areas.
- Long-Handled Bulb Planter: These planters have an extended handle, enabling the user to plant bulbs without stooping over. They are ideal for those with back pain or mobility issues.
- Auger Bulb Planter: An auger bulb planter is specifically designed for planting bulbs in densely packed soil or hard ground. It consists of a spiral-shaped drill-like attachment, which helps in digging holes quickly and effortlessly.
- T-Handled Bulb Planter: This type of planter features a T-shaped handle, providing a comfortable grip and increased control while planting bulbs. It often has a depth gauge or scale for precise planting.
- Automatic Bulb Planter: These innovative planters are designed with a mechanized mechanism that automatically digs a hole, plants the bulb, and covers it up with soil. They are electric or battery-powered and offer convenience and efficiency in bulb planting.
These are just a few examples of bulb planters available in the market. Each type has its unique features and benefits, catering to various gardening preferences and needs.
What is the expected planting rate per hour using a bulb planter?
The expected planting rate per hour using a bulb planter can vary depending on several factors, including the size and type of bulb, the efficiency and experience of the planter, and the soil conditions. However, on average, an experienced gardener using a bulb planter may be able to plant anywhere from 50 to 100 bulbs per hour.
How to improve drainage when planting bulbs with a bulb planter?
Improving drainage when planting bulbs with a bulb planter is essential to ensure healthy root development and prevent rotting. Here are some steps to improve drainage:
- Choose a well-draining location: Select a spot in your garden or raised bed that has good drainage. Avoid low-lying areas or places where water tends to collect.
- Loosen the soil: Use a garden fork or trowel to loosen the soil in the planting area. This will help break up any compacted soil and promote better drainage.
- Add organic matter: Incorporate organic matter like compost or well-rotted manure into the soil to improve its structure and drainage capacity. This will also enhance the nutrient content of the soil.
- Mix in sand or perlite: If your soil is heavy or clay-like, mix in coarse sand or perlite to improve the drainage. These amendments will help create air pockets and allow excess water to drain away.
- Create a raised bed: If your soil has poor drainage, consider creating a raised bed specifically for bulb planting. This will provide better control over the soil composition and drainage.
- Ensure proper bulb planting depth: Use a bulb planter or dig a hole that is deep enough for the bulb according to the package instructions. Planting bulbs too shallow or too deep can impact their drainage and overall health.
- Use bulb-specific potting mix: If planting bulbs in containers, use a well-draining potting mix specifically designed for bulbs. These mixes typically contain perlite or vermiculite to enhance drainage.
- Consider using gravel or sand layer: In areas with heavy clay soil, you can create a layer of fine gravel or coarse sand at the bottom of the planting hole. This layer will help excess water to drain away from the bulbs.
- Mulch properly: Mulching helps regulate soil moisture levels, but excessive mulch can hinder drainage. Apply a thin layer of mulch after planting the bulbs, ensuring to keep it away from the bulb itself.
- Water sparingly: After planting, water the bulbs sparingly, especially if the soil is already moist. Overwatering can lead to poor drainage and rotting of the bulbs.
By following these steps, you can greatly improve drainage when planting bulbs with a bulb planter, allowing your bulbs to thrive and grow successfully.
What is the ideal soil type for using a bulb planter?
The ideal soil type for using a bulb planter is loose, well-draining soil with a good amount of organic matter. This type of soil allows for easy penetration of the bulb planter, making it easier to insert and remove the bulbs without damaging them. Additionally, well-draining soil ensures that excess moisture does not accumulate around the bulbs, which can cause rot. Incorporating organic matter, such as compost or aged manure, into the soil helps improve its texture, drainage, and nutrient content, providing a favorable environment for healthy bulb growth.
What is a bulb planter and how does it work?
A bulb planter is a specialized gardening tool designed for planting bulbs in the ground. It typically consists of a tube-shaped metal or plastic cylinder with a sharp edge at one end and a handle at the other.
Here's how it works:
- Prepare the soil: Choose a suitable location in your garden and prepare the soil by removing any weeds or stones.
- Dig a hole: Place the bulb planter on the ground and firmly press it into the soil. Use your foot or body weight to push the planter into the ground, ensuring the sharp edge cuts through the soil.
- Remove the plug: Twist or lift the bulb planter to extract a plug of soil from the ground. The depth of the plug should depend on the recommended planting depth for the bulb you are planting.
- Place the bulb: Drop the bulb into the hole created by the bulb planter. Make sure it is positioned correctly with the pointed end facing upwards.
- Replace the plug: Gently lower the plug of soil back into the hole, covering the bulb completely. Press down lightly to ensure good soil contact.
- Repeat the process: If you are planting multiple bulbs, repeat the steps above, spacing the holes appropriately.
Using a bulb planter makes the process of planting bulbs quicker and more efficient. It creates neat, uniform holes for the bulbs and helps ensure they are planted at the correct depth. Additionally, the sharp edge of the planter makes it easier to penetrate through the soil, particularly in areas with dense soil or roots.
What is the correct way to dispose of soil plugs extracted by a bulb planter?
The proper way to dispose of soil plugs extracted by a bulb planter depends on the contents of the soil and local regulations. Here are a few general options:
- Reuse: If the soil is of good quality and doesn't contain any contaminants, you can reuse the plugs in other parts of your garden or compost them.
- Composting: If the soil plugs are organic and free from chemicals or pesticides, you can add them to a compost bin or pile. Make sure to mix them well with other compost ingredients to ensure proper decomposition.
- Municipal green waste collection: Check if your local waste management accepts green waste for composting. If they do, you can dispose of the soil plugs in the green waste bin.
- Landfill: As a last resort, if none of the above options are feasible, you can dispose of the soil plugs in the landfill. However, this should be avoided whenever possible, as it contributes to waste accumulation.
Always consider your local regulations and guidelines for waste disposal to ensure the appropriate method for your specific area.