
Best Smart Thermostats to Buy in July 2026
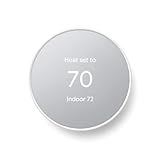
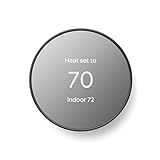
Google Nest Thermostat - Smart Thermostat for Home - Programmable Wifi Thermostat - Snow
- SAVE ENERGY EFFORTLESSLY WITH AUTOMATIC TEMPERATURE ADJUSTMENTS WHEN AWAY.
- REMOTE CONTROL VIA THE APP LETS FAMILY MEMBERS SET THE IDEAL COMFORT.
- HVAC MONITORING ALERTS FOR MAINTENANCE, ENSURING OPTIMAL SYSTEM HEALTH.


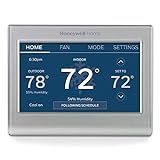
Honeywell Home RTH9585WF1004 Wi-Fi Smart Color Thermostat, 7 Day Programmable, Touch Screen, Energy Star, Alexa Ready, Gray
-
PERSONALIZE YOUR COMFORT: CUSTOM COLORS MATCH YOUR HOME'S DÉCOR.
-
ENERGY SAVINGS: JOIN REBATE PROGRAMS AND EARN REWARDS BY CONSERVING.
-
SMART SCHEDULING: FLEXIBLE PROGRAMMING TO FIT YOUR LIFESTYLE AND UTILITIES.
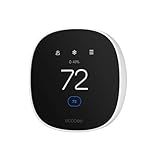
ecobee Smart Thermostat Essential - Energy Star Certified programmable Wi-Fi Thermostat - Works with Siri, Alexa, and Google Assistant
- SAVE 23% ANNUALLY ON ENERGY COSTS WITH SMART SCHEDULING FEATURES.
- EASY DIY INSTALLATION-NO C WIRE NEEDED; CHECK COMPATIBILITY ONLINE!
- WORKS WITH APPLE HOMEKIT, GOOGLE ASSISTANT, AND ALEXA FOR SMART CONTROL.
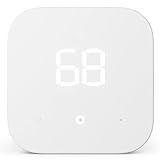
Amazon Smart Thermostat – Save money and energy - Works with Alexa and Ring - C-wire required
- UPGRADE EASILY WITH ALEXA FOR OPTIMAL COMFORT AND ENERGY SAVINGS.
- ENJOY REBATES AND SAVE UP TO $50 ANNUALLY ON ENERGY BILLS.
- CONTROL YOUR HOME'S TEMPERATURE EFFORTLESSLY FROM ANYWHERE!
Google Nest Thermostat - Smart Thermostat for Home - Programmable Wifi Thermostat - Charcoal
- SAVE ENERGY EFFORTLESSLY WITH SMART SCHEDULING VIA GOOGLE HOME APP.
- CONTROL YOUR COMFORT REMOTELY FROM ANY DEVICE, ANYTIME, ANYWHERE!
- RECEIVE ALERTS AND TIPS FOR HVAC MAINTENANCE TO ENSURE EFFICIENCY.
ecobee Smart Thermostat Enhanced - Programmable Wifi Thermostat - Works with Siri, Alexa, Google Assistant - Energy Star Certified - Smart Home
-
SAVE 26% YEARLY ON HEATING/COOLING COSTS WITH SMART TEMPERATURE CONTROL.
-
ENJOY PERFECT COMFORT AS IT ADJUSTS TEMPERATURE BEFORE YOU ARRIVE HOME.
-
EASY INSTALLATION & CONTROL WITH SMART DEVICES; NO BATTERIES NEEDED!
Honeywell Home RTH9600WF Smart Color Thermostat ENERGY STAR Wi-Fi Programmable Touchscreen Alexa Ready - C-Wire Required
- SAVE ENERGY & EARN REWARDS: CHECK FOR REBATES TO REDUCE COSTS!
- CONTROL ANYWHERE: USE APP OR VOICE WITH ALEXA, GOOGLE, & MORE!
- CUSTOMIZABLE DISPLAY: CHANGE YOUR THERMOSTAT'S COLOR FOR A UNIQUE LOOK!
A smart thermostat can potentially lead to substantial savings on energy bills, though the exact amount can vary based on several factors, such as climate, energy rates, and household habits. According to various studies and manufacturers' claims, smart thermostats can save users anywhere from about 10% to 20% on heating and cooling costs annually. They achieve these savings primarily through improved efficiency and control, allowing you to program temperature settings and optimize your energy use by learning your schedule and preferences. Additionally, features like remote access, geofencing, and energy usage reports help homeowners manage and reduce energy consumption more effectively. However, individual savings will depend on how well the smart thermostat is integrated into your daily routine and the overall energy efficiency of your home.
What is a zoning system in HVAC?
A zoning system in HVAC (Heating, Ventilation, and Air Conditioning) refers to a method of dividing a home or building into distinct areas or "zones," each of which can be independently controlled in terms of temperature. This system is designed to improve comfort and energy efficiency by allowing different areas within a building to be heated or cooled according to specific needs and preferences.
Key components of an HVAC zoning system typically include:
- Thermostats: Multiple thermostats are used to control the temperature of each zone separately. These can be programmable or smart thermostats that allow for more precise control.
- Dampers: These are installed in the ductwork and act like valves to regulate airflow to different zones. When a zone reaches its desired temperature, the damper closes to restrict airflow, redirecting heated or cooled air to other zones that need it.
- Control Panel: This central system manages the communication between the thermostats and the dampers, ensuring that each zone receives the appropriate amount of conditioned air.
- HVAC System: A compatible HVAC system that can effectively handle variable airflow needs generated by the zoning system.
Benefits of an HVAC zoning system include enhanced comfort since each zone can be maintained at a different temperature to suit individual preferences or use patterns. It can also lead to energy savings by reducing the need to heat or cool areas that are not in use, thereby lowering overall energy consumption and costs.
Overall, zoning systems are particularly beneficial in larger homes or buildings with multiple levels, rooms with large windows, or rooms that are used infrequently.
How to set a schedule on a smart thermostat?
Setting a schedule on a smart thermostat can vary depending on the brand and model, but the basic steps are generally similar. Here's a general guide to help you set a schedule on most smart thermostats:
- Consult the User Manual: Refer to the specific instructions for your model, as features and interfaces can vary.
- Access the Thermostat: Physical Interface: Use the touchscreen or physical buttons on the thermostat itself. Mobile App: Download the manufacturer’s app on your smartphone or tablet. This often provides more detailed control and is more user-friendly. Web Interface: Some models allow scheduling through a web portal.
- Navigate to Scheduling: Look for a "Menu" or "Settings" option. Find the "Schedule" or "Programming" section.
- Choose Schedule Type: Daily: Set different temperatures for each individual day. Weekly: Set a repeating schedule for each day of the week or group certain days (e.g., weekdays and weekends).
- Set Time Periods: Break each day into time periods such as "Wake," "Away," "Home," and "Sleep." Adjust the start and end times for each period to fit your routine.
- Set Temperatures for Each Period: For each time period, specify the desired temperature. Many thermostats allow you to set different heating and cooling temperatures for each period.
- Save Your Schedule: Ensure you save your settings after programming the schedule. Some devices might have an automatic save feature, while others require manual confirmation.
- Adjust As Needed: You can easily adjust the schedule whenever your routine changes, either via the app, the thermostat interface, or the web portal.
- Use Smart Features: Explore additional features like geofencing, adaptive learning, or energy usage reports, if available, to optimize comfort and efficiency.
- Test the Schedule: Monitor your thermostat for a few days to ensure the schedule aligns with your needs and the temperatures are comfortable.
Remember, if you encounter difficulties or if your thermostat has unique features, consulting the specific manual or manufacturer’s customer service can be very helpful.
What is the lifespan of a smart thermostat?
The lifespan of a smart thermostat can vary depending on the brand, model, and usage conditions, but typically, they last between 5 to 10 years. Some factors that can affect the lifespan include the quality of the device, how frequently it's used, software updates, and any potential advances in technology that may lead to obsolescence. Regular maintenance, such as keeping it clean and ensuring software updates are applied, can help maximize its lifespan.
How does a smart thermostat use sensors?
A smart thermostat uses sensors in several ways to efficiently manage heating, ventilation, and air conditioning (HVAC) systems. Here are some of the key functions and uses of sensors within a smart thermostat:
- Temperature Sensors: The primary function of a smart thermostat is to maintain a comfortable indoor temperature. Built-in temperature sensors continuously monitor the ambient temperature in the room or area where the thermostat is installed. This data allows the thermostat to automatically adjust the heating or cooling system to maintain the desired setpoint temperature.
- Humidity Sensors: Some smart thermostats also include humidity sensors to monitor indoor humidity levels. Managing humidity can be critical for comfort and can affect how warm or cool a space feels. Based on humidity readings, the thermostat can make adjustments to the HVAC system to optimize comfort and energy efficiency.
- Motion/Occupancy Sensors: Advanced smart thermostats often include motion or occupancy sensors to detect whether someone is present in the home or a particular room. This allows the thermostat to adjust settings dynamically based on occupancy, for instance, lowering energy use by reducing heating or cooling when a space is unoccupied, or preemptively adjusting temperatures when occupancy is detected.
- Proximity Sensors: Some systems use proximity sensors that detect when you are near the thermostat, triggering it to activate its display and provide quick access to settings. Additionally, these sensors may interact with smartphone geofencing features to adjust home climate settings based on your proximity to the home.
- Light Sensors: Certain thermostats utilize light sensors to detect ambient light levels. This information can adjust the brightness of the thermostat’s display according to the lighting conditions, enhancing readability and reducing energy consumption.
- Remote Sensors: Many smart thermostats allow for additional remote sensors to be placed in various areas of a home. These sensors can provide more detailed information about temperature and humidity levels in different rooms, permitting zone-based temperature control and more even heating or cooling throughout the house.
- Learning Algorithms: While not a sensor itself, smart thermostats often utilize algorithms that learn from sensor data over time. By analyzing usage patterns, such as when the house is usually occupied or specific temperature preferences, the thermostat can further optimize energy use and maintain comfort.
In combination, these sensors and features enable smart thermostats to provide more precise control over home climate systems, enhance energy efficiency, and improve user comfort through automation and adaptive responses based on real-time data.
What is the installation process for a smart thermostat?
Installing a smart thermostat can help improve energy efficiency and provide greater control over your home's temperature. Here is a general guide to installing a smart thermostat, but always refer to the specific instructions provided by the manufacturer of your device:
Tools and Materials Needed:
- Smart thermostat
- Screwdriver (usually Phillips)
- Drill (if needed for new holes)
- Smartphone or tablet with the thermostat's app
- Labels or colored tape for wires (usually included with the thermostat)
- Level (optional)
Steps:
- Turn Off Power: Locate the circuit breaker for your HVAC system and turn off the power to ensure safety during installation.
- Remove the Old Thermostat: Detach the faceplate of your old thermostat to expose the wiring. Take a picture of the wiring configuration, noting which wires are connected to which terminals. Remove the wires and carefully detach the baseplate from the wall.
- Label the Wires: If not already labeled, use the provided labels or colored tape to label each wire according to its terminal letter (e.g., G, R, W, Y).
- Install the New Baseplate: Attach the new baseplate to the wall, using a level to ensure it is straight. Use the screws provided; you may need to drill new holes if they don't align with the old ones.
- Connect the Wires: Carefully connect the labeled wires to the corresponding terminals on the new thermostat. Ensure that each wire is securely fastened.
- Attach the Thermostat: Snap the new thermostat faceplate onto the baseplate. Ensure it is securely attached and looks level.
- Restore Power: Turn the power back on at the circuit breaker.
- Configure the Thermostat: Follow the on-screen prompts to set up your thermostat. This usually involves selecting the Wi-Fi network and entering network credentials, then configuring your HVAC system settings as per the instructions.
- Connect to Smart Home System (if applicable): Download the manufacturer’s app to your smartphone or tablet. Follow in-app instructions to connect the thermostat to your Wi-Fi network. Complete any additional configuration, such as setting schedules or integrating with other smart home devices.
- Test the System: Verify the thermostat controls the heating and cooling system properly. Adjust the temperature to confirm that the system responds accurately to commands from the thermostat and the app.
Additional Tips:
- Ensure compatibility: Before purchasing, confirm that the smart thermostat is compatible with your HVAC system.
- Consider a C-wire: Some smart thermostats require a common wire (C-wire) for power. If you don’t have a C-wire, check if the thermostat offers an adapter or power extender kit.
- Seek professional help: If you're uncomfortable handling electrical wiring or the system involves complex configurations, consider hiring a professional installer.
By following these steps carefully, you'll be able to install a smart thermostat and start benefiting from improved efficiency and remote control of your home climate system.