Best Smart Thermostats to Buy in July 2026
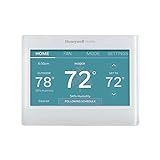
Honeywell Home RTH9585WF1004 Wi-Fi Smart Color Thermostat, 7 Day Programmable, Touch Screen, Energy Star, Alexa Ready, Gray
- PERSONALIZE YOUR COMFORT: MATCH YOUR THERMOSTAT TO YOUR DÉCOR.
- ENERGY SAVINGS & REWARDS: CHECK FOR REBATES AND DEMAND RESPONSE PROGRAMS.
- EASY CONTROL & COMPATIBILITY: USER-FRIENDLY TOUCH SCREEN; WORKS WITH VARIOUS SYSTEMS.


Google Nest Thermostat - Smart Thermostat for Home - Programmable Wifi Thermostat - Snow
-
SAVE ENERGY AND MONEY WITH ENERGY STAR CERTIFIED SMART TECHNOLOGY.
-
CONTROL HOME TEMPERATURE REMOTELY VIA APP OR VOICE WITH GOOGLE ASSISTANT.
-
ENERGY SAVINGS FINDER OPTIMIZES YOUR SCHEDULE FOR MAXIMUM EFFICIENCY.
ecobee Smart Thermostat Enhanced - Programmable Wifi Thermostat - Works with Siri, Alexa, Google Assistant - Energy Star Certified - Smart Home
-
SAVE 26% YEARLY ON ENERGY COSTS WITH SMART TEMPERATURE CONTROL!
-
ENJOY ULTIMATE COMFORT WITH PREHEATING/COOLING BEFORE YOU ARRIVE.
-
EASY INSTALLATION AND CONTROL VIA APP FOR SMARTER LIVING!
Google Nest Thermostat - Smart Thermostat for Home - Programmable Wifi Thermostat - Charcoal
- SAVE ENERGY AUTOMATICALLY; ADJUSTS WHEN YOU LEAVE HOME.
- CONTROL FROM ANYWHERE VIA APP; KEEP COMFORT AT YOUR FINGERTIPS.
- GET ALERTS FOR SYSTEM ISSUES; ENSURES OPTIMAL HVAC PERFORMANCE.
ecobee Smart Thermostat Essential - Energy Star Certified programmable Wi-Fi Thermostat - Works with Siri, Alexa, and Google Assistant
-
SAVE 23% ANNUALLY ON HEATING/COOLING COSTS WITH SMART ADJUSTMENTS.
-
EASY TOUCHSCREEN CONTROL & APP ACCESS FOR EFFORTLESS TEMPERATURE CHANGES.
-
COMPATIBLE WITH 85% OF SYSTEMS; CHECK COMPATIBILITY ONLINE EASILY.
Amazon Smart Thermostat – Save money and energy - Works with Alexa and Ring - C-wire required
- SAVE AN AVERAGE OF $50 YEARLY WITH ENERGY STAR CERTIFIED THERMOSTAT!
- CONTROL TEMPS FROM ANYWHERE WITH ALEXA OR THE MOBILE APP!
- EASY INSTALLATION GUIDED BY THE ALEXA APP PLUS CUSTOMER SUPPORT!
ecobee Smart Thermostat Premium with Smart Sensor and Air Quality Monitor - Programmable Wifi Thermostat - Works with Siri, Alexa, Google Assistant
-
SAVE 26% ANNUALLY ON ENERGY COSTS WITH ENERGY STAR CERTIFICATION!
-
SMARTSENSOR OPTIMIZES COMFORT BY ADJUSTING ROOM TEMPERATURES EFFECTIVELY.
-
BUILT-IN SECURITY ALERTS AND VOICE CONTROL ENHANCE SAFETY AND CONVENIENCE.
Honeywell Home RTH9600WF Smart Color Thermostat ENERGY STAR Wi-Fi Programmable Touchscreen Alexa Ready - C-Wire Required
-
SAVE ENERGY WITH ENERGY STAR, AND EARN REBATES FROM PROVIDERS!
-
CONTROL YOUR THERMOSTAT REMOTELY VIA APP AND SMART HOME DEVICES.
-
CUSTOMIZE YOUR DISPLAY COLOR FOR A PERSONALIZED TOUCH!
Setting a schedule on your smart thermostat involves using the device's app or the thermostat interface to program specific times and temperatures for heating or cooling your home. First, you need to download and install the thermostat's corresponding app on your smartphone or tablet if you prefer not to use the thermostat's touchscreen. Once you've logged into the app with your account, navigate to the schedule or programming section. Here, you can choose specific days of the week and set times for the thermostat to adjust temperatures automatically. For example, you might set a lower temperature for the hours when you're generally asleep or away at work and a more comfortable temperature for when you are usually at home. You can customize these settings based on your daily routine, ensuring efficient energy use. Some smart thermostats offer advanced scheduling features, such as learning your habits over time and suggesting optimized schedules or allowing you to set different temperatures for individual rooms if you have a zoned heating or cooling system. Don't forget to save your schedule once you've set it up to ensure that the thermostat operates according to your preferences. Additionally, you can usually make temporary adjustments to the schedule without disrupting the whole setup.
How do I reset my smart thermostat?
Resetting a smart thermostat can vary depending on the model and manufacturer, but here are some general steps that you can follow for most smart thermostats:
- Consult the Manual: Always check the user manual that came with your thermostat, as it will have specific instructions for your model.
- Power Cycling: Turn off the thermostat by setting it to the 'OFF' position. Turn off the power to the thermostat at your circuit breaker or by unplugging it if it's powered through an outlet. Wait a few minutes before turning the power back on.
- Soft Reset: Often, there's a 'reset' or 'restart' option in the settings menu. Access the menu on the thermostat display and look for a Settings or System menu. Select the reset option and follow any on-screen prompts.
- Hard Reset/Factory Reset: This will erase all settings and return the thermostat to its original factory state. Make sure you want to do this, as it will likely delete all custom settings. Look for a 'Factory Reset' option in the settings menu. Some models require you to hold down a specific button combination or insert a sharp object into a pinhole reset button on the device. Follow the on-screen instructions if you initiated it from the menu.
- Online Support: Check the manufacturer’s website for support documents or forums. They might have specific instructions or videos to guide you through the process.
- Contact Support: If you’re unsure or if these steps don’t work, contact the manufacturer’s support line for assistance.
Remember to note down or remember your settings if you plan to restore them after the reset.
What is the difference between a smart thermostat and a programmable thermostat?
The main difference between a smart thermostat and a programmable thermostat lies in their features and capabilities.
- Programmable Thermostats: Basic Scheduling: Programmable thermostats allow users to set a schedule for heating and cooling based on their daily or weekly routines. You can program different temperatures for different times of the day or days of the week. Manual Programming: Typically, these devices require manual input to set the desired schedules and temperatures. Depending on the model, they might support different programming options, like 5-2 days (weekdays and weekends), 5-1-1 days (weekdays and separate schedules for Saturday and Sunday), or 7-day independent scheduling. Limited Remote Control: Generally, programmable thermostats lack connectivity features such as Wi-Fi or app integration, meaning they must be adjusted physically at the device.
- Smart Thermostats: Connectivity and Remote Control: Smart thermostats have Wi-Fi connectivity, allowing you to control them remotely via smartphone apps, computers, or even voice assistants like Amazon Alexa, Google Assistant, or Apple HomeKit. Learning and Automation: Many smart thermostats have learning capabilities. They can automatically adjust settings based on your habits, preferences, and occupancy patterns. Some may even offer geofencing, adjusting temperatures based on your location. Energy Usage Insights: Some smart thermostats provide detailed insights into energy usage, helping you optimize for efficiency and potentially lower energy bills. Integration with Smart Home Systems: Smart thermostats can often integrate with broader smart home ecosystems and devices, offering more comprehensive automation and control. Advanced Features: They might include features like humidity sensors, air quality sensors, and system diagnostics, providing a more comprehensive climate control system.
In summary, while both types of thermostats can help manage your heating and cooling system, smart thermostats offer advanced features, connectivity, and automation that go beyond the basic schedule-based control of programmable thermostats.
How do I set a humidity control on my smart thermostat?
Setting up humidity control on your smart thermostat varies depending on the brand and model of the thermostat. However, here are some general steps you can follow that should help with most smart thermostats that have humidity control:
- Check Compatibility: Ensure your smart thermostat supports humidity control; not all models do. You may need additional equipment like a humidifier or dehumidifier connected to your HVAC system.
- Access the Menu: Open the thermostat's menu by either tapping the screen or using the mobile app associated with your thermostat.
- Locate Humidity Settings: Look for a section labeled "Humidity," "Comfort Settings," or something similar. It might be nested under "Settings," "Preferences," or "Climate Control."
- Select Your Preferences: Set your desired humidity level. You might see settings for both winter and summer if your thermostat has seasonal adjustments.
- Enable/Disable Humidity Control: Turn the humidity control feature on if it isn't already enabled.
- Link Devices: If your thermostat interfaces with a humidifier or dehumidifier, ensure these devices are properly connected and linked to the thermostat system.
- Save Settings: Confirm your selections and save the changes. The thermostat should now automatically maintain the set humidity level.
- Monitor and Adjust: You may need to monitor the system for a few days to ensure it's maintaining the desired humidity level and make further adjustments if necessary.
For more specific instructions, refer to the user manual provided with your thermostat or the manufacturer's website for detailed guidance. If your thermostat connects via a mobile app, the app's help or support section might also provide detailed instructions.
How do I integrate my smart thermostat with Alexa?
Integrating your smart thermostat with Alexa can enhance your smart home experience by allowing you to control your thermostat using voice commands. The integration process may vary slightly depending on your specific thermostat model, but here is a general guide to help you connect your smart thermostat with Alexa:
- Ensure Compatibility: Confirm that your smart thermostat is compatible with Alexa. Most popular brands like Nest, Ecobee, Honeywell, and others typically offer this integration.
- Install and Set Up Your Thermostat: Make sure your smart thermostat is properly installed and connected to your home Wi-Fi network. Complete any necessary setup using the thermostat's app on your smartphone.
- Set Up Alexa: If you haven't already, download the Amazon Alexa app from the App Store (iOS) or Google Play Store (Android). Sign in to your Amazon account, or create one if you don't have an account.
- Enable the Related Skill in the Alexa App: Open the Amazon Alexa app on your smartphone or tablet. Tap on the "More" icon in the lower right corner. Select "Skills & Games." Use the search function to find the skill corresponding to your smart thermostat (e.g., "Nest," "Ecobee," "Honeywell Home"). Tap on the skill and then select "Enable to Use."
- Link Your Accounts: After enabling the skill, you will be prompted to sign in to your smart thermostat account. Enter your credentials and follow any additional instructions to link your accounts. Grant the necessary permissions for Alexa to control your thermostat.
- Discover Devices: Once your account is linked, run a device discovery in the Alexa app. Tap "Devices" in the bottom menu, then the "+" icon and choose "Add Device." Select "Thermostat" and follow the on-screen instructions to discover and add your thermostat.
- Control Your Thermostat: After successful setup, you can now control your thermostat with Alexa voice commands. Some examples include: “Alexa, set the thermostat to 72 degrees.” “Alexa, increase the temperature by 2 degrees.” “Alexa, what’s the temperature in the living room?”
- Create Routines (Optional): You can also set up routines in the Alexa app to automate the thermostat adjustments at specific times, or based on other triggers.
By following these steps, you should be able to seamlessly integrate your smart thermostat with Alexa, allowing for convenient voice control and smart home interactions. If you encounter any issues, consult your thermostat's support documentation or the Alexa support page for additional troubleshooting tips.
How do I set vacation mode on my smart thermostat?
Setting vacation mode on a smart thermostat can be a great way to save energy while you're away. The process can vary slightly depending on the brand and model of your thermostat, but here are some general steps you can follow:
- Read the Manual: First, check the user manual or the manufacturer's website for specific instructions related to your thermostat model.
- Access the Thermostat Menu: If your thermostat has a touchscreen, tap to wake it up. If it has physical buttons, press the appropriate button to access the main menu.
- Navigate to Vacation Mode: Look for options in the menu that mention "Vacation," "Away," or "Hold." This is often under settings or schedule adjustments. In some models, such as Nest, you may find this under "Eco Mode" which adjusts the temperature for energy conservation when you're not home.
- Set Your Preferences: Enter the dates and times when you will be away. Choose your desired temperature settings for heating and cooling while you’re gone. Generally, it's best to set it a bit lower in winter or higher in summer than your usual settings.
- Save Your Settings: After inputting your settings, be sure to save them. Some thermostats might require you to confirm the schedule or settings changes.
- Use the App (If Applicable): If your thermostat is connected to a smartphone app, you might find it easier to set vacation mode through the app. Log into the app, find the vacation or away settings, and enter your desired schedule and temperature settings.
- Check Notifications: Some smart thermostats will send you a notification or email confirmation when vacation mode is activated. Make sure these notifications are enabled if you want to be updated.
- Remote Adjustments: If you have a smart thermostat connected to the internet, you can often adjust the settings remotely through the app if your plans change.
If these steps don’t match your thermostat or if you encounter any issues, consulting the specific brand's customer support or website FAQ section can provide further guidance. Popular brands like Nest, Ecobee, Honeywell, and others typically have detailed instructions online.