Best Smart Thermostats to Buy in July 2026
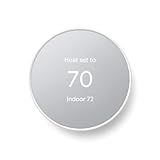
Google Nest Thermostat - Smart Thermostat for Home - Programmable Wifi Thermostat - Snow
- SMART SCHEDULING SAVES ENERGY WHILE KEEPING YOUR HOME COMFORTABLE.
- CONTROL YOUR THERMOSTAT REMOTELY VIA PHONE, LAPTOP, OR TABLET.
- HVAC MONITORING ALERTS YOU FOR MAINTENANCE, ENSURING EFFICIENCY.


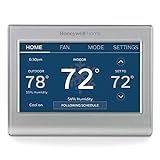
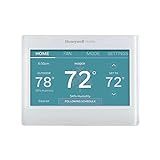
Honeywell Home RTH9585WF1004 Wi-Fi Smart Color Thermostat, 7 Day Programmable, Touch Screen, Energy Star, Alexa Ready, Gray
-
PERSONALIZE YOUR COMFORT: MATCH YOUR THERMOSTAT TO YOUR DÉCOR.
-
SAVE ENERGY MONEY: EXPLORE REBATES AND EARN REWARDS FOR SAVING ENERGY.
-
SMART CONTROL ANYWHERE: WI-FI CONNECTIVITY LETS YOU ADJUST TEMPS REMOTELY.
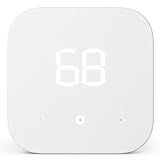
Amazon Smart Thermostat – Save money and energy - Works with Alexa and Ring - C-wire required
- SEAMLESSLY UPGRADE TO SMART COMFORT AND CUT ENERGY COSTS EASILY.
- USE ALEXA FOR EFFORTLESS CONTROL AND OPTIMAL TEMPERATURE SETTINGS.
- UNLOCK POTENTIAL SAVINGS WITH ENERGY PROVIDER REBATES AFTER PURCHASE.
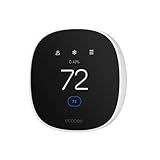
ecobee Smart Thermostat Essential - Energy Star Certified programmable Wi-Fi Thermostat - Works with Siri, Alexa, and Google Assistant
- SAVE UP TO 23% ANNUALLY ON HEATING AND COOLING COSTS EFFORTLESSLY.
- EASY INSTALLATION WITH SMART COMPATIBILITY FOR MOST SYSTEMS.
- CONTROL TEMPERATURE VIA TOUCHSCREEN OR ECOBEE APP ANYTIME, ANYWHERE.
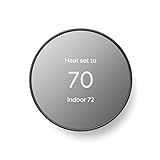
Google Nest Thermostat - Smart Thermostat for Home - Programmable Wifi Thermostat - Charcoal
- SAVE ENERGY AUTOMATICALLY WITH SMART SCHEDULING AND REMOTE CONTROL.
- MONITOR HVAC HEALTH AND RECEIVE MAINTENANCE ALERTS FOR PEACE OF MIND.
- EFFORTLESSLY CONTROL WITH GOOGLE ASSISTANT AND MULTIPLE SMART PLATFORMS.

ecobee Smart Thermostat Enhanced - Programmable Wifi Thermostat - Works with Siri, Alexa, Google Assistant - Energy Star Certified - Smart Home
- SAVE UP TO 26% ANNUALLY ON HEATING AND COOLING COSTS EFFORTLESSLY.
- SMART SCHEDULING KEEPS YOUR HOME AT THE PERFECT TEMPERATURE, ALWAYS.
- INSTALL EASILY AND CONTROL FROM ANYWHERE VIA THE ECOBEE APP.
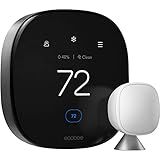
ecobee Smart Thermostat Premium with Smart Sensor and Air Quality Monitor - Programmable Wifi Thermostat - Works with Siri, Alexa, Google Assistant
- SAVE UP TO 26% ON ENERGY COSTS WITH ENERGY STAR CERTIFICATION.
- SMARTSENSOR OPTIMIZES COMFORT BY ELIMINATING HOT/COLD SPOTS.
- BUILT-IN AIR QUALITY MONITOR ENSURES A HEALTHIER HOME ENVIRONMENT.
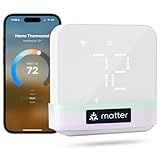
meross Smart Thermostat for Home, WiFi Thermostat Works with Matter, Alexa, Apple Home, Google Assistant, App & Voice Control, 7x24h Scheduling, Energy Saving, C-Wire Required
-
BROAD HVAC COMPATIBILITY: WORKS WITH 95% OF HVAC SYSTEMS FOR EASY INTEGRATION.
-
SMART CONTROL ANYTIME: MANAGE YOUR THERMOSTAT REMOTELY VIA THE APP.
-
ENERGY SAVINGS: TRACK USAGE TO LOWER HEATING AND COOLING BILLS EFFORTLESSLY.
Honeywell Home RTH9600WF Smart Color Thermostat ENERGY STAR Wi-Fi Programmable Touchscreen Alexa Ready - C-Wire Required
-
ENERGY STAR CERTIFIED: SAVE ENERGY WHILE ENJOYING PERSONALIZED TIPS!
-
CONTROL YOUR THERMOSTAT REMOTELY WITH POPULAR SMART HOME DEVICES.
-
CUSTOMIZE THE HIGH-DEFINITION DISPLAY TO MATCH YOUR HOME DÉCOR.
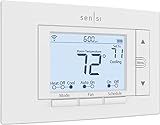
Sensi Smart Thermostat, 100 Years Of Expertise, Wi-Fi, Data Privacy, Programmable, Easy DIY Install, Works With Alexa, Energy Star Certified, Mobile App, ST55
-
PRIVACY FIRST: SENSI NEVER SELLS YOUR DATA TO THIRD PARTIES.
-
QUICK DIY SETUP: EASY INSTALLATION WITH STEP-BY-STEP APP GUIDANCE.
-
ENERGY SAVINGS: CUT HVAC COSTS BY ABOUT 23% WITH SMART FEATURES!
To install a smart thermostat, begin by ensuring that your HVAC system is compatible with the device. Turn off power to your HVAC system at the circuit breaker to ensure safety during installation. Remove the cover of your existing thermostat and take a picture of the wiring for reference. Carefully disconnect the wires and unmount the old thermostat. Follow the instructions provided with your smart thermostat to mount its base on the wall, ensuring it's level. Connect the wires to the corresponding terminals on the smart thermostat's base, using the photo you took as guidance. Attach the thermostat unit to its base. Restore power to the HVAC system and configure your new thermostat according to the manufacturer's instructions. This usually involves connecting it to your Wi-Fi network and setting up the related smartphone app for remote control. Complete any initial setup prompts, such as choosing your preferred temperature settings and scheduling. If the installation process is too complex or if you're unsure about any steps, consider consulting a professional installer.
How do I connect a smart thermostat to a smart home hub?
Connecting a smart thermostat to a smart home hub can help centralize your home's automation and create more convenient and efficient control. Here's a general guide to help you connect a smart thermostat to a smart home hub. Note that specific steps can vary depending on the brand and model of both the thermostat and hub:
General Steps:
- Check Compatibility: Before starting, ensure that your smart thermostat is compatible with your smart home hub. Refer to user manuals or the manufacturer's website for compatibility lists.
- Install the Thermostat: Install the smart thermostat according to the manufacturer's instructions. This usually involves replacing your old thermostat and wiring the new one correctly.
- Connect to Wi-Fi: Once installed, power on the thermostat and connect it to your home's Wi-Fi network. This is usually done through the thermostat's touchscreen or companion app.
- Install the App: Download and install the app for your smart thermostat on your smartphone or tablet. This app often helps in initial setup and management of the device.
- Create an Account: Open the app, create an account, and register your thermostat. This often involves entering a unique device code or scanning a QR code.
- Set Up the Smart Home Hub: Ensure your smart home hub is set up and connected to your Wi-Fi network. Follow the hub's setup process if it’s not already configured.
- Link the Thermostat to the Hub: Open the app for your smart home hub. Navigate to the section for adding new devices. Look for your specific thermostat model or a generic "thermostat" option. Follow the on-screen instructions to connect the thermostat to the hub. This may involve pressing a button on the thermostat or entering a code from the thermostat’s app into the hub’s app.
- Test the Connection: Once the thermostat is added to the hub, test the connection by adjusting the temperature or settings through the hub’s app. Ensure the changes reflect on the thermostat.
- Set Up Automations: If your smart home hub supports it, create automation rules to make full use of the thermostat. For example, you can set the temperature to adjust based on your location or time of day.
Tips:
- Firmware Updates: Ensure both the thermostat and hub have the latest firmware updates for optimal performance and compatibility.
- Technical Support: If you encounter issues, consult the support sections of the respective brands' websites or forums where other users might have solved similar problems.
- Voice Assistants: If your hub supports voice control through assistants like Alexa, Google Assistant, or Siri, you may need to link accounts in their respective apps for voice control functionalities.
By following these steps, you should be able to successfully connect and integrate your smart thermostat into your smart home ecosystem.
How do I install a smart thermostat with a heat pump system?
Installing a smart thermostat with a heat pump system can improve energy efficiency and give you greater control over your home's climate. Here's a general guide to get you started, but always refer to the thermostat's manual and consult a professional if needed.
Tools and Materials Needed
- Screwdriver (typically a Phillips head)
- Drill (if new holes are needed)
- Smart thermostat compatible with heat pumps
- Smartphone or tablet (for setup, if applicable)
- Labels or tape
- Voltage tester (optional but recommended for safety)
Steps for Installation
- Turn Off Power: Turn off the power to your HVAC system at the circuit breaker. This is crucial for safety to prevent electric shock.
- Remove Old Thermostat: Take off the cover of your old thermostat. Unscrew and remove the base plate, noting the wires connected to each terminal. Label the Wires: As you disconnect each wire, label them according to the terminals they were connected to (e.g., R, G, Y, W, etc.).
- Verify Compatibility: Check that the smart thermostat is compatible with heat pump systems. Most smart thermostats are, but it’s good to confirm in the manual.
- Install the New Base Plate: Thread the wires through the base plate of the new thermostat. Use a drill to mount the base plate to the wall. Make sure it's level.
- Connect the Wires: Attach the labeled wires to the corresponding terminals on the new thermostat base. Ensure all connections are secure and follow the diagram provided in your thermostat’s manual. Typical heat pump wiring includes terminals like R (power), C (common), Y (compressor), O/B (reversing valve), G (fan), and Aux/E (auxiliary or emergency heat).
- Attach Faceplate: Snap the new thermostat onto the base plate.
- Power On and Set Up: Restore power to the HVAC system at the circuit breaker. Follow the instructions on the thermostat’s screen for initial setup. This may involve connecting to a Wi-Fi network and setting preferences via a smartphone app.
- Configure Thermostat Settings: Specify you have a heat pump during setup. Set your desired temperature schedules and any specific energy-saving features the smart thermostat offers.
- Test the System: Ensure the system is heating and cooling as expected. Test all modes (heat, cool, fan) to verify correct operation.
- Additional Configuration:
- Configure more advanced settings through the app, like geofencing, scheduling, and energy reports.
Important Considerations
- Professional Help: If you’re unsure about any part of the process, consider hiring a professional technician for installation.
- Wiring Verification: Some older systems might not have a common wire (C-wire), which is required by most smart thermostats. You may need a C-wire adapter or professional assistance to install one.
- Safety: Always ensure power is off when handling wiring and use caution to prevent mistakes that could damage the thermostat or HVAC system.
Following these steps should help you successfully install a smart thermostat with a heat pump system.
What is the process for updating the firmware on a smart thermostat?
Updating the firmware on a smart thermostat generally involves the following steps. However, please refer to the specific instructions for your thermostat model, as the process can vary slightly between different brands and models:
- Check for Updates: Access the thermostat’s mobile app or web portal. Navigate to the settings menu and look for a section related to firmware updates or software updates.
- Prepare Your System: Ensure the thermostat is connected to a stable Wi-Fi network. A strong internet connection is often necessary for downloading and installing updates. Make sure the thermostat is powered and that the batteries are fresh if it uses batteries.
- Initiate the Update: If an update is available, you might see a prompt either on the thermostat’s interface or within the app. Follow the instructions to begin the update process. This usually involves pressing a button to confirm the update on either the device or within the app.
- Installation: The thermostat will typically download and install the update automatically. This process might take several minutes. Do not turn off the power or disconnect the device from Wi-Fi during the update.
- Reboot: After the update is complete, the thermostat may automatically restart. Allow it to reboot fully before attempting to control it again.
- Verify the Update: Once the update is complete, verify that the firmware version has been updated in the settings menu. Check that the thermostat operates as expected and all settings have been retained.
- Troubleshooting: If you encounter issues during the update, refer to the support section of your thermostat’s user manual or contact customer support for assistance.
Always refer to the user manual or the manufacturer’s website for specific instructions related to your particular model of thermostat.
How do I troubleshoot connectivity issues with my smart thermostat?
Troubleshooting connectivity issues with your smart thermostat can help restore its functionality and ensure it efficiently controls your home's heating and cooling system. Here's a step-by-step guide to help diagnose and resolve these issues:
- Check Power Supply: Ensure the thermostat is receiving power. Check the circuit breaker for any tripped switches. For battery-operated models, replace or recharge the batteries.
- Verify Wi-Fi Connection: Confirm that your Wi-Fi network is working for other devices. Ensure the thermostat is within range of the Wi-Fi router. If necessary, consider moving the router or using a range extender.
- Reboot the Thermostat: Restart the thermostat following the manufacturer's instructions, often by pressing a reset button or removing and reinserting batteries.
- Reconnect to Wi-Fi: Go to the thermostat's settings menu and reconnect to your Wi-Fi network. Ensure you enter the correct password.
- Update the Firmware: Check if there is a firmware update available for your thermostat. Updating can resolve compatibility and connectivity issues.
- Verify Router Settings: Make sure your router’s firmware is up to date. Ensure that the correct network settings (such as 2.4GHz vs. 5GHz) are compatible with your thermostat. Check whether MAC address filtering is enabled and add your thermostat’s MAC address if necessary.
- Check Network Congestion: Too many devices connected to your network can cause connectivity issues. Disconnect some devices if needed.
- Examine Thermostat's App: Make sure the app on your smartphone is up to date. Log out and back into the app to refresh the connection.
- Factory Reset: As a last resort, perform a factory reset on the thermostat. Follow the manufacturer-specific instructions for this process.
- Check for Interference: Other electronic devices or thick walls can cause interference. Try relocating these items or the thermostat itself.
- Contact Support: If the issue persists, contact the manufacturer's customer support for further assistance.
Following these steps should help you resolve most connectivity issues with your smart thermostat. If problems continue, the issue may require professional evaluation or replacement of the device.
How do I lock or unlock my smart thermostat to prevent tampering?
Locking or unlocking your smart thermostat to prevent tampering can vary depending on the brand and model you have. However, here are some general steps for popular smart thermostats:
Nest Thermostat
- Locking: Open the Nest app on your smartphone or go to the thermostat. Go to "Settings" and select "Lock." You’ll be prompted to set a PIN. This PIN will be required to change the temperature outside of the set range. Confirm the temperature range that you allow (outside of this range, a PIN will be needed).
- Unlocking: On the thermostat, select the option to unlock. Enter the PIN you set to unlock the thermostat.
Ecobee Thermostat
- Locking: Go to the main menu on your thermostat or the Ecobee app. Navigate to “Settings,” then “Access Control.” Enable the “Screen Lock” option. Set up a 4-digit PIN to lock the thermostat’s settings or controls.
- Unlocking: Tap the screen or go to the app, and it will prompt you to enter the PIN. Enter the 4-digit PIN you set to unlock the thermostat.
Honeywell Thermostat (e.g., T6 Pro Smart)
- Locking: Press “Menu” on the thermostat. Use the arrow keys to navigate to “Lock” or “Screen Lock.” Choose the level of locking: “Partially Locked” (limited control) or “Fully Locked” (no control without PIN). Enter a 4-digit PIN when prompted.
- Unlocking: Press the lock symbol or attempt an input to prompt the unlock screen. Enter your 4-digit PIN to unlock.
General Tips:
- Consult the Manual: Always refer to your thermostat’s user manual for specific instructions and capabilities.
- App Usage: Most smart thermostats allow for locking through their respective apps, which might provide more flexibility or options.
- Remember or Note Your PIN: Forgetting your PIN can be troublesome as it may require a factory reset or contacting customer support.
If you continue to have issues or difficulties, it might be helpful to consult the customer support of your smart thermostat’s brand for assistance.
How do I control a smart thermostat using my smartphone?
To control a smart thermostat using your smartphone, you generally need to follow these steps:
- Choose a Compatible Smart Thermostat: Ensure that the smart thermostat you have is compatible with your smartphone and your home Wi-Fi network.
- Download the App: Go to the App Store (iOS) or Google Play Store (Android) and download the app specific to your thermostat’s brand (e.g., Nest, Ecobee, Honeywell Home).
- Install the Thermostat: If you haven’t installed the thermostat yet, follow the manufacturer’s instructions for installation. This might include wiring, mounting, and connecting it to your Wi-Fi network.
- Create an Account: Open the app and create an account if you haven’t already. You’ll typically need to provide some basic information like your email address and password.
- Connect Your Thermostat to Wi-Fi: Access the thermostat’s settings either through the device itself or the app. Follow the prompts to connect the thermostat to your home’s Wi-Fi network.
- Pair Your Smartphone with the Thermostat: Open the app and log in with your credentials. Follow the instructions to add a new device or connect your thermostat. This often involves scanning a QR code on the thermostat or entering a setup code.
- Set Preferences and Schedules: Use the app to set your temperature preferences, create heating/cooling schedules, and adjust settings. Most apps offer an intuitive interface for customizing these options.
- Remote Control: Through the app, you can adjust the temperature, switch between heating and cooling modes, and monitor energy usage from anywhere, as long as your smartphone is connected to the internet.
- Integration with Smart Home Systems: If desired, integrate your thermostat with other smart home products, such as Amazon Alexa, Google Assistant, or Apple HomeKit, for voice control and automation.
- Troubleshooting: Refer to the app’s help section or the manufacturer’s website if you encounter any issues. Ensure both your smartphone and thermostat have the latest software updates for optimal performance.
By following these steps, you can manage your home’s climate easily and efficiently from your smartphone.