Best Smart Thermostats to Buy in July 2026
Google Nest Thermostat - Smart Thermostat for Home - Programmable Wifi Thermostat - Snow
- SAVE ENERGY WITH SMART SCHEDULING VIA THE GOOGLE HOME APP.
- CONTROL TEMPERATURE REMOTELY FROM ANY DEVICE-COMFORT ANYWHERE!
- RECEIVE ALERTS FOR HVAC ISSUES TO ENSURE OPTIMAL PERFORMANCE.


Honeywell Home RTH9585WF1004 Wi-Fi Smart Color Thermostat, 7 Day Programmable, Touch Screen, Energy Star, Alexa Ready, Gray
-
PERSONALIZE YOUR THERMOSTAT TO MATCH YOUR HOME DÉCOR EFFORTLESSLY.
-
SAVE ENERGY AND EARN REWARDS THROUGH UTILITY REBATE PROGRAMS.
-
CONTROL TEMPERATURE ANYWHERE USING ALEXA, GOOGLE HOME, OR OUR APP.
Amazon Smart Thermostat – Save money and energy - Works with Alexa and Ring - C-wire required
- SMART UPGRADE: SWITCH EASILY TO SAVE ENERGY WITH SMART THERMOSTAT.
- SAVE MONEY: EXPLORE LOCAL ENERGY REBATES AFTER YOUR PURCHASE.
- AUTOMATIC CONTROL: LET ALEXA SET PREFERRED TEMPS FOR HOME OR AWAY.
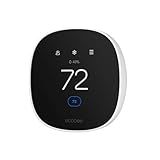
ecobee Smart Thermostat Essential - Energy Star Certified programmable Wi-Fi Thermostat - Works with Siri, Alexa, and Google Assistant
- SAVE 23% ANNUALLY ON HEATING/COOLING COSTS WITH SMART SCHEDULING!
- COMPATIBLE WITH 85% OF SYSTEMS; CHECK YOURS ONLINE TODAY!
- EASY DIY INSTALL; NO C WIRE NEEDED WITH POWER EXTENDER KIT!
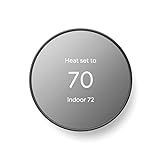
Google Nest Thermostat - Smart Thermostat for Home - Programmable Wifi Thermostat - Charcoal
- SAVE ENERGY AUTOMATICALLY WITH SMART SCHEDULING AND REMOTE CONTROL.
- STAY COMFORTABLE; MONITOR HVAC AND RECEIVE MAINTENANCE ALERTS.
- SEAMLESS CONNECTIVITY WITH GOOGLE HOME FOR VOICE CONTROL CONVENIENCE.
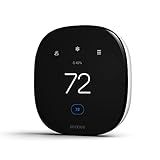
ecobee Smart Thermostat Enhanced - Programmable Wifi Thermostat - Works with Siri, Alexa, Google Assistant - Energy Star Certified - Smart Home
- SAVE 26% ANNUALLY ON HEATING AND COOLING COSTS EFFORTLESSLY!
- ALWAYS ARRIVE TO IDEAL TEMPS WITH PREHEAT AND PRECOOL FEATURES.
- CONTROL FROM ANYWHERE USING THE APP-ADAPT TO ANY SCENARIO!
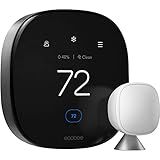
ecobee Smart Thermostat Premium with Smart Sensor and Air Quality Monitor - Programmable Wifi Thermostat - Works with Siri, Alexa, Google Assistant
-
SAVE UP TO 26% YEARLY ON HEATING AND COOLING WITH ENERGY STAR CERTIFICATION.
-
SMARTSENSOR OPTIMIZES COMFORT BY ADJUSTING TEMPERATURES IN KEY ROOMS.
-
BUILT-IN SAFETY ALERTS FOR AIR QUALITY, SMOKE DETECTION, AND BREAK-INS.
meross Smart Thermostat for Home, WiFi Thermostat Works with Matter, Alexa, Apple Home, Google Assistant, App & Voice Control, 7x24h Scheduling, Energy Saving, C-Wire Required
- COMPATIBLE WITH 95% OF HVAC SYSTEMS; CHECK COMPATIBILITY FIRST!
- SET FLEXIBLE SCHEDULES TO MAINTAIN COMFORT AND SAVE ON ENERGY BILLS!
- MONITOR & CONTROL FROM ANYWHERE WITH THE MEROSS SMART APP!
A smart thermostat and a regular thermostat primarily differ in terms of functionality, connectivity, and user experience. A regular thermostat typically allows users to manually adjust the temperature or set simple schedules, providing basic temperature control without any connectivity features. In contrast, a smart thermostat offers advanced capabilities, such as the ability to connect to Wi-Fi and integrate with smartphones or smart home systems. This connectivity allows users to control the thermostat remotely, receive energy usage reports, and even use voice commands with compatible voice assistants. Additionally, smart thermostats often incorporate learning algorithms that enable them to automatically adjust temperature settings based on user preferences and habits over time, leading to potential energy savings and increased comfort. These features make smart thermostats more flexible and convenient compared to their regular counterparts.
What is a learning thermostat?
A learning thermostat is a type of smart thermostat designed to optimize and manage heating, ventilation, and air conditioning (HVAC) systems in homes and buildings by using intelligent algorithms and machine learning. These devices go beyond the traditional programmable thermostats by automatically adapting to a household's schedule, preferences, and even the local weather conditions over time to improve energy efficiency and comfort.
Here are some key features of learning thermostats:
- Automatic Scheduling: They learn the preferred temperatures at different times of the day and week, gradually creating a schedule that suits the occupants' lifestyle without manual programming.
- Adaptive Algorithms: The device uses data and algorithms to understand usage patterns and predict future heating and cooling needs, adjusting settings accordingly.
- Remote Control: Most learning thermostats offer smartphone apps or web interfaces that allow users to monitor and control their home’s temperature remotely.
- Energy Usage Reports: They often provide insights and reports on energy usage, helping users understand their consumption patterns and identify opportunities for savings.
- Integration with Smart Home Systems: Learning thermostats can often be integrated with other smart home devices and ecosystems, allowing for more comprehensive home automation.
- Environmental Adjustment: They can adapt to changes in the environment, such as weather variations, making automatic adjustments that account for external temperature fluctuations.
The Nest Learning Thermostat, developed by Nest Labs (now part of Google), is one of the most well-known examples of this technology. These devices are popular in part because they can lead to significant energy savings and increased convenience by reducing the need for manual thermostat adjustments.
What is the lifespan of a smart thermostat?
The lifespan of a smart thermostat typically ranges from 5 to 10 years. However, this can vary depending on the brand, model, usage, and how well it is maintained. Regular software updates, proper installation, and avoiding physical damage can help extend the device’s functionality. Technological advancements might also render older models obsolete before they fail physically, prompting users to upgrade for improved features or compatibility with newer smart home systems.
How to upgrade from a regular thermostat to a smart one?
Upgrading from a regular thermostat to a smart thermostat can improve energy efficiency and provide greater control over your home’s climate. Here’s a step-by-step guide to help you through the process:
Step 1: Choose the Right Smart Thermostat
- Compatibility: Check if the smart thermostat is compatible with your HVAC system. Look at voltage requirements (most are 24V systems) and whether you have a heat pump, multi-stage system, etc.
- Features: Determine which features are important to you, such as remote control via smartphone, learning capabilities, geofencing, etc.
- Brand and Model: Popular brands include Nest, Ecobee, Honeywell, and others. Research reviews and reliability.
Step 2: Gather Necessary Tools and Materials
- Screwdriver (Phillips/flathead, depending on your old thermostat)
- Drill (in case new holes are needed)
- Level (to ensure the thermostat is straight)
- Smartphone or tablet for setup if required
Step 3: Turn Off Power to Your HVAC System
- Locate your circuit breaker panel.
- Turn off the power to your heating and cooling system to prevent electrical shock.
Step 4: Remove the Old Thermostat
- Remove Cover: Take off the cover of your old thermostat to access the wires.
- Label Wires: Use labels or take a photo to note where each wire goes. This is crucial for connecting the new thermostat correctly.
- Disconnect Wires: Loosen the terminal screws and carefully disconnect the wires.
- Remove Base Plate: Unscrew and remove the base plate.
Step 5: Install the Smart Thermostat Base
- Position Baseplate: Place the new thermostat’s baseplate on the wall, and use a level to ensure it's straight.
- Mark and Drill Holes: If necessary, mark the new screw positions, then drill pilot holes or use the old ones if they match.
- Attach Baseplate: Fasten the base plate to the wall using the screws provided.
Step 6: Connect the Wires
- Match Wires: Connect the wires to the new thermostat’s terminals. Follow the labels or photo you took earlier.
- Use Wire Extenders if Necessary: Some smart thermostats come with wire extenders for systems with fewer wires.
Step 7: Attach the Smart Thermostat
- Place Thermostat: Attach the smart thermostat to the base plate.
- Snap or Screw in Place: Depending on the model, snap it into place or secure it with screws.
Step 8: Restore Power and Configure
- Turn Power Back On: Go to the circuit breaker and switch the power back on.
- Initial Setup: Follow the instructions on the thermostat or use the associated app to complete the setup process. This may include: Connecting to Wi-Fi Setting temperature schedules Integrating with other smart home devices
Step 9: Test the System
- Check Functionality: Make sure the thermostat controls your HVAC system properly. Test both heating and cooling functions.
- Adjust Settings: Fine-tune settings for comfort and energy efficiency.
Tips:
- If you're not comfortable working with electrical systems, consider hiring a professional installer.
- Keep track of your energy usage with the smart thermostat's app to monitor savings and operational efficiency.
By following these steps, you should be able to successfully upgrade your thermostat to a smart one, gaining greater control and efficiency in your home's heating and cooling systems.
How does a smart thermostat save money?
A smart thermostat can save money in several ways:
- Energy Efficiency: Smart thermostats optimize heating and cooling by learning your schedule and adjusting the temperature accordingly. This reduces energy consumption when you're not home or during times when you don’t need as much heating or cooling.
- Remote Control: Most smart thermostats can be controlled remotely via a smartphone app. This allows you to adjust the settings from anywhere, ensuring you’re not wasting energy if plans change and you’re coming home later than expected.
- Adaptive Learning: Over time, smart thermostats learn your preferences and daily routines, automatically adjusting settings to improve efficiency without sacrificing comfort. This means less manual intervention and more optimized energy use.
- Energy Usage Reports: Many smart thermostats provide detailed reports on your energy usage, helping you identify patterns and opportunities for further savings. Understanding your consumption helps in making informed decisions about how to optimize settings.
- Integration with Other Smart Devices: By integrating with other smart home systems, such as lighting or occupancy sensors, smart thermostats can further optimize energy consumption. For example, they can adjust the temperature based on whether a room is occupied.
- Seasonal Adjustments: Some smart thermostats can automatically adjust your home's temperature settings based on the weather forecast, ensuring the HVAC system is not working harder than necessary.
- Zoned Heating and Cooling: Certain smart thermostats can work with zoned heating and cooling systems to allow for precise temperature control in different areas of your house, reducing energy use in unoccupied zones.
By automating and optimizing heating and cooling, smart thermostats can significantly reduce energy waste, leading to lower utility bills and a smaller carbon footprint.
How to connect a smart thermostat to the internet?
Connecting a smart thermostat to the internet can vary slightly depending on the brand and model you have, but the general process is quite similar for most devices. Here's a step-by-step guide to help you connect your smart thermostat to the internet:
- Install the Thermostat: Ensure the smart thermostat is properly installed and configured with your HVAC system. Follow the manufacturer's instructions for installation. If you're not comfortable handling wiring, consider hiring a professional.
- Power On the Thermostat: Once installed, turn your HVAC system back on to power the thermostat. Make sure it boots up correctly.
- Access Wi-Fi Settings: On the thermostat's display (usually a touchscreen), navigate to the settings menu. Look for options like "Network," "Wi-Fi," or "Internet."
- Select Your Wi-Fi Network: Within the Wi-Fi settings, you should see a list of nearby Wi-Fi networks. Select your home Wi-Fi network from the list.
- Enter Wi-Fi Password: Enter the password for your Wi-Fi network when prompted. Double-check that you enter it correctly, as passwords are case-sensitive.
- Connect and Verify: After entering the password, the thermostat will attempt to connect to the network. This may take a few seconds. Once connected, you might see a confirmation message or an icon indicating a successful connection.
- Register the Device (If Required): Some smart thermostats require you to create an account or register the device. This can often be done through the manufacturer's app or website. Follow the instructions provided.
- Download the Mobile App: To control your thermostat remotely, download the manufacturer’s app on your smartphone or tablet. For example, if you have a Nest thermostat, download the Google Home app or the Nest app.
- Add the Thermostat to the App: Open the app and sign in with your account. Look for an option to add a new device. Follow the prompts to add your thermostat. This might involve scanning a QR code on the thermostat or entering a setup code.
- Verify Connectivity: Once everything is set up, test the connection by adjusting the temperature through the app. Ensure that the thermostat responds accordingly.
- Adjust Settings and Preferences: Finally, explore the app and thermostat settings to configure preferences like schedules, temperature ranges, and any home automation features.
If you encounter any issues during setup, consult the user manual or the manufacturer’s support website for troubleshooting steps specific to your model.
What is the impact of smart thermostats on energy bills?
Smart thermostats can have a significant positive impact on energy bills through several mechanisms. Here are some of the ways they contribute to energy savings:
- Programmable Scheduling: Smart thermostats let users set heating and cooling schedules that match their daily routines, reducing energy use when they're not home or during sleeping hours.
- Adaptive Learning: Many smart thermostats learn your habits over time and automatically adjust to improve efficiency. They can predict when to heat or cool the home based on previous behavior and occupancy patterns.
- Remote Control: With smartphone apps, users can adjust their thermostats remotely, making it easy to change settings if their schedule changes or they forget to adjust the thermostat before leaving the house.
- Geofencing: Some smart thermostats use geofencing technology to adjust settings based on your phone’s location, automatically reducing heating or cooling when you leave and starting it up again as you head home.
- Energy Usage Reports: These devices often provide detailed reports on energy usage, helping homeowners understand where they can cut back and optimize energy use for additional savings.
- Integration with Other Smart Devices: Smart thermostats can often be integrated with other smart home devices like lights and occupancy sensors to optimize the home's overall energy use.
- Efficient Temperature Changes: They adjust temperatures gradually to maintain comfort while reducing energy spikes that come with manual temperature adjustments.
- Weather Adaptability: Many smart thermostats adjust settings based on real-time weather conditions to maintain efficiency without sacrificing comfort.
By reducing unnecessary heating and cooling, smart thermostats can lead to significant reductions in energy bills, often between 10% and 20%, depending on individual usage patterns and local climate. However, the actual savings can vary widely based on factors like local energy prices, home insulation, and the presence of additional energy-efficient systems.