
Best Push Mower Cleaning Essentials to Buy in July 2026
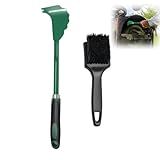
Heavy-Duty Lawn Mower Cleaning Scraper and Cleaning Stiff Brush are Used for The Maintenance and Cleaning of Outdoor Garden Lawn Mower Decks. (1 Pack)
- CLEAN 98% OF CAKED GRASS IN MINUTES WITH DUAL CLEANING SYSTEM.
- ERGONOMIC HANDLE REDUCES FATIGUE BY 40%-NO MORE BLISTERS!
- DURABLE DESIGN WITH SPACE-SAVING HANGING HOLE FOR EASY STORAGE.


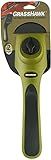
Good Vibrations Grass Hawk Ultimate Mower Cleaning Tool - Lawn Mower Dual Blade Deck Scraper - Clean All Contours of The Deck Flat or Curved
- EFFORTLESSLY SWITCH BLADES FOR VERSATILE MOWER CLEANING.
- ONE-HANDED OPERATION WITH A SIMPLE, CONVENIENT ROTATING KNOB.
- PROTECTS MOWER FROM RUST AND DIRT, ENHANCING PERFORMANCE AND LONGEVITY.

American Lawn Mower Company SK-1 Reel Lawn Mower, Compound Sharpening Kit
-
MAINTAIN PEAK MOWING PERFORMANCE WITH OUR DIY SHARPENING KIT!
-
EFFORTLESSLY SHARPEN BLADES AT HOME TO SAVE TIME ON LAWN CARE.
-
COMPATIBLE WITH MAJOR BRANDS FOR HASSLE-FREE MOWER MAINTENANCE.
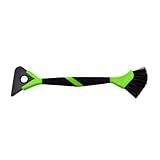
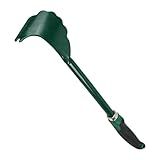
Walensee Lawn Mower Tools Lawn Mower Accessories Lawn Mower Deck Cleaner Lawn Mower Scraper Brush Mower Cleaner Mower Deck Brush Tractor Cleaning Tools 16 Inches Length Green
-
DUAL FUNCTION DESIGN: CLEAN QUICKLY WITH SCRAPER & BRUSH IN ONE TOOL!
-
VERSATILE COMPATIBILITY: WORKS ON ALL MOWER TYPES & RIDING EQUIPMENT.
-
SAFETY FIRST: EXTENDED HANDLE MINIMIZES INJURY RISKS WHILE CLEANING.
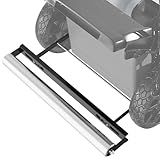
Lawn Striping Kit for Push Mower Compatible with EGO AR2100 21inch Lawn Striper, Stainless Steel, Easy to Install and Dismantle for Lawn Enthusiasts
-
HEAVY DUTY DESIGN ENSURES DURABLE, BEAUTIFUL LAWN STRIPING.
-
RUST-PROOF MATERIALS GUARANTEE LONG-LASTING PERFORMANCE.
-
QUICK, TOOL-FREE INSTALLATION FOR HASSLE-FREE LAWN CARE.
Leefasy Mower Cutter Cleaning Tool, Mower Deck Cleaner,Mower Deck Scraper, Mower Accessories with Long Rubber Handle for Lawnmower Maintenance, Easy Storage Design
- DURABLE DESIGN: BUILT TO LAST WITH RUBBER AND IRON FOR RELIABLE USE.
- EFFORTLESS CLEANING: ERGONOMIC DESIGN MAKES TOUGH TASKS EASY AND EFFICIENT.
- COMPACT AND VERSATILE: CLEAN MOWERS, SHOVELS, AND MORE-SPACE-SAVING TOOL!

HOODELL 10 Pack 491588S Air Filter + 394358 Fuel Filter Compatible with 491588 4915885, Toro 20332, Craftsman 33644, Pro Performance for Push Lawn Mower
-
BOOST PERFORMANCE: HIGHER AIR INTAKE AND LOWER RESISTANCE ENHANCE EFFICIENCY.
-
UNIVERSAL COMPATIBILITY: FITS MULTIPLE BRANDS, ENSURING WIDE MARKET APPEAL.
-
VALUE BUNDLE: 10 AIR FILTERS AND 4 FUEL FILTERS FOR COST-EFFECTIVE MAINTENANCE.
After each use of a push mower, it is vital to clean and store it properly to ensure its longevity and performance. Here are the steps to follow for cleaning and storing a push mower:
- Wait for the engine to cool down: Always allow the mower's engine to cool completely before starting the cleaning process. This will minimize the risk of burns and ensure safety.
- Remove the spark plug wire: Locate the spark plug wire connected to the mower's engine and disconnect it. This will prevent the engine from accidentally starting during the cleaning process.
- Remove debris: Use a brush or a sturdy cloth to remove dirt, grass clippings, and other debris from the mower's deck, wheels, and blades. Pay particular attention to the underside of the deck, as this area tends to accumulate a lot of debris.
- Clean the blades: Carefully inspect the blades for any signs of damage and clean them thoroughly. You can use a brush, cloth, or even a mild detergent mixed with water to remove any caked-on debris. Ensure all grass and dirt particles are completely removed.
- Oil the blades: Applying a thin coat of oil to the blades will help prevent rusting during storage. Use a light machine oil or a spray lubricant and coat the blades evenly.
- Check the air filter: Remove the mower's air filter and inspect it. If the filter is dirty or clogged, clean it using compressed air or wash it with warm, soapy water. Allow it to dry completely before reinstalling it.
- Empty the fuel tank: Before storing the mower, it's best to empty the fuel tank to avoid complications. Start the engine and let it run until it runs out of fuel. This will prevent fuel from sitting in the tank and potentially clogging the carburetor.
- Clean the fuel system (optional but recommended): If you want to go the extra mile, you can add a fuel stabilizer to the remaining fuel in the tank and run the engine for a few minutes. This will help protect the fuel system components during storage.
- Store the mower in a clean, dry area: It is important to store the push mower in a clean, dry location to prevent rust and damage. If possible, cover it with a tarp or use a dedicated mower cover to protect it from dust, moisture, and pests.
By following these steps, you can ensure that your push mower remains clean, well-maintained, and ready for use whenever needed. Regular cleaning and proper storage will significantly extend its lifespan and maintain its efficiency.
How to properly drain the fuel before storing a push mower?
To properly drain the fuel before storing a push mower, follow these steps:
- Ensure the mower is cool and turned off: Allow the engine to cool completely after its last use. Make sure the mower is turned off.
- Locate the fuel tank: Identify the fuel tank on your push mower. The location depends on the model but is generally situated on top of or near the engine.
- Disconnect the spark plug: Before draining the fuel, it is important to disconnect the spark plug to avoid accidental ignition. Remove the spark plug wire from the spark plug, typically located at the rear of the engine.
- Position the mower: Place the mower on a flat, stable surface to prevent accidents or spills while working on it.
- Prepare a fuel-safe container: Choose a fuel-safe container, such as a gas can, that is clean and free from any residue or contaminants. It is recommended to use a separate container for the purpose of storing old fuel.
- Carefully remove the fuel cap: Unscrew the fuel cap from the fuel tank slowly. This will release any built-up pressure or vacuum, ensuring a smoother fuel-draining process.
- Tilt the mower: Tilt the push mower slightly, pouring the remaining fuel from the fuel tank into the designated container. Tilt the mower towards the side opposite the air filter or muffler, minimizing the risk of fuel getting into them.
- Use a hand pump or siphoning tool: If the mower has a significant amount of fuel remaining, you may opt to use a hand pump or a siphoning tool for easier removal. These tools help extract the fuel through a hose and into the empty container.
- Dispose of old fuel properly: If the gas in the container is no longer usable or of poor quality, it should be properly disposed of according to your local regulations. Gasoline can be hazardous if not disposed of correctly.
- Reinstall the fuel cap and reconnect the spark plug: Once the fuel tank is empty, securely reattach the fuel cap. Make sure it is tightened properly. Reconnect the spark plug wire to the spark plug.
By properly draining the fuel from your push mower, you can prevent fuel-related issues, such as stale gasoline and carburetor problems, when it comes time to use it again.
How to clean the air filter of a push mower?
Cleaning the air filter of a push mower is essential for maintaining its performance and prolonging its life. Here's a step-by-step guide on how to clean the air filter:
- Turn off the mower: Ensure that the mower is turned off and remove the spark plug wire to prevent any accidental starting.
- Locate the air filter: The air filter is usually located on the side or top of the engine, covered by a plastic or foam housing. Remove any screws or clips securing the housing.
- Remove the air filter: Take out the air filter carefully to avoid damaging it or releasing any loose dirt or debris into the engine.
- Inspect the air filter: Examine the filter to determine its condition. If it appears excessively dirty or clogged, it is time to clean or replace it. Foam filters should be replaced, while paper filters can be cleaned.
- Clean the foam filter (if applicable): If your mower has a foam air filter, gently wash it with warm, soapy water. Rinse it thoroughly until the water runs clear. Squeeze out the excess water and allow it to air dry completely before reinstallation. Do not wring or twist the filter as it may cause damage.
- Clean the paper filter: If your mower has a paper air filter, you can clean it by gently tapping it against a hard surface or blowing compressed air through it to remove the loose dirt and debris. However, if it is heavily soiled or damaged, it is best to replace it with a new one.
- Reinstall the air filter: Once the air filter is clean and dry, carefully place it back into the housing, making sure it fits snugly. Attach any clips or screws to secure the housing.
- Reconnect the spark plug wire: Ensure that the spark plug wire is securely connected to prevent any accidental starting.
Regularly cleaning or replacing the air filter, depending on its type and condition, is crucial to maintaining optimal air intake and ensuring the longevity and efficiency of your push mower.
What is the procedure to clean a push mower's starter cord?
To clean a push mower's starter cord, you can follow these steps:
- Preparation: Ensure that the mower is turned off and the spark plug wire is disconnected to prevent accidental starting.
- Access the Starter Housing: Locate the starter housing, typically found on the top or side of the mower. It is usually covered by a plastic or metal housing.
- Remove the Housing: Unscrew or unclip the fasteners that hold the housing in place. Carefully lift off the housing to expose the starter cord and mechanism.
- Clean the Starter Cord: Inspect the starter cord for any built-up dirt, grass, or debris that may be causing it to become stuck or difficult to pull. Use a soft brush or cloth to gently remove any obstructions or dirt from the cord.
- Lubricate the Cord: With a silicone-based lubricant or some light oil, lightly lubricate the starter cord to ensure smooth movement. Be careful not to use excessive lubricant, as it may attract more dirt and cause further problems.
- Check the Recoil Spring: While the housing is off, check the recoil spring to ensure it is in good condition. If it appears damaged or worn, it may need to be replaced.
- Reassemble the Housing: Carefully reposition the starter housing back onto the mower, aligning any screw holes or clips. Secure it with the appropriate fasteners, ensuring everything is tightly in place.
- Reconnect the Spark Plug Wire: Once the housing is securely in place, reconnect the spark plug wire to its terminal.
- Test: To ensure everything is functioning properly, give the starter cord a few gentle pulls to check for smooth operation. If it retracts correctly and pulls smoothly, you have successfully cleaned the starter cord.
Remember, if you encounter any difficulties or are unsure about any steps, it is always best to consult the mower’s manual or seek assistance from a professional.
How to properly clean a push mower's grass catcher bag?
To properly clean a push mower's grass catcher bag, follow these steps:
- Remove the grass catcher bag from the push mower. Most bags can be easily detached by lifting them off the mower's frame or by disconnecting any clips or straps.
- Shake out the excess grass clippings from the bag. Hold the bag upside down and vigorously shake it to remove any loose grass, dirt, or debris. You can do this over a trash can or an outdoor area where you don't mind the clippings falling.
- Use a brush or a soft-bristle scrub brush to remove any stubborn debris. Gently brush the interior and exterior of the bag to loosen and dislodge dirt or grass stuck to the fabric. Be careful not to use anything too abrasive that could tear the bag.
- Rinse the grass catcher bag thoroughly with water. Use a hose or a bucket of clean water to rinse away any remaining grass clippings or dirt. It's best to rinse from the inside to the outside to ensure all areas are cleaned.
- Allow the bag to fully dry. Hang the grass catcher bag upside down or lay it flat on a clean surface to air dry completely. Ensure that it is thoroughly dry before storing it to prevent mold or mildew growth.
- Reattach the bag to the push mower. Once the bag is clean and dry, reattach it to the push mower following the manufacturer's instructions. Make sure it is securely fastened to avoid any issues while mowing.
Regularly cleaning and maintaining the grass catcher bag will help ensure proper grass collection and extend its lifespan. It is recommended to clean the bag after each use or whenever it becomes visibly dirty.
How to safely clean a push mower's spark plug?
To safely clean a push mower's spark plug, you can follow these steps:
- Ensure Safety: Before starting any work, make sure the mower is turned off and the spark plug wire is disconnected to prevent accidental starting.
- Remove the Spark Plug: Locate the spark plug wire, usually black, attached to the spark plug, which is usually located at the top of the engine. Gently grasp the boot of the wire and twist to remove it, being careful not to pull on the wire itself.
- Inspect the Spark Plug: Check the spark plug for any signs of damage, wear, or corrosion. If the plug looks excessively worn or damaged, it might be necessary to replace it rather than clean it.
- Clean the Spark Plug: a. Use a wire brush: With a wire brush, gently scrub the spark plug electrode to remove any carbon buildup or dirt. Be cautious not to apply too much pressure or bend the electrode. b. Use a spark plug cleaner tool: If available, use a spark plug cleaner tool, also known as a spark plug gapper, to clean the electrode. Follow the instructions on the tool and ensure proper safety measures. c. Use a specialized cleaner: You can also use a specialized spark plug cleaner or carburetor cleaner. Spray the cleaner onto the spark plug and let it sit for a few minutes. Then, use a wire brush or toothbrush to scrub away any dirt or carbon deposits.
- Check the Spark Plug Gap: Using a spark plug gap tool or a feeler gauge, ensure that the gap between the center and side electrode is the correct measurement specified by the manufacturer. Adjust the gap if necessary by carefully bending the side electrode.
- Reinstall the Spark Plug: Once the spark plug is clean and inspected, carefully reconnect the spark plug wire by pushing it onto the spark plug until it clicks into place.
- Test the Mower: After the spark plug has been cleaned and reinstalled, reconnect the spark plug wire and start the mower. Observe how the engine runs to determine if any further adjustments or maintenance are needed.
Remember, if you are unsure about cleaning the spark plug yourself, it is recommended to consult the manufacturer's instructions or seek professional assistance.