
Best Outdoor Cooler Drainage Solutions to Buy in July 2026
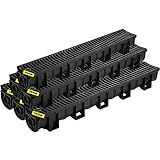
VEVOR Trench Drain System with Plastic Grate, 5.9x5.1-Inch HDPE Channel Drainage for Garden, Driveway - 6 Pack
-
EFFORTLESS SETUP: INTERLOCKING DESIGN FOR QUICK, HASSLE-FREE INSTALLATION.
-
VERSATILE OUTLETS: MULTIPLE OUTLET SIZES ADAPT TO ANY DRAINAGE NEEDS.
-
ROBUST & RELIABLE: DURABLE HDPE CONSTRUCTION ENSURES LONG-LASTING PERFORMANCE.


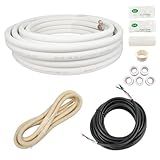
Wostore 33FT Mini Split Line Set 1/4 and 3/8 inch Insulated Copper Pipe with 16/4 Wire Cable, HVAC Refrigerant Conduit Kit for Split AC Cooling System (Includes Sleeve, Drain Hose, Fittings)
- ALL-IN-ONE KIT: INCLUDES EVERYTHING NEEDED FOR QUICK AC INSTALLATION.
- LEAK-PROOF & EFFICIENT: INSULATED DESIGN MINIMIZES ENERGY LOSS & CONDENSATION.
- DURABLE & FLEXIBLE: CORROSION-RESISTANT COPPER PIPES FIT TIGHT SPACES EASILY.
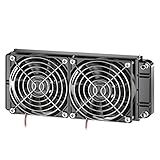
Clyxgs Water Cooling Radiator, 12 Pipe Aluminum Heat Exchanger Radiator with Fan for PC CPU Computer Water Cool System DC12V 240mm Black
-
SUPERIOR HEAT DISSIPATION WITH PURE ALUMINUM FINS FOR OPTIMAL PERFORMANCE.
-
ENHANCED THERMAL EFFICIENCY FROM DURABLE BLACK OXIDATION PAINT FINISH.
-
VERSATILE COOLING FOR CPUS, INDUSTRIAL DRIVES, AND LASER APPLICATIONS.
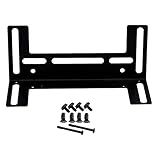
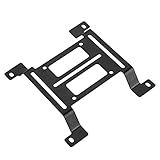
JAGTRADE 12cm Water Cooling Radiator Support Water Pump Drainage Tank Reservoir Mounting Bracket Stand PC Heatsink Fan Holder, 120x50x50mm, Black
- DURABLE METAL DESIGN ENSURES LONG-LASTING PERFORMANCE AND STABILITY.
- VERSATILE USE: MOUNTS WATER PUMP TANKS ON HEAT SINKS OR FANS.
- OPTIMIZED FOR EFFICIENT COOLING WITH EASY INSTALLATION OPTIONS.
120MM Pump Reservoir Bracket,Water Pump Water Mount Bracket,Computer Water Cooling Water Drainage Metal Arched Bracket Holder Mount Stand
- EXTENDABLE DISTANCE FOR VERSATILE WATER PUMP AND DRAIN SETUP.
- ELEGANT PLATING ENHANCES AESTHETICS IN ANY INSTALLATION.
- QUALITY KIT DESIGNED FOR DURABILITY AND LONG-LASTING PERFORMANCE.

owegel Liposomal Lymphatic Drainage Drops 2000mg – Immune & Lymph System Support – Lymphatic Detox and Cleanse with Echinacea, Red Clover, Dandelion & Cleavers – Sugar-Free, Alcohol-Free – 2 FL OZ
-
ENHANCED ABSORPTION: LIPOSOMAL DELIVERY MAXIMIZES NUTRIENT BIOAVAILABILITY.
-
POWERFUL LYMPHATIC SUPPORT: BOOSTS LYMPHATIC SYSTEM AND IMMUNE FUNCTION.
-
CLEAN & VEGAN FORMULA: 100% ALCOHOL AND SUGAR-FREE, FITS VARIOUS DIETS.

hessrida Lymphatic Drainage Supplements, Lymph System Support for Men & Women, Lymphatic Support Supplement with Dandelion, Burdock, Echinacea, Lemon & More, 60 Capsules
- CLEANSE YOUR LYMPHATIC SYSTEM FOR OPTIMAL WELLNESS AND IMMUNITY.
- BOOST IMMUNE DEFENSE WITH OUR NATURAL HERBAL FORMULA DAILY!
- EASY-TO-SWALLOW CAPSULES MAKE LYMPHATIC SUPPORT HASSLE-FREE!
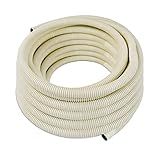
Daisypower Universal Air Conditioner Water Drain Hose Pipe,for Mini-Split Ductless AC, Heat Pump System,Cooling Only (50ft)
- FITS ALL 5/8 MINI SPLIT AC SYSTEMS FOR VERSATILE USE.
- UV-RESISTANT PE MATERIAL ENSURES DURABILITY AND CORROSION RESISTANCE.
- FLEXIBLE 50 FT DRAIN HOSE SIMPLIFIES INSTALLATION AND CUTS TO SIZE.
Installing drainage in an outdoor cooler is a simple process that involves a few basic steps. Here's a description of how you can do it:
- Choose a location: First, find a suitable location for your outdoor cooler. It should be a place where excess water can easily drain away without causing any problems. Make sure the ground beneath the cooler is level.
- Gather the necessary tools and materials: You will need a drill, a hole saw or spade bit, a screen or mesh material, a rubber grommet or gasket, and a drain hose or tubing.
- Determine the drain location: Decide on the ideal location for the drainage hole. It's usually best to place it near the bottom of the cooler, on the side or at the back.
- Prepare the cooler: Empty the cooler and clean it thoroughly to remove any debris or dirt. Ensure that the cooler is dry before proceeding.
- Drill the drainage hole: Use the drill with the appropriate hole saw or spade bit to create a hole in the cooler at the chosen location. Start slowly and apply gentle pressure to avoid cracking or damaging the cooler.
- Install the screen/mesh and grommet: Cut a piece of screen or mesh material slightly larger than the hole you drilled. Place it over the hole from the inside of the cooler to prevent insects or debris from entering. Then, insert the rubber grommet or gasket around the hole to provide a watertight seal.
- Connect the drain hose/tubing: Attach one end of the drain hose or tubing to the outside of the rubber grommet or gasket. The other end of the hose should extend to a suitable drainage area, such as a garden bed or a nearby sewer connection.
- Test the drainage: Once everything is securely in place, pour some water into the cooler to check if it drains properly. Make sure the water flows out smoothly through the drain hose/tubing and away from the cooler.
- Make necessary adjustments: If you notice any leaks or issues with the drainage, double-check that all connections are tightly secured. You may need to tighten the grommet or adjust the position of the drain hose/tubing to ensure proper drainage.
By following these steps, you can easily install proper drainage for your outdoor cooler, preventing any water accumulation and ensuring it functions optimally.
How to maximize the efficiency of the outdoor cooler by optimizing the drainage design?
To maximize the efficiency of an outdoor cooler by optimizing the drainage design, you can follow these steps:
- Proper location: Place the cooler on a level surface to ensure efficient drainage. Avoid placing it on uneven ground that can hinder water flow.
- Use a sloped surface: If possible, position the cooler on a slightly sloped surface. This will aid in water drainage by allowing gravity to assist in the flow of water.
- Create a drainage hole: Drill a small drainage hole at the bottom of the cooler to allow the water to drain out. Ensure that the hole is large enough to prevent clogging, but not too big that it compromises the insulation or structure of the cooler.
- Install a drainage plug: Use a plug or spigot with a valve that can be opened or closed to regulate the drainage process. This will enable you to control when to drain the water and prevent any leaks when the valve is closed.
- Elevate the cooler: Raise the cooler slightly above the ground by placing it on bricks or blocks. This will prevent the cooler from sitting directly on the surface and obstructing the drainage hole. Additionally, elevating the cooler aids in protecting it from insects, dirt, and debris.
- Use a removable drain tray: Consider using a removable drain tray at the bottom of the cooler. This tray can be easily pulled out and emptied, simplifying the draining process and preventing any water accumulation.
- Regular maintenance: Ensure that the drainage hole and plug are kept clean and free from debris. Regularly inspect and clean the drainage system to avoid any blockages that might impede water flow.
By optimizing the drainage design of an outdoor cooler using these steps, you can enhance its efficiency and prevent issues such as water accumulation, mold growth, or damage to the cooler's insulation.
How to choose the right drainage system for the cooler?
When choosing the right drainage system for a cooler, there are a few factors to consider. Here are some steps to help you make the right choice:
- Determine the cooler's intended use: Consider the purpose of the cooler and how it will be used. Will it be used for storing perishable items like food and beverages? Or will it primarily be used for keeping ice, drinks, or other non-perishable items? Understanding the purpose will help you assess the drainage needs.
- Assess the size and capacity: Determine the size and capacity of the cooler. Larger coolers may benefit from a more robust drainage system, as they tend to hold more ice or liquid. Smaller coolers may require a simpler drainage solution.
- Consider mobility: If you plan to move the cooler frequently, a drainage system that allows for easy draining and minimal spillage during transportation is essential. Look for designs with leaks or spill-proof features to prevent messy situations.
- Evaluate drain plug options: Many coolers come with drain plugs, typically located at the bottom. Check the design and quality of the drain plug to ensure it is easy to use, durable, and leak-proof. Some models even offer a threaded drain plug that enables better control of the drainage speed.
- Look for built-in drainage channels or spouts: Some coolers have built-in drainage channels or spouts designed to direct the water flow efficiently. These features can prove useful to channel water away from the cooler, preventing pooling and maintaining dry storage space.
- Consider additional accessories: Some coolers offer accessories like hose attachments or external drain kits that allow you to extend the drainage point, making it easier to drain the water directly into a designated area or container.
- Cost and brand: Finally, consider your budget and preferred brands. Higher-priced coolers may tend to have more advanced drainage systems with improved durability and performance. Research well-known brands and check user reviews to ensure you're investing in a reputable product.
By considering these factors, you can determine the most suitable drainage system for your cooler, ensuring efficient and hassle-free water removal when needed.
How to install drainage in an outdoor cooler?
Installing drainage in an outdoor cooler is generally a simple process. Here is a step-by-step guide to help you install drainage in your outdoor cooler:
- Empty and clean the cooler: Remove all items from your cooler and make sure it is thoroughly cleaned before starting the installation process.
- Locate the drainage hole: Most outdoor coolers already have a drainage hole in the bottom. If you cannot find one, look for a screw or plug that can be removed to create a hole. If there is no existing hole, you may need to drill one using a drill and an appropriate size hole saw bit.
- Prepare the drainage pipe: You will need a pipe to fit into the drainage hole to direct water away from the cooler. PVC pipes or flexible tubing are common choices for drainage. Measure the diameter of the drainage hole and purchase a pipe of the same size.
- Cut the pipe to length: Determine how long the drainage pipe needs to be in order to extend beyond the cooler base and reach a suitable drainage area. Use a saw or pipe cutter to trim the pipe to the appropriate length.
- Attach the pipe to the cooler: Insert one end of the pipe into the drainage hole. If the pipe is a tight fit, you may need to use silicone sealant or plumber's tape to create a watertight seal between the pipe and the drainage hole.
- Direct the pipe towards a drainage area: Position the other end of the pipe to direct the drainage water away from the cooler and towards a suitable drainage area, such as a flower bed or a designated drainage area on your property.
- Test the drainage system: Pour a small amount of water into the cooler to test the drainage system. Ensure that the water flows freely through the pipe and is directed away from the cooler. Adjust the pipe if necessary to ensure proper drainage.
- Secure the pipe (optional): If desired, you can use brackets, clamps, or zip ties to secure the pipe in place and prevent it from shifting or coming loose.
Remember to regularly clean and maintain the drainage system to prevent any blockages that may inhibit proper water flow.
How to prepare the cooler for drainage installation?
To prepare the cooler for drainage installation, follow these steps:
- Turn off and unplug the cooler: Make sure the cooler is switched off and unplugged from the power source to avoid any accidental electric shocks.
- Empty the water reservoir: Open the cooler and remove any standing water from the water reservoir. Use a bucket or a large container to empty the water.
- Remove any filters or accessories: Take out any filters, ice packs, or other accessories from the cooler. This will allow you to access the drain area easily.
- Locate the drain spout: Look for the drain spout or outlet on the cooler. It is usually located at the bottom of the cooler, either at the back or the side. Refer to the cooler's manual if you are having trouble finding it.
- Clean the drain spout: Inspect the drain spout and make sure it is free from any dirt, debris, or blockages. Use a small brush or a cloth to wipe away any buildup.
- Connect the drainage hose: If you have a drainage hose, attach it securely to the drain spout. Make sure it is tightly connected to prevent any leaks. If your cooler doesn't come with a hose, you can use a plastic tubing to create a makeshift drainage system.
- Direct the hose to a suitable drainage location: Determine where you want the water to drain and position the hose accordingly. Make sure the hose is directed into a floor drain, sink, or a suitable outdoor area. Ensure that the hose has a slight downward slope to allow water to flow freely.
- Test the drainage: With the hose properly positioned, turn on the cooler and pour some water into the reservoir. Check if the water is smoothly flowing through the hose and draining to the desired location. Make adjustments if needed.
- Secure the hose in place: If necessary, use zip ties or clamps to secure the hose in place and prevent it from moving or detaching during operation.
By following these steps, you will be able to prepare your cooler for drainage installation and ensure that the water is properly drained away.
What is the ideal position for the drainage outlet?
The ideal position for a drainage outlet would depend on several factors, including the specific drainage system being used and the intended purpose of the drainage. However, some general considerations for an ideal drainage outlet position include:
- Lower points or areas: Drainage outlets should typically be positioned at the lowest points or areas to ensure that water flows naturally towards the outlet.
- Away from the foundation: The drainage outlet should be positioned away from the foundation of a building to prevent water from pooling or seeping into the foundation, which can cause structural damage.
- Downhill or away from structures: If the drainage outlet is connected to a larger drainage system or discharge area, it is usually desirable to position it downhill or away from structures to prevent water from collecting or causing erosion around buildings or other structures.
- Good access for maintenance: The drainage outlet should be easily accessible for maintenance and cleaning purposes to ensure it remains functional.
- Compliance with local regulations: It is important to consider any local regulations or building codes that may specify requirements for drainage outlet positions.
Overall, the ideal position for a drainage outlet will vary based on individual circumstances, so it is recommended to consult with a professional or engineer who can assess the specific situation and provide appropriate guidance.