
Best Outdoor Cooler Accessories to Buy in July 2026

HEXNUB Cooler Box Light, Waterproof, Rechargeable LED Light Compatible with YETI, RTIC, ORCA, Ninja, Igloo, Coleman Ice Chest, Magnetic Base, Great for Outdoor Events, Camping Fishing Hunting Boating
- ILLUMINATE ADVENTURES: 55 HOURS OF BRIGHT & RED LED LIGHT OPTIONS!
- UNIVERSAL FIT: EASILY ATTACHES TO ANY COOLER BRAND FOR SERIOUS CONVENIENCE.
- HASSLE-FREE CHARGING: QUICK 4-HOUR RECHARGE WITH LED BATTERY INDICATOR.


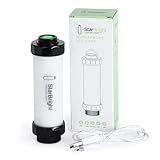
StarBright Rechargeable Cooler Light with USB Charging - Cooler Light for YETI, RTIC, Igloo, Coleman - Waterproof LED - No Installation Required - 5.35x1.61x5.35 Inches - Durable for Outdoor Use
-
60 HOURS OF BRIGHT ILLUMINATION FOR NIGHTTIME ADVENTURES!
-
WATERPROOF DESIGN: FULLY SUBMERSIBLE FOR EXTREME CONDITIONS!
-
USB RECHARGEABLE: LONG-LASTING LIGHT FOR EXTENDED TRIPS!
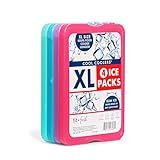
Cool Coolers by Fit & Fresh 4 Pack XL Slim Ice Packs, Quick Freeze Space Saving Reusable Ice Packs for Lunch Boxes or Coolers, Multi
-
EXTRA LARGE, SLIM DESIGN FITS EASILY IN PACKED BAGS FOR MAXIMUM CHILL.
-
DURABLE, NON-TOXIC ICE PACKS KEEP FOOD AND DRINKS FRESH ON ANY ADVENTURE!
-
VERSATILE FOR WORK, SCHOOL, OR OUTDOOR FUN-NO MESS, JUST COOL COMFORT!
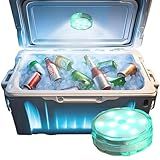
Skywin Waterproof Multicolor LED Cooler Lights – 2.76 x 1 x 1 Inches, 3 x AA Battery-Operated, Reusable Cooler Accessories for Camping, Outdoor Events, and Parties
- WATERPROOF & DURABLE DESIGN FOR ALL OUTDOOR ADVENTURES
- BRIGHT LED ILLUMINATION FOR EASY ACCESS TO DRINKS & SNACKS
- BATTERY-OPERATED FOR HASSLE-FREE, WIRELESS CONVENIENCE
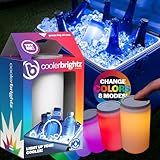
Brightz CoolerBightz LED Cooler Light - 8 Color Modes - Battery Powered Ice Chest Light - Camping Cooler Accessories - Cool Camping, Fishing, Boating, or Tailgating Gadgets
- ILLUMINATE COOLERS EASILY FOR NIGHTTIME FUN AT ANY OUTDOOR EVENT!
- WATERPROOF DESIGN FITS POPULAR COOLER BRANDS FOR VERSATILE USE.
- ENJOY MULTIPLE LIGHT MODES TO SET THE PERFECT PARTY ATMOSPHERE!
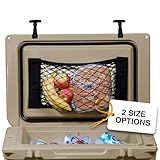
Cooler Net for Dry Storage and Organization - Compatible with YETI, RTIC, Ninja, Igloo, Coleman, Lifetime, Pelican Ice Chests - Works with Cooler Lights, Wheel Kits, RTIC Cooler Accessories, and More
- KEEP FOOD DRY: ULTRA-STRONG NET PREVENTS MOISTURE; KEEPS ITEMS CRISP.
- STAY ORGANIZED: CONVENIENT DESIGN ELIMINATES MESS AND CLUTTER IN COOLERS.
- DURABLE & VERSATILE: WATER-RESISTANT AND FITS MANY COOLER BRANDS SEAMLESSLY.
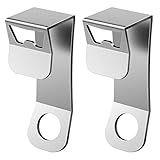
2 Packs Cooler Lock Bracket with Bottle Opener, Heavy Duty Metal Cooler Tie Down Compatible with Yeti/RTIC Coolers, Security Lock Bracket Cooler Accessories
-
DURABLE ZINC ALLOY CONSTRUCTION: WATERPROOF, RUST-RESISTANT, BUILT TO LAST.
-
CONVENIENT BUILT-IN OPENER: EASILY REMOVE CAPS WITHOUT EXTRA TOOLS.
-
UNIVERSAL FIT FOR COOLERS: DESIGNED FOR MOST MID/LARGE YETI/RTIC MODELS.
Customizing the appearance of an outdoor cooler can be a creative way to add a personal touch and make it stand out. Here are a few tips to consider:
- Determine the theme or design: Decide on the look you want to achieve. You might want to match your cooler with your outdoor décor, add a favorite sports team logo, or create a unique design.
- Clean the cooler: Before starting any customization, thoroughly clean the cooler to remove any dirt, debris, or existing stickers.
- Choose the right paint: Select paint that is suitable for outdoor use and can adhere properly to the cooler's surface. Look for paint specifically designed for plastic or metal surfaces.
- Prep the surface: Use sandpaper to roughen up the cooler's exterior slightly. This will help the paint adhere better and provide a long-lasting finish.
- Prime the cooler (optional): Applying a primer can help the paint adhere more effectively. If you choose to use a primer, apply a coat evenly and allow it to dry completely.
- Paint the cooler: Use a paintbrush or spray paint to apply the desired color or design to the cooler's surface. Apply multiple thin coats for a smooth and even finish. Allow each coat to dry before adding the next.
- Add decorative elements: Once the base paint is dry, you can add decorative elements such as stencils, decals, or hand-painted designs. Get creative and personalize your cooler with patterns, logos, or images.
- Seal the design (optional): Consider applying a clear coat or sealant to protect the paint and design from outdoor elements like UV rays, moisture, and scratches. This step is particularly important if you plan to place the cooler outside for an extended period.
- Allow ample drying time: Properly drying the paint and any added elements is essential to avoid smudges or smears. Follow the manufacturer's instructions for drying time.
- Enjoy your customized cooler: Once the paint and any additional elements have dried completely, your personalized outdoor cooler is ready to use. Admire your creativity and have fun using it during outdoor gatherings, picnics, or parties.
Remember that customization options are limitless, so feel free to explore your own unique ideas and get inspired by various sources such as online tutorials, DIY blogs, or even professional artists.
How to create a camouflage pattern on an outdoor cooler?
Creating a camouflage pattern on an outdoor cooler can be a fun and creative project. Here is a step-by-step guide on how to achieve it:
Materials you'll need:
- Outdoor cooler
- Spray paint in camouflage colors (green, brown, black)
- Painter's tape
- Newspaper or plastic to protect the surrounding area
- Sandpaper (optional)
Step 1: Prepare the surface Clean the outdoor cooler thoroughly to remove any dirt, dust, or grease that could affect the durability of the paint. If the cooler has a shiny or smooth surface, lightly sand it with sandpaper to help the paint adhere better.
Step 2: Protect the areas you don't want to paint Use painter's tape and newspaper or plastic to cover any parts of the cooler you don't want to be painted, such as handles, hinges, or latches. Ensure good coverage to prevent overspray.
Step 3: Apply the base color Start by applying the lightest color you have chosen for the camouflage pattern. It is typically a light green or tan color. Shake the spray paint can thoroughly and then spray even coats over the entire cooler, holding the can about 6-8 inches away from the surface. Apply multiple thin coats rather than a heavy one to avoid dripping or running paint. Let each coat dry before applying the next.
Step 4: Create your camouflage pattern Once the base coat is dry, use small pieces of painter's tape to create irregular shapes and curves in various sizes. These shapes will form the camouflage pattern. Randomly stick the tape on the cooler, ensuring that some areas are left exposed for the next color.
Step 5: Apply the second color Now, using the next darker color of spray paint (usually a medium green or brown), spray another even coat over the cooler, including the areas protected by the tape. Ensure overlapping and blending of colors to achieve a realistic camouflage look. Again, apply multiple thin coats and let them dry before proceeding.
Step 6: Finalize the pattern Remove the painter's tape carefully while the paint is still slightly wet. This will create soft edges and help in achieving a realistic camouflage pattern. If you want, you can repeat steps 4 and 5 using the darkest color (often black) to add more depth and dimension to the pattern.
Step 7: Let it dry and cure Allow the paint to fully dry according to the instructions provided by the spray paint manufacturer. Once the paint is dry, let the cooler cure for a minimum of 24 hours before using it outdoors.
Please note that the specific technique and colors used in creating a camouflage pattern may vary depending on your personal preference or the type of camouflage you want to mimic. Be creative and experiment to achieve the desired look.
How to customize the appearance of an outdoor cooler?
Customizing the appearance of an outdoor cooler can be a fun and creative project. Here are some steps to get you started:
- Clean the cooler: Begin by thoroughly cleaning your outdoor cooler to remove any dirt, stains, or residue. Use soap, water, and a non-abrasive sponge. Rinse it well and let it dry completely.
- Choose a theme or design: Decide on a theme or design concept that you want for your cooler. This can be based on your personal preferences, favorite colors, or a specific theme that matches your outdoor space.
- Gather necessary supplies: Depending on the design you choose, you will need some supplies such as paint, stencils, adhesive vinyl, waterproof stickers, decals, or even decorative fabric. Purchase these materials from a craft store or online.
- Prepare the surface: Before applying any paint or decoration, prepare the surface of the cooler for better adhesion. If your cooler has a shiny finish, use sandpaper to roughen it slightly. Wipe off any dust particles before proceeding.
- Paint the cooler: If you want to paint the entire cooler or create a base color, use outdoor-rated spray paint or acrylic paint. Apply multiple thin coats for an even finish and let each coat dry before applying the next.
- Add designs or patterns: Use stencils, adhesive vinyl, or other decorative materials to create patterns or designs on the cooler. You can stencil on some shapes, draw patterns using permanent markers, or create a custom vinyl decal with a cutting machine if you have one.
- Seal the design: After you have finished decorating the cooler, protect the design by applying a clear protective sealant. This will help protect the paint and decorations from elements such as UV rays, water, and scratching.
- Personalize with accessories: To further enhance the appearance, consider adding accessories like stickers, magnets, or even handles or wheels for easier mobility. Make sure to choose items that are weather-resistant and suitable for outdoor use.
Remember to let the cooler dry completely between each step, and always follow the instructions on the products you are using. Being creative and adding your personal touch will ensure a unique and visually appealing outdoor cooler.
How to repurpose old license plates to decorate an outdoor cooler?
Repurposing old license plates to decorate an outdoor cooler can add a unique and vintage touch to your outdoor space. Here's a step-by-step guide on how to do it:
Materials you'll need:
- Old license plates
- Outdoor cooler
- Sandpaper
- Cleaning solution
- Protective gloves and goggles
- Epoxy adhesive or strong craft glue
- Optional: Paint, spray paint, or clear coating
Step 1: Prepare the cooler Clean the surface of the outdoor cooler thoroughly with a cleaning solution to remove any dirt or debris. If there are any existing stickers or adhesive residue, scrape them off or use an adhesive remover. Use sandpaper to roughen the surface slightly, ensuring better adherence of the license plates.
Step 2: Prep the plates Clean the old license plates to remove any dirt or grime. You can use warm soapy water or a cleaning solution appropriate for the material of the plates. If desired, you can also spray paint them in a color of your choice for a more cohesive look. Let the plates dry completely.
Step 3: Arrange the plates Plan the arrangement of the license plates on the cooler. You can lay them out on a flat surface or directly on the cooler's surface to get an idea of how they will fit. Consider the size and shapes of the plates, ensuring they cover the desired area while allowing easy access to the cooler's handles and lid.
Step 4: Glue the plates Put on protective gloves and goggles for safety. Apply epoxy adhesive or strong craft glue to the back of each license plate, ensuring full coverage. Align and carefully press each plate onto the cooler's surface according to your planned arrangement. Make sure to securely attach them, applying even pressure to prevent any lifting or gaps. Allow the adhesive to dry completely as per the product's instructions.
Step 5: Optional finishing touches If desired, you can further enhance the look and durability of the license plate decor. Apply a clear coating or sealant over the plates and the surrounding area to protect them from elements like rain, sun, and humidity. Additionally, you can lightly sand the edges of the plates to give them a more distressed or aged appearance.
Remember, when using old license plates, be cautious of any sharp edges. Sand them or cover them with adhesive-backed foam strips to ensure safety.
Once the repurposed license plates are securely attached, your outdoor cooler will have a unique and personalized look. Enjoy your functional and eye-catching outdoor decor!
How to create a weathered look on an outdoor cooler?
To create a weathered look on an outdoor cooler, you can follow the steps below:
- Clean the cooler: Start by cleaning the cooler thoroughly to remove any dirt, dust, or grime. Use a mild detergent and warm water, and scrub the surface with a sponge or brush. Rinse it well and let it dry completely.
- Sand the surface: Use sandpaper with medium grit (around 120-220) to start roughing up the surface of the cooler. Focus on the areas that would naturally wear out over time, such as corners, edges, and areas near the handle. You can also sand random areas on the main body to create a more authentic weathered look.
- Distress the material: Use various tools like screwdrivers, hammers, nail heads, or chains to make marks on the cooler's body. Gently tap or scratch the surface in different areas to imitate scratches, dings, or dents that occur naturally over time. Apply more pressure on the areas that would typically experience wear and tear.
- Apply a base coat: Choose a paint color that resembles aged or weathered wood, such as a light gray or beige. Apply a thin coat of paint, ensuring that the entirety of the cooler is covered evenly. This base coat will serve as a foundation for the weathered effect.
- Apply a darker paint layer: After the base coat has dried completely, mix a darker shade (like a darker gray or brown) with water or glaze to create a diluted paint mixture. Apply this mixture unevenly over the cooler's surface, focusing on the sanded and distressed areas. Use a brush or sponge to create a streaky or blotchy appearance, mimicking natural wear patterns.
- Blend and feather the paint: While the second coat is still wet, use a clean, dry brush or sponge to blend and feather the paint. This technique will help create a more organic and realistic weathered effect. Lightly brush or dab the painted areas, fading the edges and merging them into the rest of the cooler's surface.
- Allow drying and touch-ups: Let the paint dry according to the instructions on the paint can. If needed, you can add further distressing by sanding specific areas or adding additional paint layers to enhance the weathered appearance.
- Seal the cooler: To protect the weathered finish, apply a clear protective sealant over the entire surface of the cooler. Ensure that the sealant is suitable for outdoor use and is compatible with the type of paint you used. Follow the manufacturer's instructions on the sealant for application and drying time.
Once the sealant is dry, your outdoor cooler will have an authentic and weathered look, adding a touch of rustic charm to your outdoor space.