Best Under Cabinet LED Lights with Remote Control to Buy in July 2026
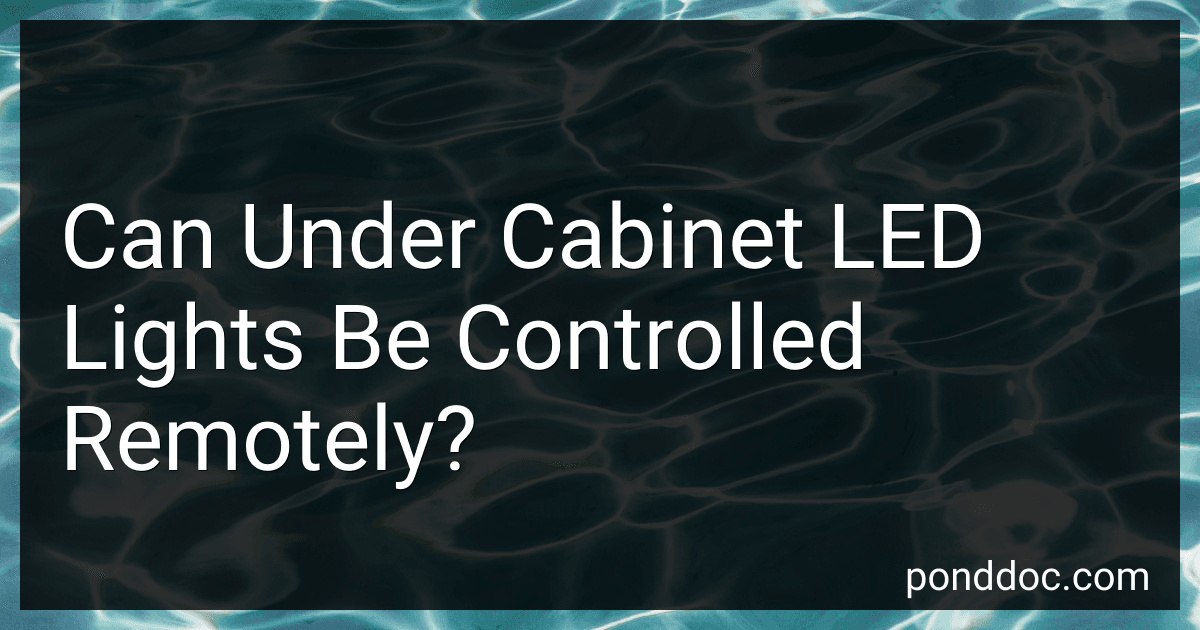
MCGOR 10inch Under Cabinet Lighting, 2 Pack Rechargeable Motion Sensor Light Indoor, 5 Levels Dimmable Magnetic Closet Lights, Wireless Under Counter Lights for Kitchen, Stairs
- AUTO-ACTIVATE ON MOTION FOR SAFE NAVIGATION IN THE DARK!
- DIMMABLE BRIGHTNESS LEVELS ADAPT FOR ANY TASK OR MOOD.
- USB-C RECHARGEABLE: HASSLE-FREE INSTALL & LONG-LASTING USE!


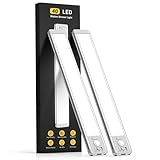
Gritin 10.2inch Under Cabinet Lighting Rechargeable -84 LED Super Bright,3-Color& 5 Level Brightness,4 Modes,Motion Sensor,Long Lasting- Easy Installation Magnetic Under Cabinet Closet Lights -2 Pack
-
SMART MOTION SENSORS: AUTO-TURNS OFF AFTER 20S WITHOUT MOTION, SAVING ENERGY.
-
CUSTOMIZABLE LIGHTING: 3 COLOR TEMPS & 5 BRIGHTNESS LEVELS FOR ANY MOOD.
-
EASY INSTALLATION: STRONG MAGNETS & ADHESIVES FOR VERSATILE PLACEMENT OPTIONS.
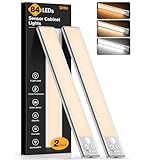
Under Cabinet Lighting, 14.7" Rechargeable Motion Sensor Light Indoor, 2 Pack Magnetic Dimmable Closet Lights, Wireless Under Counter Lights for Kitchen, Stairs,Hallway
-
AUTO-ON MOTION DETECTION: LIGHTS ACTIVATE WITHIN 10FT IN LOW LIGHT.
-
VERSATILE ALWAYS-ON MODE: PERFECT FOR READING OR LONG TASKS ANYTIME.
-
EASY USB-C RECHARGE: LONG BATTERY LIFE WITH HASSLE-FREE CHARGING.
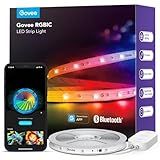
Govee RGBIC LED Strip Lights, Smart LED Lights for Bedroom, Bluetooth LED Lights APP Control, DIY Multiple Colors on One Line, Color Changing LED Strip Lighting Music Sync, Home Decor, 16.4ft
-
VIBRANT MULTI-COLOR EFFECTS: ENJOY DYNAMIC RGBIC LIGHTING FOR STUNNING VISUALS.
-
CUSTOMIZABLE VIA APP: PERSONALIZE COLORS & BRIGHTNESS EASILY WITH GOVEE APP.
-
SYNC TO MUSIC: ELEVATE YOUR AMBIANCE WITH 11 MUSIC SYNC MODES FOR FUN.
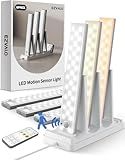
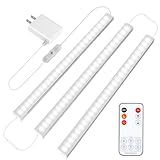
EZVALO 6-Pack Under Cabinet Lighting with Charging Station, 2000mAh Rechargeable Wireless Motion Sensor Lights, 3 Color Temps, Dimmable, Timer, Magnetic, with Remote Control for Kitchen, Closet, Stair
- VERSATILE MODES: THREE LIGHTING MODES FOR EVERY USE, DAY OR NIGHT.
- CUSTOMIZABLE BRIGHTNESS: STEPLESS DIMMING FOR OPTIMAL COMFORT AND CLARITY.
- EASY SETUP: TOOL-FREE INSTALLATION WITH PEEL-AND-STICK OR MAGNETIC OPTIONS.
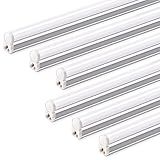
Barrina T5 4FT LED Shop Light, 2200lm,5000K Daylight White, 20W Utility Light Fixture, Ceiling and Under Cabinet Lights for Workshop Garage, Corded Electric with ON/Off Switch, 6 Pack
- POWERFUL BRIGHTNESS: 5000K DAYLIGHT WHITE, 2200+ LUMENS, LOW 20W POWER.
- FLEXIBLE SETUP: LINK UP TO 8 LIGHTS EFFORTLESSLY WITH EASE.
- QUICK & SIMPLE: EASY PLUG-AND-PLAY INSTALLATION WITH ALL ACCESSORIES INCLUDED.
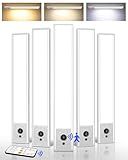
EZVALO 5 Pack Under Cabinet Lighting, 2400mAh Rechargeable Motion Sensor Light, 10inch Magnetic Closet Lights with Dimmable & 3 Color Temps, Wireless Motion Activated Lights with Remote for Kitchen
- MOTION-ACTIVATED: LIGHTS TURN ON INSTANTLY FOR SAFE NIGHTTIME ACCESS.
- LONG-LASTING RECHARGEABLE: ENJOY 15-45 DAYS ON A SINGLE CHARGE!
- ADJUSTABLE MODES & COLORS: CUSTOMIZABLE BRIGHTNESS AND TONES FOR EVERY NEED.
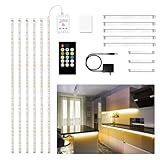
DAYBETTER Under Cabinet Lights, 6 PCS Under Cabinet Lighting with Remote, Dimmable LED Strip Lights for Bedroom, LED Lights for Kitchen Cabinet, Counter Shelf 2700K-6500K Warm to Daylight White, 9.8ft
- VERSATILE DIMMING OPTIONS: CUSTOMIZE WARMTH WITH 2700 K-6500 K LIGHT.
- DUAL CONTROL CONVENIENCE: EFFORTLESS DIMMING VIA RF REMOTE & TOUCH.
- EASY INSTALLATION & SAFETY: STRONG ADHESIVE AND LOW VOLTAGE FOR SAFETY.
MCGOR 10inch Under Cabinet Lighting, 2 Pack Rechargeable Motion Sensor Light Indoor, 5 Levels Dimmable Magnetic Closet Lights, Wireless Under Counter Lights for Kitchen, Stairs
-
SMART MOTION SENSOR: AUTO-ON WITHIN 10FT, NO MORE DARK TRIPS!
-
DIMMABLE BRIGHTNESS LEVELS: CUSTOMIZE LIGHT FOR TASKS OR NIGHT USE.
-
USB-C RECHARGEABLE: LONG-LASTING POWER WITHOUT THE HASSLE OF WIRES.
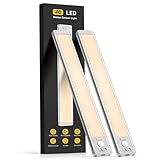
Maylit Under Cabinet Lights Plug in, 3 Pcs 12 Inch Ultra Thin Under Cabinet Lighting, Super Bright Daylight White Under Counter Lights for Kitchen, Dimmable Light for Cabinet, Counter, Workbench, Desk
-
SUPER BRIGHT LEDS: 81 LEDS DELIVERING 1200 LUMENS FOR ULTIMATE VISIBILITY.
-
SMART TOUCH DIMMER: EFFORTLESSLY ADJUST BRIGHTNESS WITH A SIMPLE TOUCH.
-
ULTRA THIN DESIGN: SLEEK 0.25 PROFILE FITS DISCREETLY UNDER ANY SURFACE.
Yes, under cabinet LED lights can be controlled remotely. Many modern LED lighting systems designed for under cabinet installation come with remote control features or integrate with smart home systems. These systems often use wireless technology, such as Wi-Fi, Bluetooth, or RF (radio frequency), to enable remote control via a physical remote or a mobile app. Through these methods, users can conveniently turn the lights on or off, dim them, or even change the color if the LEDs are RGB. Additionally, integration with smart home assistants like Amazon Alexa, Google Assistant, or Apple HomeKit allows users to control the lights through voice commands, adding another layer of convenience and functionality.
How to hide cords and wires for under cabinet LED lights?
Hiding cords and wires for under-cabinet LED lights can greatly enhance the aesthetic of your kitchen or workspace. Here are some strategies to achieve a clean, organized look:
- Conceal with Cord Covers: Use adhesive cord covers or cable raceways to run wires along the underside of the cabinets. These are often paintable, allowing them to blend with the cabinet finish.
- Use Cable Clips: Cable clips or adhesive-backed cable ties can help keep wires neatly bundled and attached to the bottom or back of the cabinets.
- Run Along Cabinet Edges: Route the cables along the edges or seams of the cabinets where they meet the wall or underneath trim. This minimizes visibility.
- Install Inside Cabinets: Drill small holes at the back or bottom corners of the cabinets and route the wires inside. This keeps them concealed within the cabinet structure.
- Utilize Cabinet Channels: Some cabinets have pre-designed channels or spaces that can be used to route wires discreetly without additional accessories.
- Wirelessly Control Fixtures: If possible, use wireless or battery-operated LED lights to eliminate the need for visible power cords. While not entirely hiding the wires, this can simplify the setup.
- Consider a Plug-in Power Strip: Install a power strip inside an adjacent cabinet or along the wall. This can reduce the need for multiple visible power outlets.
- Integrated Lighting Options: Opt for lighting fixtures with integrated channels for wire management, allowing for a neater overall appearance.
- Professional Installation: If the do-it-yourself approach seems challenging, hiring a professional for a seamless installation can ensure wires are neatly concealed.
By thoughtfully planning the installation and utilizing available tools and techniques, you can effectively hide cords and wires for a polished look.
How to integrate under cabinet LED lights with voice control assistants?
Integrating under cabinet LED lights with voice control assistants can enhance convenience and add a modern touch to your kitchen or workspace. Here's a general guide to achieve this integration:
1. Choose the Right Smart LED Lights
- Smart LED Strip or Pucks: Ensure your LED lights are compatible with smart home systems. Many brands like Philips Hue and LIFX offer voice-compatible LED strips or puck lights.
- Compatibility: Check if the lights are compatible with your voice assistant (Amazon Alexa, Google Assistant, or Apple HomeKit).
2. Set Up the Smart LED Lights
- Install the Lights: Follow the manufacturer's instructions to install the LED lights under your cabinets. This usually involves adhering the strips or mounting the pucks and connecting them to power.
- Connect to Wi-Fi: Use the corresponding app to connect your smart lights to your home Wi-Fi network.
3. Integrate with a Voice Control System
- Install Necessary Apps: Download the smart light manufacturer's app to customize and control your lights. Ensure you have the app for your voice assistant (Amazon Alexa, Google Home, or Apple Home).
- Link Accounts: Open the voice assistant app and navigate to the section where you add or manage smart devices. Link your smart lighting account. This often involves signing into your smart lighting account within the voice assistant app to allow integration.
4. Configure Voice Control
- Discover Devices: Use the voice assistant app to discover new devices. Alexa calls this "Discover Devices," while Google Home automatically discovers supported devices once they're on the same network.
- Assign Device Names and Rooms: Assign clear and logical names to your lights (e.g., "Kitchen Cabinet Lights") for easy voice control. Group the lights under a specific room if your assistant supports room grouping, which can help with broader commands like "turn off the kitchen lights."
- Set Up Voice Commands: Create specific voice commands to control the lights. For example: “Alexa, turn on the kitchen cabinet lights.” “Hey Google, dim the cabinet lights to 50%.” “Hey Siri, set the cabinet lights to blue.”
5. Advanced Configurations
- Create Routines or Automations: Use routines or automation features to set up complex commands that involve your cabinet lights. For example, “Alexa, Good Morning” can turn on the lights, adjust brightness, and set them to a specific color.
- Schedule Timers: Some apps allow you to schedule when the lights turn on and off or change brightness and color based on time or activity.
6. Troubleshooting
- Connectivity Issues: Ensure strong Wi-Fi coverage in the area. Poor connectivity can cause delays or failures in response.
- Firmware Updates: Regularly update the firmware of your devices and apps to ensure compatibility and access to the latest features.
By following these steps, you can enjoy the convenience of voice-controlled under-cabinet lighting in your home.
How to sync multiple under cabinet LED lights to a single remote?
Syncing multiple under cabinet LED lights to a single remote can greatly simplify control and operation. Here’s a general guide on how to do it, though you should always refer to the specific instructions that came with your LED lights, as details might vary by brand and model:
- Check Compatibility: Ensure that all the LED lights you want to sync are compatible with the same type of remote. If you are purchasing new lights, consider getting a kit where the lights and remote are designed to work together.
- Power Off All Units: Before you start, make sure all the LED lights are turned off. This sometimes helps in resetting them and ensuring they start fresh during the syncing process.
- Connect All Units: Install and connect all your LED light strips according to the manufacturer’s instructions. Make sure they are all powered from the same source if that is a requirement for syncing.
- Initiate Pairing Mode on Remote: Typically, you will need to put your remote into a pairing or learning mode. This could involve pressing a specific button or combination of buttons. Commonly, it may involve holding down the 'on' button or a designated 'pair' button until an indicator light on the remote flashes.
- Activate Pairing Mode on Lights: Each light may need to be put into pairing mode. This can often be done by quickly turning the power on and off a specific number of times or using a designated 'pair' button or switch on the light or its controller.
- Sync One at a Time: Select one light unit to pair initially. Using the remote, send the pairing signal. This may involve holding down a button or following a specific sequence. Most under cabinet lights will have an indicator, like a blinking light, to show they're in pairing mode and successfully paired.
- Repeat for Other Units: Once one light is synced, repeat the process for each additional light unit. Ensure each light is responding correctly to the remote before proceeding to the next.
- Test the System: After syncing all lights, test the remote control to ensure it operates all the connected LED lights simultaneously and as expected. Try different functions, such as turning them on/off, dimming, and changing colors if applicable.
- Follow Troubleshooting Steps if Necessary: If any light doesn’t respond, consult the manual for troubleshooting tips. This could involve resetting the individual light or the remote and starting the process again.
- Finalize Installation: Once everything is working correctly, secure all the components and tidy up any cables. Ensure everything is in its final position and that the remote operates comfortably from your intended locations.
This process should help in syncing multiple under cabinet LED lights to a single remote, providing seamless control.
How to set up a schedule for under cabinet LED lights?
Setting up a schedule for under cabinet LED lights can enhance convenience and energy efficiency. Here's a step-by-step guide to help you:
Determine Your Requirements
- Purpose: Decide if the lighting is primarily for task lighting, accent lighting, or both. This will influence the timing and duration of illumination.
- Timing Needs: Consider the times of day you commonly use the kitchen, and if you want lights for morning, evening, or both.
Choose a System
- Smart Plug or Smart Switch: Invest in a smart plug or switch that is compatible with smart home ecosystems like Amazon Alexa, Google Home, or Apple HomeKit.
- Smart LED Controller: If your LED strips are not native smart lights, purchase a smart LED controller. It will allow you to manage non-smart LED strips digitally.
- Smart LED Strips: Consider LED strips with integrated Wi-Fi or Bluetooth controllability that come with their own app.
Install the System
- Mount Lights: Ensure that the LED lights are securely installed under the cabinets.
- Connect Lights to Power: Plug the lights into a smart plug or smart switch.
Configure the System
- App Setup: Download the associated app for your smart plug, switch, or the LED lights themselves. Create an account if necessary and pair the device through a Wi-Fi or Bluetooth connection as directed by the instructions.
- Integration with Smart Home System (Optional): If using Amazon Alexa, Google Home, or Apple HomeKit, add your device to the respective app and configure basic settings.
Set up the Schedule
- Access Scheduling Feature: Open the smart device app, and find the scheduling feature. This is often located in a section labeled “Automation” or “Routines.”
- Create Schedule: Define the time you want the lights to turn on and turn off. You might want to create different schedules for weekdays and weekends.
- Advanced Scheduling (Optional): Consider seasonal adjustments, sunrise/sunset triggers, or motion sensor integration, if supported.
- Test the Schedule: After setting the schedule, test to ensure the lights turn on and off at the desired times.
Maintain and Adjust
- Monitor Usage: Check if the set schedule fits your real-life routine, and be open to adjusting times if necessary.
- Updates: Keep the app and any firmware/software for your smart devices updated for improved functionalities and security.
By following these steps, you can effectively set up a schedule for your under cabinet LED lights, adding both convenience and efficiency to your daily routine.
What is the difference between hardwired and plug-in under cabinet LED lights?
Under cabinet LED lights can be a great way to add both task and ambient lighting in a kitchen or workspace. When choosing between hardwired and plug-in options, there are several differences to consider:
- Installation: Hardwired: Hardwired LEDs are directly connected to your home's electrical system. This type of installation often requires professional help unless you have the necessary electrical skills. Hardwired options offer a cleaner look with no visible wires or plugs. Plug-in: Plug-in LED lights are much simpler to install. They typically involve mounting the fixture and plugging it into an available electrical outlet. This makes them a suitable option for DIY projects and renters.
- Aesthetic: Hardwired: Because the wiring is hidden, hardwired options can provide a more seamless and integrated appearance under your cabinets. Plug-in: These lights will have visible cords and need to be near an outlet, which might not be as visually appealing but can be mitigated by using cord management solutions.
- Flexibility: Hardwired: Once installed, hardwired lights are more permanent. If you want to change the position or type of lighting, it could require significant work. Plug-in: These lights are more flexible and portable. They can be easily moved or replaced with minimal effort.
- Cost: Hardwired: Installing hardwired lights can be more expensive due to the potential need for professional installation and the additional wiring involved. Plug-in: Generally less expensive in terms of installation because they don't require professional help unless you choose to hide the cords in a more sophisticated way.
- Control Options: Hardwired: These lights can often be integrated with wall switches or built-in dimmers, providing more sophisticated control options. Plug-in: Typically controlled through an inline switch or a remote, which might offer fewer options for integration with existing home automation systems.
- Power Sources: Hardwired: They rely on your home's electrical supply and won't take up any outlet space. Plug-in: Require an available outlet, which could be a limiting factor in placing them, especially in older kitchens with fewer outlets.
Choosing between the two largely depends on your priorities, such as ease of installation, aesthetic preferences, flexibility, and budget.