Best Bulb Planters to Buy in July 2026
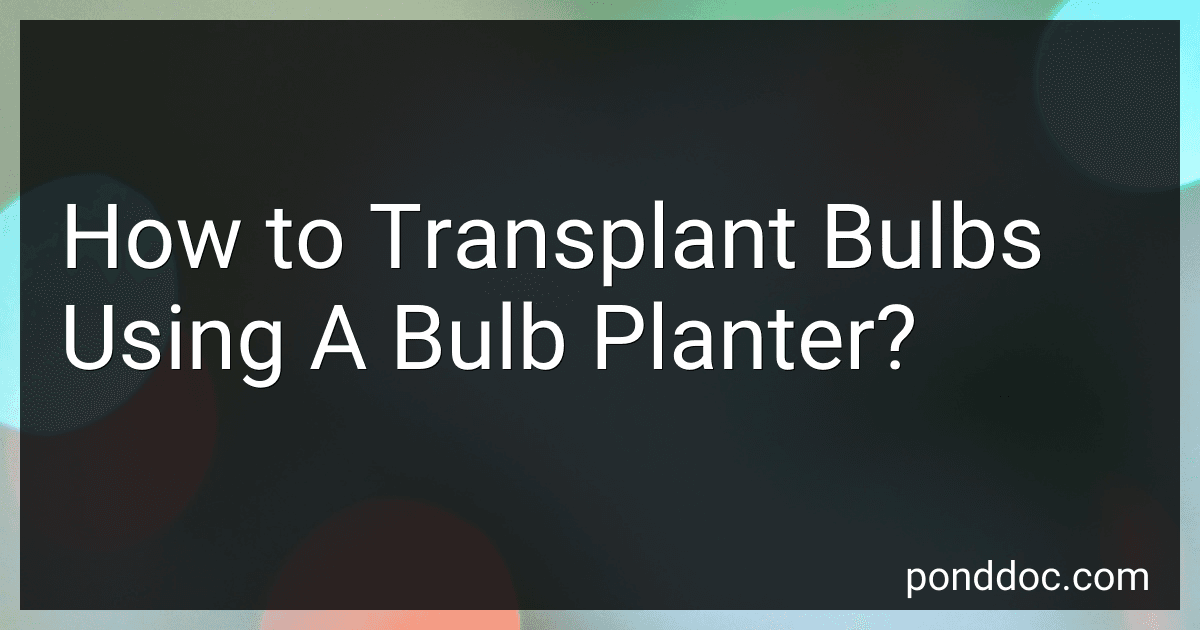
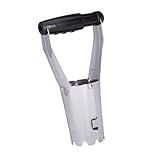
Fiskars Bulb Transplanter
- PLANT BULBS QUICKLY WITH A SPRING-LOADED, EASY-RELEASE HANDLE.
- ACCURATE DEPTH MEASUREMENT WITH GRADATION MARKS FOR PERFECTION.
- DURABLE 2.25 DIAMETER DESIGN, BACKED BY A LIFETIME WARRANTY.


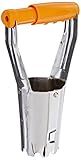
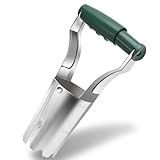
FLORA GUARD Bulb Planter with Depth Markers - Automatic Soil Releasing Seed Bulb Transplanter for Planting/Digging Tulips, Daffodils, Dahlias and More
- EFFORTLESS PLANTING: ERGONOMIC DESIGN & AUTOMATIC SOIL RELEASE FOR EASE.
- BUILT TO LAST: DURABLE MATERIALS ENSURE LONG-LASTING USE AND RELIABILITY.
- VERSATILE USE: PERFECT FOR VARIOUS BULBS AND PLANTS, MAXIMIZING GARDENING SUCCESS.
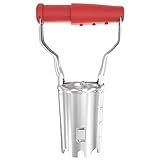
XVBITOR Bulb Planter Tool, Bulb Planter with Depth Markers and Bend Free for Planting Bulbs and Digging, Designed Automatic Soil Releasing Seed for Tulips, Dahlias, Daffodils
- EFFORTLESS PLANTING WITH SMOOTH SOIL CLEARANCE FOR QUICK RESULTS.
- DURABLE REINFORCED STEEL DESIGN FOR TOUGH DIGGING TASKS.
- CONSISTENT DEPTH CONTROL FOR UNIFORM PLANTING EVERY TIME.
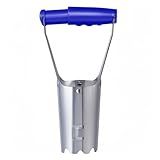
Edward Tools Bulb Planter - Bend Free Tool for Planting Bulbs, Depth Marker for More consistent Planting Tulips, Daffodils, Dahlias (Assorted)
- QUICK PLANTING WITH AUTOMATIC SOIL RELEASE MECHANISM.
- DURABLE REINFORCED STEEL FOR EASY DIGGING IN TOUGH SOILS.
- CONSISTENT PLANTING DEPTHS WITH BUILT-IN DEPTH MARKER.
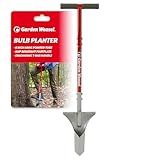
GARDEN WEASEL Bulb Planter Tool – Manual Bulb Planting Tool and Sod Cutter for Tulips, Daffodils, and Perennials – Ergonomic Footplate and Carbon Steel Design Latest Model 91350-3
- EFFORTLESSLY PLANT BULBS WITH NO KNEELING OR DIGGING REQUIRED!
- CLEVER EJECTOR: SMOOTH, FAST PLANTING WITH TIDY HOLES EVERY TIME.
- DURABLE, ERGONOMIC DESIGN ENSURES COMFORT DURING HEAVY-DUTY TASKS.
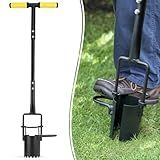
Colwelt Bulb Planter Tool Long Handle, Serrated Base Gardening Bulb Transplanter with Soft Grip, Heavy Duty Long Handled Bulb Planter Sod Plugger for Digging Holes to Plant Tulips, Iris, Daffodils
- EASY PLANTING: STEP, TWIST, AND PULL FOR QUICK, PERFECT HOLES!
- ERGONOMIC DESIGN: LONG HANDLE LETS YOU PLANT COMFORTABLY STANDING UP.
- DURABLE QUALITY: HEAVY-DUTY, RUST-RESISTANT STEEL ENSURES LASTING USE.
Corundara Bulb Planter Tool for Daffodil Bulbs - Tulip Bulb Planting Tool & Garden Tool Bulb Planter - Automatic Soil Releasing with Depth Markers - Bulb Dibbler Hole Digger
-
DURABLE STEEL DESIGN: ZINC-PLATED STEEL ENSURES LONG-LASTING USE IN TOUGH SOILS.
-
FAST & EASY PLANTING: SPRING HANDLE CLEARS SOIL FOR PLANTING BULBS 2X FASTER.
-
ACCURATE PLANTING DEPTH: ENGRAVED MARKERS GUARANTEE UNIFORM GROWTH EVERY TIME.
Transplanting bulbs using a bulb planter is a relatively simple process that can help you seamlessly move flowering bulbs from one location to another. Here's an explanation of how to do it:
- Select the right time: Bulbs are typically transplanted during the dormant season when they are not actively growing. For most bulbs, this is usually in the late summer or early fall. However, pay attention to the specific requirements of the bulbs you are transplanting.
- Prepare the new location: Choose a suitable spot in your garden that receives the optimal amount of sunlight for the specific bulb variety. Make sure the soil is loose, well-drained, and amended with compost for better nutrition. Prepare the area by removing any weeds or debris.
- Dig a hole: With a bulb planter in hand, locate the area in your garden where you want to transplant the bulbs. Firmly press the bulb planter into the ground, pushing down and rocking it gently to create a hole of the appropriate depth (typically three times the size of the bulb).
- Lift and separate the bulbs: Carefully dig up the bulbs you wish to transplant using a garden fork or shovel. Be cautious not to damage the bulbs or their roots. If there are multiple bulbs growing in a clump, gently separate them for individual planting.
- Place the bulbs: Take each bulb and place it in the hole you created with the bulb planter. Orient them with the pointed end facing upwards. Ensure that the bulb sits at the proper depth according to the planting instructions provided with the bulbs.
- Backfill the hole: Gently push the soil back into the hole using the bulb planter or your hands, ensuring that the bulb is covered with soil. Be careful not to pack the soil too tightly, as it should be loose to allow the roots to establish easily.
- Water the area: After transplanting all the bulbs, water the newly planted area thoroughly to help settle the soil around the bulbs and eliminate any air pockets. Make sure the soil is evenly moist, but avoid overwatering.
- Mulch and protect: Apply a layer of mulch, such as shredded leaves or bark, around the transplanted bulbs. Mulching helps retain moisture, suppresses weed growth, and protects the bulbs during winter.
Remember to keep an eye on your transplanted bulbs as they establish themselves in their new location. Follow the specific care instructions for each bulb variety regarding watering, fertilizing, and additional maintenance. With time, your transplanted bulbs should thrive and reward you with beautiful blooms.
What is the typical lifespan of a bulb planter, and when should it be replaced?
The typical lifespan of a bulb planter can vary depending on factors such as the quality of the tool, frequency of use, and the type of soil conditions it is used in. A good quality bulb planter can last several years with proper care and maintenance.
However, over time, the cutting edges of the bulb planter may become dull and less effective, making it harder to create clean, precise holes for planting bulbs. The handles or other components of the planter may also wear out or become loose with continuous use.
As a general guideline, if you notice that the bulb planter is struggling to cut through the soil or is not functioning efficiently despite cleaning and sharpening, it may be time to replace it. Additionally, if any parts are broken, bent, or damaged beyond repair, it's a good idea to invest in a new bulb planter for optimal performance during planting.
What is the process for cleaning and disinfecting a bulb planter?
To clean and disinfect a bulb planter, follow these steps:
- Remove any excess soil or debris: Use a brush or your hands to remove soil or debris from the bulb planter. Make sure to remove it thoroughly to prepare for cleaning.
- Soak the planter in warm, soapy water: Fill a basin or sink with warm water and add a mild dish soap. Place the bulb planter in the soapy water and let it soak for about 15-30 minutes. This will help to loosen any remaining dirt or residue.
- Scrub the planter: After soaking, use a soft brush or sponge to scrub the planter, paying special attention to any areas with residue or stains. Scrub both the inside and outside of the planter to ensure a thorough cleaning.
- Rinse with clean water: Once you've scrubbed the planter, rinse it thoroughly with clean water to remove any soap residue. Make sure to rinse it inside and out.
- Disinfect the bulb planter: To disinfect the planter, you can use a diluted bleach solution. Prepare a mixture of 1 part bleach to 9 parts water. Fill a basin or sink with the solution and soak the planter for about 10 minutes. This helps kill any bacteria or pathogens that may be present.
- Rinse again: After disinfecting, rinse the planter once more with clean water to remove any bleach residue.
- Dry the planter: Allow the bulb planter to air dry completely before using it again. Placing it in direct sunlight or using a clean towel or cloth to dry it can help speed up the process.
By following these steps, you can ensure that your bulb planter is clean and disinfected, ready for future use.
How to transplant bulbs with a bulb planter in small garden spaces?
Transplanting bulbs with a bulb planter in small garden spaces is relatively easy. Here is a step-by-step guide to help you:
- Select the area for transplanting: Choose a suitable location in your garden with enough sunlight, soil drainage, and appropriate conditions for the specific type of bulbs you want to transplant.
- Prepare the soil: Prior to transplanting, prepare the soil by removing weeds, stones, and other debris that may hinder growth. Loosen the soil to allow easy penetration of the bulb planter.
- Choose the right bulb planter: There are various bulb planter designs available, including hand tools and long-handled ones. Select a bulb planter suitable for small garden spaces. Consider the handle length, width, and depth of the planter.
- Dig holes: With the bulb planter in hand, press the sharp end into the soil, using your foot or body weight if necessary. Depress the planter to the desired depth, typically indicated on the tool. Avoid going too deep, as this may affect the bulb's growth.
- Remove soil plugs: Once the bulb planter is in the ground, gently twist it back and forth to create a clean hole. When pulling the tool out of the ground, soil plugs will come with it. Set these plugs aside to use later.
- Place the bulbs: Take your bulbs and position them in the holes created by the bulb planter. Be mindful of the recommended planting depth and spacing guidelines specific to your bulbs. Depending on the size of your garden, you can transplant multiple bulbs simultaneously.
- Cover the bulbs: Using the soil plugs you set aside earlier, place them back into the holes to cover the bulbs completely. This will ensure they are planted at the appropriate depth and provide enough soil for growth.
- Water and mulch: After transplanting, give the bulbs a good watering to help settle the soil around them and promote root establishment. Apply a layer of mulch over the transplanted bulbs to conserve moisture and suppress weed growth.
- Care and maintenance: Monitor the bulbs regularly and provide necessary care, such as watering, fertilizing, and protection from pests or extreme weather conditions, depending on the specific requirements of the bulbs you transplanted.
Remember to follow the specific instructions for each type of bulb you transplant, as some may have specific requirements, including planting depth, spacing, and care.
How to care for a bulb planter to ensure longevity?
To ensure the longevity of a bulb planter, here are some care tips:
- Cleaning: After each use, make sure to clean the bulb planter thoroughly. Clear out any dirt or debris that might have accumulated on the blades or inside the planting chamber. This will prevent any potential contamination and ensure smooth functioning.
- Regular maintenance: Check for any signs of wear and tear in the bulb planter. Look for blade sharpness, handle stability, or any loose parts. If necessary, tighten any screws or replace worn-out parts to maintain its effectiveness.
- Lubrication: Periodically lubricate the moving parts of the bulb planter, such as the joint between the handle and the planting chamber. Use a light oil or silicone-based lubricant to ensure smooth operation and prevent rust or corrosion.
- Protection: Store the bulb planter in a clean, dry place, away from moisture or direct sunlight. Consider using a tool shed or hanging it on a wall to prevent any damage or accidental knocks.
- Proper use: Use the bulb planter according to the manufacturer's instructions. Avoid excessive force when plunging the planter into the soil, as this can strain the mechanism or bend the blades.
- Avoid soil buildup: To prevent soil buildup inside the planter, tap the tool against a hard surface or give it a gentle shake after each use. This will help dislodge any soil stuck in the chamber or on the blades.
- Avoid exposure to extreme temperatures: Bulb planters should not be exposed to extreme cold or heat as it may affect their structural integrity or sharpness. Avoid leaving them outside during freezing temperatures or direct sunlight.
By following these care tips, you can ensure the longevity of your bulb planter, allowing you to enjoy the convenience and ease of planting bulbs for years to come.
How to use a bulb planter for transplanting bulbs?
Using a bulb planter for transplanting bulbs can make the process quicker and easier. Here's a step-by-step guide on how to use a bulb planter:
- Prepare the soil: Before using the bulb planter, prepare the soil by loosening it with a garden fork or spade. Remove any weeds or debris that may hinder the process.
- Choose the right spot: Select a suitable location for planting the bulbs. Consider factors like sunlight, soil drainage, and spacing requirements for the specific type of bulb you are transplanting.
- Insert the bulb planter into the soil: Hold the bulb planter firmly in your hands. Position it where you want to transplant the bulb and gently push it into the soil. Apply a bit of pressure to ensure it goes deep enough.
- Twist and lift: Once the bulb planter is inserted, give it a slight twist clockwise and anti-clockwise. This will help loosen the soil and create a hole for the bulb. Lift the bulb planter out of the soil, keeping it upright.
- Prepare the bulb: If using a larger-sized bulb, you may need to remove any excessive roots or shoots. However, leave smaller bulbs intact. Ensure the bulbs are in good condition, free from mold or any other signs of damage.
- Place the bulb in the planter: Take the bulb and carefully position it into the hole created by the bulb planter. Ensure the pointy end is facing upward, as this is where the stem will emerge from.
- Fill the hole: Gently press the soil-filled bulb planter back into the hole, covering the bulb completely. Be cautious not to damage the bulb. Avoid compacting the soil too tightly, as it should still allow for proper drainage.
- Repeat the process: Move to the next transplant spot and repeat steps 3–7 until all the bulbs are planted.
- Water and maintain: After planting, water the bulbs thoroughly to help settle the soil and provide necessary moisture. Follow the specific watering instructions for the type of bulb you are transplanting.
Using a bulb planter can make transplanting bulbs more efficient, especially when dealing with a larger number of bulbs. Just remember to choose the right size bulb planter for your bulbs, and follow proper planting depth and spacing guidelines to ensure successful growth.