
Best Outdoor Shed Flooring Options to Buy in July 2026
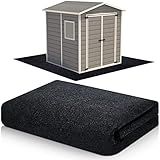
Haull Outdoor Storage Shed Floor Moat Waterproof Outdoor Carport Mat Thickened Soft Patio Furniture Pad Washable with Non Slip Backing, Storage Shed Not Included(6 x 8.2 ft)
- PROTECTS SHED & GROUND: PREVENTS EROSION FROM DAMP GROUND, KEEPING IT CLEAN.
- DURABLE & NON-SLIP: WATERPROOF, WEAR-RESISTANT, ABSORBS WATER AND OIL EFFECTIVELY.
- SIMPLE MAINTENANCE: WASHABLE, REUSABLE, FOLDS EASILY FOR CONVENIENT STORAGE.


MAXWAVE 18 Pack 12" x 12" Modular Interlocking Floor Mats, Soft PVC Non-Slip Drainage Tiles, Splicing Rubber Cushion Flooring for Deck, Shower, Pool, Basement, Shed, Indoor and Outdoor Use
-
DURABLE PVC DESIGN: SOFT, FLEXIBLE, AND LONG-LASTING FOR ULTIMATE COMFORT.
-
DIY INTERLOCKING MATS: EASY ASSEMBLY AND CUSTOMIZABLE TO FIT ANY SPACE.
-
EFFICIENT DRAINAGE SYSTEM: PREVENTS WATER BUILDUP AND ENSURES SAFETY.
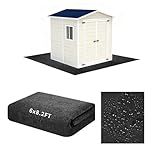
6 x 8.2FT Outdoor Storage Shed Floor Mat, Washable Garden Flooring Pad with Waterproof Bottom, Anti-Slip Patio Furniture Covering Dust Oil Mat for Shed, Tent, Carport, Storage Shed Not Included(Grey)
-
DURABLE DESIGN: WATERPROOF & DUSTPROOF MAT PROTECTS AGAINST MOISTURE.
-
EASY SETUP: INSTALL IN 30 SECONDS; CUSTOMIZABLE FOR ANY SIZE NEEDS.
-
VERSATILE USE: IDEAL FOR SHEDS, GARAGES, CAMPING, OR INDOOR PROTECTION.
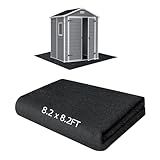
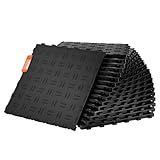
RUNZEG Outdoor Storage Shed Floor Mat, 8.2*8.2FT Waterproof Washable Garden Flooring Pad with Non Slip Backing, Soft Furniture Patio Covering Carport dust Oil Mat-Tool Shed, Storage Shed Not Included
- DURABLE AND WATERPROOF MATERIAL: PROTECTS AGAINST WEAR AND TEAR.
- EASY TO CLEAN & MAINTAIN: VACUUM, RINSE, OR WASH FOR QUICK CLEANING.
- VERSATILE USES: IDEAL FOR SHEDS, CARPORTS, AND OUTDOOR ACTIVITIES.
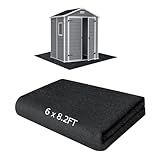
RUNZEG Outdoor Storage Shed Floor Mat, 6 * 8.2FT Waterproof Washable Garden Flooring Pad with Non Slip Backing, Soft Furniture Patio Covering Carport dust Oil Mat-Tool Shed, Storage Shed Not Included
- PROTECTS YOUR SHED FROM WEAR, TEAR, AND WATER DAMAGE EFFECTIVELY.
- EASY TO CLEAN AND REUSABLE, SAVING TIME ON MAINTENANCE.
- VERSATILE MAT FOR OUTDOOR SHEDS, CARPORTS, AND MORE USES!
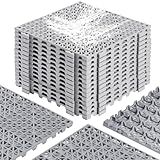
12” x 12” Drainage Interlocking Floor Tiles, 12 Pack Non-Slip Pool Deck Drain Mats for Flooring, Soft PVC Splicing Modular Cushion Mats, Rubber Floor Tiles with Holes for Shower Basement Garage Shed
-
NON-SLIP SAFETY: PREVENT SLIPS WITH DURABLE, TEXTURED PVC TILES.
-
VERSATILE USES: IDEAL FOR POOLS, SHOWERS, GARAGES, AND MORE SETTINGS.
-
EASY INSTALL & CLEAN: SNAP TOGETHER AND HOSE DOWN FOR QUICK MAINTENANCE.
VEVOR Garage Tiles Interlocking 25 Pack, 12 x 12 x 0.53 inch, Non-Slip Double-Sided Texture Easy to Clean, for Garages, Basements, Repair Shops, 5500lbs Load Capacity, Black
-
TRANSFORM ANY SPACE: VERSATILE TILES FOR GARAGES, WAREHOUSES, AND MORE.
-
HEAVY-DUTY STRENGTH: SUPPORTS UP TO 5500LBS-PERFECT FOR HEAVY VEHICLES.
-
FAST, TOOL-FREE SETUP: EASY INTERLOCKING DESIGN FOR QUICK INSTALLATION.
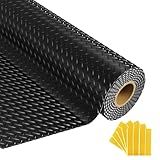
Grandroad auto 8x20 FT Garage Floor Mat, 2.8mm Thickened Flooring Roll for Under Car Diamond Plate PVC Rubber Mat with 20 Pcs Tapes, Non-Slip Floor Mat for Garage, Warehouse, Gyms, Trailer, Black
-
HIGH-QUALITY PVC RUBBER: DURABLE, NON-SLIP, AND WEAR-RESISTANT.
-
SAFETY FIRST: ANTI-SLIP DIAMOND PLATE TEXTURE ENSURES SECURE FOOTING.
-
SPACIOUS COVERAGE: 8X20FT SIZE FITS VARIOUS GARAGE SPACES PERFECTLY.
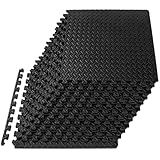
ProsourceFit Puzzle Exercise Mat ½ in, EVA Interlocking Foam Floor Tiles for Home Gym, Mat for Home Workout Equipment, Floor Padding for Kids, Black, 24 in x 24 in x ½ in, 48 Sq Ft - 12 Tiles
-
DURABLE, NON-SKID DESIGN PROTECTS FLOORS AND ENHANCES WORKOUT COMFORT.
-
HIGH-DENSITY EVA FOAM OFFERS CUSHION, SUPPORT, AND TOXIN-FREE SAFETY.
-
VERSATILE MATS: WATER-RESISTANT, EASY TO CLEAN, PERFECT FOR ANY SPACE.
Choosing the right flooring for an outdoor storage shed is essential to ensure durability, functionality, and long-lasting performance. Here are some important factors to consider when making your decision:
- Material: Opt for a flooring material that can withstand outdoor conditions, including moisture, extreme temperatures, and heavy foot traffic. Common options include concrete, gravel, asphalt, or pressure-treated wood.
- Water resistance: Since outdoor sheds are prone to moisture exposure, it is crucial to select a flooring that is resistant to water damage and rot. Avoid materials like regular wood or carpet, which may easily degrade when exposed to moisture.
- Durability: The chosen flooring should be sturdy enough to withstand the weight of the stored items and any equipment that may be used inside. It should also be able to endure heavy loads without cracking, chipping, or breaking.
- Easy maintenance: Consider a flooring material that requires minimal maintenance, as outdoor sheds are often used for storage rather than regular living spaces. Flooring options that are easy to clean and maintain, such as concrete or gravel, can save you time and effort.
- Safety: Ensure that the flooring provides a safe surface to walk on, especially when carrying heavy objects. Avoid materials that become slippery when wet, as they may pose a risk of accidents. Textured or non-slippery surfaces are preferred.
- Cost: Evaluate the cost of the flooring material, taking into account both the initial installation expenses and long-term durability. Choose an option that fits your budget while offering the necessary qualities.
- Aesthetics: While not the most crucial factor, consider how the flooring will enhance the overall appearance of your shed. Opt for a flooring material that complements the shed's style, whether it is rustic, modern, or traditional.
- Local regulations: Check if there are any specific regulations or restrictions in your area that dictate the type of flooring material you can use.
By carefully considering these factors, you can choose the right flooring for your outdoor storage shed, ensuring it is functional, resilient, and long-lasting.
What is the ease of cleaning and maintenance for different shed flooring options?
The ease of cleaning and maintenance for different shed flooring options can vary. Here are some common shed flooring options and their general cleaning and maintenance requirements:
- Concrete: Concrete floors are relatively easy to clean and maintain. Regular sweeping or vacuuming to remove debris, followed by mopping with a mild detergent and water, is usually sufficient for routine cleaning. If stained or soiled, a pressure washer or a specialized concrete cleaner can be used.
- Wood: Wood floors, such as plywood or tongue-and-groove panels, require more maintenance compared to concrete. Sweeping or vacuuming to remove dust and debris should be done regularly. Wood floors should also be sealed or coated with a protective finish to prevent moisture damage. Additionally, occasional refinishing or resealing may be necessary to maintain the appearance and durability of the wood.
- Vinyl or Linoleum: Vinyl or linoleum flooring is relatively easy to clean and maintain. Sweeping or vacuuming, followed by mopping with a mild detergent and water, is usually sufficient for routine cleaning. Avoid using harsh chemicals or abrasive cleaners that can damage the flooring. Some vinyl or linoleum floors may require periodic resealing to maintain their appearance.
- Rubber: Rubber flooring is durable and easy to maintain. Sweeping or vacuuming to remove loose dirt and debris is usually sufficient for regular cleaning. For deeper cleaning, a mild detergent and water can be used with a soft brush or mop. Avoid using abrasive cleaners or solvents that may damage the rubber.
- Gravel or Crushed Stone: Gravel or crushed stone floors require minimal cleaning and maintenance. Regular sweeping or raking to even out the surface and remove loose debris is usually enough. Occasionally, additional gravel may need to be added to maintain the desired thickness and levelness of the floor.
It's important to note that specific cleaning and maintenance requirements may vary depending on the specific product or material used for each flooring option. Always refer to the manufacturer's recommendations for the best practices when cleaning and maintaining your shed flooring.
What is the process of preparing the shed's foundation before installing flooring?
Preparing the shed's foundation before installing flooring typically involves the following steps:
- Clear the area: Remove any vegetation or debris from the site where the shed will be located. This ensures a clean and level surface for the foundation.
- Level the ground: Use a shovel, rake, or other leveling tools to make the ground as even as possible. Remove any bumps or high spots, and fill in any low areas with compacted soil or gravel.
- Create a perimeter: Use wooden stakes and string to mark the perimeter of the shed's foundation. This will help you visualize the exact dimensions and ensure straight, even lines.
- Dig footings: Excavate shallow footings around the perimeter of the shed's foundation. These footings should be approximately 6-8 inches deep and wide enough to accommodate the shed's floor frame. Ensure the footings are level and evenly spaced.
- Install gravel or crushed stone: Fill the excavated footings with a layer of compacted gravel or crushed stone. This will provide a stable and well-draining base for the shed's foundation.
- Build a frame: Construct a wooden frame within the excavated area using treated lumber. This frame will serve as the base for the shed floor. Check for levelness and adjust as needed.
- Add a vapor barrier: Place a vapor barrier, such as heavy-duty plastic sheeting, on top of the compacted gravel or crushed stone. This helps prevent moisture from seeping into the shed and causing damage.
- Install joists: Place pressure-treated wooden joists across the frame, spaced evenly apart. These joists will support the shed floor and distribute the weight evenly.
- Secure flooring material: Nail or screw the flooring material, such as plywood or oriented strand board (OSB), to the installed joists. Ensure the flooring is firmly attached and flush with the edges of the foundation frame.
- Check for levelness: Use a level to verify that the shed's foundation and flooring are level in all directions. Make any necessary adjustments before proceeding with the shed installation.
By following these steps, you can properly prepare the shed's foundation before installing flooring, ensuring a sturdy and level base for your shed.
How to choose flooring that provides adequate insulation against cold or heat for a shed?
When it comes to choosing flooring for a shed that provides adequate insulation against cold or heat, there are several factors to consider. Here are some tips to help you make the right choice:
- Material: Opt for flooring materials that offer good insulation properties. Some popular options include foam-based mats, rubber flooring, cork, or carpet tiles. These materials have inherent insulation properties that can help regulate the temperature inside the shed.
- Thickness: Choose a flooring material that is thick enough to provide efficient insulation. Thicker materials often offer better insulation against temperature fluctuations.
- Vapor barrier: Install a vapor barrier between the ground and the flooring material. This barrier helps prevent moisture from seeping through the floor and into the shed, reducing the risk of mold and mildew. It also acts as an additional layer of insulation.
- Seal gaps: Before installing the flooring, make sure to seal any gaps or cracks in the shed's floor or walls. This step ensures that no air leaks occur, thus maintaining the insulation efficiency.
- R-value: Consider the R-value of the flooring material. R-value is a measure of thermal resistance, indicating the material's ability to resist heat transfer. The higher the R-value, the better the insulation.
- Reflective properties: Look for flooring materials with reflective properties. Some materials, like ceramic or porcelain tiles, have a reflective surface that helps bounce back heat or cold, ensuring a more comfortable environment inside the shed.
- Budget: Take your budget into account while choosing the flooring. Some high-insulation materials may be more expensive, so prioritize what fits within your budget while still providing adequate insulation.
- Local climate: Consider the climate of your area when selecting the flooring material. If you live in an area with extreme cold or heat, opt for materials with higher insulation properties and adjust thickness and R-value accordingly.
Don't forget to consult with a flooring professional or seek advice from a home improvement store to determine the best flooring option that suits your specific needs and shed requirements.
How to choose flooring that is resistant to pests and insect damage for a shed?
When choosing flooring that is resistant to pests and insect damage for a shed, there are a few factors to consider. By taking certain precautions, you can minimize the risk of pest infestations and protect your shed's flooring. Here are some tips to guide you:
- Material selection: Opt for flooring materials that are less attractive to pests and have properties that make them less susceptible to damage. Some ideal options include concrete, vinyl, and rubber flooring. These materials provide a solid and less permeable surface, making it challenging for pests to penetrate or burrow through.
- Avoid wood-based materials: While wood flooring may be aesthetically appealing, it is vulnerable to pests and insect damage. Termites, carpenter ants, and other wood-boring insects can infest wooden flooring, leading to significant durability issues. Therefore, it's best to avoid wood or wood-based materials for your shed's flooring.
- Seal gaps and cracks: Ensure that there are no gaps or cracks in the shed's flooring where pests can enter. Utilize a durable sealant to fill any potential entry points. This prevents insects from finding their way inside and damaging the flooring. Regularly inspect and maintain the sealing to ensure its integrity.
- Consider raised flooring: Installing a raised flooring system can create a physical barrier between pests and the shed. A raised floor can be built using concrete blocks, bricks, or any other sturdy materials. Additionally, it allows air circulation and prevents moisture buildup, which can also attract pests.
- Proper insulation and moisture control: Moisture can attract pests and insects, so it is crucial to maintain moisture control within the shed. Ensure proper insulation to prevent condensation and reduce humidity levels. Consider using a vapor barrier beneath the flooring to further limit moisture intrusion and minimize the risk of pest infestations.
- Regular maintenance: Inspect and clean your shed on a routine basis, paying close attention to the flooring. Regularly remove any dirt, debris, or spilled substances that may attract pests. Promptly address any signs of damage or pest activity to prevent infestations from spreading.
By considering these factors and taking preventative measures, you can choose a flooring option that is resistant to pests and insect damage for your shed. This will help ensure the longevity and durability of your shed's flooring.