Best Fish Health Products to Buy in July 2026
koi Betsey Johnson KOIBA156 Women's Scrub Accessory Pill Box OS
- UNIQUE PRINTS TO EXPRESS YOUR PERSONALITY AT WORK!
- PERFECT FOR ANYONE-STYLE THAT SUITS ALL PROFESSIONS!
- FUN DESIGNS MAKE WEARING YOUR BADGE ENJOYABLE!


The Pond Guy Pond Salt, Outdoor Water Garden Treatment, Natural Crystal Rock Salt Additive, Koi Stress Control, Slime Coat Health & Electrolytes Treatments, Fish, Bird & Pet Safe, 20 lbs
- ALL-NATURAL SEA SALT BOOSTS FISH HEALTH & PROTECTS AQUATIC LIFE.
- REDUCES STRESS & ENHANCES GILL FUNCTION FOR THRIVING POND FISH.
- EFFECTIVE AGAINST PARASITES, ENSURING A SAFE ENVIRONMENT FOR KOI.
Aquascape PROTECT Water Treatment Koi and Fish Ponds, All-natural Formulation Effectively Reduces Fish Stress and Promotes Fish Health, 16 ounce / 473-ml | 96070
-
ALL-NATURAL FORMULA WITH TEA TREE OIL FOR HEALTHY POND FISH PROTECTION.
-
PREVENTS INFECTIONS AND SPEEDS UP HEALING FOR FISH INJURIES EFFECTIVELY.
-
SAFE FOR ALL AQUATIC LIFE; WON’T DISCOLOR WATER OR HARM FILTERS.
EasyPro Pond Products PD16C Concentrated Serenity Pond Dye for Water Gardens and Koi Ponds - Helps Filter Out UV Rays from The Sun - Safe for Use Around Fish, Plants, and Pets -16 fl oz
-
BLOCKS HARMFUL UV RAYS TO PROTECT AQUATIC LIFE AND ENHANCE BEAUTY.
-
TRANSFORMS POND WATER TO A STUNNING BLACKISH-BLUE AESTHETIC.
-
SAFE FOR FISH AND PLANTS-NO STAINING OR HARM WHEN USED CORRECTLY.

Kotbs 6 Sheets Temporary Tattoos Large Koi Fish Body Tattoos Sticker for Men Women Waterproof Fake Tattoos
-
EXTRA-LARGE DESIGNS SURPRISE FRIENDS AT PARTIES AND SPECIAL EVENTS!
-
NON-TOXIC, FDA-APPROVED TATTOOS: SAFE FOR ALL SKIN TYPES!
-
WATERPROOF, DURABLE & EASY TO APPLY/REMOVE FOR ULTIMATE FUN!
MICROBE-LIFT MLLHGEBAG High Growth and Energy Floating Fish Food Pellets for Ponds, Water Gardens, and Fountains, Safe for Live Goldfish and Koi, 40 Pounds
- BOOST PROTEIN FOR STRONGER, HEALTHIER FISH YEAR-ROUND!
- IDEAL HIGH-PROTEIN DIET FOR SPRING GROWTH AND FALL PREPARATION.
- SUPPORTS IMMUNE HEALTH WITHOUT CLOUDING YOUR POND WATER!
KOI Classics A156 Shaker Badges Ambulance OS
- UNIQUE COLORFUL DESIGNS TO STAND OUT AT WORK!
- SECURELY HOLDS YOUR BADGE WITH STYLE.
- FUN ACCESSORY FOR ANYONE, ENHANCING YOUR WORK VIBE!
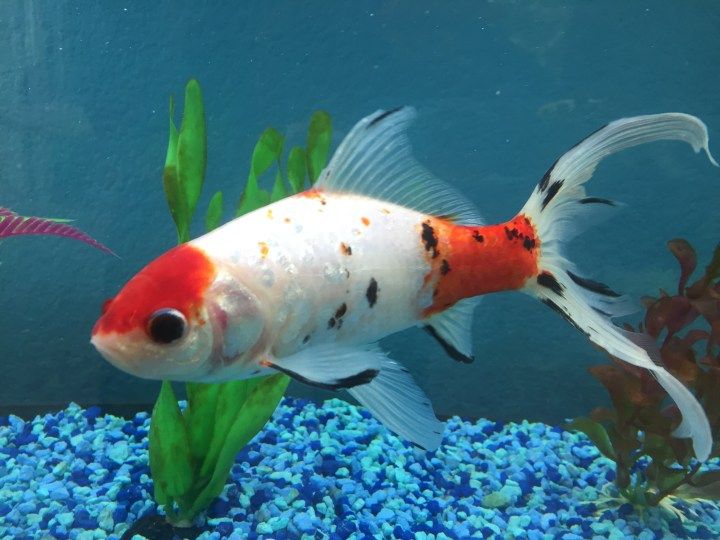
It’s February and soon spring will be here. Spring is my favorite time of the year but, unfortunately, it is the most crucial time for our koi and goldfish. During winter and cold weather our finny friends go dormant. They are cold-blooded so, as the water temperature drops, their metabolism slows down. They do not eat (and should not eat in water temperatures under 50°) and just hover on the bottom of the pond. The most concerning effect cold water has on pond fish is that they lose their immunity systems and are weak from not eating. As warmer weather approaches they will become more active but will not fully regain their immunity systems until water temperatures reach 70°.
Spring is the most troubling for koi and goldfish in southern states like Georgia. This is the time we see outbreaks of the dreaded ulcer disease. Some of the reasons for this are:
Parasites and bad bacteria are growing and spreading rapidly in 50° to 60° F while our fish have not developed their immunity systems. In Georgia, in the spring, due to our climate, water temperatures warm up then cool down - warm up again and cool down again. This is the worst thing that could happen to our koi and goldfish. This type of weather is ideal for bad bacterial blooms while confusing our koi and goldfish’s developing immunity system. Ideally, when the water starts warming, if we could heat our ponds and raise the water temperature from 55° to 70° over a 2-week period of time and hold it there we would see minimal ulcer disease. Unfortunately, heating our ponds is expensive and everyone cannot do this. The most perfect situation would be to heat our ponds throughout the winter, never allowing the water temperature to drop under 60°.
Another factor that causes problems in the spring is dirty ponds heavily layered with organics such as leaves and mulm. This creates a haven for rapid growth of bacteria and parasites, offering ideal conditions where they can thrive. It is of the utmost importance that the pond is cleaned to eliminate this condition. If ponds are netted in the fall they are generally easier to clean. Our pond is state-of-the-art with bottom drains, skimmers, UV lights and, because of this low-maintenance equipment and the fact that it is located away from any trees, the pond is in relatively clean condition, not needing to be completely drained to be cleaned. All we will do to it is perform a salt treatment, inspect the fish and give the system a thorough backwashing. If I find that any of my fish have ulcers I will treat the pond and the infected fish for bacterial problems.
If you are not quite so lucky and have a layer of mulm on the floor of your pond it would be an excellent idea to give it a thorough cleaning which will include draining the pond. If you have a small pond (3000 gallons or less) with relatively small fish (16” and under) drain the pond completely and clean it. Pump some of the pond water into a holding tank to temporarily house your koi and goldfish while you clean the pond. Then start draining your pond. When the water level gets low you can catch your fish more easily to transfer them to the holding tank. Cover the holding tank with netting to prevent the frightened koi and goldfish from jumping out of the tank. Do not overload the container with too many fish. If the water temperature is over 60° and/or the pond takes more than a couple of hours to clean you will need to aerate the holding tank. When I clean a pond and if it’s only a 2-hour job and the water temperature is cold I don’t normally add aeration. Instead, I add a few capfuls of hydrogen peroxide which turns into dissolved oxygen. Always during cleaning keep an eye on the fish for signs of stress (gulping for air at the water surface). You can make a partial water change (about 1/2 of your holding tank) in cases of stress by re-filling with fresh tap water. This will increase the oxygen content. Don’t forget to add the right amount of de-chlorinator if you’re using a municipal water source.
Now you should completely clean your pond while your koi and goldfish are still in the holding tank. Remove the plants. You will find all kinds of crud underneath and behind the pots. Hose this and all areas, including the walls, washing all the crud down to the bottom of the pond. Do not scrub the sides of your pond - please. The green coating on your liner or tub is beneficial to your pond. Once all the debris is washed to the bottom of the pond suck up the crud with a wet vac. To get a clearer bottom you will find that it will probably take washing down the sides and vacuuming twice. Be careful getting into your pond. The sides and bottom are very slippery!
You can now refill your pond. Add the correct amount of de-chlorinator required for the total gallons of your pond. There’s no need to wait to add the de-chlor. Add it as you begin to fill your pond. Once you get enough water in the pond to be able to turn on the pump, do so to begin re-circulating the pond water. Before you begin re-circulating, however, make sure that you have properly cleaned your filters and stream bed. Backwash your bead filter thoroughly if you have one before running any pond water through it and back to the pond.
You may return your fish to the pond after you’ve accumulated at least one foot of water in the bottom of the pond. Acclimate the koi and goldfish in the holding tank to the water temperature of the pond by draining the holding tank by 50% then adding tap water with the correct amount of de-chlorinator for the amount of water you’re adding back. Wait about 20 minutes then transfer your fish back to their pond.
As your pond fills add your plants back. Take the opportunity, however, to prepare them for the new season before replacing them. Clean them up, divide them if necessary, and prune dead leaves or other dead growth from the season before. If it’s late spring when cleaning take this opportunity also to add fertilizer tabs.
Your pond is now clean (doesn’t it feel great) and your koi and goldfish have fresh water and a nice, clean environment. Let’s go the next step to fight off ulcer disease and keep them healthy!
The next step is to salt the pond. Use 3 pounds of non-iodized salt without minerals or caking agents per 100 gallons of pond water. Add the salt over a period of 3 days. Add 1 pound per 100 gallons on the first day, follow it up the next day with another pound per 100 gallons and complete the dosage the third day with the last 1 of the 3 pounds of salt per 100 gallons of water. The salt does two things. It will kill most of the common koi and goldfish parasites (not flukes or anchor worm) and it will cause your fish to naturally form a heavier slime coat. Their slime coat is a protective coating that helps them fight off disease and parasites - you might call it a fish condom.
If you decide to salt - and I hope you will - you will need to remove many of your plants. Some plants, like Iris and umbrella palm are salt tolerant and may be left in the pond while salting. Water lilies and anacharis are a few types of plants that cannot tolerate salt, even in dormant stage. Remove these to a holding tank (plastic container or baby pool, etc.) and treat the plants with Formalin. The dosage to use differs with each size of container so it’s best to call us to find out the amount to use in your situation.
The salt must remain in your pond for 3 weeks. After 3 weeks make a 50% water change and de-chlorinate. Wait 1 week and make another 50% water change. After this water change you may safely add the plants back to the pond.
The last thing I like to do to our ponds in early spring to fight off disease is to perform a potassium permanganate treatment - or simply, PP treatment. As I’m writing this article I am performing a PP treatment on two of my ponds at home. PP treatments kill bad bacteria that was mentioned earlier and kills Flukes that salt won’t touch.
To use PP it is absolutely crucial that you know the exact gallons of your pond! It is extremely easy to overdose with potassium permanganate. Proper procedure must be followed. Most every one of us involved in koi health and advanced hobbyists have, at one time or another, destroyed some of our finny pets by accidentally overdosing or, in my case, pushing the dosage over its limits trying to achieve a more effective treatment or to save time! PP is a great product when used properly but a dangerous one for those who do not take the required precautions. Once again, the exact gallons of your pond must be known and you must be willing to make water changes between treatments as well as have the time to watch your koi and goldfish while the treatment is active.
PP works by oxidizing the organics in your pond. This oxidative process is what kills the bacteria and parasites. It takes a long treatment time to kill flukes (an active treatment time of 6 to 8 hours). The cleaner your pond is - the longer each treatment will last as it will have less organic matter to oxidize. If your pond was not cleaned and is dirty your first treatment might only last for 20 minutes and require many treatments to reach the effective kill time for bacteria and flukes.
Let’s assume you cleaned your pond before the treatment which I hope you did. When refilling your pond you will have a perfect opportunity of finding the number of gallons of your pond. You can read your water meter before filling and after filling while being careful not to run any other water while filling the pond. Another way to find your pond’s number of gallons is the 5-gallon method. Fill a 5-gallon bucket while timing how long it takes to fill it then multiply the amount of gallons in a minute and how many minutes it takes to fill your pond. For example: A 5-gallon bucket fills in 20 seconds. 60 seconds gives you 15 gallons per minute. It takes 65 minutes to fill the pond (15 gallons per minute X 65 minutes) The pond would hold 975 gallons. If it takes 15 seconds to fill the 5-gallon bucket this gives you 20 gallons per minute. 30 seconds would give you 10 gallons per minute, and so on. The third way is to buy or rent a water meter that screws onto the end of your garden hose that will record the amount of gallons passing through it.
The dosage for PP is 1 level (not heaping) teaspoon of PP per 600 gallons of pond water. You can downsize by using 1/2 teaspoon per 300 gallons, etc. As the PP oxidizes the organics in the pond it uses up oxygen in the water, therefore, you must run your pump or use an air stone or other means of aeration during treatment. Summertime PP treatments require adding extra aeration devises over and above what you normally have. In early spring, however, when water temperatures are low (45° to 55°) normal pumping should be enough. Colder water is naturally saturated with higher dissolved oxygen content than warmer water. During summer months you must by-pass your filter system. Potassium permanganate will kill the good nitrifying bacteria as well as the bad bacteria. We do not want to kill the active bacteria in the filter in summer. I prefer, however, to run PP through the filter in early spring because if the water temperature is 55° or below the good nitrifying bacteria (nitrosomonas and nitrobacter) are not yet growing or established in the filter so there’s nothing to kill.
Let’s get with the actual treatment:
Wait to perform the treatment until 4 or 5 days after any de-chlorinator has been added to the pond. De-chlorinator deactivates PP causing the water to turn brown immediately upon adding the treatment. (Brown water signals that the treatment is no longer active). Calculate the dosage properly for your total gallons of water. Dissolve the prescribed amount of PP in a bucket filled 2/3 full of pond water and stir the contents to mix. PP is caustic and will stain your hands, skin and clothes so use gloves when handling and be careful not to breathe in the chemical or allow it to get into your eyes. Once dissolved in the bucket, pour the mixture all around the pond. Do not pour all of it in one spot. Rinse the bucket with pond water and pour back into the pond.
The pond is aerated and PP added so now it’s a waiting and watching game! When the PP is added your pond will turn purple. If the pond water is purple or pink the PP is still active and doing its job. The object is to keep this purple to pink color for 6 hours. As the PP oxidizes organics it will turn colors. It will go from purple, pink to orange, to amber (tea-colored). The amount of time it takes to complete this cycle is dependent on the organics in the water. The dirtier the pond the quicker it turns to tea-color. We need to achieve 6 to 8 hours of pink or purple treatment time. If your pond takes only 2 hours to start turning tea-colored it is permissible to add an additional dosage at 1/2 the original dosage amount. The correct way to judge the color of the water is not by looking at the pond but taking a sample of the water in a white ceramic coffee cup and looking at it inside the cup. Purple to pink means active. Orange means turning inactive. Brown or tan means inactive. If your pond is clean with no residual de-chlorinator in the water you will probably achieve a 6-hour treatment the first time. If you don’t get 6 hours of treatment you must change 50% of the water out and re-treat the pond in a day or two. The water change must be made to eliminate the high content of dissolved organics in your pond water to protect your koi and goldfish. If you must re-treat in a day or two you cannot use de-chlorinator when re-filling the pond because de-chlorinator will deactivate the treatment. You can gently spray your fresh water back into the pond through a hose attachment by spraying a fine mist so the chlorine in the fresh water will dissipate naturally. If you use de-chlorinator during your water change you must wait 3 or 4 days before re-treating the pond to allow the de-chlorinator to dissipate from the water. Be careful not to overdose your pond with de-chlorinator. I prefer to spray the water back into the pond and follow with re-treatment in a couple of days. If your pond is dirty you may have to perform several treatments followed by water changes to achieve the required time of treatment.
Your treatment lasted for 6 to 8 hours and it was deemed successful. Wait! You’re not yet finished. You must perform a second 6 to 8 hour successful PP treatment. The second treatment will not be as difficult as the first because now you have a sparkling clean pond. The reason you need to do another treatment is that PP kills adult flukes only. It does not kill the eggs. We must allow the fluke eggs to hatch and then kill the new ones with the second treatment. Water temperatures dictate the time we wait between treatments. In warm water the adult flukes reproduce more often and the eggs hatch much quicker. In cooler water (like in early spring) it will take 4 to 5 days for the eggs to hatch. After the initial 6 to 8-hour treatment, a second 6 to 8-hour treatment must be performed on the 5th day. Some points to remember when using PP:
- A one-time supplement dosage of 1/2 the original dose may be added if your first treatment lasted 2 hours or more before turning brown.
- If koi or goldfish stress or if you overdose your may deactivate the treatment by adding de-chlorinator or hydrogen peroxide.
- Hydrogen peroxide may be added to your last treatment to deactivate the treatment. It has the added benefit of rendering your water clear and allows you to avoid another water change. Use 1 pint per 1000 gals.
- 2 (two) 6 to 8-hour active treatments 5 days apart must be accomplished.
- Do NOT overdose!
- PP treatments seem like a lot of trouble but is well worth it if you have large or high-quality koi.
- In closing, I hope I’ve been some help with what to do to prepare your koi and goldfish for spring. In order of importance:
- First, your pond needs to be clean.
- Next, by performing a salt treatment you give the immunity systems of your koi and goldfish a boost in their fight to survive spring fish disease and
- Lastly, a PP treatment is the extra mile in fighting off bacteria and flukes which can harm your koi and goldfish.
Everybody needs a pond thermometer. Water temperatures control every phase of our pond. Remember to feed after water temperatures reach above 50° and to feed sparingly since nitrifying bacteria are not yet established in your biofilter. Monitor your ammonia, nitrite and pH, especially in the spring because nothing in your pond is established or balanced.