
Best Bulb Planters to Buy in July 2026
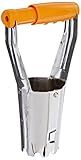
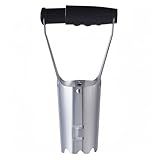
Fiskars Bulb Transplanter
- EFFORTLESS BULB PLANTING WITH SPRING-LOADED HANDLE DESIGN.
- ACCURATE DEPTH MEASUREMENT WITH GRADATION MARKS FOR PERFECT RESULTS.
- DURABLE 2.25 SIZE WITH A LIFETIME WARRANTY FOR PEACE OF MIND.


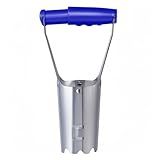
XVBITOR Bulb Planter Tool, Bulb Planter with Depth Markers and Bend Free for Planting Bulbs and Digging, Designed Automatic Soil Releasing Seed for Tulips, Dahlias, Daffodils
-
EFFORTLESS PLANTING: SMOOTH SOIL CLEARING FOR FASTER, EASIER USE!
-
DURABLE DESIGN: REINFORCED STEEL WITHSTANDS TOUGH CONDITIONS, WON'T BEND.
-
ACCURATE PLANTING: CLEAR DEPTH SCALE ENSURES UNIFORM HOLES EVERY TIME!
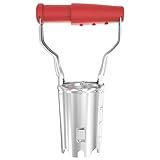
FLORA GUARD Bulb Planter with Depth Markers - Automatic Soil Releasing Seed Bulb Transplanter for Planting/Digging Tulips, Daffodils, Dahlias and More
- ERGONOMIC DESIGN REDUCES STRAIN, ENSURING COMFORT DURING USE.
- AUTOMATIC SOIL RELEASE SPEEDS UP PLANTING FOR EFFICIENT GARDENING.
- LIFETIME WARRANTY GUARANTEES LONG-LASTING DURABILITY AND RELIABILITY.
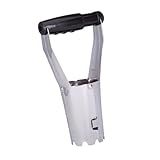
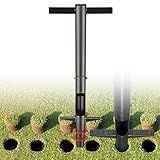
Edward Tools Bulb Planter - Bend Free Tool for Planting Bulbs, Depth Marker for More consistent Planting Tulips, Daffodils, Dahlias (Assorted)
- AUTOMATIC SOIL RELEASE SPEEDS UP PLANTING FOR QUICK RESULTS.
- REINFORCED STEEL DESIGN ENSURES DURABILITY IN TOUGH SOIL CONDITIONS.
- DEPTH MARKER GUARANTEES CONSISTENT PLANTING FOR HEALTHY BLOOMS.
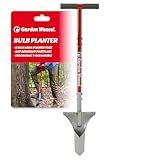
GARDEN WEASEL Bulb Planter Tool – Manual Bulb Planting Tool and Sod Cutter for Tulips, Daffodils, and Perennials – Ergonomic Footplate and Carbon Steel Design Latest Model 91350-3
-
EFFORTLESSLY PLANT BULBS WITHOUT KNEELING OR DIGGING-QUICK AND EASY!
-
ENJOY SMOOTH PLANTING FLOW WITH CLEVER SOIL PLUG EJECTION SYSTEM.
-
BUILT TO LAST WITH A RUST-RESISTANT FRAME AND COMFY ERGONOMIC HANDLE.
Colwelt Bulb Planter Tool Long Handle, Serrated Base Gardening Bulb Transplanter with Soft Grip, Heavy Duty Long Handled Bulb Planter Sod Plugger for Digging Holes to Plant Tulips, Iris, Daffodils
- EFFORTLESS PLANTING: LONG HANDLE DESIGN LETS YOU PLANT FROM A STANDING POSITION.
- QUICK & EASY USE: STEP, TWIST, AND PULL FOR FAST, EFFICIENT HOLE DIGGING.
- DURABLE & RELIABLE: HEAVY-DUTY, RUST-RESISTANT STEEL ENSURES YEARS OF USE.
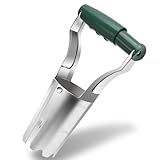
Corundara Bulb Planter Tool for Daffodil Bulbs - Tulip Bulb Planting Tool & Garden Tool Bulb Planter - Automatic Soil Releasing with Depth Markers - Bulb Dibbler Hole Digger
-
DURABLE STEEL ENSURES LONGEVITY; BUILT TO TACKLE TOUGH SOIL EFFORTLESSLY.
-
PLANT BULBS 2X FASTER WITH AUTOMATIC SOIL RELEASE FOR HASSLE-FREE GARDENING.
-
ENGRAVED DEPTH SCALE GUARANTEES UNIFORM GROWTH FOR PERFECT BLOOMS EVERY TIME.
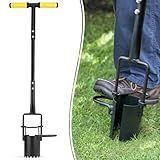
Bulb Planter Tool, 33.5 inch Long Handle Garden Sod Plugger to Dig Hole, Heavy Duty Metal Garden Tools for Soil Test Planting or Weeding Spring Flowers Bulbs,Bedding Plants,Tulips, Lilies, Potato
-
REDUCE FATIGUE WITH ERGONOMIC HANDLE-WORK LONGER, STAY HEALTHIER!
-
BULB PLANTER BOOSTS EFFICIENCY-DIG QUICK, PLANT WITH PRECISION!
-
DURABLE, MULTI-PURPOSE TOOL FOR ALL YOUR GARDENING NEEDS-BUY NOW!
Toresano Bulb Planter, Bulbs Transplanter Designed for Automatic Soil Release with Depth Marker for Dgging Holes and Planting Tool for Tulips, Daffodils, Dahlias
- REINFORCED STEEL CONSTRUCTION: PREVENTS BENDING, DIG IN HEAVY SOIL EASILY.
- DURABLE DESIGN: HIGH-HARDNESS MATERIALS ENSURE LONG-LASTING USE.
- PRECISE DEPTH CONTROL: CLEARLY MARKED SCALE FOR UNIFORM PLANTING EVERY TIME.
Planting bulbs in a lawn using a bulb planter is a fairly straightforward process that can add a pop of color and beauty to your outdoor space. Here are the steps to do so:
- Choose your bulbs: Select the type of bulbs you'd like to plant based on your preference and the climate you live in. Common options include tulips, crocuses, daffodils, and hyacinths.
- Prepare the lawn: Clear the area where you want to plant the bulbs of any weeds, rocks, or debris. Use a rake to level the soil and provide a smooth surface for planting.
- Mark the planting spots: Decide where you want to place each bulb and use small markers, like sticks or flags, to mark those spots. This will help you avoid accidentally planting bulbs in the same spot or missing any areas.
- Dig holes with a bulb planter: Using a bulb planter, insert the tool into the ground at each marked spot. Press the planter into the grass, then twist it slightly and pull up to remove a section of soil. The depth should match the recommended planting depth for the specific bulb variety.
- Place the bulbs: Place one bulb in each hole, making sure the pointed end is facing upwards. Gently lower it into the hole, ensuring it is planted at the proper depth. Repeat this process for the remaining holes.
- Fill the holes and cover bulbs: After placing a bulb in a hole, use the bulb planter or your hands to fill the hole with soil. Pack the soil gently to avoid air pockets. Once all the bulbs are planted, lightly cover the area with topsoil or replace the removed grass if desired.
- Water and care for the bulbs: After planting, give the bulbs a thorough watering to settle the soil and initiate growth. Make sure the soil remains slightly moist throughout the bulb's active growth period. Follow specific care instructions for the bulb variety you have planted, such as fertilizing and regular maintenance.
- Let the foliage die back naturally: Allow the bulbs' foliage to die back naturally after flowering. Avoid cutting or mowing the lawn until the foliage has turned yellow or brown, as this period allows the bulb to store energy for future growth.
By following these steps, you can successfully plant bulbs in your lawn using a bulb planter, resulting in vibrant blooms for seasons to come.
How to plant bulbs in a lawn using a bulb planter?
Planting bulbs in a lawn using a bulb planter is a relatively simple process. Here's a step-by-step guide:
- Choose the right location: Select an area of your lawn where you want to plant the bulbs. Make sure it is an area with well-draining soil and receives the appropriate amount of sunlight for the specific bulbs you're planting.
- Prepare the soil: Prepare the soil by removing any existing grass or weeds from the area where you will be planting the bulbs. Loosen the soil using a gardening fork or spade to a depth of about 6-8 inches.
- Select the bulbs: Choose the bulbs you want to plant, considering their size, bloom time, and specific soil and light requirements.
- Determine the spacing and depth: Read the instructions provided with the bulbs or research online to determine the ideal spacing and planting depth for the specific bulbs you have.
- Use a bulb planter: A bulb planter is a specialized tool designed to make the planting process easier. It consists of a long tube with a hollow end and a handle. Insert the hollow end into the soil at the desired location, push it down to the recommended depth, and twist it back and forth slightly to create a hole.
- Planting the bulbs: Once the hole is made, place the bulb into the hole with the pointed end facing upwards. Gently press the soil around the bulb to ensure good contact and eliminate any air pockets.
- Repeat the process: Continue using the bulb planter to dig a hole for each bulb, keeping the spacing and depth consistent. As you proceed, you can use a ruler or measuring tape to ensure the spacing is accurate.
- Finish and water: After planting all the bulbs, lightly water the area to help settle the soil and initiate growth. Avoid overwatering as excessive moisture can lead to bulb rot.
- Clean and store the bulb planter: Clean the bulb planter thoroughly after using it, removing any soil or debris. Store it in a safe place, ready to be used for future bulb planting.
Remember to follow any specific care instructions for the bulbs you planted, such as watering and fertilizing requirements, to ensure successful growth and beautiful blooms.
What is the lifespan of a bulb planter?
The lifespan of a bulb planter can vary depending on the quality of the materials used, how frequently it is used, and the conditions in which it is stored. Generally, a well-made bulb planter can last for several years or even decades if properly maintained. However, there are also cheaper or lower-quality bulb planters that may wear out or break more quickly. It is important to clean and store the bulb planter correctly after each use to extend its lifespan.
How deep should I plant bulbs using a bulb planter?
When using a bulb planter, it is recommended to plant bulbs at a depth of approximately three times their own height. This ensures that the bulbs are properly anchored in the soil and have enough space to grow and bloom. However, it is important to consider the specific instructions provided with the bulbs you are planting, as different types of bulbs may have slightly different planting depths.
How do I maintain a bulb planter for optimal performance?
Here are some tips to maintain a bulb planter for optimal performance:
- Clean and dry after each use: After planting bulbs, clean the planter thoroughly, removing any soil or debris stuck to it. Dry it completely before storing to prevent rust or corrosion.
- Lubricate moving parts: Apply a light coat of lubricant or oil to any moving parts, such as hinges or joints, to ensure smooth operation. This will prevent any rust formation and help maintain the overall functionality of the planter.
- Check for wear and tear: Regularly inspect the bulb planter for any signs of wear and tear. Look for loose or bent parts, cracks, or corrosion. If you notice any damage, repair or replace the affected parts promptly.
- Sharpen blades or edges: Over time, the cutting blades or edges of the planter may become dull. Keep them sharp by using a file or a sharpening tool. Sharp blades will ensure clean and precise cuts while planting bulbs.
- Store in a dry place: After cleaning and drying, store the bulb planter in a dry place, away from moisture or extreme temperature fluctuations. Hanging or placing it in a tool shed, garage, or other protected areas is ideal to prevent rusting or other damage.
- Follow manufacturer's instructions: Always refer to the manufacturer's instructions for specific care requirements and recommendations for your bulb planter model. They may have additional tips or specific maintenance procedures tailored to your planter's design.
What are some signs that indicate bulbs planted with a bulb planter are healthy and thriving?
- Green and healthy foliage: One of the most obvious signs that bulbs are healthy is the presence of vibrant and lush green foliage. Healthy bulbs will produce leaves that are sturdy, upright, and not discolored.
- Strong stem growth: Bulbs that are healthy and thriving will have strong and sturdy stems that are able to support the weight of the flowers. The stems should be straight and not floppy or weak.
- Robust root system: A healthy bulb will develop a strong and extensive root system. Gently dig around the base of the plant to check for white, firm, and well-developed roots.
- Proper flowering: Healthy bulbs will produce flowers that are true to their variety, with vibrant colors, shapes, and sizes characteristic of the particular bulb plant. The flowers should also appear in the expected season or time frame.
- Multiple blooms or offsets: Bulbs that are thriving and healthy may produce multiple flowers or offsets (small bulblets), indicating that the plant is reproducing and growing well.
- Absence of pests and diseases: Healthy bulbs will be relatively free from pests and diseases. Signs of damage or infestation, such as holes, wilting, or discoloration, should be absent or minimal.
- Regular growth and progress: A healthy bulb will exhibit steady growth and progress throughout the growing season. If the plant continues to develop, with foliage, stems, and flowers appearing at the appropriate times, it is likely that the bulbs are healthy and thriving.