
Best Window Installation Kits for Outdoor Sheds to Buy in July 2026
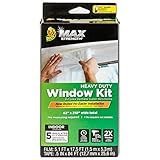
Duck MAX Strength Window Insulation Kit, Winter Window Seal Kit Fits up to 5 Windows, Heavy Duty Shrink Film Cuts to Size for Easy Indoor Installation, Window Tape Included,62 In. x 210 In., Clear
- CUT ENERGY COSTS THIS WINTER WITH OUR THICK, PUNCTURE-RESISTANT FILM!
- SIMPLE INSTALLATION: JUST SCISSORS AND A HAIR DRYER NEEDED!
- CRYSTAL CLEAR VISIBILITY-BLOCKS DRAFTS WITHOUT SACRIFICING LIGHT!


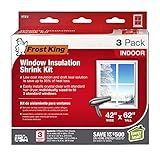
Frost King V73/3H Shrink Window Kit, Indoor, 42 x 62 in, 3 pack
- EXCEPTIONAL VALUE THAT ENHANCES YOUR EVERYDAY EXPERIENCE!
- DURABLE DESIGN ENSURES LONG-LASTING PERFORMANCE WITH EASE OF USE.
- COMPACT 8.0-INCH SIZE FITS PERFECTLY IN ANY SPACE OR SETUP!
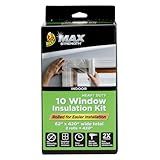
Duck MAX Strength Window Insulation Kit, Winter Window Seal Kit Fits up to 10 Windows, Heavy Duty Shrink Film Cuts to Size for Easy Indoor Installation, Window Tape Included,62 In. x 420 In., Clear
-
SAVE ON ENERGY COSTS: BLOCK DRAFTS WITH AIRTIGHT SEAL TECHNOLOGY!
-
EASY INSTALLATION: NO MEASURING; JUST CUT FILM FOR A PERFECT FIT!
-
CRYSTAL CLEAR VIEW: ENJOY CLARITY WHILE KEEPING YOUR HOME COZY!
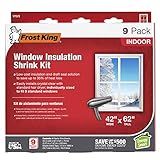
Frost King V73/9H Indoor Shrink Window Kit 42 62-Inch, Clear, 9-Pack
- HIGH DURABILITY ENSURES LONG-LASTING VALUE AND PERFORMANCE.
- USER-FRIENDLY DESIGN MAKES INSTALLATION A BREEZE FOR EVERYONE.
- EASY REAPPLICATION EVERY YEAR FOR A RELIABLE, EFFECTIVE SEAL.

Duck Brand Window Insulation Kit - Winter Seal Kit Fits up to 10 Windows - Rolled Shrink Film Cuts to Size for Easy Indoor Installation - Tape Included - 62 in. by 420 in.- Clear
- CUT ENERGY COSTS WITH AN AIRTIGHT SEAL AGAINST COLD DRAFTS!
- NO MEASURING NEEDED; EASY INSTALLATION WITH SCISSORS & HAIR DRYER!
- CRYSTAL CLEAR FILM ENSURES VISIBILITY WHILE INSULATING YOUR WINDOWS!
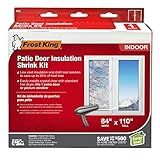
Frost King V76H Shrink Window Kit 84-Inch by 110-Inch, Clear
- EASY INSTALLATION: NO TOOLS REQUIRED FOR A QUICK, HASSLE-FREE SETUP.
- ENERGY-EFFICIENT: REDUCES DRAFTS, HELPING TO CUT HEATING COSTS.
- CRYSTAL-CLEAR VIEW: ENJOY UNOBSTRUCTED LIGHT WHILE INSULATING WINDOWS.
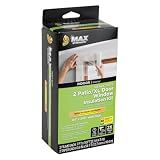
Duck MAX Strength Window Insulation Kit, Winter Window Seal Kit Fits Patio Doors & Large Windows, Heavy Duty Shrink Film Insulator, Indoor Installation, Window Tape Included, 84" x 120", Clear, 2 Pack
- SAVE ON HEATING COSTS WITH DUCK MAX STRENGTH'S AIRTIGHT SEAL.
- EASY NO-MEASURE INSTALLATION; JUST CUT TO SIZE AND APPLY!
- CRYSTAL CLEAR FILM THAT REMOVES EASILY AFTER THE SEASON ENDS.

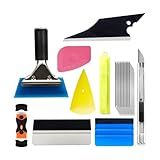
HTVRONT Window Film Kit - 4 Pcs Window Privacy Film Installation Tools, Easy to Apply Glass & Car Windows Tint Kit, Includes Felt Squeegee, Detachable Knife & 1 Extra Blade, 100ML Spray Bottle
- COMPLETE KIT: SQUEEGEE, KNIFE, AND SPRAY FOR EFFORTLESS TINTING!
- ERGONOMIC TOOLS FOR A SMOOTH INSTALLATION-NO SCRATCHES, NO FUSS!
- VERSATILE USE FOR ALL FILMS-IDEAL FOR HOME, OFFICE, OR VEHICLES!

Worldity 12 Pieces Windshield Installation Tools Kit, Included 1 Pcs Widshield Installing Tool, 1 Pcs Cotter Pin Puller and 10 Pcs Installation Setting Tool, Perfect for Installing Windshield Gasket
-
COMPLETE KIT: INCLUDES 3 ESSENTIAL TOOLS FOR EASY WINDSHIELD MAINTENANCE.
-
INNOVATIVE DESIGN: 4-CORE TOOL WITH 90° ROTATION FOR BETTER ACCESSIBILITY.
-
DURABLE BUILD: RUST-PROOF MATERIALS ENSURE LONGEVITY AND RELIABILITY.
Mandark 18PCS Car Window Tint Kit, Vehicle Glass Protective Film Wrapping Installation Set, Auto Vinyl Wrap Tinting Tools Included Squeegees, Felt Squeege, Cutting Knife with Blades
- DURABLE DESIGN: SOFT PLASTIC & STRONG METAL ENSURE LONG-LASTING USE.
- EFFICIENT APPLICATION: VERSATILE TOOLS ELIMINATE AIR BUBBLES EFFORTLESSLY.
- ALL-PURPOSE KIT: PERFECT FOR TINTING, DECALS, & VARIOUS FILM APPLICATIONS.
To install windows in an outdoor storage shed, follow these steps:
- Begin by measuring and marking the desired location for the window in your shed. Take into consideration the shed's structure and the availability of studs to attach the window frame.
- Using a hand saw or a powered circular saw, cut an opening in the shed's wall according to the measurements you made. Be cautious while cutting and ensure the opening is square and smooth.
- Install a window frame in the opening. Apply a bead of exterior caulk along the outer edge of the frame to create a weatherproof seal. Use screws or nails to secure the frame to the shed's studs for stability.
- Place the window into the frame from the inside and secure it in place according to the manufacturer's instructions. This may involve using a combination of screws, brackets, or clips. Ensure the window is level and properly sealed.
- Apply a layer of exterior-grade caulking around the edges of the window frame both inside and outside the shed. Use a caulk gun to ensure an even application and to create a weather-resistant seal.
- Install window trim around the edges of the window frame to enhance the aesthetic appeal and provide further protection against the elements. Trim can be attached using finishing nails or exterior-grade screws.
- Lastly, check the window for proper functioning, such as opening and closing smoothly. Make any necessary adjustments to ensure a secure fit.
Remember, these instructions may vary depending on the type and size of the windows you choose, so it's always important to consult the manufacturer's guidelines for precise installation steps.
How to measure for windows in a storage shed?
To measure for windows in a storage shed, follow these steps:
- Determine the placement of the windows: Decide where you want the windows to be located on your shed. Consider factors such as natural light, ventilation, and the overall design and functionality of the shed.
- Choose the window size: Select the size of the window that would fit best in the chosen location. Note that standard window sizes are available commercially, so it may be easier to choose a size that is readily available rather than custom ordering a window.
- Measure the rough opening: To install a window, you need to create a rough opening in the wall of the shed. Measure the width and height of this rough opening to ensure that it matches the size of the window you have chosen.
- Subtract the necessary clearances: To ensure a proper fit and allow for easy installation, subtract a 1/2 inch from both the width and height of the rough opening. This will provide enough clearance for shimming and leveling the window during installation.
- Measure for the window frame: If the window you have chosen has a frame, measure the width and height of the frame to determine if it will fit within the rough opening. Ensure that the frame overlaps the rough opening evenly on all sides.
- Check for level and square: Measure the diagonals of the rough opening to check for squareness. The measurements should be equal if the opening is square. Use a level to ensure that the sides of the rough opening are plumb.
- Consider additional requirements: Depending on the type of window and local building codes, you may need to factor in additional requirements such as egress requirements, energy efficiency ratings, and necessary weatherproofing or insulation measures.
Remember to double-check all measurements before ordering or purchasing windows for your storage shed to ensure accuracy and a proper fit.
What is the purpose of window trim in a storage shed?
The purpose of window trim in a storage shed is primarily to provide an aesthetic appeal and enhance the overall appearance of the shed. Window trim helps to frame the windows, improving their visual appeal by making them stand out and giving them a more finished and polished look. Additionally, window trim also serves to protect the edges and corners around the windows from moisture, rot, and other damages, increasing the lifespan and durability of the shed.
What is the best type of window glass for a storage shed?
The best type of window glass for a storage shed would depend on several factors such as the climate, security needs, and budget. Here are a few options to consider:
- Tempered Glass: Tempered glass is suitable for sheds located in areas prone to extreme temperatures, as it is more resistant to thermal stress and less likely to shatter. It also provides better security than regular glass, as it breaks into small, pebble-like pieces instead of sharp shards.
- Plexiglass/Acrylic: Plexiglass or acrylic is a lightweight, shatter-resistant alternative to traditional glass. It offers good insulation properties, is UV resistant, and requires less maintenance. However, it may scratch more easily than glass and can yellow over time with exposure to sunlight.
- Polycarbonate: Polycarbonate is a durable, impact-resistant material often used in greenhouses or sheds. It is lightweight, offers good insulation, and provides high transparency. Polycarbonate is generally more expensive than other options but provides excellent protection against impacts, weather, and UV radiation.
- Safety Glass/Laminated Glass: Safety glass, such as laminated glass, consists of two or more layers of glass bonded with an interlayer. It is designed to hold together when shattered, minimizing the risk of injury from broken glass. This type of glass provides enhanced security and is recommended for sheds in areas with high crime rates.
Consider your specific needs and consult with a local window professional who can assess the characteristics of your shed and recommend the most suitable option.
How to prepare the shed walls for window installation?
Preparing the shed walls for window installation involves several steps. Here is a step-by-step guide:
- Measure and mark the location of the window on the shed wall. Take into consideration the desired height and width of the window, as well as the distance from the floor and neighboring walls.
- Use a tape measure and level to ensure the dimensions and alignment are accurate. Double-check the measurements to avoid any errors.
- Remove any siding or cladding material from the marked area on the shed wall. This can usually be done by prying it off with a pry bar or using a reciprocating saw to cut through it. Be careful not to damage the surrounding areas.
- Cut an opening in the shed wall adhering to the marked dimensions. Use a reciprocating saw or jigsaw to carefully cut along the lines. Ensure the opening is precisely measured and even.
- Check the size and fit of the window in the opening. It should fit snugly without any gaps. Make any necessary adjustments to the opening if needed.
- Apply a layer of waterproof sealant or caulking around the perimeter of the window opening. This will help create a watertight seal between the window frame and the shed wall.
- Insert the window into the opening and use shims to adjust and level it. Ensure that the window is centered and level within the opening.
- Secure the window in place by screwing it into the shed wall. Use screws or nails recommended by the manufacturer along the window frame to hold it securely in place. Take care not to overtighten the screws or nails, as it may damage the window frame.
- Insulate the gaps and around the window frame with expanding foam insulation. This will help improve energy efficiency and prevent drafts.
- Replace any siding or cladding material that was removed earlier. Use nails or screws to secure it back into place, making sure it covers the edges of the window frame to provide a finished look.
- Seal the edges of the siding or cladding with exterior caulk to prevent water infiltration.
Following these steps will ensure that your shed walls are properly prepared for window installation, resulting in a securely installed window that enhances the functionality and aesthetics of your shed.