Best Tools to Find Pool Leaks to Buy in July 2026
Gorilla Waterproof Patch & Seal Tape, White Tape, 4" x 10' (Pack of 1) - Permanent Weather Resistant Seal for Leaks and Repairs
-
PERMANENT BOND SEALS OUT AIR, WATER, AND MOISTURE INSTANTLY!
-
VERSATILE FOR ANY REPAIR-INDOORS, OUTDOORS, AND EVEN UNDERWATER!
-
WEATHER-RESISTANT DESIGN ENDURES MOISTURE AND UV WITHOUT FADING!


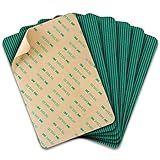
All-in-One Repair Kit for Above-Ground Pools | Fast, Underwater-Capable Peel-and-Stick OR Adhesive Glue-Down Vinyl Patches & for Easy Set and Frame Pools 2-1/2 Inch Peel and Stick
-
SELECT THE PERFECT REPAIR: QUICK PEEL-AND-STICK OR STRONG GLUE OPTIONS.
-
SAVE WATER & TIME: REPAIR LEAKS UNDERWATER-NO DRAINING NEEDED!
-
SEAMLESS & DURABLE: ACHIEVE PROFESSIONAL-QUALITY REPAIRS EASILY.
Pool Liner Repair 408517Boxer - 4 oz Vinyl Swimming Kit
- PROUDLY MADE IN THE USA FOR QUALITY ASSURANCE.
- COMPACT SIZE: PERFECT FOR EASY STORAGE AND TRAVEL.
- INNOVATIVE DESIGN OPTIMIZED FOR MAXIMUM FUNCTIONALITY.
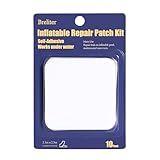
Breliter Inflatable Patch Repair Kit - Waterproof TPU Pool Repair Tape, Heavy Duty Repair Patch for Air Mattress, Bounce House, Inflatable Toys, Tent, Swimming Ring - 10 Packs of 2.5in x 2.5in, Square
-
EFFORTLESS REPAIRS: FIX LEAKS QUICKLY WITH OUR EASY-TO-USE PATCH KIT!
-
DURABLE QUALITY: PREMIUM TPU ENSURES LONG-LASTING, STRONG REPAIRS!
-
VERSATILE USE: PERFECT FOR INFLATABLES, TENTS, AND MORE-ONE KIT, MANY FIXES!
Pool Patch Repair Kit, Pool Cover Patch, 12x8 Self Adhesive Vinyl (PVH), Swimming Pool Patch Repair Kit, 6 Pack
-
HEAVY-DUTY MATERIAL: TEAR-PROOF, DUST-PROOF, AND UV-RESISTANT PATCHES.
-
OVERSIZED COVERAGE: EACH PATCH MEASURES 12X8 INCHES FOR LARGE REPAIRS.
-
SIMPLE APPLICATION: NO TOOLS NEEDED-JUST PEEL AND PRESS FOR STRONG HOLD.
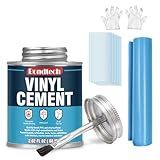
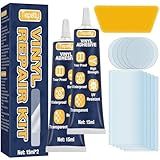
Vinyl Cement with Brush, Pool Patch Repair Kit High Strength, Watertight Seal Vinyl Glue, Flexible Bond for Inflatables, PVC, Pool Liners, Tarps, Hot Tubs, Air Mattresses (2 OZ)
-
SUPER STRONG BOND: HIGH-DENSITY FORMULA ENSURES AIRTIGHT, WATERPROOF REPAIRS.
-
VERSATILE USE: PERFECT FOR INFLATABLES, POOLS, BOATS, AND VARIOUS MATERIALS.
-
EASY APPLICATION: BRUSH HEAD ALLOWS FOR SMOOTH, UNIFORM BONDING WITH NO TOOLS.
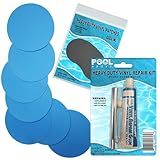
Heavy Duty Vinyl Repair Patch Kit for Above-Ground Pool Liner Repair; Glue and Patch Inflatables; Boat; Raft; Kayak; Air Beds; Inflatable Mattress Repair Blue
-
HEAVY-DUTY PATCHES FOR LONG-LASTING, RELIABLE REPAIRS.
-
WATERPROOF ADHESIVE WORKS ABOVE & BELOW WATER FOR VERSATILITY.
-
REPAIR VARIOUS INFLATABLES, SAVING MONEY ON REPLACEMENTS.
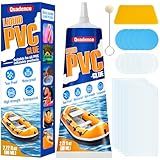
Quadence Pool Patch Repair Kit, Transparent Air Mattress Repair Kit Waterproof PVC Glue for Inflatables, Air Mattress, Hot Tubs, PVC Boat, Bounce House, Kayak, Swimming Ring | UV-Resistant Heavy Duty
-
VERSATILE USE: REPAIRS ALL PVC & INFLATABLE ITEMS FOR FUN ANYWHERE!
-
STRONG BOND: PREMIUM ADHESIVE ENSURES LASTING, LEAK-FREE REPAIRS.
-
EASY APPLICATION: QUICK, SIMPLE STEPS FOR HASSLE-FREE PATCHING!
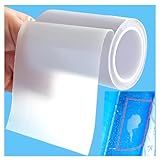
Birllaid Inflatable Patch Repair Kit Waterproof Heavy Duty, Clear TPU Repair Tape for Bounce House, Tent, Canvas, Canopy, Pool Floats, Swimming Ring
-
VERSATILE 3.15 X 7 FT ROLL REPAIRS VARIOUS INFLATABLE LEAKS EFFORTLESSLY.
-
WATERPROOF AND QUICK-SETTING-12-HOUR WAIT BEFORE RE-INFLATING!
-
IDEAL FOR SMOOTH SURFACES; KEEP ITEMS CLEAN FOR BEST RESULTS.
Vinyl Repair Kit Transparent, Air Mattress Patch Kit Heavy Duty, Pool Liner Patch Waterproof, for TPU, EVA, ABS, PVC, Inflatables, Swimming Pool, etc (15ml, 2pack)
-
DURABLE, WATERPROOF REPAIRS: ENSURES LONG-LASTING, AIRTIGHT FIXES FOR LEAKS.
-
INVISIBLE AND UV-PROOF: BLENDS SEAMLESSLY INTO SURFACES WITHOUT YELLOWING.
-
VERSATILE USE: PERFECT FOR VARIOUS MATERIALS AND INFLATABLE PRODUCTS.
Finding a leak in an above-ground pool can be a bit challenging, but with a systematic approach, you can locate and fix it. Here are the steps involved in finding an above-ground pool leak:
- Visual Inspection: First, visually inspect the pool for any obvious signs of leaks. Look for wet spots on the ground around the pool, sinking areas, or any visible cracks in the pool walls or floor. Pay attention to fittings, connections, and the pool liner as well.
- Water Loss Observation: Monitor the water level in your pool over several days. If you notice a significant drop in water level more than normal evaporation, you likely have a leak.
- Mark the Water Level: Now, mark the water level on the pool wall, either with a piece of tape or a grease pencil. This will help you determine if the water is leaking above or below the marked level during further investigations.
- Test Equipment: Turn off all pool equipment, including the pump and filter.
- Skimmer and Return Line Inspection: Check the skimmer and return lines for any visible leaks or cracks. Ensure skimmer lids are properly sealed and not allowing water to escape.
- Plug the Skimmer: Use a plug or expandable rubber stopper to temporarily seal the skimmer opening and prevent water flow. Leave it for 24 to 48 hours and observe if the water level drops below the marked line.
- Plug the Return Lines: Repeat the same process as above for the return lines. Plug them and observe the water level for any significant drops.
- Inspect the Liner: Look for tears, holes, or punctures in the pool liner. This can be done by visually inspecting the liner or using a dye test: Add a small amount of food coloring to a syringe, inject the dye close to suspected areas, and observe if the dye is drawn out of the liner. This indicates a leak in that specific area.
- Pressure Testing: If all else fails, perform a pressure test. Attach a plug or a test plug to the skimmer and return lines, then use a threaded adapter to connect a pressure tester (available at pool supply stores). Pump air into the lines at a low pressure and check for any escaping air bubbles or hissing sounds. This will help pinpoint the specific location of the leak.
Once you identify the source of the leak, you can proceed with repairing it accordingly. It could be a simple fix, such as patching a hole in the liner, tightening a connection, or using sealants.
What is the role of evaporation in pool water loss in above-ground pools?
Evaporation plays a significant role in pool water loss in above-ground pools. When the weather is warm and sunny, water molecules at the surface of the pool gain energy from the heat, which causes them to rise and transform into water vapor. This process is known as evaporation. As a result, the pool loses water in the form of vapor.
The rate of evaporation depends on various factors such as temperature, humidity, wind speed, and surface area. Higher temperatures and lower humidity levels tend to increase evaporation, while windy conditions can further enhance the evaporation rate. Additionally, larger pool surface areas provide more space for evaporation to occur, leading to increased water loss.
Since above-ground pools are typically exposed to the open air, they tend to lose more water through evaporation compared to in-ground pools. It is essential for pool owners to regularly monitor the water level and compensate for evaporation by adding water to maintain the desired pool level. During hot and dry weather conditions, the rate of evaporation may be substantial, necessitating more frequent water top-ups.
What is the impact of improper maintenance on the occurrence of leaks in above-ground pools?
Improper maintenance can have a significant impact on the occurrence of leaks in above-ground pools. Here are some specific effects:
- Deterioration: Lack of proper maintenance, such as failure to clean and treat the pool regularly, can lead to the deterioration of pool materials. This can include the liner, seams, or structural components, making them more susceptible to developing leaks.
- Chemical Imbalance: Failure to maintain the appropriate chemical balance in the pool water can result in corrosion or damage to the pool components. Excessively high or low pH levels, alkalinity, or sanitizer levels can lead to degradation of the pool's containment system, causing leaks.
- Liner Damage: The pool liner acts as a barrier against water seepage, but if it is not maintained properly, it can develop tears, punctures, or other damages. This can happen due to improper handling, sharp objects, or neglecting regular inspections. Damaged liners can lead to leaks in the pool.
- Malfunctioning Equipment: Incorrect or inadequate maintenance of pool equipment, such as malfunctioning pumps, filters, or valves, can contribute to leaks. These leaks can occur due to broken seals, loose connections, or worn-out parts, resulting in water leakage from the pool.
- Freeze-Thaw Cycles: In colder climates, improper winterization or neglecting to drain the pool before freezing temperatures can cause water to freeze and expand inside the pool. This expansion can lead to cracks in the pool's structure or plumbing, creating leaks once the ice melts.
- Negligence in Repairs: If pool owners do not promptly address minor issues or leaks discovered during regular maintenance, those problems can escalate and worsen over time. Failure to fix small leaks can often result in larger, more expensive repairs or even total pool failure.
Overall, the impact of improper maintenance on the occurrence of leaks in above-ground pools is significant. Regular cleaning, water treatment, equipment inspection, and prompt repairs are vital to ensure the longevity and leak-free operation of an above-ground pool.
How to determine if there's a leak in an above-ground pool?
To determine if there is a leak in an above-ground pool, you can follow these steps:
- Monitor the water level: Check the water level over a period of a few days. If you notice a consistent drop in water level, there is likely a leak.
- Conduct a visual inspection: Inspect the pool walls, floor, and fittings for any visible cracks, tears, or damaged areas. Look for dampness or wet spots around the pool or equipment.
- Inspect the equipment: Check the pool pump, filter, and plumbing for any signs of moisture or water leakage. Pay attention to fittings, valves, and connections.
- Use a dye test: Add a few drops of food coloring to the suspected leak area. If the dye gets pulled into the crack or damaged area, it indicates a leak.
- Perform a bucket test: Fill a bucket with water to match the pool water level and place it on the pool steps or another pool ledge. Mark the water level inside the bucket and on the outside. After 24 hours, compare the water levels inside and outside the bucket. If the pool level has dropped significantly more than the bucket, there might be a leak.
- Check the plumbing: Inspect the plumbing system, including pipes, joints, and valves, for any signs of leakage. A high water bill or an audible sound of running water when the pool equipment is off may also indicate a plumbing leak.
- Supervise the pool when not in use: If you suspect a leak but are unsure of its origin, closely monitor the pool for a few days when it is not in use. This may help identify the exact location of the leak.
If you determine that you have a leak, it is recommended to contact a pool professional or a pool leak detection service to accurately locate and fix the leak.
What is the recommended way to inspect the pool ladder for leaks in an above-ground pool?
To inspect the pool ladder for leaks in an above-ground pool, you can follow these steps:
- Ensure safety: Before inspecting the ladder, make sure the pool is empty and completely dry. This prevents any accidents or injuries.
- Remove the ladder: Carefully detach the ladder from the pool, following the manufacturer's instructions. This usually involves removing screws, bolts, or pins that hold the ladder in place.
- Clean and dry the ladder: Thoroughly clean the ladder using a mild detergent and water to remove any dirt, grime, or debris. Rinse it well and make sure it is completely dry before proceeding.
- Fill with water: Once the ladder is dry, turn it upside down and fill it with water. Ensure that the ladder is properly supported to prevent any damage or further leaks.
- Observe for leaks: Carefully watch for any water drips or leaks coming from the ladder. Look out for small holes, cracks, or loose joints where water may escape. Inspect all parts of the ladder, such as steps, handles, and connectors.
- Repair or replace: If you notice any leaks or damages, it is recommended to repair or replace the affected parts. Small cracks or holes can be patched using appropriate adhesive or sealant designed for pool equipment. For significant damages or if the ladder is old, it might be wise to replace it entirely.
- Reinstall the ladder: Once you have inspected and repaired any leaks, reinstall the ladder following the manufacturer's instructions. Ensure it is securely fastened and stable before using it again.
Regularly inspecting and maintaining your pool ladder is crucial for safety and longevity. Following these steps can help you identify and address any leaks, ensuring a safe and enjoyable swimming experience.