Best Air Mattress Repair Kits to Buy in July 2026
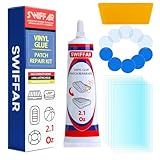
Breliter Inflatable Patch Repair Kit - Waterproof TPU Pool Repair Tape, Heavy Duty Repair Patch for Air Mattress, Bounce House, Inflatable Toys, Tent, Swimming Ring - 10 Packs of 2.5in x 2.5in, Square
- SAVE TIME AND MONEY WITH OUR STRONG, WATERPROOF REPAIR PATCH KIT!
- MADE FROM PREMIUM TPU FOR UNMATCHED FLEXIBILITY AND DURABILITY.
- EASY APPLICATION-CLEAN, STICK, AND SECURE FOR INSTANT REPAIRS!


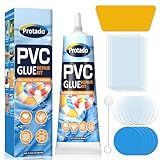
Air Mattress Patch Kit, Heavy Duty Inflatable Patch Repair Kit, Safe, Gentle, and All-in-One Vinyl PVC Glue for Blow Up Bed, Above Pool, Underwater Liners, Bounce House, Hot Tub and More
- STRONG, LASTING SEAL FOR LEAK-FREE AIR MATTRESSES
- INCREDIBLE ADHESION: STAYS FIRM, NO PEELING
- WATERPROOF & HEAT-RESISTANT FOR ULTIMATE DURABILITY
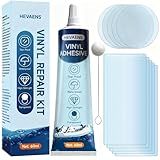
Yeardera Air Mattress Patch Kit, Waterproof Vinyl Repair Kit, High Strength PVC Adhesive for Inflatables, PVC Boats, Vinyl Glue (60ml/1 Pack)
-
DURABLE & WATERPROOF: RELIABLE PATCH FOR LASTING AIR-TIGHT REPAIRS.
-
WIDE COMPATIBILITY: FIX PVC, RUBBER, & MORE-PERFECT FOR ALL INFLATABLES!
-
USER-FRIENDLY: SIMPLE APPLICATION; NO PROFESSIONAL SKILLS REQUIRED!
Air Mattress Patch Kit, Heavy Duty Underwater Pool Liner Patch Kit, Effective Vinyl Glue for Above Ground Pool, Paddle Board, Float, PVC Boat, Raft, Air Bed, Bounce House, Hot Tub, Gentle Formula
- STRONG, SEAMLESS REPAIRS FOR ALL INFLATABLE TYPES!
- NO-SLIP, NO-PEELING ADHESION THAT LASTS!
- QUICK DRYING FOR INSTANT FUN-REPAIRS IN JUST ONE HOUR!
PVC Stitch Liquid Patch – Air Mattress Patch Kit Heavy Duty, Inflatable Patch Glue for PVC & PU, Inflatable Boats, Rafts, Kayaks, SUP, Hot Tubs, Waterbeds, Bounce Houses. Waterproof, 3-hr Cure, 20 ml
- INSTANT REPAIR: CURES IN JUST 2 HOURS, MAX STRENGTH IN 6 HOURS!
- VERSATILE USE: IDEAL FOR AIR MATTRESSES, POOLS, BOATS, & MORE!
- STRONG ADHESION: WATER AND UV RESISTANT FOR LASTING DURABILITY.
PVC Stitch Heavy Duty Repair Kit for Air Mattresses, Waterbeds, Hot Tubs, Above-Ground Pools, Bouncy Houses, Air Mats, PVC Pipes & Hoses, Punching Bags, and Much More (+ Reinforcing Mesh Cord)
-
PERMANENT PATCHES FOR AIR MATTRESSES AND POOL LINERS, NO MESS!
-
FAST REPAIR: READY TO USE IN JUST 2-3 HOURS AFTER APPLICATION!
-
DURABLE, WATER AND UV RESISTANT FOR OUTDOOR GEAR AND INFLATABLES!
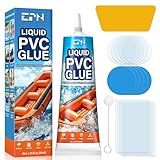
EPN Air Mattress Patch Kit, Waterproof Vinyl Pool Liner Repair Kit for Inflatables, Air Mattress, Swimming Ring, Tent, Bounce House, Inflatable Toys, Hot Tub, PVC Boat, Raft, Kayak (80 ML)
-
RELIABLE FIX FOR ALL INFLATABLE DAMAGE – WATERPROOF & AIRTIGHT!
-
VERSATILE FOR VARIOUS MATERIALS – PERFECT FOR MULTIPLE APPLICATIONS!
-
EASY APPLICATION PROCESS – QUICK REPAIRS, LASTING RESULTS!
Air Mattress Patch Kit, Heavy Duty Waterproof Vinyl Repair Patch Kit, 80 ML Inflatable Patch Repair Kit for Air Mattresses, Swimming Pools, Hot Tubs, PVC Boats, Tent, Kayaks, Inflatable Toys
-
RELIABLE, LONG-LASTING BOND SEALS PUNCTURES AND TEARS EFFECTIVELY.
-
WATERPROOF AND FLEXIBLE, IDEAL FOR INDOOR AND OUTDOOR REPAIRS!
-
EASY APPLICATION-NO TOOLS NEEDED FOR QUICK, DURABLE FIXES!
Air Mattress Patch Kit, Heavy Duty Inflatable Repair Kit for Air Mattress, Bounce House, Inflatable Toys, PVC Boat, Tent, Swimming Ring, UV- Resistant Waterproof TPU Pool Repair Glue, Heavy Duty
- FLAWLESS REPAIRS: STRONG, LASTING FIXES FOR ALL AIR MATTRESS PUNCTURES.
- WATERPROOF & DURABLE: WORKS UNDERWATER; FLEXIBLE, UV-RESISTANT PATCHES.
- EASY USE & VERSATILE: QUICK APPLICATION FOR ALL PVC REPAIRS, NO SKILLS NEEDED.
To repair an air mattress seam leak, you will need a few supplies such as a patch kit, scissors, and rubbing alcohol. Begin by locating the leak using a mixture of soap and water to create bubbles at the leak site. Once the leak is found, clean the area with rubbing alcohol and allow it to dry completely. Cut a patch from the patch kit, making sure it is slightly larger than the leak. Apply the adhesive included in the patch kit to the patch and place it over the leak, pressing down firmly. Allow the patch to dry for the recommended amount of time before inflating the air mattress to check for any additional leaks. Repeat the process if necessary until the seam leak is completely sealed.
What is the most common cause of seam leaks on air mattresses?
The most common cause of seam leaks on air mattresses is wear and tear over time, causing the seams to weaken and eventually crack or split. This can be exacerbated by over-inflating the mattress, frequent folding or bending, or sharp objects puncturing the surface.
What materials do you need to repair an air mattress seam leak?
To repair an air mattress seam leak, you will need the following materials:
- Patch kit specifically designed for air mattresses
- Rubbing alcohol
- Clean cloth or cotton ball
- Sandpaper or an abrasive pad
- Permanent marker
- A pair of scissors
- Optional: PVC or vinyl adhesive, and a brush or applicator for the adhesive
Make sure to carefully read the instructions on the patch kit before starting the repair process.
How to apply the adhesive to the patch and the seam for a secure repair?
- Start by cleaning the area around the patch and the seam with soap and water to remove any dirt, grease, or debris. Allow it to dry completely before proceeding.
- Apply a thin layer of adhesive to the back of the patch using a brush or applicator. Make sure to spread the adhesive evenly over the entire surface of the patch.
- Press the patch firmly onto the damaged area, making sure it is positioned correctly and securely in place.
- Apply a thin layer of adhesive along the seam where the patch meets the surface, ensuring that the adhesive fills any gaps or crevices.
- Press the seam together firmly to ensure a tight bond between the patch and the surface.
- Allow the adhesive to dry and cure according to the manufacturer's instructions before using the repaired item.
- For extra security, you can apply a second layer of adhesive over the patch and seam once the first layer has dried completely.
- Allow the second layer of adhesive to dry and cure before using the repaired item.
What is the best way to transport an air mattress without risking seam damage?
The best way to transport an air mattress without risking seam damage is to first ensure it is properly deflated before packing it up. This will prevent unnecessary strain on the seams and reduce the risk of them tearing or bursting during transport.
Once deflated, roll up the air mattress tightly and secure it with straps or twine to keep it compact. Place it in a durable carrying bag or storage container to protect it from any sharp objects or rough surfaces that could cause damage to the seams.
When loading the air mattress into a vehicle, make sure it is secured properly to prevent it from shifting or getting crushed during travel. Avoid placing heavy items on top of the mattress and be mindful of any sharp edges that could puncture the seams.
By taking these precautions and handling the air mattress with care, you can safely transport it without risking seam damage.
How to determine if a seam leak on an air mattress is covered under warranty?
- Read the warranty information provided with the air mattress: The first step is to read the warranty information that came with the air mattress. Look for any specific language regarding coverage for seam leaks and what is considered a defect.
- Contact the manufacturer: If you are unsure whether a seam leak is covered under warranty, contact the manufacturer directly. They will be able to provide you with information on what is covered and how to file a claim.
- Provide evidence of the seam leak: Take photos or videos of the seam leak to show the manufacturer as evidence of the issue. This will help them assess whether the seam leak is covered under warranty.
- Check the warranty coverage period: Check the length of the warranty coverage period to see if the seam leak falls within that timeframe. Some warranties may only cover defects for a limited time after purchase.
- Review the warranty terms and conditions: Carefully review the terms and conditions of the warranty to see if seam leaks are specifically mentioned as a covered issue. If they are not, it is less likely that the seam leak will be covered under warranty.
- File a warranty claim: If you believe the seam leak is covered under warranty, file a claim with the manufacturer according to their specific process. Be prepared to provide proof of purchase, photos of the seam leak, and any other information requested by the manufacturer.
- Follow up with the manufacturer: After filing a warranty claim, follow up with the manufacturer to track the progress of your claim and ensure that the issue is being addressed in a timely manner.
How to prepare the area around the seam for repair?
- Clean the area: Start by cleaning the area around the seam using a mild detergent and water. Remove any dirt, debris, and grease that may be present on the surface.
- Sand the area: Use sandpaper to gently sand the area around the seam. This will help roughen up the surface, allowing the repair material to adhere better.
- Apply a primer: Use a primer that is suitable for the material you are working with to prime the area around the seam. This will help improve adhesion and ensure a stronger bond with the repair material.
- Mask off the surrounding area: Use painter's tape to mask off the area around the seam that you do not want to be covered with repair material. This will help keep the repair neat and prevent any accidental spills or splatters.
- Allow the area to dry: Before applying the repair material, make sure the area is completely dry. This will ensure proper adhesion and a durable repair.
By following these steps, you can properly prepare the area around the seam for repair and ensure a successful and long-lasting fix.