
Best Tools to Clean Leaf Blower Carburetors to Buy in July 2026
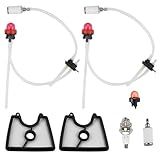
Hettluo 581798001 Fuel Line 581798001 Air Filter Kit for Husqvarna 125B Fuel Line Kit 125 B 125BX 125BVX Handheld Leaf Blower with Fuel Filter Grommet Primer Bulb Spark Plug
-
COMPREHENSIVE COMPATIBILITY: FITS VARIOUS HUSQVARNA & JONSERED MODELS.
-
COMPLETE MAINTENANCE KIT: INCLUDES FUEL LINES, SPARK PLUG, & AIR FILTERS.
-
BOOST PERFORMANCE: ENHANCES OPERATION FOR OPTIMUM BLOWER EFFICIENCY.


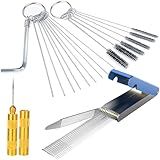
lasuroa Carburetor Cleaning Kit, Torch Tip Cleaner Set 13 Cleaning Wires Set 8 Nylon Brushes 10 Needles 1 Sharp Pick Carb Cleaner Tools for Lawnmower Motorcycle ATV Chainsaw Spray Guns
-
COMPLETE KIT: INCLUDES 30+ TOOLS FOR THOROUGH, EFFICIENT CLEANING.
-
DURABLE MATERIALS: LONG-LASTING BRUSHES DESIGNED FOR TOUGH CLEANING TASKS.
-
COMPACT & PORTABLE: EASY TO STORE AND CARRY FOR ON-THE-GO MAINTENANCE.
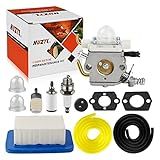
Huztl C1M-K77 Carburetor for Echo PB403H PB403T PB413H PB413T Leaf Blower Replace A021000893 A021000894 A021000773 with Air Filter Tune Up Kit
- DIRECT REPLACEMENT FOR MULTIPLE ECHO MODELS-SEAMLESS COMPATIBILITY.
- COMPREHENSIVE PACKAGE: EVERYTHING YOU NEED FOR A HASSLE-FREE INSTALL.
- HIGH-QUALITY PARTS BACKED BY PROFESSIONAL SERVICE-SHOP WITH CONFIDENCE.
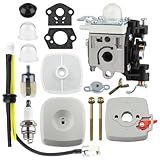
REMEDART 531147180 Carburetor Fits for Husqvarna 150BT (2022-Present) 150BT Mark II 345BT Backpack Leaf Blower Carb with air filter spark plug tune-up kit
- COMPLETE KIT: INCLUDES CARBURETOR, FILTERS, SPARK PLUG, AND MORE.
- FITS MULTIPLE MODELS: COMPATIBLE WITH VARIOUS HUSQVARNA LEAF BLOWERS.
- CUSTOMER SUPPORT: ENJOY TIMELY PRE-SALES AND AFTER-SALES ASSISTANCE.
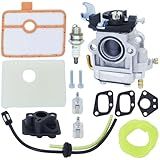
HUSWELL PB-250 PB-250LN Carburetor Air Filter Cover for Echo RB-K106 PB250 ES-250 Leaf Blower PB 250LN Tune UP Kit Parts 165 Mph and 391 Cfm A021003661 Carburetor Fuel Line kit Spark Plug
- COMPATIBLE WITH ECHO PB-250LN & PB-250; CHECK SHAPE BEFORE BUYING!
- COMPLETE TUNE-UP KIT: CARBURETOR, AIR FILTER, FUEL LINE & MORE!
- BOOST PERFORMANCE: 165 MPH SPEED & 391 CFM AIRFLOW FOR LEAF BLOWERS!
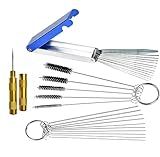
Wroskay Carburetor Cleaning Kit, Premium Gun Jet Cleaner, Stainless Steel 13 Clean Line Set, 9 Cleaning Needles, 6 Nylon Brushes, 1 Pointed Picks,1 Throttle Wrench
- ONE-STOP KIT: EFFORTLESSLY TACKLE ALL YOUR CLEANING NEEDS!
- DURABLE MATERIALS: RUST-PROOF TOOLS ENSURE LONG-LASTING PERFORMANCE.
- PORTABLE DESIGN: CONVENIENT FOR HOME WORKSHOPS AND ON-THE-GO REPAIRS.
LImeiy Carburetor Carbon Dirt Jet Remove Cleaner, 13 Cleaning Wires Set + 10 Cleaning Needles + 5 Nylon Brushes + 1 Sharp Pick Tool Kit for Motorcycle ATV Moped Welder Carb Chainsaw Spray Guns Torch
-
EFFORTLESSLY CLEAN TIGHT SPACES WITH VERSATILE NYLON BRUSHES & NEEDLES.
-
DURABLE, FLEXIBLE TOOLS REACH DIRT IN HARD-TO-CLEAN CORNERS EASILY.
-
MULTIPLE DIAMETERS TACKLE A VARIETY OF CLEANING TASKS FOR ANY DEVICE.
Husqvarna 585605001 Urethane Carburetor Air Filter Craftsman AYP Leaf Blowers
Cleaning a clogged leaf blower carburetor is a straightforward process and can be done with the following steps:
- Safety first: Before starting any maintenance, ensure that the leaf blower is turned off, and disconnect the spark plug wire to prevent accidental starting.
- Remove the air filter: Locate and remove the air filter cover, usually secured with screws or clips, depending on the model. Take out the air filter and set it aside.
- Unbolt and disconnect the carburetor: Locate the carburetor, usually attached to the engine with bolts. Carefully unbolt and disconnect any connections, such as linkages and fuel lines, from the carburetor. Keep track of all the pieces you remove to reassemble later.
- Disassemble the carburetor: Carefully disassemble the carburetor into its individual components. Most carburetors have a cover that can be removed using a screwdriver. Pay close attention to the order and orientation of the components as you take them apart.
- Clean the carburetor body: Using a carburetor cleaner, spray the inside and outside of the carburetor body to remove any clogs or debris. Use a small brush to scrub away stubborn deposits. Ensure that all the passages and jets are thoroughly cleaned.
- Clean small carburetor components: Use the carburetor cleaner and a brush to clean the float needle, fuel inlet needle, and other small components. Be gentle to avoid damaging any delicate parts.
- Clean the pilot and main jets: Use a spray cleaner and compressed air to clean the pilot and main jets, ensuring they are clear and free from any blockages.
- Reassembly: Once all the components are clean and dry, carefully reassemble the carburetor in the reverse order. Be mindful of how each part fits together and reconnect any linkages or fuel lines.
- Reinstall the carburetor: Attach the carburetor back onto the engine, ensuring all the connections are secure. Tighten the bolts firmly but not excessively, being careful not to strip the threads.
- Reinstall the air filter: Put the air filter back into place and secure the air filter cover with screws or clips.
- Reconnect the spark plug wire: Once everything is reassembled, make sure the spark plug wire is properly connected to the spark plug.
- Test the leaf blower: Start the leaf blower and allow it to run for a few minutes to ensure it is working properly. If there are any issues, double-check the carburetor assembly for any mistakes.
Cleaning a clogged leaf blower carburetor can significantly improve its performance and efficiency. Regular maintenance, including carburetor cleaning, will help keep your leaf blower running smoothly.
How to clean the fuel inlet in a leaf blower carburetor?
Cleaning the fuel inlet in a leaf blower carburetor is relatively simple and can be done using the following steps:
- Safety first: Ensure that the leaf blower is turned off and cool before starting any cleaning procedures. Disconnect the spark plug wire to prevent accidental engine startup.
- Remove the air filter cover and air filter: The fuel inlet is usually located near the air filter area. Remove the cover and the air filter to access the carburetor.
- Locate the fuel inlet: The fuel inlet is a small metal or plastic tube where the fuel line connects to the carburetor. It may have a small filter screen inside.
- Remove the fuel line: Carefully detach the fuel line from the fuel inlet. Depending on the type of connection, you may need to use pliers or a screwdriver to disconnect it.
- Clean the fuel inlet: Once the line is disconnected, inspect the fuel inlet for any signs of debris, dirt, or clogs. Use a can of compressed air or a small brush to clean the area thoroughly. Take care not to damage any delicate parts.
- Check the fuel filter: Some carburetors have a small filter screen inside the fuel inlet. If your leaf blower has one, gently remove it and clean it with a soft brush or by rinsing it with fuel or carburetor cleaner. Replace the filter if it is damaged or heavily clogged.
- Reassemble the fuel inlet: Once the fuel inlet and fuel filter are clean and dry, reassemble them into the carburetor. Make sure the fuel line is securely reconnected.
- Replace the air filter and air filter cover: Put the air filter back in its housing and replace the cover.
- Reconnect the spark plug wire: Before using the leaf blower again, reconnect the spark plug wire.
- Start the leaf blower and test: Start the leaf blower and let it run for a few minutes to ensure that the fuel inlet is functioning properly and that there are no leaks. If everything seems normal, you have successfully cleaned the fuel inlet.
Note: If you are not comfortable performing these steps yourself or if you are unsure, it is always best to consult the manufacturer’s instructions or take the leaf blower to a professional for servicing.
How to ensure proper reassembly of a cleaned leaf blower carburetor?
To ensure proper reassembly of a cleaned leaf blower carburetor, follow these steps:
- Gather all the necessary tools: a clean, well-lit workspace, a carburetor rebuild kit (if available), a small container for holding screws and small parts, and a service manual or diagram specific to your leaf blower model.
- Refer to the service manual or diagram to understand the correct order of reassembly and identify the individual components of the carburetor.
- Carefully clean all the carburetor parts with carburetor cleaner, ensuring that all dirt, debris, and old gasket remnants are removed. Take note of any o-rings or gaskets that may need replacing.
- Inspect all the parts for damage or wear and replace any worn-out or damaged parts as necessary. If you have a carburetor rebuild kit, replace all the necessary components according to the instructions provided.
- Begin reassembly by placing the gaskets and o-rings in their respective positions, ensuring they fit snugly.
- Reinstall the needle, seat, and float assembly followed by the main jet, emulsion tube, and other small components. Use a small amount of oil or grease on the parts if needed to aid in installation.
- Carefully place the diaphragm and slide back into their positions, ensuring they fit properly.
- Reattach the carburetor body to the main engine assembly, aligning the mounting holes correctly.
- Fasten all the screws and bolts according to the specific torque specifications mentioned in the service manual. Ensure that all screws and bolts are properly tightened, but be cautious not to overtighten and risk damaging the threads.
- Reconnect all the fuel lines and fuel filter to their respective ports, ensuring a proper seal.
- Double-check all the connections and make sure no loose parts are left unsecured.
- Finally, test the reassembled carburetor by starting the leaf blower and checking for proper fuel flow, smooth throttle response, and correct idle settings.
Following these steps should help ensure a proper reassembly of a cleaned leaf blower carburetor. However, it's always recommended to consult the specific service manual or diagram for your leaf blower model to ensure correct and accurate reassembly.
How to properly soak the carburetor parts in a cleaning solution?
When soaking carburetor parts in a cleaning solution, it's important to follow these steps to ensure proper cleaning:
- Safety first: Wear protective gloves and eye protection to avoid coming into direct contact with the cleaning solution and any contaminants on the parts.
- Disassemble the carburetor: Take the carburetor apart, removing all removable parts like jets, float bowls, needle valves, and gaskets. Remember to keep track of the order and location of each part for easy reassembly later.
- Prepare the cleaning solution: Fill a container with a suitable carburetor cleaning solution. You can purchase carburetor cleaner from an auto parts store, or make your own by mixing equal parts of hot water and a carburetor cleaning agent like Simple Green or Pine-Sol.
- Submerge the parts: Place the carburetor parts into the cleaning solution, ensuring complete submersion. Make sure all surfaces are immersed, including small passages and orifices. If necessary, use a wire or soft bristle brush to agitate or scrub the parts gently.
Note: Avoid soaking any rubber or plastic components (like gaskets or o-rings) in the cleaning solution, as it may damage them. Clean these parts separately using a mild detergent and water.
- Let it soak: Allow the parts to soak in the cleaning solution for at least 30 minutes or as recommended by the cleaning agent manufacturer. This will help dissolve and loosen any dirt, grime, or varnish buildup.
- Rinse thoroughly: After soaking, remove the parts from the cleaning solution and rinse them thoroughly with water to remove any remaining cleaner residue. Use a brush or compressed air to clean out any stubborn debris from small passages or jets.
- Dry the parts: Once rinsed, dry the carburetor parts completely using compressed air or by allowing them to air dry. Make sure there is no moisture left, as it could lead to corrosion or other damage.
- Reassemble the carburetor: Once the parts are dry, carefully reassemble the carburetor, ensuring all components are properly aligned and tightened. Consider replacing any worn-out or damaged gaskets or seals during reassembly.
By following these steps, you can effectively clean the carburetor parts and improve the overall performance of your carburetor.
How to adjust the carburetor after cleaning it in a leaf blower?
Adjusting the carburetor after cleaning it in a leaf blower may require a series of specific steps. Here's a general guide to help you with the process:
- Start by locating the carburetor on your leaf blower. It is typically found near the engine, and it will have adjustment screws labeled “L,” “H,” and “T” or “T” and “LA.”
- Before making any adjustments, ensure that the air filter and spark plug are clean and in good condition.
- Turn the “L” and “H” screws clockwise until they are fully closed. However, make sure not to overtighten the screws to prevent damage to the carburetor.
- Start the leaf blower engine and let it warm up for a few minutes.
- Once the engine has warmed up, adjust the idle speed screw (T) by turning it slowly in either direction. Ideally, the engine should run smoothly without stalling or racing.
- Once you've set the idle speed, it's time to adjust the fuel mixture screws. Start by turning the “L” (low speed) screw clockwise until it's lightly seated, then turn it counterclockwise about 1 to 1.5 turns.
- Next, adjust the “H” (high speed) screw. Turn it clockwise until it is lightly seated, then turn it counterclockwise about 1 to 1.5 turns.
- With the leaf blower running at full throttle, fine-tune the fuel mixture screws by turning the “L” screw counterclockwise until the engine sounds smooth and doesn't bog down. If the engine starts to sound rough, turn the screw clockwise until it smooths out again.
- While still running at full throttle, fine-tune the “H” screw. Turn it counterclockwise until the engine sounds smooth and produces maximum power without any hesitation or four-stroking (sputtering). If it begins to bog down or runs lean, turn the screw slightly clockwise.
- Repeat the fine-tuning process by alternating between “L” and “H” screws, gradually adjusting them until you achieve the optimum performance of your leaf blower.
It's important to note that different carburetor models and leaf blowers may have slightly different adjustment requirements. Therefore, referring to the manufacturer's instruction manual specific to your leaf blower model is highly recommended.