Best Fire Pits with Seating Walls to Buy in July 2026
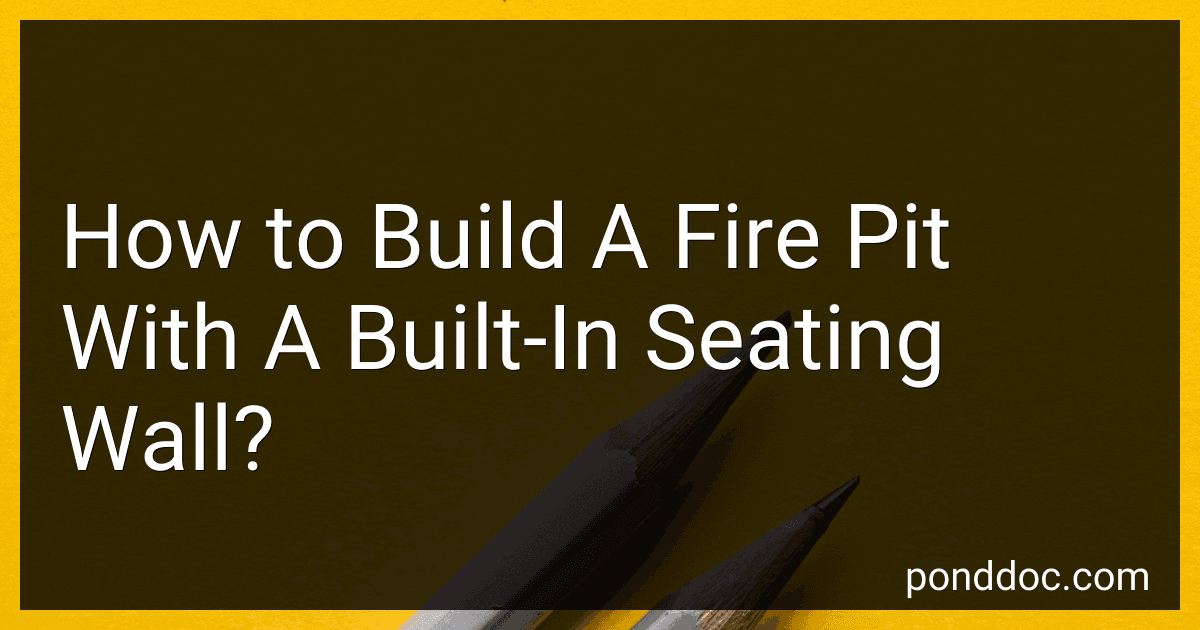
SoulMate Outdoor 40-Inch Outer/36-Inch Inner Fire Pit Ring Smokeless,Duty Solid Metal Steel Round Firepit Rim Insert for DIY Fire Pits, Outdoor Above or In-Ground, Camping Garden Patio Backyard.
- QUICK ASSEMBLY: INSTALL IN MINUTES FOR MORE TIME ENJOYING THE FIRE!
- ENHANCED AIRFLOW: TOP VENTILATION BOOSTS COMBUSTION AND REDUCES SMOKE.
- VERSATILE USE: PERFECT FOR GATHERINGS, CAMPING, AND BACKYARD BARBECUES!


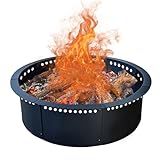
GRISUN Drop-in Fire Pit Kit 36 x 12 Inch, H-Shape Burner with Pan, Comes with Upgraded Spark Ignition Kit for Gas Fire Pit, Fire Pit Table Insert Stainless Steel for Indoor Outdoor Decoration
-
COMPLETE DIY KIT: EVERYTHING YOU NEED IN ONE PACKAGE FOR EASY SETUP!
-
SAFETY CERTIFIED: ANSI/CSA CERTIFIED FOR RELIABLE OPERATION AND PEACE OF MIND.
-
DURABLE DESIGN: CRAFTED FROM 304 STAINLESS STEEL FOR LONG-LASTING PERFORMANCE.
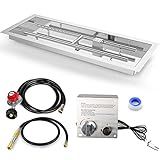
VEVOR 36 x 12 inch Drop-in Fire Pit Pan, Rectangular Stainless Steel Fire Pit Burner Kit, Propane Fire Pan 150,000 BTU with H-Burner for Indoor or Outdoor Use
-
ALL-IN-ONE SET: INCLUDES EVERYTHING NEEDED FOR SAFE, INSTANT USE!
-
DURABLE DESIGN: CRAFTED FROM RUST-PROOF STAINLESS STEEL FOR LASTING BEAUTY.
-
VERSATILE SIZES: CHOOSE FROM 24, 30, OR 36 FOR ANY SPACE!

10 Pcs Marshmallow Roasting Sticks for Fire Pit Long 32Inch, Smores Sticks Skewers, Smores Kit for Fire Pit, Premium Telescoping Hot Dog Roasting Sticks for Campfire Accessories Outside Camping VOPTON
-
PREMIUM SAFETY DESIGN: QUALITY STAINLESS STEEL AND HEAT-RESISTANT HANDLE.
-
FUN COLORS FOR KIDS: 10 VIBRANT ROASTING STICKS MAKE IT EXCITING!
-
EASY STORAGE & CLEAN-UP: TELESCOPING DESIGN WITH A CARRY BAG INCLUDED.
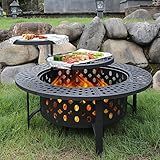
OutVue 36 Inch Fire Pit with 2 Grills, Wood Burning Fire Pits for Outside with Lid, Poker and Round Waterproof Cover, BBQ& Outdoor Firepit & Round Metal Table 3 in 1 for Patio, Picnic, Party
- 3-IN-1 DESIGN: FIRE PIT, BBQ GRILL, AND DINING TABLE FOR VERSATILITY.
- EASY SETUP: ASSEMBLY IN JUST 20 MINUTES FOR INSTANT ENJOYMENT.
- SAFE & DURABLE: BUILT TO LAST WITH RUST RESISTANCE AND SPARK GUARDS.
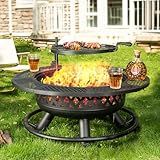
Panovue 36 Inch Fire Pit with Grill,Wood Burning Fire Pits for Outside with Lid& Fire Poker,Round Metal Firepit Table 3 in 1 with Cooking Grate,Outdoor Firepits for Yard Patio Bonfire Camping(Black)
-
MODERN ELEGANCE: ENJOY A STYLISH 360° VIEW WITH A SLEEK DESIGN.
-
VERSATILE 3-IN-1: TRANSFORMS FROM FIRE PIT TO GRILL TO STYLISH TABLE.
-
SAFETY FIRST: DURABLE WITH SPARK GUARD AND STABLE LEGS FOR PEACE OF MIND.
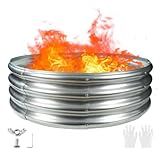
3FT Diameter Camp Fire Ring Pit, Large Round Galvanized Steel Fire Pit, Heavy Duty Steel Fire Pit Silver for Backyard, Camping, Bonfire (3x3x1FT)
- DURABLE GALVANIZED STEEL WITHSTANDS ALL WEATHER FOR LASTING USE.
- RUST-RESISTANT ZINC COATING ENSURES LONG-TERM PROTECTION AND BEAUTY.
- SAFE AND STURDY DESIGN PREVENTS FIRE SPREAD FOR WORRY-FREE GATHERINGS.

MalloMe Smores Sticks for Fire Pit Long - Marshmallow Roasting Sticks Smores Kit - Smore Skewers Hot Dog Fork Campfire Cooking Equipment, Camping Essentials S'mores Gear Outdoor Accessories 32" 5 Pack
-
DURABLE & SAFE: NON-TOXIC STAINLESS STEEL WITH SMOOTH WOODEN HANDLES!
-
ULTIMATE S'MORES EXPERIENCE: PERFECT PRONG DESIGN FOR MAX CONTROL!
-
FAMILY FUN: SAFE, COLORFUL FORKS KEEP KIDS 32 INCHES FROM FLAMES!
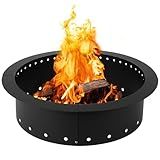
Iron Forge Tools Smokeless Firepit - 36 inch Outer/30 inch Inner Round Fire Ring Insert Liner - Heavy Duty Metal Permanent Outdoor Fire Pit Ring (36x30x10) Utility Patent Pending
-
PREMIUM CRAFTSMANSHIP FOR LONG-LASTING DURABILITY AND STYLE.
-
SMOKELESS DESIGN ENSURES A CLEANER, MORE ENJOYABLE EXPERIENCE.
-
EASY INSTALLATION FOR A STUNNING, PERMANENT OUTDOOR FEATURE.
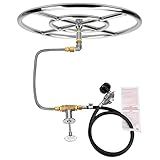
Stanbroil LP Propane Gas Fire Pit Stainless Steel Burner Ring Installation Kit, 18-inch
-
DURABLE 304# STAINLESS STEEL FOR LONG-LASTING PERFORMANCE!
-
STYLISH CROSS-BAR DESIGN ENHANCES FIRE PIT AESTHETICS!
-
COMPLETE INSTALLATION KIT INCLUDED FOR HASSLE-FREE SETUP!
To build a fire pit with a built-in seating wall, you will need to follow a few steps:
- Choose the location: Determine where you want to install the fire pit and seating wall. Ensure that it is a safe distance from any nearby structures or flammable materials.
- Gather the required materials: For the fire pit, you will need fire bricks or concrete blocks, adhesive or mortar, a steel fire ring, and a grate. For the seating wall, you will need concrete blocks, adhesive or mortar, crushed stone or gravel, and capstones for the top.
- Prepare the area: Clear away any debris, grass, or plants from the chosen location. Make sure the area is level and lay a foundation of crushed stone or gravel to provide stability to the fire pit and seating wall.
- Build the seating wall: Begin by laying the first course of concrete blocks on the prepared foundation. Apply adhesive or mortar between each block to create a sturdy bond. Place subsequent rows of blocks, staggered, and secure them with adhesive or mortar. Leave gaps every few feet for drainage. Build the wall to your desired height.
- Construct the fire pit: Lay a steel fire ring inside the seating wall where you want the fire pit to be. Surround the fire ring with either fire bricks or concrete blocks, stacking them tightly together. Use adhesive or mortar to keep the blocks in place and create a stable fire pit structure. Make sure the top of the fire pit is level and allows for air circulation.
- Finish the seating wall: Once you have reached your desired wall height, attach capstones to the top using adhesive or mortar. The capstones will provide a comfortable seating surface. Make sure they are level and secure.
- Test the fire pit: Before using the fire pit, ensure that everything is safely constructed. Check for any loose bricks or blocks and make any necessary adjustments. Follow proper fire safety guidelines when using the fire pit, such as keeping a fire extinguisher nearby and never leaving the fire unattended.
By following these steps, you can successfully build a fire pit with a built-in seating wall. It is essential to prioritize safety and carefully follow instructions for a successful project.
What are the advantages and disadvantages of using natural stones vs. bricks for the seating wall?
Advantages of using natural stones for seating walls:
- Aesthetic appeal: Natural stones offer a unique and natural appearance that can enhance the overall beauty of the seating area. They come in various shapes, sizes, and colors, allowing for creative and visually appealing designs.
- Durability: Natural stones are known for their strength and durability, making them a long-lasting choice for seating walls. They can withstand various weather conditions, including extreme heat, cold, and moisture.
- Low maintenance: Natural stones are relatively low maintenance, as they are resistant to stains, wear, and fading. They require minimal cleaning and are not easily damaged by regular use.
- Versatility: With a wide range of stone types available, using natural stones allows for flexibility in design. Different stones can be mixed and matched to create intricate patterns and textures.
Disadvantages of using natural stones for seating walls:
- Cost: Natural stones can be more expensive compared to other materials such as bricks. The price of natural stones can vary greatly depending on the type and quality chosen.
- Limited availability: Certain types of natural stones may not be readily available in all areas, which can limit choices and increase transportation costs if the desired stone needs to be sourced from a distant location.
Advantages of using bricks for seating walls:
- Affordability: Bricks are generally more budget-friendly than natural stones, making them a cost-effective option for constructing seating walls.
- Wide availability: Bricks are widely available in most regions, making it easier to source the materials locally and reducing transportation costs.
- Ease of installation: Bricks are relatively easy to work with due to their uniform shape and size. They can be easily stacked and laid in patterns, simplifying the installation process.
- Customizability: Bricks are available in various colors and styles, allowing for a range of design options. They can be painted, stained, or coated to achieve the desired aesthetic.
Disadvantages of using bricks for seating walls:
- Less natural appearance: Bricks may not provide the same natural and unique look as natural stones. Some may prefer the organic and distinct characteristics of natural stones.
- Limited design options: While bricks offer versatility to a certain extent, they may not provide the same level of design flexibility as natural stones. The options for different shapes, textures, and patterns may be more limited.
- May require more maintenance: Compared to natural stones, bricks may require more maintenance over time, as they can be prone to chipping, fading, or wearing down. Regular cleaning and occasional repairs may be necessary to maintain their appearance and functionality.
What type of fire pit should be used for a built-in seating wall design?
When designing a built-in seating wall, it is important to choose a fire pit that complements the overall aesthetic and functionality of the space. Here are a few types of fire pits that work well for a built-in seating wall design:
- Wood-Burning Fire Pit: This traditional option adds warmth and ambiance to the seating area. It creates a cozy atmosphere and allows for gathering around a crackling flame. Ensure that the fire pit is properly equipped with safety features and clearance requirements to prevent any hazards.
- Gas Fire Pit: These fire pits offer convenience and ease of use. With the flip of a switch, you can instantly enjoy a controlled fire. They also produce less smoke and require less maintenance compared to wood-burning fire pits. Gas fire pits can be fueled by propane tanks or connected to a natural gas line.
- Tabletop Fire Pit: Perfect for smaller spaces, a tabletop fire pit adds a touch of elegance and functionality to the seating wall design. These compact fire pits can be fueled with either propane or gel fuel and can be easily placed on top of the seating wall, creating an intimate and inviting atmosphere.
- Fire Pit with built-in Seating: Some fire pits come with built-in seating, eliminating the need for a separate seating wall. These fire pits typically have circular or square designs with integrated benches or seating ledges. They are a space-efficient option and provide a cohesive look to the seating area.
It is crucial to consider local regulations, safety guidelines, and the available space while selecting the appropriate fire pit for a built-in seating wall design. Additionally, consulting with a professional designer or contractor can help ensure that the chosen fire pit aligns with the overall vision and requirements of the space.
How to add accent lighting to enhance the aesthetics of the seating wall?
Adding accent lighting to a seating wall can greatly enhance its aesthetics and create a beautiful ambiance in your outdoor space. Here are some steps to help you achieve this:
- Plan the lighting design: Before you start adding lighting, it's important to plan your design. Consider the style and purpose of your seating wall. Determine the areas you want to highlight and the type of lighting that will best suit your needs. There are various options, such as recessed lighting, LED strips, spotlights, or even solar-powered lights.
- Choose the right fixtures: Once you have a design plan, select the appropriate fixtures that will complement your seating wall. Consider the type of bulbs, their brightness, and the color temperature that will create the desired effect. For example, warm white lights can create a cozy and inviting atmosphere, while cool white lights can give a modern and elegant feel.
- Install the lighting fixtures: Start by locating the electrical outlets or power sources near the seating wall. If necessary, hire a professional electrician to connect the wiring and install additional outlets. Depending on your design, you may need to install recessed lighting into the wall itself or mount fixtures directly onto the wall surface.
- Position the lights strategically: Place the lighting fixtures in positions that will highlight the architectural features or focal points of the seating wall. This could be along the top of the wall, underneath the seating area, or along the edges. Experiment with different positions to achieve the desired effect and ensure that the lighting is evenly distributed.
- Consider dimming options: To enhance the ambiance and flexibility of your lighting, consider adding dimming options. This will allow you to adjust the brightness of the lights according to different occasions or preferences.
- Hide the wiring: To maintain a clean and polished look, hide the wiring as much as possible. You can conceal it within the wall or use wire channels or conduit to keep it organized and out of sight.
- Test and adjust: Once the installation is complete, make sure to test each lighting fixture and adjust their positioning if needed. Ensure that the lighting is balanced and properly highlights the seating wall features.
Remember to prioritize safety throughout the process. It's always recommended to consult with a professional electrician or landscape designer if you're unsure about any aspect of the installation or need assistance in creating a customized lighting design.
What is the process for constructing a fire pit with a built-in seating wall using pavers?
Constructing a fire pit with a built-in seating wall using pavers can be broken down into several steps. Here is a general outline of the process:
- Plan and Design: Start by deciding on the desired size and shape of your fire pit and seating wall. Consider factors such as the number of people the seating needs to accommodate and the layout of your outdoor space. Prepare a sketch or use design software to visualize your project.
- Gather Materials: Purchase the necessary materials, including pavers for the seating wall and fire pit, adhesive, gravel base, sand, fire-resistant bricks or stones for the fire pit interior, and a metal fire pit insert if desired.
- Prepare the Site: Clear the area where you plan to construct the fire pit and seating wall. Ensure it is level and free of any obstructions or vegetation. Mark the boundaries using stakes and string.
- Excavate and Level: Dig the area where the fire pit and seating wall will be located. Excavate to the desired depth, typically about 6-8 inches. Use a level to ensure the excavated area is even.
- Create a Base: Add a layer of gravel to the excavated area to create a stable base. Compact the gravel using a compactor or by tamping it down firmly.
- Lay the First Course: Start building the seating wall by laying the first course of pavers. Apply a layer of adhesive to the base, and place the pavers on top, ensuring they are level and properly aligned. Leave gaps between the pavers for drainage.
- Build the Seating Wall: Continue adding additional courses of pavers, securing each layer with adhesive. Stagger the joints to create stability. Use a level periodically to check for evenness and make adjustments as needed.
- Construct the Fire Pit: If using a metal fire pit insert, follow the instructions provided to place it within the seating wall. Alternatively, you can build a fire-resistant interior using fire bricks or stones. Arrange the bricks or stones in a circular pattern, using fire-rated adhesive, leaving gaps for air circulation.
- Complete the Seating Wall: Continue adding courses of pavers to complete the seating wall, ensuring each layer is level and securely attached with adhesive. Be mindful to create a comfortable seating height.
- Fill Gaps and Finish: Fill the gaps between pavers with sand, sweeping it into the cracks and ensuring it is fully compacted. Use a broom or brush to remove any excess sand. Clean the pavers and seating wall to complete the project.
Remember, these steps provide a general guideline, and specific instructions may vary depending on the type of pavers and materials you choose. It's important to consult the manufacturer's instructions and follow all safety guidelines when working with fire.
What is the process of connecting gas lines to a fire pit with seating?
Connecting gas lines to a fire pit with seating typically involves several steps. Here's a general process for the installation:
- Determine the location: Choose a suitable area for your fire pit with seating, keeping in mind any local regulations or restrictions regarding placement. Ensure the spot has proper ventilation and is away from flammable materials.
- Measure and mark the location: Measure the dimensions of your fire pit and seating area to plan the gas line installation accurately. Mark the spots where gas lines will be connected and any other connections needed, such as a gas supply line from the house or propane tank.
- Dig a trench: Excavate a trench from the gas source (either the house or propane tank) to the fire pit location. The trench should be deep enough to bury the gas line at the recommended depth, typically around 18 inches below ground level.
- Lay the gas lines: Install the gas lines in the trench, ensuring they are properly sized and meet local codes and regulations. Gas lines can be made of copper, black iron pipes, or flexible piping depending on your local jurisdiction's requirements.
- Attach gas regulators and valves: Connect a gas regulator and shutoff valve to control the gas flow. Ensure the regulator and valve are securely attached to the gas lines and accessible for operation.
- Connect gas lines to the fire pit: Run a gas line from the main gas line to the fire pit. Depending on the fire pit's design, this may involve connecting to a gas burner assembly or a gas log set. Follow the manufacturer's instructions for proper connection.
- Test for leaks: Before using the gas fire pit, test the entire system for leaks. Apply a mixture of soap and water to all connections and joints. If you notice bubbles forming, there is a leak. In such cases, tighten the connections or consult a professional gas technician to fix the issue.
- Cover and backfill: Once the system is tested and confirmed to be leak-free, cover the gas lines with soil or gravel, backfilling the trench.
- Install seating and finish landscaping: Once the gas lines are safely installed, you can proceed with setting up your seating around the fire pit and complete any landscaping or decorative elements.
It's essential to note that gas line installation can be complex and potentially dangerous. If you are unsure or uncomfortable with any aspect of the process, it is highly recommended to consult a licensed professional or gas technician to ensure a safe and compliant installation.
How to seal and protect the seating wall to ensure it withstands outdoor elements?
To seal and protect a seating wall, follow these steps to ensure it withstands outdoor elements:
- Clean the wall: Start by thoroughly cleaning the seating wall to remove any dust, dirt, or debris. Use a stiff brush or broom to scrub the surface and a power washer if necessary. Allow it to dry completely before moving to the next step.
- Inspect for damage: Check for any cracks, loose stones, or damaged areas that need repair before sealing. Make necessary repairs using appropriate materials, such as mortar or concrete patching compound.
- Choose the right sealer: Select a high-quality penetrating sealer specifically designed for outdoor use on masonry surfaces. Look for a sealer that offers UV protection, is water-resistant, and is suitable for the type of stone or material used in the seating wall.
- Test in a small area: Before applying the sealer to the entire wall, it's advisable to test it in a small, inconspicuous area. This will help determine if the sealer provides the desired appearance and protection without causing any unwanted discoloration.
- Apply the sealer: Following the manufacturer's instructions, apply the sealer to the seating wall. Usually, you can use a paintbrush, roller, or sprayer for application. Ensure even coverage and allow it to penetrate into the surface for the specified drying time.
- Apply additional coats: Depending on the level of protection desired and the manufacturer's recommendations, you may need to apply multiple coats of sealer. Apply subsequent coats after the previous one has dried completely.
- Follow curing time: Once the final coat has been applied, allow the sealer to cure for the recommended time mentioned by the manufacturer. This helps the sealer bond and creates a durable protective layer.
- Regular maintenance: To maximize the life of the sealer and the protection it provides, perform regular maintenance. This may involve periodic cleaning with a mild detergent and water, along with reapplying the sealer as needed based on the manufacturer's recommendations and the level of wear and tear.
By following these steps, you can effectively seal and protect your seating wall, ensuring it withstands the outdoor elements and maintains its appearance and integrity for an extended period.