Best Smart Ceiling Fans with LED Lights to Buy in July 2026
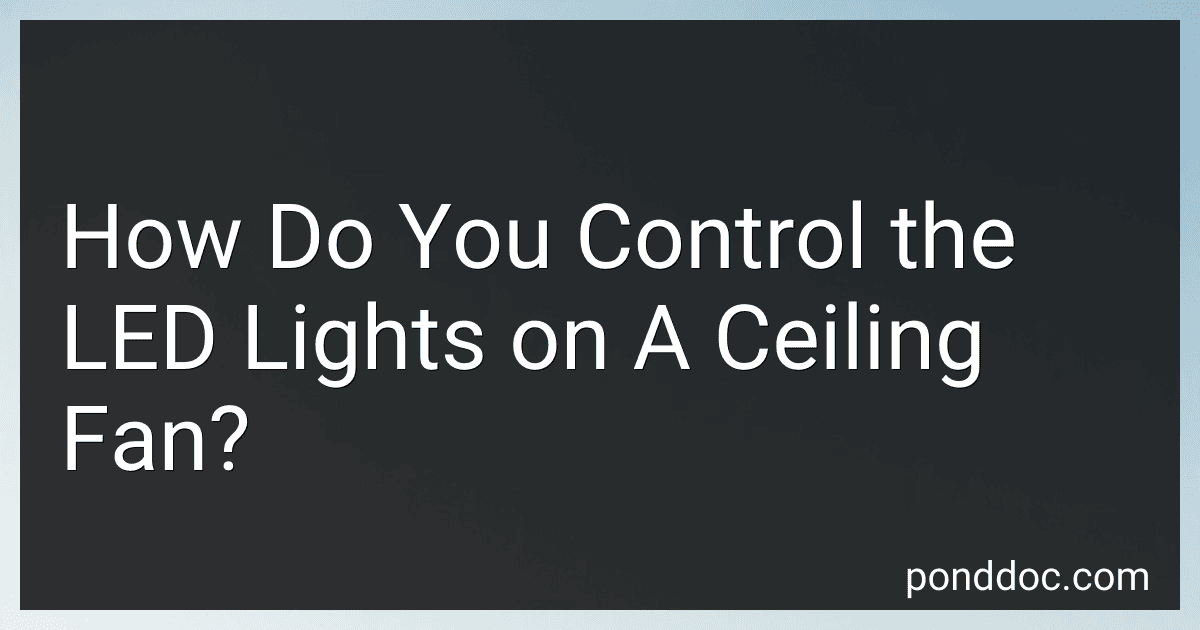
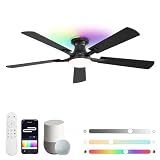
Amico 52 Inch Smart Ceiling Fan with Lights, Remote/App/Alexa/Google Control, WiFi Modern Downrod Mount Ceiling Fan, Reversible DC Motor, 6 Speeds, 3CCT, Dimmable, Quiet for Bedroom/Living Room, Black
- CUSTOM COMFORT: 6-SPEED SETTINGS FOR TAILORED AIRFLOW AND LIGHTING.
- SMART CONTROL: OPERATE VIA REMOTE, APP, ALEXA, OR GOOGLE HOME EASILY.
- WHISPER-QUIET: ULTRA-QUIET DESIGN AT JUST 25DB FOR SERENE SPACES.


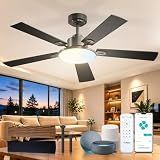
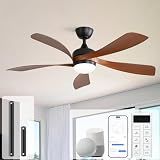
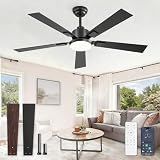
DREO Smart Ceiling Fan with Lights, 52 Inch, 12 Speeds & 3 Fan Modes, Stepless, Dimmable LED Light, Timer, 22dB Quiet DC Motor, Remote/APP/Alexa Control, Black Ceiling Fans Indoor, 2026 Upgraded
- VOICE CONTROL & APP INTEGRATION: EASILY ADJUST FAN SPEED & LIGHTS!
- POWERFUL PERFORMANCE: 6000 CFM WITH 12 SPEEDS FOR EVERY MOMENT.
- CUSTOM LIGHTING: SET BRIGHTNESS & TEMPERATURE FOR ANY MOOD ANYTIME.
CINOTON Smart Ceiling Fan with Lights, 52'' RGBCW Ceiling Fan with Lights and Remote App Voice Control, Reversible DC Motor, 2600lm Dimmable, 6 Speeds & 2 Fan Modes, Quiet Fan for Bedroom, Living Room
-
CONTROL WITH VOICE: SYNC WITH ALEXA, GOOGLE ASSISTANT & CINOTON APP!
-
DYNAMIC LIGHTING: RGB & DIMMABLE LED CREATE PERFECT MOOD SETTINGS!
-
ENERGY EFFICIENT: WHISPER-QUIET MOTOR SAVES UP TO 80% ON ENERGY COSTS!
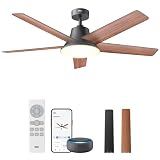
ZMISHIBO 52 Inch Smart Ceiling Fans with RGB Lights, Low Profile Flush Mount Ceiling Fan with Alexa/App/Remote Control, Dimmable 20W LED Light, Black Modern Fan for Living Room, Bedroom, Game Room
-
CONTROL WITH VOICE/APP: HANDS-FREE OPERATION VIA ALEXA, GOOGLE & APP.
-
CUSTOM LIGHTING: 16M+ COLORS AND DIMMABLE BRIGHT LED FOR EVERY MOOD.
-
ENERGY-EFFICIENT & QUIET: 6-SPEED MOTOR RUNS SILENTLY UNDER 30DB.
Sofucor 52" Smart Ceiling Fan, Indoor/Outdoor Ceiling Fans with Lights and Remote, Compatible with Alexa/Google/App, 3-Color Light 6-Speed Timing Reversible DC Motor for Bedroom Living Room Patio
- CONTROL WITH EASE: OPERATE VIA APP, VOICE, OR REMOTE ANYTIME!
- WHISPER-QUIET EFFICIENCY: SAVE 75% ENERGY WITH A POWERFUL DC MOTOR.
- VERSATILE & STYLISH: CUSTOMIZE LIGHT AND AIRFLOW FOR ANY SEASON!
Ohniyou Ceiling Fans with Lights, 52'' Low Profile Ceiling Fan with Light and Remote/APP Control, Modern Flush Mount Ceiling Fan for Indoor Bedroom Living Room, Dimmable, Quiet DC Motor, Black
-
CONTROL VIA APP OR REMOTE-ADJUST SPEED, LIGHTS, AND TIMERS EASILY!
-
ULTRA-QUIET MOTOR DELIVERS POWERFUL AIRFLOW FOR YEAR-ROUND COMFORT.
-
STYLISH, VERSATILE DESIGN COMPLEMENTS ANY DECOR-INDOORS OR OUTDOORS!
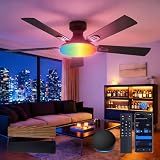
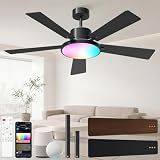
Amico Ceiling Fans with Lights, 52'' Smart RGB Ceiling Fan with Remote/APP/Alexa Control, Flush Mount, Reversible DC Motor, 5 Blades, 6 Speeds, 3CCT, Dimmable, Noiseless, Bedroom, Living Room, Black
-
CUSTOM COMFORT: 6 FAN SPEEDS & ADJUSTABLE RGB/WHITE LIGHTING MODES.
-
SMART CONTROL: SEAMLESS INTEGRATION WITH ALEXA, GOOGLE, & APP REMOTE.
-
VERSATILE DESIGN: PERFECT FIT FOR ANY ROOM, IDEAL FOR INDOOR & OUTDOOR USE.

ZMISHIBO 52 Inch Ceiling Fan with Light, App&Remote Control, Flush Mount Low Profile, Dimmable 20W LED Light, Quiet Reversible Motor for Bedroom, Living Room, Apartment, Black
- VERSATILE COOLING: PERFECT FOR LARGE SPACES WITH 3057 CFM AIRFLOW.
- SMART CONTROL: APP & REMOTE WITH DIMMABLE LIGHTING FOR ULTIMATE EASE.
- PEACEFUL OPERATION: WHISPER-QUIET MOTOR ENSURES UNINTERRUPTED COMFORT.
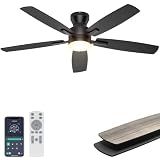
Glowivia 52 Inch Ceiling Fans with Lights and Remote&APP Control, Black Smart Ceiling Fan with 3000-6000K Dimmable, 6 Speeds Quiet Reversible Motor, Indoor/Outdoor Ceiling Fan for Bedroom Living Room
-
CUSTOMIZABLE LIGHTING: ADJUST FROM WARM TO COOL, DIMMABLE FOR ALL MOODS.
-
SMART CONTROL: OPERATE WITH REMOTE OR APP; 6 SPEEDS AND TIMER OPTIONS.
-
YEAR-ROUND COMFORT: QUIET DC MOTOR WITH REVERSIBLE MODE FOR EVERY SEASON.
Controlling the LED lights on a ceiling fan typically involves several methods, depending on the fan's design and technology. Many modern ceiling fans with LED lights come with a remote control or a wall-mounted switch that allows the user to turn the lights on or off and sometimes even dim them. Additionally, some ceiling fans can be controlled via a smartphone app if they feature smart home integration, allowing for remote operation and scheduling. If the fan is integrated with a home automation system, voice control through devices like Amazon Alexa or Google Assistant may also be available. Some ceiling fans with LED lights may also have pull chains, although this is becoming less common in favor of more technologically advanced controls. It is important to consult the user's manual for specific instructions related to your ceiling fan model, as the method for controlling the LED lights can vary significantly between different brands and models.
What is the installation cost for LED lights in a ceiling fan?
The installation cost for LED lights in a ceiling fan can vary based on several factors, including the complexity of the installation, the rates of the electrician or technician, and your geographic location.
Here's a general breakdown of potential costs:
- Electrician Fees: The hourly rate for an electrician can range from $50 to $100 or more, depending on the region and the professional’s experience.
- Installation Complexity: If you are simply replacing existing lights with LED bulbs, it might cost less than if the fan doesn't currently have a light fixture, or if additional wiring or components are needed.
- Materials: LED bulbs can vary in price, usually ranging from $5 to $20 per bulb, depending on brand, brightness, and additional features (like dimmability or smart technology).
- Additional Components: If your ceiling fan doesn't already have a light kit, purchasing one can cost anywhere from $20 to $100 or more, depending on the style and brand.
- Travel Fees: Some electricians might charge a travel fee, especially if you live in a remote area.
To get an accurate estimate, it's advisable to consult with local electricians or handymen, providing them with details like the type of fan and any existing light fixtures. They can give you a more precise quote based on their hourly rates and the specifics of your situation.
What is the common issue with ceiling fan LED light remotes?
A common issue with ceiling fan LED light remotes is that they can sometimes become unresponsive or lose synchronization with the fan. This can occur due to several reasons, such as interference from other wireless devices, dead or weak remote batteries, or a need to reprogram or reset the remote and receiver. Additionally, compatibility issues might arise if replacement remotes or fans aren't from the same manufacturer or model line. Ensuring the remote is properly paired and checking the batteries can often resolve these issues. If problems persist, consulting the fan's manual for troubleshooting steps or seeking support from the manufacturer can be helpful.
How do you sync multiple ceiling fans with LED lights?
Syncing multiple ceiling fans with LED lights typically involves using remote controls, smart home systems, or compatible wall switches. Here is a general approach you can follow:
- Identify Compatibility: Ensure that your ceiling fans and LED lights are compatible with remote controls or smart home systems. Many modern fans come with built-in remote receivers or are compatible with universal remotes.
- Remote Controls: Use the remote control that came with the fan if available. If your fans have separate remotes, you can often program them to operate on the same frequency or channel. Follow the fan manual to set each remote to the same frequency/channel. If your fans didn’t come with remotes, you can purchase a universal fan remote kit that is compatible with both ceiling fans and the lights.
- Smart Home Systems: Install smart home devices such as smart switches or smart bulbs. Many ceiling fans and LEDs nowadays work with smart systems like Amazon Alexa, Google Home, or Apple's HomeKit. Use a smart hub or app to group the fans and lights together. This way, you can control them simultaneously through voice commands or app controls.
- Wall Controls: Some fans can be wired directly to a wall switch that can control multiple fans and lights. Ensure the wall switch is designed for this purpose. If you’re wiring to a single switch, make sure your electrical circuit can support the combined load.
- Installation and Programming: Follow the installation instructions carefully for whichever option you choose, whether it’s remote, smart home, or wall control. Pair all devices (fans and lights) to a single remote or smart hub as directed in the user manual.
- Testing: Once installed, test your setup to ensure all fans and lights respond to the control commands as expected. Make adjustments as needed.
- Consulting a Professional: If you are not comfortable with electrical installations or programming, consider hiring a professional electrician or a smart home specialist to handle the setup.
This approach may vary depending on the specific models and brands you are using, so always refer to the specific manuals or manufacturer support for detailed instructions.
How do you switch between warm and cool LED light settings on a ceiling fan?
Switching between warm and cool LED light settings on a ceiling fan generally depends on the type of lighting system integrated into your fan. Here are some common methods to switch between warm and cool light settings:
- Remote Control: Many modern ceiling fans with lighting features come with a remote control. If your fan has this option, look for a button that controls the color temperature or light setting. It might be labeled as "CCT" (Correlated Color Temperature) or have icons representing warm and cool tones. Pressing this button should cycle through different light settings.
- Wall Control: If your ceiling fan has a dedicated wall control panel, it may include a switch or button that allows you to change the color temperature. Similar to a remote, this could be labeled specifically for changing the light setting.
- Smart Control: If your fan is equipped with smart capabilities, you can likely use a smartphone app to adjust the light settings. Check the app used for controlling your fan for options to change the color temperature.
- Switch Pull Chain: Some fans with LED lights might have a pull chain specifically for adjusting light settings. Pulling the chain repeatedly can cycle through the available light options.
- Manual Configuration: For some models, changing the LED settings might require accessing the light fixture manually, which can involve removing the cover and adjusting switches/dials directly on the light assembly.
- Instruction Manual: If you’re unsure, consult the instruction manual that came with your ceiling fan. It should provide guidance on how to adjust the light settings for your specific model.
If your fan does not clearly offer these options, and you can’t find the necessary information in the manual, it’s a good idea to contact the manufacturer or look up your model online for specific instructions.