
Best Cooler Insulation Upgrades to Buy in May 2026
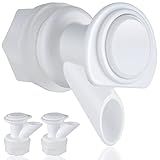
Upgrade Push-Button Cooler Spigot Replacement, Compatible with Igloo 2, 3, 5 and 10 Gallon Beverage Coolers, Durable Water Cooler Spigot for 2-10 Gallon Water Jugs Replacement Part (White-3PC)
-
EASY HYDRATION: PUSH-BUTTON DESIGN ENSURES QUICK, MESS-FREE POURING.
-
LEAK-PROOF GUARANTEE: STURDY, ANTI-DRIP VALVE PREVENTS ANY SPILLS.
-
QUICK INSTALL: REPLACEMENT MADE SIMPLE WITH ALL NECESSARY PARTS INCLUDED.


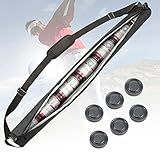
Upgraded Golf Beer Sleeve with 6 Ice Pucks-7 Cans Beer Cooler Sleeves for Golf Bags, Ideal Men's Gift for Golf Lovers (Black)
- KEEP DRINKS COLD: ENJOY ICY BEVERAGES ON THE COURSE WITH OUR COOLER!
- DURABLE & WATERPROOF: BUILT WITH PREMIUM MATERIALS TO PREVENT LEAKS.
- PERFECT GIFT FOR GOLFERS: IDEAL FOR FATHER'S DAY OR ANY OCCASION!
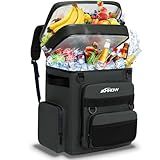
Backpack Cooler Insulated Leak Proof for Men Women 50 Cans Soft Cooler Backpack Insulated Waterproof Large Capacity Coolers Bag Portable for Lunch Camping Travel Picnic Hiking Grey
- LEAK-PROOF DESIGN: ENJOY COLD DRINKS WITHOUT SPILLS; PERFECT FOR OUTINGS!
- 20+ HOURS INSULATION: KEEP FOOD AND DRINKS FRESH FOR YOUR ADVENTURES!
- SPACIOUS & ORGANIZED: STORE UP TO 50 CANS WITH MULTIPLE POCKETS FOR CONVENIENCE!
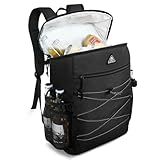
Upgraded Cooler Backpack 24 Cans – Lightweight Insulated Backpack Cooler, Leak-Proof & 18-Hour Ice Retention for Beach, Camping, Hiking (Men, Women, Family)
-
18-HOUR ICE RETENTION: KEEPS FOOD/DRINKS COLD FOR ALL-DAY ADVENTURES!
-
24 CAN CAPACITY: SPACIOUS DESIGN FITS 24 CANS PLUS ESSENTIALS EFFORTLESSLY.
-
ULTIMATE ORGANIZATION: 8 POCKETS FOR CLEVER STORAGE AND EASY ACCESS.
Haimont Cooler Backpack Insulated Leakproof Ice Chest Bag, Upgrade Thermal Lunch Backpack for Men Women Hiking Beach Travel Picnic Work, 35 Can, Black
-
16-HOUR INSULATION: KEEP FOOD AND DRINKS HOT OR COLD, UP TO 35 CANS.
-
COMFORTABLE DESIGN: MESH BACK AND PADDED STRAPS FOR HEAVY LOADS.
-
WATERPROOF & EASY CLEAN: TURN INSIDE OUT FOR HASSLE-FREE MAINTENANCE.
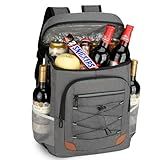
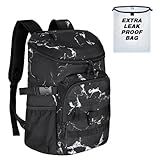
Backpack Cooler Insulated Leak Proof for Men Women 36 Cans Soft Cooler Backpack Insulated Waterproof Large Capacity Coolers Bag Portable for Lunch Camping Travel Picnic Hiking Deep Grey
-
22-HOUR INSULATION: KEEPS DRINKS AND SNACKS FRESH FOR EXTENDED ADVENTURES!
-
LARGE CAPACITY: HOLDS UP TO 36 CANS; PERFECT FOR ALL YOUR OUTDOOR NEEDS!
-
DURABLE & WATERPROOF: EASY TO CLEAN, DESIGNED FOR WORRY-FREE OUTDOOR FUN!
To upgrade the insulation in an outdoor cooler, there are a few key steps to follow. These steps include selecting appropriate materials, preparing the cooler, applying insulation, and ensuring a secure seal.
Firstly, identify suitable insulation materials for your cooler. One commonly used option is extruded polystyrene foam, which can be purchased in rigid sheets and easily cut to fit the cooler's interior. Other choices include polyurethane foam boards or spray-in expanding foam insulation.
Next, prepare the cooler for insulation. Empty the cooler and thoroughly clean the interior to remove any dirt or debris. Make sure the surface is dry before proceeding.
Now, take the selected insulation material and cut it into pieces that fit the interior walls, bottom, and lid of the cooler. The pieces should be snugly placed to maximize coverage and minimize gaps. It is essential to measure and cut accurately to achieve an effective insulation layer.
Once the insulation pieces are ready, adhere them to the cooler's interior walls, bottom, and lid. If using sheets or boards, apply a layer of silicone-based adhesive or strong adhesive tape to secure them in place. If using spray-in expanding foam insulation, carefully follow the product instructions to create a uniform layer within the cooler.
After applying the insulation, ensure a secure seal is maintained. Inspect the cooler's lid gasket for any damage or wear. If needed, replace it with a new gasket to ensure an airtight closure. Additionally, ensure the cooler's latches or fasteners are in good condition and functioning properly to create a tight seal. Any gaps or air leaks can compromise the effectiveness of the insulation.
It is important to note that while upgrading insulation can improve the cooler's performance, it may not completely transform its ability to maintain cold temperatures. Factors like ambient temperature, ice quality, and frequency of opening the cooler will also impact its performance.
By following these steps and selecting suitable insulation materials, you can significantly enhance the insulation in your outdoor cooler, helping to keep its contents cooler for longer periods, whether you're camping, enjoying a picnic, or engaging in any outdoor activities.
What is the cost of upgrading insulation in an outdoor cooler?
The cost of upgrading insulation in an outdoor cooler can vary depending on several factors such as the size of the cooler, the type of insulation material, and the level of insulation improvement needed. Generally, adding insulation to an outdoor cooler can range from $10 to $50 or more, depending on the aforementioned factors. Additionally, if hiring a professional to install or upgrade the insulation, there may be additional labor costs to consider.
How to prevent condensation in an insulated outdoor cooler?
To prevent condensation in an insulated outdoor cooler, you can follow these steps:
- Pre-chill the cooler: Before using the cooler, it's helpful to pre-chill it by filling it with ice or cold water and letting it sit for a while. This reduces the temperature difference between the cooler and its surroundings, minimizing the likelihood of condensation.
- Use an insulating barrier: Place a barrier between the contents of the cooler and the ice or cold packs. This insulating barrier can be a layer of cardboard, foam, or even a towel. This helps prevent direct contact between the cold source and the items inside, reducing the chances of condensation.
- Ensure a tight seal: Make sure the cooler has a tight seal to prevent warm air from entering. Check the gasket and hinges for any damage or wear that may compromise the seal. If needed, replace or repair these parts.
- Use moisture-absorbing materials: Place moisture-absorbing materials such as silica gel packs or uncooked rice in the cooler to draw in any excess moisture. These materials help in reducing the chances of condensation.
- Ventilate the cooler when possible: If conditions allow, open the cooler periodically to allow air circulation, especially if the cooler is used in a humid environment. This can help evaporate any accumulated moisture.
- Avoid overpacking the cooler: Ensure there is enough space between the items inside the cooler to allow for proper airflow. Overpacking can lead to poor circulation and increase the chances of condensation.
- Keep the cooler in the shade: Direct sunlight can increase the temperature inside the cooler, potentially leading to condensation when combined with the cooler's insulation. Keep the cooler in the shade or use a reflective cover to minimize heat absorption.
By following these steps, you can greatly reduce or even eliminate condensation in an insulated outdoor cooler.
What is the role of reflective barriers in insulated outdoor coolers?
Reflective barriers in insulated outdoor coolers play a crucial role in minimizing heat transfer. These barriers are typically made of reflective materials, such as aluminum foil or reflective films, and are placed within the insulation layers of the cooler.
The primary function of reflective barriers is to reflect radiant heat away from the cooler, preventing it from entering the interior and maintaining a lower temperature inside. Radiant heat transfer occurs when heat energy is transmitted through electromagnetic waves, and reflective barriers help to minimize this transfer by bouncing back the rays instead of absorbing them.
By reflecting the sun's rays and other external sources of heat, reflective barriers enhance the insulation capacity of the cooler. They significantly reduce the heat load on the insulation material by decreasing the amount of heat that would infiltrate the cooler's interior, thereby improving its overall cooling effectiveness.
In addition to providing insulation from heat, reflective barriers also contribute to the structural integrity and durability of the cooler. They act as additional protective layers, shielding the insulation material from potential damage caused by punctures, tears, or exposure to moisture.
Overall, reflective barriers are crucial components in insulated outdoor coolers as they enhance the insulation properties, reduce heat transfer, and contribute to the overall efficiency and longevity of the cooler.