
Best Leaf Blower Troubleshooting Tools to Buy in July 2026
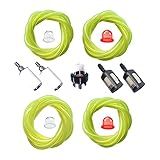
ZHRANXZ Fuel Line Gas Hose Tube 4 Size (per 2 feet) for Common 2-cycle Small Engines Primer bulb 530095646 Filter Chainsaw String Trimmer Blower Repair kit
- UNIVERSAL FIT FOR 2-CYCLE ENGINES: CHAIN SAWS, BLOWERS, MOWERS.
- PREMIUM TYGON TUBING: OIL, GAS, AND CORROSION-RESISTANT.
- COMPLETE KIT WITH FILTERS & BULBS FOR RELIABLE ENGINE PERFORMANCE.


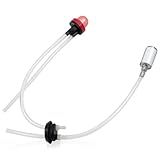
Hipa 581798001 125B Fuel Line Kit Replace 545081841 Fuel Line Kit Fit for Husq 125B 125BVX 125BX Leaf Blower Parts Pack of 1
- VERSATILE COMPATIBILITY: FITS VARIOUS HUSQVARNA AND JONSERED MODELS.
- DIRECT REPLACEMENT: USE OEM PART NUMBERS FOR EASY INSTALLATION.
- DURABLE QUALITY: HIGH-QUALITY MATERIALS ENSURE LONG-LASTING PERFORMANCE.
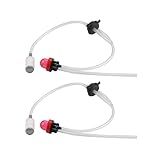
Wellsking 2Pcs 581798001 Fuel Line Kit Compatible with Husqvarna 125B Blower 125B 125BX 125BVX Handheld Leaf Blower Redmax HB280 Blower handheld Replace 545081841 5450818-41 Fuel Line
- WIDELY COMPATIBLE: FITS MULTIPLE HUSQVARNA AND REDMAX MODELS SEAMLESSLY.
- DURABLE QUALITY: BUILT FOR LONG-LASTING PERFORMANCE AND RELIABILITY.
- HASSLE-FREE WARRANTY: 3-MONTH WARRANTY FOR YOUR PEACE OF MIND!
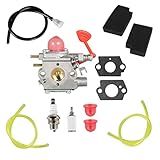
ALL-CARB Carburetor with Repair Kit Replacement for Poulan Pro Blower 545081855 GBV325 P325 (RoW) XLB325 BVM200C BVM200VS WT-875A
- PREMIUM QUALITY ENSURES LONG-LASTING PERFORMANCE AND RELIABILITY.
- HASSLE-FREE INSTALLATION MAKES REPLACING YOUR CARBURETOR A BREEZE.
- COMPATIBLE WITH MULTIPLE BLOWER MODELS FOR VERSATILE USE.
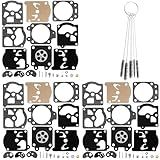
QAZAKY Pack of 3 Carburetor Diaphragm Gasket Rebuild Repair Kit Compatible with K10-WAT WA WT Series 2-Cycle String Trimmer Leaf Blower Chainsaw Poulan Ryobi Ryan IDC Homelite Toro Weedeater Craftsman
- COMPREHENSIVE COMPATIBILITY WITH NUMEROUS 2-CYCLE EQUIPMENT BRANDS.
- EASY REPLACEMENT FOR K10-WAT AND D10-WAT CARBURETORS.
- ESSENTIAL FOR EFFICIENT REPAIR OF WA AND WT SERIES CARBURETORS.
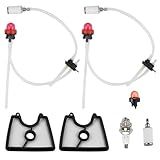
Hettluo 581798001 Fuel Line 581798001 Air Filter Kit for Husqvarna 125B Fuel Line Kit 125 B 125BX 125BVX Handheld Leaf Blower with Fuel Filter Grommet Primer Bulb Spark Plug
- COMPLETE REPLACEMENT KIT: EVERYTHING YOU NEED FOR OPTIMAL PERFORMANCE!
- HIGH COMPATIBILITY: FITS HUSQVARNA, JONSERED, & CRAFTSMAN BLOWERS!
- MAXIMIZE POWER: INCLUDES SPARK PLUG & AIR FILTERS FOR EFFICIENCY!
When a leaf blower fails to start, it can be frustrating and inconvenient. However, there are several steps you can take to troubleshoot the issue and potentially fix it. Here are some things you can check:
- Fuel: Ensure that the leaf blower has enough fuel by checking the fuel level in the tank. If it's low, fill it up with fresh fuel. Make sure the fuel mixture matches the manufacturer's specifications.
- Spark Plug: Examine the spark plug for any signs of damage or wear. If it appears dirty or corroded, clean it using a wire brush. Checking the spark plug's gap and adjusting it to the manufacturer's recommendation is also essential.
- Air Filter: Inspect the air filter for clogs or buildup of dirt and debris. A dirty air filter can prevent the engine from starting or running smoothly. Clean or replace the air filter if necessary.
- Carburetor: The carburetor can sometimes get clogged or dirty, hindering smooth engine operation. Remove the carburetor and clean it thoroughly with carburetor cleaner. Pay attention to small passages and jets that may be blocked.
- Fuel Lines: Inspect the fuel lines for any signs of damage, such as cracks, leaks, or blockages. Replace any damaged fuel lines, and ensure they are properly connected.
- Primer Bulb: Check the primer bulb to ensure it is not cracked or damaged. A faulty primer bulb can cause issues with starting the leaf blower. Replace it if necessary.
- Ignition Module: Test the ignition module or coil with a spark tester. If there is no spark, the ignition module may be faulty and in need of replacement.
- Compression: Low compression can also prevent the leaf blower from starting. Perform a compression test using a gauge to determine if the compression is within the manufacturer's recommended range.
- Safety Switches: Ensure that all safety switches, such as those on the throttle or handle, are properly engaged and not malfunctioning. These switches are designed to prevent the engine from starting in unsafe conditions.
- Professional Help: If you have followed these steps and the leaf blower still won't start, it may be time to seek assistance from a professional repair service. They will have the expertise to diagnose and fix any more complex issues.
Remember to always refer to the manufacturer's manual for specific troubleshooting steps and safety guidelines for your leaf blower.
How to check the flywheel key for damage in a leaf blower?
To check the flywheel key for damage in a leaf blower, follow these steps:
- Safety first: Disconnect the spark plug wire from the spark plug to prevent accidental starting of the engine.
- Remove the cover or housing: Usually, the flywheel key can be accessed by removing the cover or housing that encloses the flywheel.
- Locate the flywheel: The flywheel is typically located on the top of the engine, either exposed or covered by a plate or shroud.
- Remove the flywheel nut: By using a socket wrench or a suitable tool, carefully remove the flywheel nut. Keep the nut in a safe place to avoid misplacing it.
- Inspect the flywheel key: The flywheel key is a small metal piece that fits into a groove on both the crankshaft and the flywheel. Examine the key for any signs of damage, such as bending, shearing, or wear and tear. If damaged, it may need to be replaced.
- Check the keyway and crankshaft: Inspect the keyway (slot on the crankshaft where the flywheel key fits) and the crankshaft itself for any signs of damage. If the keyway or crankshaft is damaged, repairs may require the assistance of a professional.
- Reassemble: If everything is in good condition, carefully place the flywheel key back into the keyway, aligning it with the groove on the crankshaft. Then, reinstall the flywheel nut and tighten it securely.
- Test the leaf blower: After reassembling, reconnect the spark plug wire to the spark plug. Start the engine and ensure it runs smoothly without any abnormal noises. If the engine starts and runs fine, the flywheel key is likely intact and functioning correctly.
Remember, if in doubt or if you are uncomfortable performing these checks yourself, it's recommended to consult the user manual or a professional for assistance.
How to identify a damaged or worn-out piston in a leaf blower?
To identify a damaged or worn-out piston in a leaf blower, you can look for the following signs:
- Decreased Power: If you notice a significant decrease in the power or performance of your leaf blower, it may indicate a damaged or worn-out piston. A piston that is not functioning properly can lead to reduced compression, resulting in a loss of power.
- Difficulty Starting: A damaged piston can cause difficulties in starting the leaf blower. If you experience consistent problems starting the engine, it could be a sign that the piston is worn out or damaged.
- Engine Misfiring: A piston in poor condition can cause engine misfires or irregular combustion. If you notice the leaf blower is running rough, sputtering, or having inconsistent acceleration, it can be an indication of a faulty piston.
- Excessive Exhaust Smoke: A damaged piston can result in increased oil consumption or improper oil burning, leading to excessive smoke from the exhaust. If you notice an unusual amount of smoke or oil coming from the leaf blower's exhaust, it may indicate a piston issue.
- Metallic or Knocking Sound: A worn-out piston can produce a metallic knocking sound while the leaf blower is running. If you hear any abnormal noise from the engine, it could be a sign of a damaged piston.
- Loss of Compression: Lack of compression is a common symptom of a damaged piston. You may experience difficulties maintaining consistent power output, reduced fuel efficiency, or a general lack of performance. A compression test can help determine whether the piston has lost its sealing capability.
If you observe any of these signs, it is recommended to take your leaf blower to a professional for inspection and repair. They will be able to diagnose the exact issue with the piston and provide the necessary repair or replacement.
What is the correct spark plug type and heat range for a leaf blower?
The correct spark plug type and heat range for a leaf blower can vary slightly depending on the specific make and model. However, most leaf blowers typically use a spark plug with a short reach and a projected tip. The most commonly recommended spark plug type for leaf blowers is an RCJ6Y or RCJ7Y.
Regarding the heat range, it is recommended to refer to the manufacturer's specifications or the leaf blower's user manual for the correct heat range. The heat range of a spark plug refers to its ability to dissipate heat. It is crucial to use a spark plug with the correct heat range to prevent engine damage. Using the wrong heat range spark plug can result in overheating or fouling of the spark plug.