Best Indoor Garden Systems to Buy in July 2026
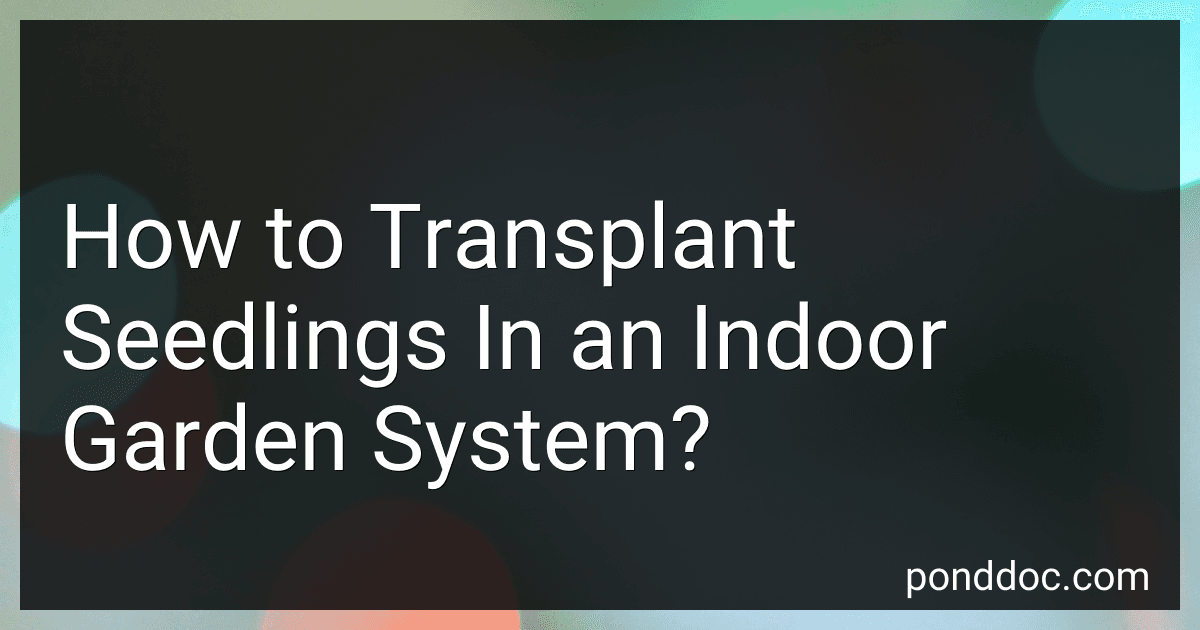
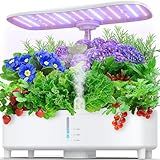
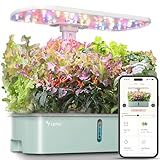
Ahopegarden Indoor Garden Hydroponics Growing System: 10 Pods Plant Germination Kit Herb Vegetable Growth Lamp Countertop with LED Grow Light - Hydrophonic Planter Grower Harvest Lettuce
-
HIGH EFFICIENCY: HYDROPONIC SYSTEM FOR FASTER, HEALTHIER PLANT GROWTH.
-
10 PODS & WATER INDICATOR: GROW MORE WITH EASY WATER LEVEL TRACKING.
-
CUSTOM LIGHT MODES: FULL-SPECTRUM LIGHTS FOR VEGGIES, FRUITS & FLOWERS.


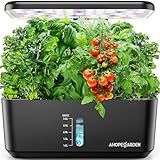
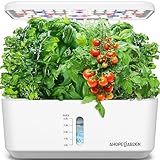
LetPot LPH-SE Hydroponics Growing System, 12 Pods Smart Herb Garden Kit Indoor, Indoor Garden, APP & WiFi Controlled, with 24W Growing LED, 5.5L Water Tank, Pump System, Automatic Timer
-
EFFORTLESSLY CONTROL YOUR INDOOR GARDEN WITH THE LETPOT APP!
-
GROW PLANTS 40% FASTER WITH OUR ADVANCED LED LIGHTING SYSTEM.
-
COMPLETE KIT: 12 CUPS, NUTRIENTS, AND ADJUSTABLE LIGHTING FOR ALL STAGES.
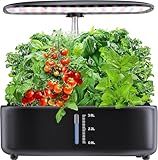
Hydroponics Growing System Indoor Garden: Herb Garden Kit Indoor with LED Grow Light Quiet Smart Water Pump Automatic Timer Healthy Fresh Herbs Vegetables - Hydroponic Planter for Home Kitchen Office
- GROW 5X FASTER WITH HYDROPONICS & 24-WATT LED GROW LIGHT!
- QUIET WATERING SYSTEM: EFFICIENT, ENERGY-SAVING, & LOW NOISE!
- EASY SETUP: EVERYTHING INCLUDED FOR YOUR INDOOR GARDENING!
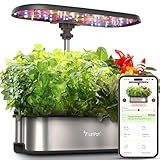
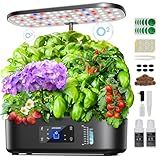
Hydroponics Growing System Kit 15 Pods Misting Indoor Gardening System Indoor Garden Gardening Gifts for Women 5L Water Capacity 48W Grow Light Herb Garden
- 50% FASTER GERMINATION WITH INNOVATIVE MISTING TECHNOLOGY!
- QUIET 48W GROW LIGHT SUPPORTS UP TO 15 PLANTS EFFORTLESSLY.
- CUSTOMIZE LIGHTING SCHEDULES FOR OPTIMAL PLANT GROWTH STAGES!
Ahopegarden Indoor Garden Hydroponics Growing System: 10 Pods Plant Germination Kit Herb Vegetable Growth Lamp Countertop with LED Grow Light - Hydrophonic Planter Grower Harvest Lettuce
-
GROW FAST AND HEALTHY HERBS WITH EFFICIENT HYDROPONIC TECHNOLOGY!
-
ENJOY EASY MONITORING WITH A CLEAR WATER LEVEL WINDOW!
-
CHOOSE BETWEEN MODES FOR VEGGIES OR FLOWERS WITH FULL-SPECTRUM LIGHT!
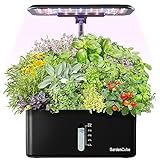
Hydroponics Growing System Kit - 12 Pods Indoor Herb Garden with LED Grow Light, Adjustable Height up to 17", Auto Timer - Perfect Home, Birthday & Mother’s Day Gift for Women
- GROW 12 PLANTS EFFORTLESSLY WITH AUTOMATIC LIGHTING & WATER CYCLING!
- IDEAL GIFT FOR HOME CHEFS & URBAN GARDENERS-PERFECT FOR ANY OCCASION!
- BOOST GROWTH UP TO 30% FASTER WITH SILENT, EFFICIENT HYDROPONICS!
Ahopegarden Hydroponics Growing System Kit Indoor Herb Garden with Grow Light 12 Pods, with LCD Touch Panel Hydroponic Planter, Planting Height Up to 17", Grower Harvest Fresh Veggie Lettuce, Black
-
SPACE-SAVING ELEGANCE: MODERN DESIGN FITS PERFECTLY IN URBAN HOMES.
-
MAXIMIZED YIELDS: OPTIMIZED FOR 12 HERBS, ENSURING NUTRIENT-RICH HARVESTS.
-
EFFORTLESS CARE: SMART CONTROLS & QUIET PUMP FOR EASY, LOW-MAINTENANCE GROWTH.
LetPot LPH-Air Hydroponics Growing System Kits, APP & WiFi Controlled Smart Indoor Garden with Adjustable 24W Grow Light Full Spectrum, 10 Pods Planter Indoor Gardening for Gifts, Kitchen, Vegetable
-
GROW UP TO 300% FASTER: REVOLUTIONIZE YOUR GARDEN WITH RAPID GROWTH!
-
SMART APP CONTROL: CUSTOMIZE LIGHTING AND GET ALERTS FOR EASY MAINTENANCE.
-
SUSTAINABLE & DURABLE: ENJOY LIFETIME SUPPORT WITH PREMIUM QUALITY MATERIALS.

Ahopegarden Indoor Garden Hydroponics Growing System Kit: 66 Pods Plant Herb Garden Germination Kit with LED Grow Light, 30L Large Capacity Kitchen Hydroponics Planter Grower for Vegetable Fruit
-
BOOST YIELDS BY 50% WITH OUR DUAL GROW LIGHT MODE FOR VIBRANT PRODUCE!
-
SPACE-SAVING DESIGN HOLDS 66 PODS-PERFECT FOR URBAN KITCHENS & OFFICES!
-
EASY SETUP MAKES FAMILY GARDENING A FUN, UNIQUE GIFT FOR ANY OCCASION!
Transplanting seedlings in an indoor garden system is a crucial step in their growth and development. Here's a step-by-step guide on how to transplant seedlings in an indoor garden system.
- Prepare the new containers: Start by selecting the appropriate containers for transplanting the seedlings. Choose containers that are clean, have drainage holes, and are slightly larger than the current pots of the seedlings.
- Prepare the growing medium: Fill the new containers with a well-draining growing medium. This can be a combination of potting soil, compost, and perlite or vermiculite. Moisten the growing medium slightly to create a favorable environment for the new seedlings.
- Water the seedlings: Before transplanting, water the seedlings in their current pots. This ensures that the soil is damp and the roots are hydrated, making it easier to remove the seedlings without causing damage.
- Remove the seedlings: Gently remove the seedlings from their current pots. You can use a small gardening tool like a trowel or your fingers to carefully loosen the soil around the seedlings. Be cautious not to damage the delicate roots.
- Transplant the seedlings: Make a hole in the center of the new containers using your finger or a tool. Place each seedling into the hole, ensuring that the roots are covered by the growing medium. Gently press the soil around the seedlings to provide support.
- Maintain proper spacing: Make sure to provide enough space between each seedling to allow for its growth. Overcrowding can lead to competition for resources and hinder the development of the plants.
- Provide adequate light: After transplanting, place the containers in a location that receives adequate light. Indoor plants require around 12-16 hours of light each day. Consider using artificial grow lights if natural light is insufficient.
- Water the seedlings: Water the newly transplanted seedlings gently, using a watering can or a misting spray bottle. Be cautious not to overwater, as it can lead to root rot. Monitor the moisture level of the growing medium and adjust the watering accordingly.
- Gradually introduce fertilizer: Wait for a couple of weeks before introducing fertilizer to the transplanted seedlings. Start with a diluted form of a balanced liquid fertilizer to provide essential nutrients for healthy growth.
- Monitor and care for the seedlings: Keep a close eye on the transplanted seedlings for any signs of stress, pests, or diseases. Maintain a suitable temperature and humidity level in the indoor garden system to promote their growth. Regularly check for any weeds and remove them promptly.
Remember, successful transplanting requires gentle handling and careful observation. By following these steps, your seedlings will have a higher chance of thriving in their new containers within your indoor garden system.
How to maintain proper air circulation around transplanted seedlings?
To maintain proper air circulation around transplanted seedlings, you can follow these steps:
- Choose an appropriate location: Select a spot for the seedlings that provides some protection from strong winds or direct exposure to harsh weather conditions.
- Space the seedlings properly: Make sure to give each seedling enough space between neighboring plants. This allows air to flow more freely around each plant and reduces the risk of fungal diseases.
- Thin out overcrowded seedlings: If you notice that the seedlings are growing too closely together, thin them out by removing the weakest plants. This will improve air circulation and give the remaining seedlings more room to grow.
- Prune excess foliage: Remove any excess or overlapping leaves that might be obstructing air movement around the seedlings. You can gently trim back some of the leaves without causing harm to the plants, especially if they are too dense.
- Use stakes or supports when necessary: If the seedlings are prone to falling or bending, use stakes or supports to keep them upright. This ensures that air can circulate around the entire plant.
- Water properly: Avoid overwatering the seedlings as it may create a damp and humid environment that can hinder air circulation and promote fungal growth. Water the plants at the base, near their roots, and allow the soil to dry out slightly between watering to encourage healthy airflow.
- Provide proper spacing while planting: When transplanting seedlings, ensure they are spaced according to their optimal growth requirements. Overcrowding can restrict air circulation and lead to various problems.
- Regularly monitor and adjust: Keep an eye on the seedlings and adjust their location or supports as needed. Check for any signs of poor air circulation, such as wilting, yellowing leaves, or mold/disease development, and take appropriate actions.
By following these steps, you can ensure proper air circulation around transplanted seedlings, which is vital for their healthy growth and development.
How long should seedlings be acclimated before transplanting?
The process of acclimating seedlings, also known as hardening off, generally takes around 7 to 10 days. This timeframe allows the seedlings to gradually adjust to the outdoor conditions before being transplanted into the garden or a larger container. During this period, the seedlings should be gradually exposed to increasing amounts of sunlight, wind, and fluctuating temperatures. Beginning with just a few hours of outdoor exposure and gradually increasing the duration over the course of a week or so will help them develop stronger stems and become more tolerant to outdoor conditions.
How to choose the right container for indoor seedling transplanting?
When choosing the right container for indoor seedling transplanting, consider the following factors:
- Size: Choose a container that provides enough space for the seedlings' roots to grow. It should be deep and wide enough to accommodate the roots without crowding.
- Drainage: Ensure the container has drainage holes to prevent waterlogging and allow excess water to drain out. This helps prevent root rot and other water-related issues.
- Material: Select a container made of a breathable material that allows air to circulate and moisture to evaporate. Common options include plastic, clay, peat pots, or biodegradable seedling trays.
- Reusability: If you plan to reuse the containers for future seedlings, opt for durable options like plastic or clay pots. Biodegradable seedling trays, on the other hand, are meant for one-time use.
- Transplanting ease: Pick a container that eases the process of transplanting. Some containers, like peat pots, can be planted directly into the soil as they decompose, eliminating the need to remove or disturb the seedling roots during transplantation.
- Temperature resilience: Consider the temperature conditions in your indoor environment. Some seedling containers may better retain heat, which can be advantageous if you're starting seedlings in a cooler space.
- Tray or individual pots: Choose between using a seedling tray with individual compartments or individual pots for each seedling. Seedling trays are convenient for organizing multiple seedlings in a compact space, while individual pots offer more control over each plant's growth.
- Light exposure: Ensure the container is transparent or has enough transparency to allow adequate light to reach the seedlings' roots to prevent them from becoming root-bound.
- Cost: Consider your budget, as container costs can vary significantly. However, keep in mind that investing in quality containers can provide longer-term benefits.
Ultimately, the choice of a container for indoor seedling transplanting depends on your specific needs and preferences.