
Best Cold Plunge Tubs to Buy in July 2026
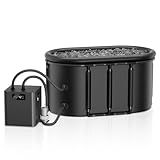
Upgrade XL 129 Gal Large Oval Ice Bath Tub for Athletes,Multiple Layered Portable Outdoor Cold Plunge Tub for Recovery,Cold Plunge for Family - Foldable Bathtubs for Gyms,Indoor,Outdoor use.
-
RAPID RECOVERY FOR ATHLETES: REDUCE SORENESS AND ENHANCE WELL-BEING.
-
SPACIOUS 129GAL DESIGN: PERFECT FOR SOLO USE OR FAMILY SESSIONS.
-
LIGHTWEIGHT & FOLDABLE: PORTABLE CONVENIENCE FOR HOME OR OUTDOOR USE.


Wxtkkom New Upgrade XL 139-Gallon Oval Ice Bath Tub - 6 Layered Portable Bathtub, Drop-In Bathtubs Foldable with Cover Cold Plunge Tub for Athletes, Home Gym, Outdoor Recovery Use.
-
SPACIOUS 139-GALLON CAPACITY: PERFECT FOR INDIVIDUALS AND FAMILIES UP TO 6'7.
-
DURABLE 6-LAYER INSULATION: MAINTAINS TEMPERATURE; BUILT TO LAST THROUGH HEAVY USE.
-
EASY STORAGE & SETUP: QUICK ASSEMBLY AND COMPACT DESIGN FOR EFFORTLESS CLEANUP.
Bubplay Ice Bath Cold Plunge Tub with Cover for Indoor Outdoor for Recovery, Cold Water Therapy, Athletes & Adults -105 Gallons, Black, XL
-
ENHANCED STABILITY: UPGRADED WITH 8 STAINLESS STEEL BARS FOR DURABILITY.
-
LONG-LASTING COMFORT: 6-LAYER INSULATION ENSURES 5 YEARS OF PERFORMANCE.
-
VERSATILE USE: ENJOY AS A HOT TUB OR ICE BATH FOR ULTIMATE RECOVERY!
XXL Ice Bath Tub for Athletes, Compatible with Water Chillers, 216-Gallon Inflatable Cold Plunge Tub with Insulated Lid, Thermometer, Water-Absorbent Mat, Portable for Outdoor & Indoor Recovery
- CONNECTS TO CHILLERS: EASILY MAINTAIN PERFECT COLD TEMPS WITHOUT ICE.
- DURABLE DESIGN: PROFESSIONAL-GRADE MATERIALS ENSURE LONG-LASTING USE.
- SPACIOUS COMFORT: EXTRA-LARGE 216-GALLON CAPACITY FOR FULL BODY IMMERSION.
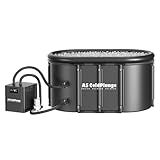
Ice Bath Chiller & Cold Plunge tub Kit, 1/3 HP Cold Plunge Chiller with External Filter & Pump, 148Gal Ice Pod, Upgraded Ice Plunge Tub, Cold Plunge Tub With Water Chiller for Cold Therapy
- SMART TOUCHSCREEN CONTROL: EASILY ADJUST & SAVE YOUR PREFERRED TEMP.
- RAPID, QUIET COOLING: COOLS TO 42°F FAST WITH LOW NOISE & ENERGY USE.
- HYGIENIC & LOW MAINTENANCE: 20-MICRON FILTER KEEPS WATER FRESH EASILY.
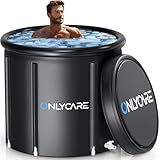
ONLYCARE XXL Ice Bath Tub for Athletes/2 Adults – Constant Temperature 5H Portable Cold Plunge Tub with Cover for Fast Muscle Recovery, Stress Relief, 130 Gal Ice Plunge Tub for Indoor/Outdoor/Gym
- REVITALIZE BODY AND MIND WITH ENERGIZING CRYOTHERAPY SESSIONS.
- DURABLE, LEAK-PROOF DESIGN SUPPORTS UP TO 680 LBS EFFORTLESSLY.
- EXTRA-LARGE SIZE FITS 2 ADULTS FOR ULTIMATE RECOVERY COMFORT.
AS ColdPlunge Ice Bath Chiller & Cold Plunge Tub Kit, 1/3HP Cold Plunge Chiller with External Pump & Filter, XXL 148Gal Upgraded Ice Pod, Cold Plunge Tub with Water Chiller for Cold Therapy Recovery
-
ICE-FREE SYSTEM: ENJOY HASSLE-FREE COLD THERAPY ANYTIME, HASSLE-FREE.
-
RAPID COOLING: SET YOUR PREFERRED TEMPERATURE IN SECONDS WITH LED CONTROL.
-
STURDY & INSULATED: UPGRADED TUB LOCKS IN COLD FOR 4 HOURS AND KEEPS CLEAN.
Installing a cold plunge tub in-ground requires careful planning and execution. Here are the steps involved in the installation process without using list items:
- Determine the Location: Choose a suitable spot in your backyard or outdoor space where you want to install the cold plunge tub. Ensure that the ground is level and the area is easily accessible.
- Excavation: Start by excavating the chosen area according to the dimensions and depth requirements of your cold plunge tub. Remove any rocks, debris, or vegetation that may hinder the installation.
- Foundation: Create a solid and level foundation for your tub. This may involve pouring a concrete pad or building a support structure using materials like bricks or stones.
- Plumbing and Electrical Work: If your cold plunge tub requires plumbing or electrical connections, consult with professionals to install the necessary infrastructure. This step is crucial for filling and maintaining the water in the tub.
- Tub Placement: Carefully lower the cold plunge tub into the excavated area and ensure it is properly aligned and centered. Make any necessary adjustments to ensure stability and proper fit.
- Backfilling: Begin backfilling around the tub, gradually packing the soil around it. Use a combination of soil, sand, and gravel to provide adequate support and stability for the tub.
- Leveling: Use a level to ensure the tub is perfectly straight and aligned in all directions. Adjust the backfill as needed to achieve a level and balanced installation.
- Finishing Touches: Once the tub is securely in place, clean the surface and remove any excess debris. Install any necessary exterior finishes such as coping stones, tiles, or decking around the tub to enhance its appearance.
- Water Filling: Follow the manufacturer's instructions to fill the cold plunge tub with water, considering any specific requirements or instructions for maintaining water temperature and cleanliness.
- Landscaping: Complete the installation by adding landscaping elements around the cold plunge tub, such as plants, rocks, or seating areas, to create a visually appealing and relaxing environment.
Remember, it is essential to closely follow the manufacturer's guidelines and consult with professionals for any technical aspects of the installation to ensure a successful and safe installation of your in-ground cold plunge tub.
What is the recommended distance from other structures for an in-ground cold plunge tub?
The recommended distance from other structures for an in-ground cold plunge tub can vary depending on local building codes and regulations. However, a common recommendation is to maintain a distance of at least 5 feet (1.5 meters) from any other structures, including buildings, walls, fences, or utilities. This distance helps ensure proper access, maintenance, and safety measures for the cold plunge tub. It is always advisable to consult local authorities or a professional installer to determine the specific requirements for your location.
How to prepare the ground before installing a cold plunge tub?
Preparing the ground before installing a cold plunge tub involves several key steps. Here's a guide to help you:
- Plan the location: Choose a suitable area for your cold plunge tub. It should have a solid, level ground with enough space for the tub and easy access to water and drainage.
- Clear the area: Remove any vegetation, rocks, or debris to create a clean surface for the installation. This may involve digging or using a shovel to clear the area.
- Level the ground: Ensure that the ground is level by using a long, straight level or a laser level. You can also use a transit level for more accurate results. Leveling is important to prevent the tub from tilting or shifting after installation.
- Compact the soil: After leveling, compact the soil by using a plate compactor or a hand tamper. This helps create a stable base for the tub and prevents sinking or shifting over time.
- Install a weed barrier: Lay down a weed barrier fabric over the compacted soil. This acts as a barrier, preventing weed growth and potential damage to the tub over time.
- Add a layer of gravel: Place a layer of crushed gravel or pea gravel on top of the weed barrier. This helps with drainage and provides additional stability to the tub.
- Level the gravel: Rake and level the gravel evenly across the area, ensuring it is evenly distributed. Use a rake or a shovel to achieve a consistent surface.
- Set up the tub: Carefully position the cold plunge tub onto the prepared ground, ensuring it sits level and stable. Follow the manufacturer's instructions for any additional steps required for installation.
- Connect water and drainage: Depending on the tub's design, you may need to connect a water supply line and a drain line. Follow the manufacturer's instructions or consult a professional plumber to ensure proper installation.
- Test the setup: Fill the tub with water and run it for a short period to ensure there are no leaks, and the water drains properly. Make any necessary adjustments before finishing the installation.
By following these steps, you can prepare the ground adequately to ensure a stable and durable installation for your cold plunge tub.
How to add jets or hydrotherapy features to a cold plunge tub?
Adding jets or hydrotherapy features to a cold plunge tub is possible with the following steps:
- Determine the feasibility: Assess whether your existing cold plunge tub can accommodate the additional features. Consider the tub's design, size, construction, and material. Ensure that there is enough space and support for the installation.
- Plan the layout: Decide where you want to place the jets or hydrotherapy features within the tub. Consider how many jets you want and where they will be positioned to provide an optimal massage experience.
- Purchase appropriate equipment: Identify and purchase the necessary equipment for the installation, such as jets, plumbing fittings, pipes, a pump, and a control system. Ensure that all components are suitable for cold water environments.
- Create access points: Determine the best locations to create access points for the equipment installation. Typically, this involves drilling holes in the tub walls or floor to allow the necessary plumbing connections.
- Install the jets and plumbing: Position the jets as desired within the tub and connect them to the plumbing system. Use appropriate fittings and pipes to ensure a watertight connection. Affix the pump and control system in a convenient location near the tub.
- Test and adjust: Fill the tub with water and test the installed jets or hydrotherapy features. Check for any leaks or malfunctions. Adjust the positioning of the jets if needed to achieve the desired massage effect.
- Seal and secure: Once you are satisfied with the installation, seal all access points and ensure that the plumbing connections are secure. Use appropriate waterproofing materials and adhesives to prevent any water leakage.
- Maintain and clean: Regularly clean and maintain the jets and plumbing system to prevent buildup and ensure proper functioning. Follow the manufacturer's instructions for maintenance and cleaning.
It is important to note that modifying a cold plunge tub to include jets or hydrotherapy features may require professional help, especially if you are not experienced in plumbing or construction work. Consider consulting with a professional or seeking expert advice during the installation process.