Best Smoke Detector Testing Kits to Buy in July 2026
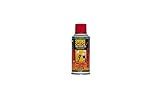
Home Safeguard 25S 2.5-Oz. Smoke Detector Tester Spray


Smoke Detector Tester, 10 in. L x 9 in. W
- PREMIUM QUALITY CRAFTSMANSHIP FROM THE NETHERLANDS.
- UNIQUE DUTCH DESIGN SETS YOUR PRODUCT APART.
- ECO-FRIENDLY MANUFACTURING: SUSTAIN LOCAL TALENT!
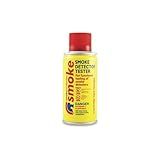
SDI Smoke Centurion, Aerosol Smoke Detector Tester,2.6oz, Case of 12
- LIGHTWEIGHT DESIGN AT 1.95 POUNDS FOR EASY HANDLING AND TRANSPORT.
- TRUSTED SDI BRAND ENSURES RELIABILITY AND QUALITY IN EVERY PURCHASE.
- IDEAL FOR VERSATILE USE, ENHANCING CONVENIENCE FOR VARIOUS CUSTOMERS.
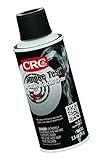
CRC Smoke Test Smoke Detector Tester, 2.5 Wt Oz, Reaches Up to 6 Feet, Checks for Obstructions or Debris which Clog Detector Vents, Aerosol Spray
- SAFE 6-FOOT SPRAY REACH FOR EASY STANDING USE ON THE FLOOR.
- EFFECTIVELY TESTS SMOKE DETECTORS FOR OBSTRUCTIONS AND DEBRIS.
- VERSATILE USE FOR BOTH COMMERCIAL AND RESIDENTIAL SMOKE DETECTORS.
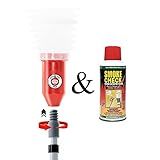
New & Improved Smoking PRO - Smoke Detector/Fire Alarm Tester + 1 Can HSI SmokeCheck
- TRUSTED SINCE 2018: UNMATCHED QUALITY IN SMOKE DETECTOR TESTING!
- INCLUDES SMOKECHECK: EASY TESTING FOR RELIABLE SMOKE DETECTOR SAFETY!
- PERFECT FOR DROP CEILINGS: SIMPLIFY YOUR TESTING IN HARD-TO-REACH AREAS!
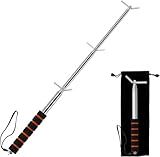
Smoke Detector Tester Pole - Smoke Detector and Emergency Exit Light Extendable Pole Tester - Emergency Light Testing Pole - Ensuring Safe and Efficient Testing of Life Safety Products,1 Pack
-
DURABLE STAINLESS STEEL DESIGN: BUILT FOR LONG-LASTING SAFETY INSPECTIONS.
-
ADJUSTABLE LENGTH FOR REACH: EXTENDS FROM 9.4 TO 53 FOR EASY ACCESS.
-
LIGHTWEIGHT, PORTABLE, AND SAFE: USER-FRIENDLY WITH INSULATED TIP AND GRIP.
Sdi Smoke Detector Tester, 12 in. H x 8 in. W
- MORE TESTS PER CAN: MAXIMIZE VALUE WITH EVERY PURCHASE!
- ECO-FRIENDLY & SAFE: SILICON-FREE, OZONE FRIENDLY SOLUTION!
- COST-EFFECTIVE TESTING: LOWEST PRICE PER TEST GUARANTEED!
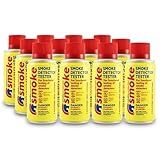
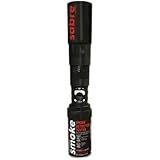
SDI Smoke Sabre, Aerosol Smoke Detector Tester,2.6oz, Case of 12
HERIOS Fire Alarm Smoke Detector Tester Spray, 180ml, Quick Test, No Stains
- QUICK & EASY SMOKE DETECTOR TESTING IN A 180ML AEROSOL SPRAY.
- NON-CORROSIVE FORMULA ENSURES SAFE USE ON PLASTIC DETECTORS.
- REALISTIC SMOKE TRIGGERS ALARMS FOR RELIABLE TESTING RESULTS.
First Alert Smoke Alarm, Battery-Operated Detector with Test & Silence Button, SMI100, 1-Pack
- ADVANCED SENSING TECH REDUCES NUISANCE ALARMS, ENSURING SAFETY.
- EASY INSTALLATION WITH BATTERY OPERATION AND QUICK BATTERY ACCESS.
- END-OF-LIFE WARNING AND TEST BUTTON FOR DEPENDABLE PERFORMANCE.
Testing a smoke detector is a straightforward process that ensures the device is functioning correctly and can alert you in case of a fire. To begin, locate the test button on the smoke detector; this is typically a clearly marked button on the device's exterior. Press and hold this button for a few seconds. A working smoke detector should emit a loud, piercing alarm sound. If the alarm is weak or doesn't sound at all, replace the batteries and test the detector again. If the problem persists, the smoke detector may need to be replaced. Additionally, to ensure the sensor is functioning, you can use approved smoke detector test aerosol sprays, which simulate smoke and trigger the alarm (always follow the manufacturer's instructions for safe usage). It's also important to regularly check the smoke detector for any dust or debris that might interfere with its operation and to replace the batteries at least once a year, or sooner if you hear a chirping sound indicating low battery.
How to clean a smoke detector?
Cleaning a smoke detector is an important maintenance task to ensure it functions properly. Here's a step-by-step guide to help you clean a smoke detector effectively and safely:
- Safety First: Turn off the power to the smoke detector at the circuit breaker, particularly if it's a hardwired model. If it's a battery-operated model, remove the batteries.
- Remove the Detector: Depending on the model, you might need to unscrew the detector from its mounting bracket or twist and remove it. Consult the manufacturer’s instructions if you’re unsure how to remove it.
- Vacuum the Detector: Use a vacuum cleaner with a soft brush attachment. Gently vacuum around the outer vents of the smoke detector to remove dust and debris. If accessible, vacuum the inside of the detector gently to clear any dust from sensors. Do not use any cleaning solutions or spray cleaners.
- Use Compressed Air: Canned compressed air can be used to blow out dust from the vents and interior. Hold the can upright and use short bursts to avoid any moisture from entering the detector.
- Wipe the Exterior: Use a soft, damp cloth to wipe down the exterior of the detector. Ensure that no moisture enters the detector as it can damage electronic components.
- Check and Replace Batteries: If it’s been a while since you last replaced the battery, now is a good time to put in a fresh one. Most detectors require a battery change every six months to a year.
- Test the Detector: After cleaning and replacing the unit back onto its bracket, test the smoke detector. Press the test button until you hear a loud beep. If it doesn’t beep, double-check the battery and electrical connections.
- Reinstall the Detector: Once cleaned and tested, securely reinstall the smoke detector. Ensure it’s seated properly in its bracket or mount.
- Restore Power (if applicable): Turn the power back on at the circuit breaker if the smoke detector is hardwired.
- Regular Maintenance: It’s advisable to clean smoke detectors every 6 months and test them monthly to ensure they are in proper working order.
Remember, if your smoke detector is more than 10 years old, it’s generally recommended to replace it with a new unit to ensure maximum efficiency and safety.
How to perform a smoke detector test?
Performing a smoke detector test is an important safety task to ensure that the device is functioning properly. Here’s a guide on how to do it safely:
- Gather Necessary Tools: A step ladder (if the detector is mounted on the ceiling or a high wall). Smoke detector test aerosol spray (optional, but useful for a more thorough test). A smoke detector tester button (most detectors come with this feature).
- Inform Household Members: Let everyone in your home know you’re testing the smoke detectors to prevent any panic.
- Check the Power Source: Ensure the smoke detector has a working battery or is properly connected to the electric power supply.
- Locate the Test Button: The test button is usually found on the front or side of the detector.
- Press the Test Button: Press and hold the test button on the smoke detector. The alarm should sound loud. If not, replace the batteries and test again. If the detector is hard-wired, ensure it is receiving power correctly.
- Test with Smoke or Aerosol: If using a smoke detector test aerosol, follow the instructions provided. Spray from a distance to simulate smoke entering the detector. Alternatively, light a candle, blow it out, and carefully wave the smoke towards the detector. Be cautious and avoid holding an open flame near the detector. The alarm should trigger when it senses smoke.
- Check the Expiry Date: Smoke detectors don’t last forever. Check the date of manufacture or expiration date on the device and replace it if it’s past its useful life, generally 8-10 years.
- Record the Test: Note the date and results of the test for your records and regular maintenance.
- Regular Maintenance: Clean the detectors with a vacuum or a can of compressed air to keep sensors clear of dust and debris.
Perform these tests monthly to keep your smoke detectors in optimal working condition. If the alarm doesn’t sound during testing, consider replacing the unit or consulting the manufacturer’s troubleshooting guide.
What is involved in a smoke detector sensitivity test?
A smoke detector sensitivity test is conducted to ensure that the smoke detector is operating within its designed sensitivity parameters. The goal is to confirm that the detector will respond appropriately to smoke and potential fires without causing false alarms or missing actual fire events. Here’s what is generally involved in a smoke detector sensitivity test:
- Preparation: Locate the Smoke Detectors: Identify all the smoke detectors in the area to be tested. Notify Occupants: Inform building occupants about the testing to avoid unnecessary alarm or evacuation. Disable Alarm System: If the smoke detectors are connected to an alarm system, disable it temporarily during testing to prevent triggering of a full alarm response.
- Visual Inspection: Check the smoke detectors for any physical damage or obstruction. Clean the smoke detectors to remove dust, cobwebs, or any other debris that might affect sensitivity.
- Testing Equipment: Use a manufacturer-approved test kit, often containing a smoke-like aerosol spray that simulates smoke. Some detectors may require specific test tools that check the electronic components.
- Conducting the Test: For ionization and photoelectric detectors, use the aerosol to simulate smoke presence. Apply the aerosol according to manufacturer instructions, typically by spraying at the sensor from a specified distance. For detectors with built-in testing functions, use the test button to perform an internal test.
- Detection and Response: Observe whether the smoke detector properly goes into alarm mode upon exposure to the test aerosol or during the self-test. Note how long it takes for the detector to respond to ensure it reacts within acceptable time limits.
- Record Keeping: Document the results of the test, noting any detectors that failed to activate or responded too slowly. Record any maintenance performed, such as cleaning or battery replacement.
- Post-Test Actions: Re-enable the building’s alarm system after completing testing. Contact a professional technician if any detectors failed and require repair or replacement. Ensure that all records are stored for future reference and regulatory compliance.
Testing frequency and procedures may be dictated by local fire safety regulations or manufacturer recommendations. It is important to adhere to these guidelines to maintain safety standards.