
Best Tools to Buy to Stop Ceiling Fan Noise in July 2026
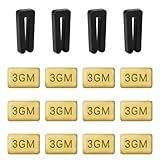
KALIONE Ceiling Fan Blade Balancing Kit Including Fan Balancing Clips and 12pcs Metal Self-Adhesive 3G Weight Practical Fan Balance Kit for Ceiling Fan Weight Balancing 4pcs
-
4 SETS INCLUDED-ENOUGH FOR ALL YOUR CEILING FAN BALANCING NEEDS!
-
TRENDY DESIGN AND DURABLE MATERIALS FOR LONG-LASTING PERFORMANCE.
-
EASY INSTALLATION: QUICKLY FIX WOBBLING FANS WITH SELF-ADHESIVE WEIGHTS.


Easycargo Fan Anti Vibration Pads, Fan Damper for Noise Reduction, Silicone Damper for Low Noise Fan 80mm, 92mm, 120mm, 140mm (Black 16-Pack)
- UNIVERSAL FIT: COMPATIBLE WITH 80MM TO 140MM FANS, EASY INSTALLATION.
- NOISE REDUCTION: SHOCK-ABSORBING DESIGN MINIMIZES VIBRATION AND NOISE.
- DURABLE MATERIAL: STRONG BLACK SILICONE ENSURES LONG-LASTING PERFORMANCE.
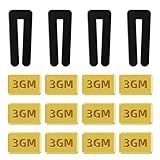
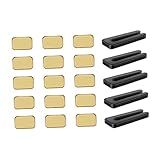
Foyods 16PCS Set Ceiling Fan Balancing Kit Fan Balancing Kit w/12 Pieces Metal Self-Adhesive Gold 3G Weight Ceiling Fan Balance Kit
- QUICKLY FIX WOBBLING FANS WITH EASY-TO-USE BALANCING KIT.
- REDUCE NOISE AND EXTEND LIFE OF CEILING FANS WITH PROPER BALANCE.
- COMPATIBLE WITH MOST FANS; INSTALLATION IS SIMPLE AND EFFECTIVE.
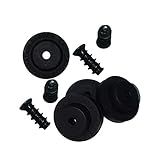
18 Pcs Rubber Grommet Kit for Hunter Ceiling Fan Parts - Grommets for Hunter Fan Blade Grommets Spare Kit - Ceiling Blade Rubber Washers
- COMPLETE SET: 18 DURABLE GROMMETS FOR RELIABLE CEILING FAN REPAIRS.
- COMPATIBLE DESIGN: FITS HUNTER FANS WITH 1/2 SCREW HOLES SEAMLESSLY.
- WHISPER-QUIET: REDUCES NOISE AND VIBRATION FOR ENHANCED PERFORMANCE.
1Set Ceiling Fan Blade Self-Adhesive Weights Balance Kit (9x3GM+6x5GM+6xclips) for Fan Correct Irregular Movements,Reduce Noise
-
EASY INSTALLATION: SELF-ADHESIVE WEIGHTS FIX WITHOUT DAMAGING BLADES.
-
NOISE REDUCTION: CORRECTS FAN OSCILLATION FOR QUIETER OPERATION.
-
UNIVERSAL COMPATIBILITY: WORKS WITH MOST CEILING FANS, ENHANCING LONGEVITY.
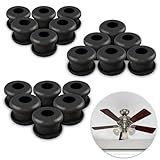
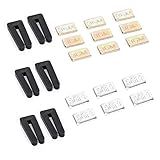
STOBOK 20pcs Ceiling Fan Blade Balancing Kit, Fan Balancing Kits Including 5Pcs Resilient Fans Balance Clips and 15Pcs Metal Self- Adhesive 3G Weight for Optimal Balance
- COMPLETE SET: 5 CLIPS + 15 WEIGHTS, PERFECT FOR ANY CEILING FAN!
- EASY-INSTALL CLIPS AND WEIGHTS ELIMINATE FAN WOBBLE AND NOISE.
- UNIVERSAL COMPATIBILITY ENSURES SEAMLESS USE WITH MOST CEILING FANS.
Ceiling fans are an excellent addition to any room. They provide comfort, circulate the air, and even help in reducing energy costs. However, a common issue that many people face with ceiling fans is the annoying ticking sound they can make. If you want to stop a ceiling fan from ticking, there are a few steps you can take:
- Check the blades: Begin by analyzing the fan blades. Make sure they are secure and tightened properly. Loose blades can rub against other components, causing a ticking sound. Tighten any loose screws and ensure the blades are balanced.
- Clean the fan: Dust and debris can accumulate over time, leading to ticking noises. Thoroughly clean the fan blades, motor housing, and other components. Use a soft cloth or a vacuum cleaner with a brush attachment to remove any dirt or dust.
- Lubricate the motor: Ceiling fan motors require lubrication to operate smoothly. Lack of lubrication can lead to friction and ticking sounds. To lubricate the motor, turn off the fan and locate the oil-holes on the motor housing. Apply a few drops of lubricating oil specifically designed for ceiling fans.
- Ensure proper installation: Improper installation can result in noise issues. Double-check that the fan is securely mounted to the ceiling and that all the screws and brackets are tight. If the fan shakes or wobbles, it can create ticking sounds.
- Use rubber washers: If the ticking noise persists, another effective solution is to use rubber washers. You can find these at hardware stores. Place rubber washers between the screws and the fan brackets, as well as between the blades and the blade brackets. This helps absorb any vibrations that may cause ticking sounds.
- Balance the fan: An unbalanced ceiling fan can also contribute to ticking. Ceiling fan balancing kits are available, consisting of clip-on weights. Attach the weights to the blades that are causing the most noise, following the kit's instructions.
Remember to exercise caution when working with electrical appliances. If you are unsure or uncomfortable performing any of these steps, it is always best to consult a professional electrician or fan repair technician.
What is causing my ceiling fan to make a ticking sound?
There can be several reasons for a ceiling fan to make a ticking sound. Some possible causes include:
- Loose screws or fasteners: Check if any screws, nuts, or bolts on the fan blades, motor housing, or mounting brackets are loose. Tighten them if needed.
- Fan blades hitting something: Make sure the fan blades are properly aligned and not hitting any nearby objects such as light fixtures, walls, or furniture.
- Buildup of dust or debris: Over time, dust and debris can accumulate on the fan blades or motor housing, causing them to become unbalanced and produce a ticking sound. Clean the blades and housing to eliminate any buildup.
- Worn-out motor bearings: The fan's motor bearings may become worn-out or misaligned, resulting in a ticking noise. If this is the case, it may require professional repair or replacement of the motor.
- Warped or damaged fan blades: If the fan blades are warped or damaged, they can produce a ticking noise as they rotate. It is recommended to replace any damaged or warped blades.
- Electrical issue: In rare cases, a ticking sound can be caused by an electrical issue within the fan. If you suspect an electrical problem, it is best to consult a licensed electrician for inspection and repair.
If you are unable to identify or resolve the issue, it is advisable to contact a professional electrician or a ceiling fan technician for further assistance.
What lubricant should I use to stop the ticking in a ceiling fan?
To stop the ticking noise in a ceiling fan, you can use any lubricant that is specifically designed for mechanical or electrical devices. It is recommended to use a silicone-based lubricant or a lightweight oil, such as a WD-40 or 3-in-1 oil. Before applying the lubricant, make sure to turn off the fan and allow it to come to a complete stop. Then, apply a few drops of lubricant to the bearings and other moving parts of the fan, paying attention to any areas that may be causing the ticking noise. Rotate the fan manually to distribute the lubricant evenly. However, it's always best to refer to the manufacturer's instructions or consult a professional if you are unsure.
How to identify and replace faulty flywheels to stop a ceiling fan from ticking?
To identify and replace a faulty flywheel in a ceiling fan to stop it from ticking, follow these steps:
- Turn off the ceiling fan: Ensure that the power to the ceiling fan is turned off before you start any work. Use the wall switch or circuit breaker to cut off the power supply to the fan.
- Remove the blades: Use a screwdriver to remove the screws that attach the blades to the flywheel. Gently pull out each blade and set them aside in a safe place.
- Remove the fan assembly: Depending on the design of your fan, you may need to remove a decorative housing or any other covering to access the flywheel. Unscrew or unclip any components that hold the fan assembly together, and carefully lower it using a ladder or step stool.
- Inspect the flywheel: Locate the flywheel, which is a disc-shaped component that connects the motor to the blades. Examine it for any visible damage, such as cracks, warping, or loose parts. A faulty flywheel could be causing the ticking sound.
- Replace the flywheel: If the flywheel is damaged, you'll need to replace it with a new one. You can purchase a replacement flywheel from a home improvement store, electronics store, or online. Make sure to match the flywheel with the model and brand of your ceiling fan.
- Disconnect wires and remove the old flywheel: Carefully disconnect any wires or connections that attach the flywheel to the motor. Take note of their positioning or take a picture to help with reconnection later. Unscrew or unclip the old flywheel, and carefully remove it from the fan assembly.
- Install and reconnect the new flywheel: Align the new flywheel with the mounting holes in the fan assembly, and secure it in place using screws or clips. Reconnect the wires or connections, ensuring they go back in their original positions.
- Reassemble the fan: Put the fan assembly back together by reattaching any covers, housing, or decorative components you removed earlier. Place the blades back onto the flywheel and secure them with screws.
- Turn on the power and test the fan: Flip the switch or turn on the circuit breaker to restore power to the fan. Gradually increase the speed of the fan using the controls and listen for any ticking sounds. If the ticking has stopped, your replacement flywheel has resolved the issue.
Note: If the ticking noise persists even after replacing the flywheel, there may be another underlying problem with the ceiling fan. In such cases, it may be best to consult a professional electrician or contact the manufacturer for further assistance.
How do I replace worn-out bearings in a ceiling fan to stop ticking?
To replace worn-out bearings in a ceiling fan and stop the ticking noise, follow these steps:
- Turn off the power: Before you start any work on the ceiling fan, make sure to turn off the power at the circuit breaker or fuse box to ensure safety.
- Remove the ceiling fan blades: Use a screwdriver to carefully remove the screws holding the ceiling fan blades in place. Gently disconnect each blade from the motor housing and set them aside.
- Remove the fan motor cover: Depending on the fan's design, there may be screws or clips holding the motor cover in place. Remove these to access the fan motor.
- Access the motor assembly: Once the motor cover is off, you should be able to see the motor assembly. It might be helpful to take a picture or make note of how the wires are connected for easy reinstallation later.
- Remove the motor housing and bracket: Loosen and remove any screws or bolts holding the motor housing to the fan bracket. Carefully disconnect any wiring connections as needed.
- Identify the worn-out bearings: The bearings are typically located at both ends of the motor shaft. Inspect them for any signs of wear, such as excess debris, rust, or noise when spinning the shaft.
- Remove the old bearings: Depending on the fan model, you might need to disassemble the motor further to access and remove the bearings. Use appropriate tools, such as pliers or an arbor press, to carefully extract the old bearings from the shaft.
- Replace the bearings: Purchase new compatible bearings based on the specifications of your ceiling fan. Press or slide the new bearings onto the motor shaft, ensuring they fit securely.
- Reassemble the motor: Put the motor assembly back together in the reverse order of disassembly. Ensure all wiring connections are properly reconnected and secure the motor housing to the fan bracket.
- Reattach the fan blades: Attach the fan blades back onto the motor housing in the correct orientation. Use the same screws you removed earlier to secure them tightly.
- Test the fan: Turn on the power at the circuit breaker or fuse box and test the fan to ensure the ticking noise is resolved. If the noise persists, there might be other issues, and you may need to contact a professional for further troubleshooting or assistance.
Note: If you're not confident in your ability to replace the bearings yourself, it's always recommended to seek professional help or consult the ceiling fan manufacturer's customer support for guidance.
How to tighten loose wires in a ceiling fan to stop ticking?
To tighten loose wires in a ceiling fan and stop ticking noises, you can follow these steps:
- Safety first: Before attempting any electrical work, make sure to turn off the power supply to the ceiling fan by flipping the circuit breaker or removing the fuse in the main electrical panel.
- Remove the ceiling fan canopy: The canopy is the metal or decorative cover that hides the electrical box where the ceiling fan is mounted. Use a screwdriver or the specific tool provided by the manufacturer to remove the screws holding the canopy in place. Carefully lower the canopy to expose the wiring.
- Identify loose wires: Inspect the wires inside the ceiling fan canopy and look for any loose connections. Loose wires can lead to ticking noises as they vibrate against other parts of the fan.
- Tighten wire connectors: If you see loose wire connectors, which are small plastic caps that hold the wires together, gently twist them clockwise to tighten. Make sure all wires are securely fastened within the wire connectors.
- Check grounding wires: Ensure that the grounding wire, usually green or bare copper, is securely connected to the metal frame of the ceiling fan. Tighten the grounding screw if necessary.
- Secure mounting screws: Check if there are any loose or wobbly screws on the ceiling fan blades, motor, or canopy. Tighten these screws using a screwdriver or the appropriate tool specified by the manufacturer.
- Reassemble and test: After confirming that all the wires are securely connected and all screws are tightened, carefully reinstall the canopy by reversing the removal steps. Turn the power back on and test the ceiling fan for the ticking noise. If the sound persists, you may want to contact a professional electrician for further assistance.
Remember, if you are unsure or uncomfortable working with electrical wirings, it is always a good idea to seek professional help to ensure safety and proper repairs.