
Best Tools to Replace Leaf Blower Pull Cord to Buy in May 2026
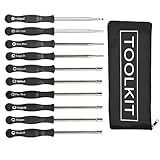
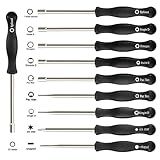
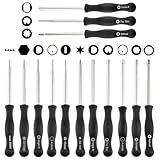
Hippotech Pack of 10 Carburetor Adjustment Tool Screwdriver Kit for Most 2-Cycle Small Engine Trimmers, Chainsaws, and Leaf Blowers
-
WIDE COMPATIBILITY: FITS STIHL, POULAN, AND ECHO TOOLS FOR VERSATILE USE.
-
PRECISION ENGINEERING: PERFECT FIT FOR LEADING BRANDS ENSURES PROFESSIONAL RESULTS.
-
DURABLE & ERGONOMIC: RUST-RESISTANT TOOLS WITH COMFORTABLE GRIPS ENHANCE CONTROL.


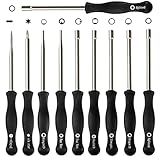
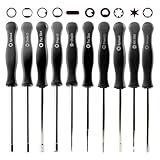
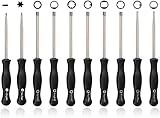
Uorimy Carburetor Adjustment Tool kit Pack-of-10 for 2 Cycle Small Engine Trimmer Weedeater Chainsaw Leaf Blower
- BOOST 2-CYCLE ENGINE PERFORMANCE WITH ESSENTIAL ADJUSTMENT TOOLS!
- EASY 1/4 TURN INCREMENTS FOR PRECISE CARBURETOR TUNING!
- VERSATILE FIT FOR POPULAR BRANDS LIKE STIHL, HUSQVARNA, AND MORE!
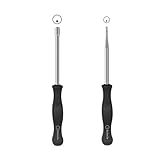
Hippotech Carburetor Adjustment Tool A-circle Scredrivers for Most 2-Cycle Small Engines - Compatible with String Trimmer, Chainsaw, Leaf Blower, Mini Cultivator
- BUILT TO LAST: HARDENED STAINLESS STEEL ENSURES LONG-LASTING DURABILITY.
- PRECISION FIT: PERFECT FOR A-CIRCLE SCREWS ON 2-CYCLE CARBURETORS.
- ERGONOMIC DESIGN: CLEAR SIZE MARKINGS FOR EASY IDENTIFICATION AND GRIP.
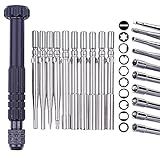
Mtanlo 10 in 1 Carburetor Screwdriver Bit Set,Carb Adjustment Tool Kit for Gasoline Small Engine 2 Cycle Trimmer Brushcutter Chainsaw Leaf Blower edger Pole Pruner
- VERSATILE KIT FOR 2 & 4 STROKE SMALL ENGINE ADJUSTMENTS.
- INCLUDES 10 SCREWDRIVER BITS FOR ALL CARBURETOR TYPES.
- COMPACT DESIGN WITH A METAL HANDLE FOR EASY TRANSPORT.
Hettluo Carburetor Adjustment Tool kit for 2 Common Cycle Carburator Adjusting Small Engine Trimmer Weedeater Chainsaw Leaf Blower
-
PERFECT FIT FOR MAJOR BRANDS: UNIVERSAL FOR ZAMA, WALBRO, STIHL & MORE.
-
PRECISION ADJUSTMENT: SQUARED HANDLES ALLOW EASY 1/4 TURN INCREMENTS.
-
COMFORTABLE USE: ERGONOMIC DESIGN ENSURES CONVENIENCE WHILE TUNING.
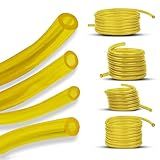
4 Sizes Petrol Fuel Gas Line Pipe Hose Tubing For String Trimmer Chainsaw Blower Lawn Mower and other Power Tools For 2 Cycle Small Engine Poulan, Craftman and more (Yellow 4PC)
- VERSATILE SIZES: KIT INCLUDES 4 SIZES, FITTING MANY SMALL ENGINES.
- EXTRA LENGTH: 4 FEET OF HOSE LETS YOU CUT TO THE PERFECT LENGTH.
- EASY DIY: COST-EFFECTIVE SOLUTION FOR MULTIPLE TOOLS & FAST REPAIRS.
10 Pcs Carburetor Adjustment Tools Ignition Coil Spark Tester for 2-Cycle Small Engine Compatible with Trimmer Leaf Blower Weedeater Chainsaw
-
UNIVERSAL COMPATIBILITY WITH POPULAR 2-CYCLE ENGINE BRANDS.
-
ERGONOMIC DESIGN FOR COMFORTABLE AND EFFICIENT ADJUSTMENTS.
-
COMPREHENSIVE TOOL KIT INCLUDES 10 VERSATILE ADJUSTMENT TOOLS.
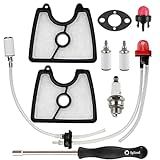
Hettluo 581798001 Fuel Line Kit Air Filter Kit Adjustment Tool for Husqvarna 125B 125BX 125BVX Leaf Blower
- COMPLETE MAINTENANCE KIT FOR OPTIMAL PERFORMANCE OF HUSQVARNA BLOWERS.
- INCLUDES ESSENTIAL TOOLS AND FILTERS TO ENHANCE BLOWER EFFICIENCY.
- FITS VARIOUS MODELS; A MUST-HAVE FOR RELIABLE YEAR-ROUND USE.
HUSWELL 14 PCS Carburetor Adjustment Tool Carb Adjusting Tool kit for 2-Cycle Small Engine Ryobi Poulan Husqvarna STIHL Echo Homelite Ruixing Craftsman Trimmer Leaf Blower Chainsaw
-
VERSATILE TOOLSET FOR MOST 2-CYCLE ENGINES-BOOST PERFORMANCE!
-
ERGONOMIC DESIGN ENSURES COMFORT DURING CARBURETOR ADJUSTMENTS!
-
COMPATIBLE WITH MAJOR BRANDS-PERFECT FOR EVERY DIYER AND PRO!
Hippotech Pack of 10 Carburetor Adjustment Tool, Universal Carb Tool & Screwdriver Set for 2-Cycle Small Engine Maintenance - Fits Chainsaw, Weed Eater, Trimmer, Leaf Blower
-
COMPREHENSIVE 10-IN-1 TOOLSET FOR MAJOR SMALL ENGINE BRANDS.
-
DURABLE, ERGONOMIC DESIGN FOR PRECISE, COMFORTABLE ADJUSTMENTS.
-
PERFECT FOR DIYERS & PROS; SAVES ON REPAIR COSTS & OPTIMIZES PERFORMANCE.
To replace the pull cord on a leaf blower, you will need a few tools and follow these steps:
- Start by disconnecting the spark plug wire to prevent accidental starting. This is an important safety precaution.
- Remove any screws or clips that hold the recoil starter housing in place. Typically, these will be located on the top or side of the blower's engine. Use a screwdriver or socket wrench to loosen and remove them.
- Once the housing is loose, carefully lift it off to access the recoil starter assembly. Set the housing aside in a safe place.
- Inspect the old pull cord attached to the recoil starter assembly. If it has snapped or has become frayed, it needs to be replaced. Ensure you have a suitable replacement cord before proceeding.
- To remove the old cord, unwind it from the recoil starter pulley. Tug gently on the cord until all of it has come free from the pulley.
- Prepare the new pull cord by feeding one end through the hole or eyelet in the center of the recoil starter pulley. Tie a secure knot to prevent it from slipping back through.
- Once the cord is tied, wind it around the pulley securely in the direction indicated by any arrows or engraved instructions. Wind it tightly but avoid over-tightening, as it may prevent the cord from recoiling properly.
- After winding the pull cord, thread the loose end through the hole on the outer rim of the recoil starter housing.
- Reattach the recoil starter housing by aligning it properly with the blower's engine. Secure it in place using the screws or clips you removed earlier.
- Before using the leaf blower again, test the recoil starter by giving the cord a gentle tug. It should reel back into the housing smoothly. If it doesn't, recheck the cord's installation and winding on the pulley.
Remember to reconnect the spark plug wire before starting the leaf blower. Following these steps will help you replace the pull cord and ensure your leaf blower is in working condition.
What is the estimated time required to replace a leaf blower's pull cord?
The estimated time required to replace a leaf blower's pull cord can vary depending on several factors such as the model of the leaf blower, the experience of the person doing the replacement, and the tools available. However, on average, it may take around 30 minutes to 1 hour to replace a leaf blower's pull cord.
What are the signs that indicate a worn-out pull cord on a leaf blower?
There are several signs that may indicate a worn-out pull cord on a leaf blower:
- Difficulty in pulling the cord: If you find it increasingly challenging or strenuous to pull the cord, it might be a sign that the cord is worn out. A worn-out pull cord can become frayed or lose its elasticity over time, making it more difficult to pull and start the leaf blower.
- Cord snapping back inside: If the cord snaps back inside the leaf blower housing after being pulled, it could mean that the cord has become detached or worn out. This can happen when the cord loses its grip or has become tangled, preventing it from fully extending and retracting.
- Visible fraying or damage: Inspect the pull cord for any signs of fraying, breakage, or damage. Over time, the cord can become damaged due to repeated use, exposure to weather conditions, or other factors. If you notice any visible signs of wear, it is likely that the pull cord needs to be replaced.
- No resistance or tension: When you pull the cord, it should provide resistance and tension. If you find that the cord easily pulls out without any resistance or tension, it could indicate a worn-out or broken pull cord. This can make it impossible to start the leaf blower.
- Lack of recoil: If the pull cord does not recoil or retract fully after being pulled, it suggests that the cord or its recoil mechanism may be worn out. This can make it difficult to start the leaf blower as the cord does not fully reset for the next pull.
If you observe any of these signs, it is advisable to replace the worn-out pull cord to ensure proper functioning of the leaf blower.
How to lubricate the pull cord assembly on a leaf blower?
To lubricate the pull cord assembly on a leaf blower, follow these steps:
- Start by disconnecting the spark plug wire to ensure the engine doesn't accidentally start during the lubrication process.
- Locate the pull cord assembly on the leaf blower. It is usually located at the top or side of the engine and may be covered by a protective plastic or metal housing.
- Remove any covering or housing that is obstructing access to the pull cord assembly. This may require using a screwdriver or wrench to loosen and remove screws or bolts.
- Once you have exposed the pull cord assembly, inspect it for any signs of dirt, debris, or damage. Clean or replace any damaged components as necessary.
- Apply a small amount of lubricating oil or silicone spray to the moving parts of the pull cord assembly, including the pulley and any other areas where friction is present. Be sure not to over-lubricate, as excessive lubrication can attract dust and dirt, leading to further issues.
- Gently pull the cord a few times to distribute the lubricant and ensure smooth operation.
- Reassemble any covers or housing that were removed during the process, and secure them in place with screws or bolts.
- Reconnect the spark plug wire.
- Test the pull cord assembly by giving it a few firm pulls to ensure it is working smoothly and without any issues.
It's important to note that it's best to consult your leaf blower's manual for specific instructions on lubricating the pull cord assembly, as different models may have different requirements or recommendations.
What is the purpose of the pawl in a leaf blower's pull cord mechanism?
The pawl in a leaf blower's pull cord mechanism serves the purpose of engaging and disengaging the engine's starter mechanism. When the pull cord is initially pulled, the pawl engages with the starter mechanism, allowing it to rotate and start the engine. Once the engine is running, the pawl disengages from the starter mechanism, preventing it from rotating and avoiding any potential damage. Essentially, the pawl is responsible for controlling the movement of the starter mechanism based on the position of the pull cord.
How to remove the pull cord on a leaf blower?
The process to remove the pull cord on a leaf blower may vary depending on the specific model and make of your leaf blower. However, here are general steps that you can follow:
- Ensure safety: Disconnect the spark plug wire from the spark plug to prevent accidental starting.
- Access the housing: Locate the pull cord housing, which is usually located on top of the leaf blower. You may need to remove some screws or protective covers to access the housing.
- Remove the cord: Once the housing is accessible, you will find a spool or reel with the pull cord wound around it. Carefully unwind the cord from the spool, taking note of the way it is wound.
- Remove the handle: Most pull cords have a handle on one end. Find the knot securing the handle and carefully remove or untie it.
- Replace or repair: If you are simply replacing the pull cord, you can untie or cut the cord near the spool, remove it completely, and replace it with a new cord by following the steps in reverse order. If you are repairing the existing cord, untangle or fix any knots or snags, and wind the repaired cord back onto the spool.
- Reassemble: Once the new cord is in place or the existing one is repaired, wind it evenly around the spool. Make sure the spool is properly seated in its housing, then reattach any covers or screws you had removed.
- Reconnect spark plug wire: Reconnect the spark plug wire to its spark plug.
Note: It is recommended to consult the owner's manual of your specific leaf blower model for detailed instructions on disassembling and reassembling the pull cord, as specific steps may vary.