Best Outdoor Storage Shed Repair Kits to Buy in July 2026
PWEOW Door Tune up Kit for Arrow Shed Storage Products, DK100-A Sliding Shed Doors Kit - Black
-
COMPLETE KIT FOR EASY SHED DOOR REPAIRS EVERYTHING NEEDED FOR A QUICK, HASSLE-FREE UPGRADE.
-
DURABLE PARTS BUILT TO LAST HIGH-QUALITY MATERIALS RESIST WEATHER, ENSURING SMOOTH OPERATION.
-
SIMPLE INSTALLATION, NO SPECIAL TOOLS REQUIRED REPLACE DAMAGED PARTS IN MINUTES FOR A LIKE-NEW DOOR!


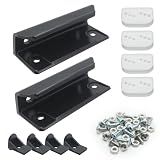
HILLMASTER Durable Anti-Sag Gate Kits for Wooden Fence, Gate Support Cable Kit in Zinc, Anti-Sagging Fence Gate Kit Steel, Wood Door Repair Kit for Outdoor, Black
-
DURABLE STAINLESS STEEL CONSTRUCTION: OUTLASTS GALVANIZED WIRE IN ANY WEATHER.
-
EASY & INSTANT INSTALLATION: NO EXTRA TOOLS NEEDED; ADJUSTABLE FOR CONVENIENCE.
-
VERSATILE USAGE: PERFECT FOR HANGING LIGHTS, GATES, AND VARIOUS OUTDOOR NEEDS.
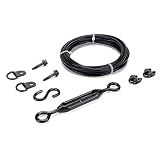
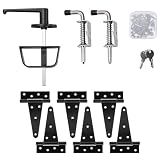
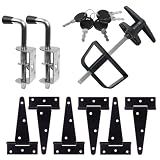
SKYSEN Shed Door Hardware Kit, Complete Set with T-Handle Lock, Barrel Bolts & Hinges.(sdhk)
- ALL-IN-ONE KIT: COMPLETE HARDWARE FOR ULTIMATE OUTDOOR SECURITY.
- TOOL-FREE SETUP: PRE-ASSEMBLED FOR QUICK AND EASY INSTALLATION.
- HEAVY-DUTY LATCH: WEATHERPROOF DESIGN RESISTS TAMPERING AND HARSH CONDITIONS.
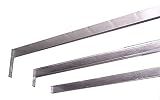
Arrow 10610 Roof Strengthening Kit for Shed Roofs, 10 by 6-Feet/10 by 8-Feet/10 by 9-Feet/10 by 10-Feet
- DURABLE ELECTRO-GALVANIZED STEEL RESISTS CORROSION AND WEAR.
- INSECT, HEAT, AND SUNLIGHT RESISTANT FOR LONG-LASTING USE.
- COMPLETE WITH HARDWARE; COMPATIBLE WITH MULTIPLE ARROW SHED SIZES.
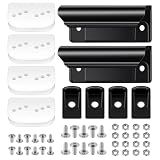
Shed Door Kit, Shed Door Hardware Kit with 4-1/2" L-Handle Lock, Stainless Steel Latches and 6" Hinges, Black
- EASY INSTALLATION: COMPLETE KIT FOR HASSLE-FREE SHED DOOR SETUP.
- WEATHER-RESISTANT: DURABLE MATERIALS PREVENT CORROSION AND RUST.
- VERSATILE USE: PERFECT FOR SHEDS, GATES, BARNS, AND MORE OUTDOOR BUILDS.
LEYURISE Shed Door Tune Up Full Kit Metal Door Glides Kit Compatible with Arrow ShelterLogic Shed Replace#: Dk100-A,Includes 2 Door Handles, 4 Lower Door Guides 4 Door Slides Screws and Nuts
-
COMPLETE KIT FOR ARROW SHELTERS: ALL PARTS FOR EASY REPAIRS!
-
DURABLE MATERIALS RESIST WEATHER: NO MORE CRACKING OR DAMAGE!
-
SIMPLIFY MAINTENANCE: ALL-IN-ONE SOLUTION FOR SHED DOOR REPAIRS!
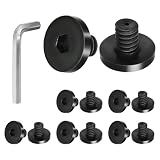
Suncast 12PCS Shed Replacement Bolts with Screwdriver, Compatible with Suncast Storage Sheds
- DURABLE PETG BOLTS FOR LONG-LASTING PERFORMANCE IN ANY ENVIRONMENT.
- INCLUDES A HEX SCREWDRIVER FOR HASSLE-FREE INSTALLATION AND USE.
- AVAILABLE IN TWO COLORS TO MATCH YOUR SUNCAST STORAGE SHED PERFECTLY.
Shed Door Hardware Kit - Complete Gate Set with Hinges, Latch, Lock & Handle for Your Shed Door
- MAXIMUM SECURITY: HEAVY-DUTY LOCKS AND HINGES ENSURE YOUR SAFETY.
- HASSLE-FREE INSTALLATION: ALL COMPONENTS INCLUDED FOR EASY SETUP.
- DURABLE DESIGN: WEATHER-RESISTANT MATERIALS FOR LONG-LASTING USE.
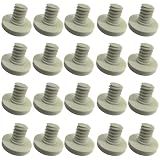
20 PCS Replacement Bolts Compatible with Suncast Storage Sheds for Suncast/Craftsman Resin Storage Sheds, Replacement Screws Compatible with Suncast Storage Sheds Shed Accessories (20, White, 3/8)
- COMPATIBLE WITH SUNCAST SHEDS FOR QUICK AND EASY INSTALLATION.
- DURABLE ABS MATERIAL ENSURES LONG-LASTING PERFORMANCE AND STRENGTH.
- IDEAL FOR DIY PROJECTS, REINFORCING STORAGE, AND REPLACING LOST SCREWS.
If you have a damaged outdoor storage shed, it may seem daunting to repair it, but with the right guidance, you can restore it to its former condition. Here are some general steps to help you repair a damaged outdoor storage shed:
- Assess the damage: Begin by thoroughly examining the shed to determine the extent of the damage. Identify any broken or rotten parts of the shed, such as doors, walls, or the roof. Take note of what needs to be repaired or replaced.
- Remove damaged components: To repair the shed, you'll need to remove any damaged components. This might include removing rotten wood, broken windows, or damaged siding. Carefully dismantle these parts taking safety precautions.
- Clean the area: Once the damaged components are removed, clean the area where the repairs will be made. Remove any debris, mold, or mildew, and ensure the area is free from any unwanted substances.
- Prepare replacement materials: If any parts need to be replaced, measure the dimensions and gather the necessary materials. This may include purchasing new wood, siding, roofing, or other materials needed to restore the shed's structure.
- Repair structural elements: Begin by repairing the shed's structural elements, such as its frame, walls, or roof. Replace any rotten or broken beams, studs, or rafters using the measurements you previously took. Secure the new components in place, ensuring they align properly with the existing structure.
- Replace siding and windows: If the siding or windows were damaged, remove the old ones and install new ones. Use appropriate screws or nails to secure the new materials to the shed's frame. Ensure proper insulation and weatherproofing to prevent future damage.
- Fix the roof: Repair any damage to the shed's roof by replacing broken or missing shingles, or repair the entire roof if necessary. Apply tar or weatherproof sealant to prevent leaks.
- Paint and seal: Once the repairs are complete, consider painting or staining the shed to give it a fresh look. Properly seal the wood and any other exposed surfaces to protect them from weather elements.
- Enhance security and maintenance: Install secure locks, hinges, and latches to improve the security of your shed. Regularly inspect your shed for signs of damage and maintain it properly to prevent future issues.
Remember that these steps are general guidelines, and the specific repair process may vary depending on the type and design of your outdoor storage shed. It's always recommended to consult professional help or use detailed repair guides if you are unsure about any specific repair procedures.
What is the proper way to seal gaps in an outdoor storage shed?
Sealing gaps in an outdoor storage shed is essential to keep out moisture, pests, and outside elements. Here are the steps to properly seal the gaps in your shed:
- Inspect the shed: Thoroughly analyze the shed for any gaps, cracks, or holes that could allow water, air, or pests to enter. Common areas for gaps include windows, doors, walls, vents, and the roofline.
- Clean the surfaces: Before sealing, ensure the surfaces are clean and free of dust, debris, or old sealant. This will allow the new sealant to adhere properly.
- Choose the right sealant: Select a high-quality sealant suitable for outdoor use and the type of material your shed is made of. Silicone-based sealants are versatile and effective for most sealing purposes, including gaps in sheds.
- Prepare the sealant: Follow the instructions provided by the manufacturer to prepare the sealant properly. This may involve cutting the nozzle, attaching it to a caulking gun, or mixing the sealant.
- Start sealing: Working systematically, start sealing the gaps. Apply the sealant in a continuous, even bead along the length of the gap, filling it completely. Use a caulking gun to ensure precise application.
- Smooth the sealant: Immediately after applying the sealant, use a caulk smoothing tool, a spatula, or a wet finger to smooth the sealant's surface. This step helps create a neat and flush finish, ensuring better water resistance and preventing dirt buildup.
- Allow curing time: Read the sealant instructions to determine the recommended curing time. Ideally, the sealant should be allowed to dry and cure undisturbed for at least 24 hours. Ensure the shed remains closed during this time.
- Check for additional gaps: Once the sealant has dried, inspect the shed again to ensure all gaps have been effectively sealed. Repeat the sealing process if any gaps were missed or newly discovered.
Remember, proper sealing is not a one-time task. Regularly inspect your shed for gaps and reseal as necessary. This will help maintain the shed's integrity, durability, and protection against outdoor elements.
How to reinforce the floor joists in a damaged outdoor storage shed?
To reinforce the floor joists in a damaged outdoor storage shed, you can follow these steps:
- Identify the extent of the damage: Inspect the floor joists to determine the specific areas that need reinforcement. Look for signs of rot, splitting, or sagging.
- Remove any damaged components: If any floor joists are severely damaged or rotted, they may need replacement. Use a reciprocating saw or a handsaw to cut away the damaged sections. Make sure to remove any nails or screws that were holding the damaged sections in place.
- Measure and cut new floor joists: Take accurate measurements of the gaps left by the removed or damaged joists. Transfer these measurements to the new lumber and cut the replacement joists accordingly.
- Install the new floor joists: Place the new joists in their corresponding positions, ensuring they are level and flush with the existing ones. Attach them securely using galvanized screws or joist hangers. Use a level to verify their alignment.
- Strengthen the connections: To reinforce the joists further, add additional fasteners such as joist hanger nails or screws. This will increase the stability and strength of the connections between the floor joists and the shed's frame.
- Add blocking or bridging: If your shed has longer spans between the joists, consider installing blocking or bridging between them. This will minimize any potential flexing or bouncing in the floor system.
- Fix any other identified issues: While reinforcing the floor joists, check for any other problems that may affect the shed's structure, such as loose or rotted floorboards. Repair or replace these components as necessary.
It is important to note that if the damage is extensive or beyond your repair skills, it may be best to seek professional help or consider rebuilding the shed.
How long does it take to repair a damaged outdoor storage shed?
The time it takes to repair a damaged outdoor storage shed can vary depending on the extent of the damage and the complexity of the repair work. In general, minor repairs such as fixing a broken door hinge or replacing a damaged panel can be completed within a few hours to a day. However, more extensive repairs that involve structural issues, roofing, or major repairs may take several days or even weeks to complete. It's best to assess the specific damage and consult with a professional to determine the estimated repair time.
What is the best method to repair a leaking roof on an outdoor storage shed?
The best method to repair a leaking roof on an outdoor storage shed would depend on the specific type of roofing material used and the extent of the damage. However, here are some general steps to consider:
- Identify the source of the leak: Inspect the roof thoroughly to locate the exact area where water is entering. Look for missing or damaged shingles, cracked flashing, or any other signs of damage.
- Clear the roof: Remove any debris or loose materials on the roof that could contribute to water pooling or further damage.
- Patch small holes or cracks: For minor damage, such as small holes or cracks in the roofing material, you can use a roofing sealant or roofing cement to seal the area. Apply the sealant or cement according to the manufacturer's instructions, using a trowel or putty knife.
- Replace damaged shingles: If the leak is caused by missing or damaged shingles, remove the old ones and replace them with new ones. Carefully lift the surrounding shingles using a flat pry bar, remove the nails securing the damaged shingle, and slide the new shingle into place. Nail it down and ensure it is properly aligned with the adjacent shingles.
- Repair flashing: Flashing is the metal or rubber material installed around vents, chimneys, or other protrusions on the roof to prevent water from seeping inside. If the flashing is damaged or deteriorated, it should be replaced. Remove the old flashing, clean the area, and install new flashing using roofing nails or screws.
- Consider applying a roof coating: To provide an extra layer of protection and waterproofing, you may consider applying a roof coating specifically designed for your type of roofing material. Follow the manufacturer's instructions for proper application.
- Regular maintenance: To prevent future leaks, make sure to regularly inspect and maintain the roof of your outdoor storage shed. Clean off debris, trim overhanging tree branches, and check for any signs of damage that need prompt repair.
If you are unsure or uncomfortable with performing the repairs yourself, it is recommended to consult with a professional roofer who can assess the situation and provide expert advice or repair services.