Best Air Purifier Cleaning Tips to Buy in July 2026
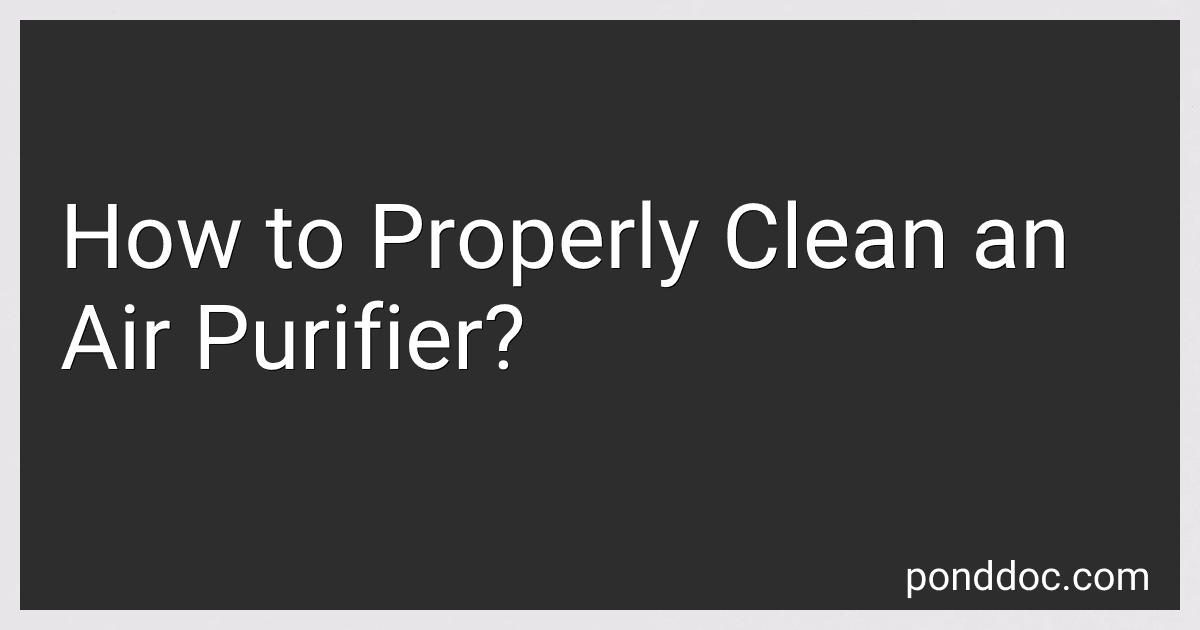
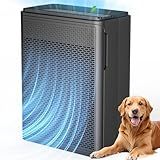
ECOSELF Smart Air Purifier for Home Large Rooms, with WiFi Control, Covers Up to 2400 Ft², Smart Mode, AQI Display, 22dB Sleep Mode & Aromatherapy with 2X-Power Filtration, HAP603WF, Bright White
-
CONVENIENT APP CONTROL FOR EFFORTLESS AIR QUALITY MANAGEMENT.
-
2X-POWER FILTRATION: CLEANS AIR IN LARGE SPACES UP TO 2400 FT²!
-
ULTRA-QUIET SLEEP MODE WITH AROMATHERAPY FOR PEACEFUL NIGHTS.


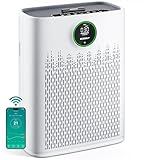
Air Purifiers for Home Large Room Cover Up to 1500 Ft² with True HEPA Filter, 20dB Sleep Mode, 360° Air Intake & Outlet, Air Cleaner for Bedroom Pets, 7 Color Light, HAP604, Bright White
-
CLEANS LARGE ROOMS FAST: REFRESH AIR 5X/HOUR IN SPACES UP TO 1500 FT².
-
TOP-NOTCH FILTRATION: 99.97% EFFICIENCY AGAINST 0.3ΜM AIRBORNE PARTICLES.
-
WHISPER-QUIET OPERATION: ENJOY PEACEFUL SLEEP AT JUST 20DB FOR RESTFUL NIGHTS.
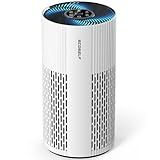
Shark Air Purifier for Home, NeverChange Compact Pro, for Bedroom, Nursery, Home Office, Dorm, HEPA-Exceeding Filter, Captures Pollutants, Pet Dander, Dust, Odor, Smoke, and More, HP071BRN, Winter Fog
-
REAL-TIME IQ DISPLAY: MONITOR AIR QUALITY INSTANTLY FOR PEACE OF MIND.
-
LONG-LASTING FILTERS: SAVE $150 ON REPLACEMENTS WITH NEVERCHANGE TECHNOLOGY.
-
COMPACT POWER: COVERS 250 SQ. FT. IN 1 HOUR-IDEAL FOR ANY SPACE!
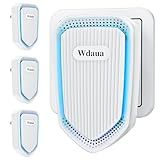
Air Purifier 4 Pack Plug In Negative Ion Air Purifiers Ionizer for Home, Bedroom, Office, Basement Kitchen Air Freshener Odor Reducer Pets Smoke Smell (4)
- PLUG-AND-PLAY DESIGN: INSTANT AIR PURIFICATION, NO INSTALLATION NEEDED.
- ADVANCED ION TECH: CAPTURES DUST, DANDER, AND ODORS FOR CLEAN AIR.
- QUIET AND COMPACT: PERFECT FOR PEACEFUL USE AT HOME OR ON-THE-GO.
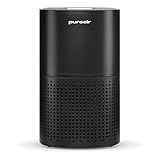
PuroAir 240 HEPA Air Purifier for Home Large Rooms - Covers Up To 1,000 Sq Ft - Filters Up To 99.9% of Pollutants, Smoke, Pollen, Dust - Quiet HEPA Air Filter - Air Purifiers for Bedroom
-
BREATHE EASY: CLEANS 1,000 SQ FT IN JUST ONE HOUR!
-
PROVEN FILTRATION: 99.9% POLLUTANTS FILTERED, 700X SMALLER THAN HAIR.
-
QUIET, SMART 24/7 OPERATION: SET IT AND FORGET IT FOR CLEANER AIR!
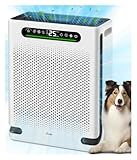
Air Purifiers for Home Large Room Up to 2600 Ft², HEPA Air Purifier with Washable Filter & Air Quality Display, Powerful Turbo Mode Air Cleaner for Pet Hair Odors Smoke Dust
-
DUAL AIR INLETS BOOST COVERAGE UP TO 2,600 SQ. FT. MAXIMIZE CLEAN AIR CIRCULATION FOR LARGER SPACES EFFECTIVELY.
-
TURBO MODE QUICKLY CAPTURES PET HAIR AND ODORS SPECIALIZED PURIFICATION FOR PET OWNERS ENSURES FRESH AIR INSTANTLY.
-
REAL-TIME AIR QUALITY MONITORING WITH SMART AUTO MODE CONTINUOUS AIR QUALITY DISPLAY AND AUTOMATIC ADJUSTMENTS FOR OPTIMAL PERFORMANCE.
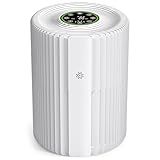
VOOPNU Air Purifiers For Bedroom And Home 1095 Sq. Ft True H13 HEPA Pet Air Purifier For Dorm Room With Air Quality Display 360° Air Intake & Outlet For Bedroom Office, DH-JHD07(White)
-
VISIBLE PURIFICATION: SEE REAL-TIME AIR QUALITY CHANGES FOR INFORMED CHOICES.
-
LOW ENERGY COSTS: SAVE ON BILLS WITH EFFICIENT, LOW-POWER PURIFICATION.
-
PET HAIR DEFENSE: LARGE GRILLE DESIGN INTERCEPTS HAIR, ENHANCING MAINTENANCE EASE.
YARIKI Air Purifiers for Home Pets Covers Up to 1500 Sq Ft,H13 Hepa Filter with Washable Pre-Filter,Pet Hair Dander Smoke Air Cleaner,22 dB Quiet Sleep for Living Room Bedroom Kitchen,P280 (Black)
-
COVERS LARGE SPACES: EFFECTIVE FOR ROOMS UP TO 1500 SQFT IN JUST 10 MINS.
-
IDEAL FOR PET OWNERS: ADVANCED HEPA FILTERS TACKLE DANDER AND ODORS EFFORTLESSLY.
-
WHISPER-QUIET OPERATION: ENJOY LOW NOISE AND ENERGY SAVINGS WITHOUT DISTURBANCES.
WINIX 5510 Air Purifier (New Generation of 5500-2 with App Support) for Home Large Room Up to 1881 Ft² in 1 Hr, True HEPA, High Deodorization Carbon Filter and Auto Mode, Captures Pet Allergies, Smoke
-
CLEANS UP TO 1,881 SQ FT IN JUST 1 HOUR FOR RAPID AIR PURIFICATION.
-
CAPTURES 99.99% OF ALLERGENS FOR A HEALTHIER LIVING ENVIRONMENT.
-
WASHABLE PRE-FILTER PROLONGS HEPA LIFE, SAVING YOU MONEY LONG-TERM.
Cleaning an air purifier is essential to maintain its performance and efficiency. Here's a step-by-step guide on how to properly clean an air purifier:
- Turn off and unplug the air purifier: Before you start cleaning, ensure that the device is powered off and disconnected from the electrical outlet to prevent any accidents.
- Remove the filters: Most air purifiers have multiple filters, which may include a pre-filter, activated carbon filter, and a HEPA (high-efficiency particulate air) filter. Refer to your device's manual to understand the filter system and instructions for removal.
- Vacuum the filters: Use a handheld vacuum cleaner or a brush attachment to gently vacuum the filters. This helps remove larger particles and dust accumulated on the surface.
- Wash pre-filters (if applicable): If your air purifier has washable pre-filters, carefully remove them and rinse under running water. Use a mild detergent if needed, but avoid harsh chemicals or hot water that may damage the filters. Allow them to completely dry before reinserting.
- Wipe down the unit: With a soft, damp cloth, wipe the exterior of the air purifier to remove any accumulated dust or dirt. Pay attention to any areas prone to build-up, such as the control panel or air intake and outlet vents.
- Clean the grilles and vents: Use a small brush or a vacuum cleaner's brush attachment to clean the grilles and vents. This helps remove dust and debris that may clog the air purifier's airflow.
- Reassemble the filters: Once the filters are thoroughly cleaned and dry, reinsert them back into the air purifier according to the manufacturer's instructions. Ensure they are properly aligned and securely placed.
- Check the air purifier's indicator light: Some air purifiers have indicator lights that indicate when it's time to clean or replace filters. Reset or replace the indicator light (if needed) according to the device's instructions.
- Regular maintenance: Depending on the manufacturer's recommendation, it's important to clean and replace filters as needed. Regularly checking and maintaining your air purifier will ensure optimal performance.
By following these steps and regularly cleaning your air purifier, you can effectively remove airborne contaminants and maintain clean indoor air quality.
How to check if all the parts of an air purifier are cleaned properly?
To check if all the parts of an air purifier are cleaned properly, follow these steps:
- Disconnect the air purifier from the power source to ensure safety.
- Remove the filters from the air purifier. These usually include a pre-filter, a carbon filter, and a HEPA filter. Carefully inspect each filter for dust, dirt, or debris.
- Clean the filters according to the manufacturer's instructions. This can include washing, vacuuming, or replacing them.
- Check the outer casing of the air purifier. Wipe it down with a damp cloth to remove any dust or grime. Pay attention to corners, edges, and crevices where dirt can accumulate.
- Examine the grill or vent openings of the air purifier. Use a brush or vacuum cleaner attachment to remove any dust or debris stuck in these areas.
- Inspect the fan and motor inside the air purifier. If accessible, carefully vacuum or wipe them to remove dust or obstructions.
- Reassemble the air purifier, making sure that all filters are securely in place and all parts are correctly attached.
- Reconnect the air purifier to the power source and turn it on. Listen for any strange noises or vibrations that may indicate a problem with the fan or motor.
- Let the air purifier run for a reasonable amount of time (consult the manufacturer's guidelines) to ensure it is functioning properly and effectively cleaning the air.
By following these steps, you can ensure that all parts of your air purifier are cleaned properly and ready to provide clean, purified air.
How to remove and clean the pre-filter in an air purifier?
To remove and clean the pre-filter in an air purifier, you can follow these steps:
- Turn off and unplug the air purifier: Ensure the air purifier is switched off and unplugged from the power source for safety.
- Locate the pre-filter: The pre-filter is typically located on the front or side of the air purifier. Refer to the user manual if needed.
- Remove the pre-filter: Depending on the model, the pre-filter may have a latch, button, or tabs to release it. Gently remove the pre-filter from the air purifier.
- Shake off loose debris: Take the pre-filter outside or over a trash bin and gently shake it to remove any loose dust and debris.
- Vacuum the pre-filter: Use a vacuum cleaner with a brush attachment to vacuum the pre-filter. This will help remove any dust or dirt that is embedded in the filter.
- Wash the pre-filter (if washable): If the pre-filter is washable, gently rinse it under lukewarm water to remove any remaining dirt. You can use mild dish soap if necessary, but avoid using any harsh chemicals. Ensure the pre-filter is completely dry before reinstalling it.
- Replace the pre-filter (if not washable): If the pre-filter is not washable, it will need to be replaced with a new one. Refer to the user manual or contact the manufacturer to order the appropriate replacement filter.
- Reinstall the pre-filter: Once the pre-filter is clean and dry, carefully place it back into the air purifier. Ensure it is properly aligned and securely fastened with the latch, button, or tabs.
- Plug in and turn on the air purifier: Once the pre-filter is back in place, plug in the air purifier and turn it on. The clean pre-filter will help improve the air quality in your environment.
Remember to check the user manual specific to your air purifier model for any additional instructions or precautions.
How to clean the control panel of an air purifier without damaging it?
To clean the control panel of an air purifier without damaging it, follow these steps:
- Power off the air purifier and unplug it from the power source to ensure safety during cleaning.
- Use a soft, lint-free cloth or microfiber cloth. Avoid using paper towels or abrasive materials as they can scratch the control panel.
- Dampen the cloth slightly with water or mild soap solution. Do not spray water directly on the control panel or immerse it in water, as this can damage the electronic components.
- Gently wipe the control panel in a circular motion to remove any dust, dirt, or grime. Pay attention to any buttons or switches on the panel, ensuring they are cleaned thoroughly.
- For stubborn stains or dirt, you can slightly increase the dampness of the cloth, but avoid excessive moisture.
- Once cleaned, use a dry cloth to wipe away any excess moisture or soap residue from the control panel.
- Allow the control panel to air dry completely before plugging in the air purifier and turning it back on.
Remember to always refer to the manufacturer's instructions or user manual for specific cleaning recommendations for your air purifier model.
What is the UV-C light system and how does it work in air purification?
UV-C light systems are used in air purification to eliminate airborne pathogens, including bacteria, viruses, and mold spores. UV-C stands for ultraviolet germicidal irradiation, which uses short-wavelength ultraviolet light to neutralize microorganisms.
The UV-C light system typically consists of a UV-C lamp, which emits UV light at a wavelength of around 253.7 nm. When air passes through the air purification system, it also passes across the UV-C lamp.
The UV-C light works by disrupting the DNA and RNA of microorganisms, rendering them unable to reproduce or causing them to die off. It damages the genetic material of the pathogens, preventing them from replicating and causing infections or illnesses. This process is known as photodimerization, and it effectively deactivates the microorganisms, rendering them harmless.
However, it is important to note that UV-C light is only effective on microorganisms that are directly exposed to the light. Therefore, it must be ensured that the air is in contact with the UV-C lamp for a sufficient amount of time, typically a few seconds, to achieve effective disinfection.
UV-C light systems are often used in conjunction with other air purification technologies, such as filters, to provide comprehensive air purification. By combining UV-C light with other filtration methods, such as HEPA filters, air purifiers can effectively remove a wide range of pollutants and improve indoor air quality.
How to clean the fan and vents of an air purifier?
Cleaning the fan and vents of an air purifier is essential to maintain optimal performance. Here's a step-by-step guide on how to clean them:
- Gather your cleaning supplies: You'll need a soft-bristle brush, a vacuum cleaner with a brush attachment, a clean cloth, mild detergent or all-purpose cleaner (if needed), and a bowl of warm water.
- Turn off and unplug the air purifier: Before starting the cleaning process, make sure the unit is switched off and unplugged to avoid any electrical mishaps.
- Remove the outer cover: Most air purifiers have an outer cover that can be easily removed. Refer to the user manual to understand how to detach it properly. In some cases, you may need to unscrew a few screws or release some latches.
- Vacuum the fan and vents: Use the brush attachment of your vacuum cleaner to gently remove any dust or debris from the fan blades and vents. Start by vacuuming the outer surface and then move closer to the fan blades. Be cautious not to damage the delicate fins or blades.
- Brush away stubborn residue: If you notice stubborn dirt or dust, use a soft-bristle brush to gently brush it away from the fan blades and vent openings. Ensure you brush in the opposite direction of the airflow to loosen and dislodge any debris.
- Wipe down the outer cover: Dampen a non-abrasive cloth with mild detergent or all-purpose cleaner diluted in warm water. Gently wipe down the outer cover to remove any grime or dirt. Avoid using excessive water, as it may damage the electronic components.
- Rinse the outer cover (if applicable): If the outer cover is removable and washable, rinse it under running water to remove any remaining detergent or cleaner. Make sure it is completely dry before reattaching it to the air purifier.
- Reassemble the unit: Once all components are completely dry, reattach the outer cover according to the manufacturer's instructions. Ensure it is fitted securely.
- Plug in and turn on the air purifier: Once you have reassembled the unit, plug it back in and switch it on to confirm that everything is functioning properly.
By following these steps regularly, ideally once every one to three months, you can ensure that your air purifier's fan and vents remain clean and free from any buildup, ensuring better air quality in your space.