Best Bulb Planters to Buy in July 2026
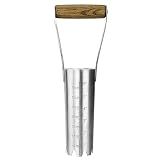
XVBITOR Bulb Planter Tool, Bulb Planter with Depth Markers and Bend Free for Planting Bulbs and Digging, Designed Automatic Soil Releasing Seed for Tulips, Dahlias, Daffodils
- EFFORTLESS PLANTING: CLEAR SOIL EASILY FOR QUICKER BULB PLANTING.
- BUILT TOUGH: REINFORCED STEEL DESIGN EXCELS IN HEAVY SOIL CONDITIONS.
- IDEAL FOR GARDENERS: LIGHTWEIGHT, ENSURING COMFORT WITH EVERY USE.


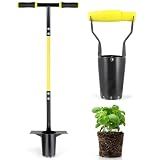
FLORA GUARD Bulb Planter with Depth Markers - Automatic Soil Releasing Seed Bulb Transplanter for Planting/Digging Tulips, Daffodils, Dahlias and More
-
ERGONOMIC DESIGN: EASY TO USE, REDUCING HAND STRAIN FOR EFFORTLESS PLANTING.
-
EFFICIENT PLANTING: LIGHTWEIGHT, POWER-SAVING GEAR DESIGN FOR FASTER SOIL ACCESS.
-
LIFETIME WARRANTY: DURABLE TOOL BACKED BY A LIFETIME GUARANTEE FOR PEACE OF MIND.
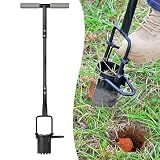
ProPlugger 5-IN-1 Lawn Tool and Garden Tool, Bulb Planter, Weeder, Sod Plugger, Annual Planter, Soil Test
- EASY PLANTING: STEP, TWIST, AND PULL FOR QUICK, PERFECT HOLES!
- VERSATILE TOOL: PLANT BULBS, VEGGIES, AND MORE WITH EASE!
- ERGONOMIC DESIGN: WORK STANDING UP TO SAVE YOUR BACK AND KNEES!
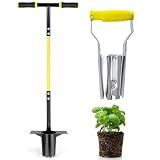
Haliaeetus Bulb Planter Tool, 6 inches Depth Mark Hand Bulb Planter, Non-Bending Stainless Steel Bulb Planter Digger, Garden Bulb Transplanter with Comfortable Wood Handle for Planting Tulip, Daffodil
- 10X FASTER PLANTING: PLANT 150 BULBS IN AN HOUR WITH EASE!
- DEPTH MADE EASY: BUILT-IN MEASUREMENT MARKS ENSURE PERFECT PLANTING.
- DURABLE DESIGN: STURDY STAINLESS STEEL RESISTS BENDING AND WEAR.

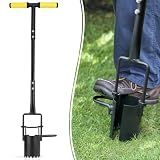
CRAFTZONE Bulb Planter Tool with Long Handle and Foot Pedal Heavy Duty High Carbon Steel Garden Dibber Sod Plugger Cutter for Planting Bulbs Tubers and Lawn Care for Digging Grass Plug Soil Tulips
-
COMFORTABLE ERGONOMIC DESIGN - REDUCE STRAIN ON BACK AND KNEES WHILE PLANTING.
-
QUICK PLANTING EFFICIENCY - STEP PEDAL BOOSTS SPEED FOR UNIFORM PLANTING HOLES.
-
DURABLE STEEL CONSTRUCTION - HIGH-CARBON STEEL ENSURES LASTING PERFORMANCE IN TOUGH SOIL.
Omesata Sod Plugger, Bulb Planter with Long Handle and Serrated Base Garden Tool, Bulb Transplanter Also Grass Plug Tool for Digging Holes to Plant Tulips, Iris, Daffodils
- EFFORTLESS PLANTING IN MOIST SOIL WITH SHARP SERRATED BASE DESIGN.
- 5-IN-1 TOOL LETS YOU PLANT WHILE STANDING, SAVING YOUR BACK AND KNEES.
- DURABLE CONSTRUCTION ENSURES STABILITY AND COMFORT FOR EVERY GARDENER.
Jardineer 2PCS Bulb Planter Tools Set, Long Handle Garden Transplanter and Small Bulb Planting Tool with Deep Marker, Ideal for Planting Bulbs, Seedlings, Flowers & Vegetables
- EFFORTLESS SOIL PENETRATION ENSURES HEALTHY BULBS AND SEEDLINGS THRIVE.
- DURABLE STAINLESS STEEL CONSTRUCTION OUTLASTS FLIMSY PLASTIC TOOLS.
- ERGONOMIC DESIGN REDUCES STRAIN, PERFECT FOR ALL GARDENERS, ESPECIALLY SENIORS.
Colwelt Bulb Planter Tool Long Handle, Serrated Base Gardening Bulb Transplanter with Soft Grip, Heavy Duty Long Handled Bulb Planter Sod Plugger for Digging Holes to Plant Tulips, Iris, Daffodils
- EFFORTLESSLY DIG PERFECT HOLES FOR SPRING FLOWERS WITH EASE!
- PLANT FROM A STANDING POSITION TO SAVE YOUR BACK AND TIME!
- DURABLE, RUST-RESISTANT DESIGN ENSURES LASTING GARDENING SUCCESS!
Jardineer Bulb Planter Tool, Long Handle Sod Plugger with Serrated Base, Automatic Soil Releasing Small Bulb Transplanter for Tulips, Daffodils, Lily
- ERGONOMIC DESIGN: PLANT BULBS COMFORTABLY WITHOUT BENDING OVER.
- EFFECTIVE DIGGING: SAW-TOOTH BLADE MAKES SOIL PLUGS A BREEZE.
- DURABLE CONSTRUCTION: BUILT TO LAST WITH POWDER-COATED STEEL.
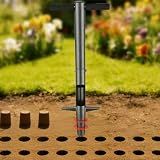
DIOVPLX Bulb Planter Tool, 33.5" Long Handle Sod Plugger for Standing Planting, 2"/4"/6" Adjustable Depth Garden Hole Digger, Heavy Duty Auto Eject Lawn Plugger for Flower Bulbs,Grass Plugs,Seedlings
-
NO CLOGGING DESIGN - AUTOMATICALLY EJECTS SOIL FOR FASTER PLANTING!
-
ERGONOMIC 33.5 HANDLE - WORK COMFORTABLY, SAVE YOUR BACK AND KNEES!
-
THREE DEPTH SETTINGS - CUSTOMIZE PLANTING FOR OPTIMAL GROWTH VERSATILITY!
Planting summer-flowering bulbs with a bulb planter is an efficient and straightforward method. Here is an overview of how to do it:
- Select the right bulbs: Choose summer-flowering bulbs that are suitable for your region and growing conditions. Some popular options include lilies, dahlias, gladiolus, begonias, and cannas.
- Prepare the soil: Find a well-drained area in your garden and remove any weeds or debris. Loosen the soil using a garden fork or spade, ensuring it is crumbly and not compacted.
- Dig the hole: Using a bulb planter tool, push it into the soil to create a hole. The depth will vary depending on the type of bulb, so refer to the specific planting instructions on the packaging or do some research.
- Place the bulb: Gently place the bulb into the hole with the pointed side facing up or as specified for that particular bulb. Avoid damaging any roots or sprouts already present.
- Cover the bulb: Use the bulb planter to remove soil from the hole and place it back into the hole to cover the bulb. Firmly press down on the soil to secure it in place.
- Repeat the process: Continue digging holes with the bulb planter at the desired spacing, depending on the bulb's recommended planting distance. Place bulbs in each hole and cover them until all bulbs are planted.
- Watering: Thoroughly water the area after planting to ensure good soil-to-bulb contact and to help settle the soil. Adequate moisture is crucial for the bulbs to establish roots and begin their growth.
- Mulch (optional): Consider applying a layer of organic mulch like straw or wood chips around the newly planted bulbs. Mulch helps conserve moisture, suppress weed growth, and protect bulbs during extreme temperatures.
- Maintenance: Throughout the summer, provide regular watering, especially during dry spells, and monitor for any signs of pests or diseases. Follow specific care instructions for the particular bulbs you planted.
By following these steps, you can successfully plant summer-flowering bulbs using a bulb planter. Enjoy the anticipation of colorful blooms that will enhance your garden throughout the season.
How to apply fertilizer to summer-flowering bulbs?
Applying fertilizer to summer-flowering bulbs is an important step to ensure they receive the necessary nutrients for growth and flowering. Here are steps to apply fertilizer to summer-flowering bulbs:
- Timing: Apply fertilizer to summer-flowering bulbs in early spring, just as new growth begins to emerge. This allows the bulbs to absorb the nutrients and promote healthy growth.
- Choose the right fertilizer: Look for a balanced fertilizer with equal or near-equal proportions of nitrogen (N), phosphorus (P), and potassium (K). For example, a 10-10-10 or 14-14-14 fertilizer would be suitable. These three essential nutrients support various aspects of plant development.
- Prepare the bulbs: Before applying fertilizer, ensure that the bulbs are planted in well-draining soil in a suitable location with adequate sunlight. It's also recommended to remove any weeds or competing plants near the bulbs.
- Measure and mix: Follow the instructions on the fertilizer packaging to determine the appropriate amount for your bulbs. Avoid over-fertilizing, as this can damage the bulbs or encourage excessive foliage growth at the expense of flowers. Add the recommended amount of fertilizer to a watering can or bucket, and fill it with water according to the package instructions.
- Apply the fertilizer: Pour the diluted fertilizer mixture carefully around the base of the bulbs, avoiding direct contact with the foliage or the bulbs themselves. Use a gentle stream to avoid disturbing the bulbs or causing soil erosion. Ensure that the soil is adequately moist prior to applying the fertilizer.
- Water thoroughly: After applying the fertilizer, thoroughly water the soil around the bulbs to allow the nutrients to penetrate the root zone. This helps to distribute the fertilizer evenly and prevents the risk of burning the roots.
- Repeat as necessary: Depending on the specific requirements of your summer-flowering bulbs and the fertilizer you are using, you may need to repeat the application every 4-6 weeks during the growing season. Always follow the instructions on the fertilizer packaging for accurate timing and frequency.
Remember, each bulb variety may have specific fertilizer requirements, so it's essential to research the specific needs of your bulbs or consult with a local horticulturist or gardening expert for more personalized advice.
What is the best time to plant summer-flowering bulbs?
The best time to plant summer-flowering bulbs is in the spring, after the danger of frost has passed and the soil has warmed up. This typically means planting bulbs in late April or early May, depending on your specific climate and region. Planting bulbs at the right time allows them to establish roots and grow before the warmer summer months, leading to healthy and vibrant blooms.
What is the recommended distance between each bulb?
The recommended distance between each bulb can vary depending on the type of bulb being used and the specific lighting needs of the situation. However, as a general guideline, a spacing of about 6 to 8 feet between bulbs is often recommended for standard residential lighting. This spacing helps to ensure adequate and even lighting throughout the space. It is always a good idea to refer to the manufacturer's recommendations or consult with a lighting professional for specific guidance.