
Best Outdoor Shed Cleaning Products to Buy in July 2026

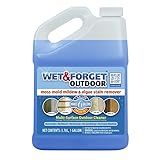
Wet & Forget Outdoor Moss, Mold, Mildew, & Algae Stain Remover Multi-Surface Cleaner, Ready to Use, 64 Ounce
-
NO SCRUBBING NEEDED: JUST SPRAY AND LET RAIN DO THE WORK!
-
VERSATILE APPLICATION: CLEANS MULTIPLE OUTDOOR SURFACES EFFORTLESSLY.
-
LONG-LASTING RESULTS: SURFACES STAY CLEAN FOR UP TO A YEAR OR MORE!


Wet & Forget Moss, Mold, Mildew, & Algae Stain Remover Multi-Surface Outdoor Cleaner Concentrate, Original, 128 Fluid Ounces
- EFFORTLESS CLEANING: NO SCRUBBING OR RINSING REQUIRED!
- VERSATILE ON MULTIPLE SURFACES: FROM ROOFS TO UPHOLSTERY!
- LONG-LASTING RESULTS: CLEAN SURFACES STAY CLEAR FOR UP TO A YEAR!
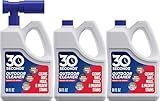
30 Seconds Outdoor Cleaner | Cleans Moss & Algae Stains from House, Vinyl Siding, Deck, Patio, Fence - 3 Capped Bottles, 1 Hose End Spray Attachment (64 Fl Oz (Pack of 3)
- RAPIDLY ELIMINATES STAINS FROM ALGAE, MOLD, AND MILDEW EFFORTLESSLY.
- SAFE FOR LAWNS AND PLANTS-CLEAN WITHOUT HARMING YOUR LANDSCAPE!
- VERSATILE CLEANER FOR WOOD, CONCRETE, BRICK, AND MORE SURFACES!
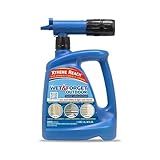
Wet & Forget Outdoor Moss, Mold, Mildew, & Algae Stain Remover Multi-Surface Cleaner, Xtreme Reach Hose End with New & Improved Nozzle, 48 Fluid Ounces
-
JET TIP REACHES 30FT: EFFORTLESSLY REMOVES TOUGH STAINS FROM AFAR!
-
LONG-LASTING RESULTS: KEEPS SURFACES CLEAN FOR UP TO 1 YEAR OR MORE!
-
SAFE & EASY TO USE: BLEACH-FREE FORMULA, NO RINSING REQUIRED!
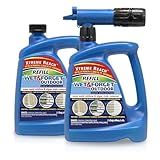
Wet & Forget Outdoor Stain Remover Multi-Surface Cleaner, Xtreme Reach Hose End with New & Improved Nozzle, 48 Fluid Ounces, 1 Pack + Refill
- POWERFUL SPRAY UP TO 30FT: EASILY REMOVES TOUGH STAINS FROM ROOFS.
- LONG-LASTING RESULTS: CLEANS OVER TIME; SURFACES STAY CLEAN FOR A YEAR!
- ECO-FRIENDLY FORMULA: BLEACH-FREE AND SAFE FOR NEARBY PLANTS AND WATER.

MICROBAN Outdoor Surface Care Multi-Purpose Foaming Cleaner
- POWERFUL FOAMING ACTION LIFTS DIRT AND STAINS EFFORTLESSLY!
- SAFE FOR ALL OUTDOOR SURFACES, FROM WOOD TO VINYL AND MORE!
- COVERS UP TO 4,500 SQ FT FOR EFFICIENT, EASY CLEANING!

CLR Brands Outdoor Furniture Cleaner, 26 oz. Spray Bottle, Cleans Outdoor Surfaces, Remove Dirt and Grime from Fabric, Wood, Wicker, PVC, Plastic and More
- VERSATILE CLEANER FOR ALL OUTDOOR FURNITURE SURFACES-EASY AND EFFECTIVE!
- ECO-FRIENDLY, EPA-CERTIFIED FORMULA SAFE FOR PLANTS AND PETS.
- SIMPLE SPRAY, SOAK, AND WIPE METHOD-CLEANING MADE EFFORTLESS!
Maintaining and cleaning your outdoor storage shed is essential to keep it in good condition and prolong its lifespan. Here are some steps to help you maintain and clean your shed:
- Clear out the shed: Start by removing all the items stored inside the shed. This allows you to thoroughly clean the entire space without any hindrances.
- Inspect the shed: While the shed is empty, inspect it for any signs of damage such as cracks, rot, or loose boards. Address these issues promptly to prevent further deterioration.
- Sweep the shed: Using a broom or brush, sweep away any dirt, dust, or debris from the floor, walls, and shelves. Pay attention to corners and hard-to-reach areas to ensure a thorough cleaning.
- Wash the shed: Depending on the shed's material, use an appropriate cleaning solution paired with a sponge or scrub brush to wash the interior and exterior surfaces. Rinse with clean water to remove any residue.
- Remove cobwebs and pests: Use a long-handled broom or a vacuum cleaner to get rid of any cobwebs in the shed. Check for signs of pests like spiders or mice and take necessary measures to eliminate or prevent them from re-entering. Consider using pest control products or seeking professional help if needed.
- Check the roof and gutters: Inspect the shed's roof for any leaks, loose shingles, or damaged areas. Repair or replace as required. Similarly, ensure the gutters are clear from debris to prevent water accumulation and potential damage.
- Paint or seal the shed: If your shed is made of wood, consider applying a fresh coat of paint or sealant to protect it from weathering and rot. This step can help extend its lifespan.
- Organize and declutter: Before putting items back into the shed, take the opportunity to declutter and organize your storage space. Dispose of any items that are no longer needed and categorize the remaining items for better accessibility.
- Regular maintenance: Regularly inspect your shed and maintain it throughout the year. This includes addressing any repairs promptly, resealing or repainting when necessary, and keeping it clean from dust, dirt, and pests.
By following these steps, you can ensure your outdoor storage shed remains clean, well-maintained, and in optimal condition for your storage needs.
How do I protect the shed from harsh weather conditions?
There are several ways to protect your shed from harsh weather conditions. Here are some suggestions:
- Choose a suitable location: When setting up your shed, try to find a location that is sheltered from strong winds and excessive rainfall. Placing it on higher ground can also help prevent water accumulation.
- Proper foundation: Ensure that your shed has a solid and leveled foundation. This will help keep it stable during storms and prevent water from seeping inside.
- Use quality materials: Invest in a shed made of durable, weather-resistant materials, such as metal or treated wood. These materials can withstand harsh conditions better than others.
- Seal gaps and cracks: Inspect your shed for any gaps or cracks that could allow water or wind to enter. Use a waterproof sealant or caulk to seal them, providing better protection.
- Install weather-stripping: Add weather-stripping to the doors and windows of your shed to create a tight seal and prevent rain, wind, or debris from entering.
- Reinforce the roof: Ensure the shed's roof is sturdy enough to withstand heavy rain, snow, or wind. Consider adding additional roofing materials, such as asphalt shingles or metal sheets, to enhance its durability.
- Proper ventilation: Adequate ventilation is crucial to prevent moisture buildup, mold, and condensation inside the shed. Install vents or windows to allow air circulation while still keeping the shed secure.
- Maintain gutters and drainage: Keep the gutters clean and ensure they are properly directing water away from the shed. Also, ensure there is proper drainage around the shed to prevent water pooling nearby.
- Regular maintenance: Regularly inspect and maintain your shed to address any issues promptly. This includes checking for leaks, loose or damaged parts, and repairing them as necessary.
- Consider additional measures: If you live in an area prone to extreme weather conditions, you may want to consider additional protective measures like reinforcing the shed with brackets or anchors, installing storm shutters or hurricane straps, or even creating a windbreak with trees or walls.
Remember, while these measures can offer better protection against harsh weather, no shed is entirely immune. Regular inspections and maintenance will help identify any potential vulnerabilities and ensure the shed remains in good condition.
What steps should I take to winterize the outdoor storage shed?
Winterizing an outdoor storage shed is a crucial step to protect your belongings and ensure that the shed remains in good condition during the colder months. Here are some steps you can take to winterize your outdoor storage shed:
- Clean and declutter: Start by tidying up and removing any clutter or debris from both the interior and exterior of the shed. This will prevent any potential damage or pests during the winter.
- Organize and store items properly: Make sure to properly organize and store items within the shed. Utilize shelves, racks, or storage containers to keep everything in place and off the floor. This will help maximize space and prevent any damage or moisture buildup on your belongings.
- Inspect the shed: Thoroughly inspect the shed for any leaks, cracks, or areas that may need repairs. Seal any gaps or openings with weather stripping or caulk to prevent cold drafts, moisture, or pests from entering.
- Check the roof: Inspect the roof for any signs of damage or loose shingles. Repair any issues to prevent leaks or water damage during snow or rainstorms.
- Insulate the shed: Consider insulating the walls, roof, or floor of the shed to help regulate the temperature and keep it more energy-efficient. This can be done by adding foam panels, insulation blankets, or sealing gaps with weatherstripping.
- Provide ventilation: Proper ventilation is essential even during winter to prevent moisture buildup, condensation, or the growth of mold and mildew. Ensure that vents are clear and unobstructed to allow for proper air circulation.
- Protect against pests: Pest-proof your shed by sealing any openings, holes, or gaps in the walls, doors, windows, or foundation. Use weather stripping, mesh screens, or caulk to prevent pests from entering.
- Install a dehumidifier: If you live in an area with high humidity, consider installing a dehumidifier in the shed to remove excess moisture, which can cause damage to your belongings.
- Secure the shed: Ensure that the shed is properly locked and secured to deter any potential burglars or unauthorized access. Consider installing motion sensor lights or an alarm system for added security.
- Remove snow regularly: During the winter months, it is important to regularly remove snow accumulation from the roof and around the shed to prevent damage or collapse. Use a snow rake or shovel to gently remove snow without causing any harm to the shed.
By following these steps, you can effectively winterize your outdoor storage shed and ensure that it remains well-protected throughout the colder months.
How do I remove rust from metal surfaces on the shed?
There are several methods to remove rust from metal surfaces on a shed. Here are a few common techniques:
- Scrub with a Wire Brush: Start by using a wire brush to scrub away loose rust and dirt from the affected area. This will help create a clean surface to work with.
- Apply Vinegar or Lemon Juice: Soak a cloth or sponge in either vinegar or lemon juice and apply it directly to the rusted area. Let it sit for a few hours or overnight. The natural acids in vinegar or lemon juice help dissolve the rust.
- Use Baking Soda Paste: Make a paste by mixing baking soda with water until it forms a thick consistency. Apply the paste to the rusted surfaces and let it sit for a few hours. Then, scrub the area with a brush or scrub pad.
- Apply a Commercial Rust Remover: There are numerous rust removal products available in the market. Follow the instructions on the product for the best results. Typically, you will need to apply the product to the rusted area, let it sit for a specified amount of time, and then wash it off.
- Utilize a Rust Converter: Rust converters chemically convert rust into a stable compound that can be painted over. Apply the rust converter as per the product instructions, and once it dries, you can paint over the affected area.
Remember to wear appropriate safety gear such as gloves and goggles when using any products or tools to remove rust. Additionally, consider applying a rust-resistant primer or paint on the metal surface after removing rust to prevent future rusting.