Best Patio Heater Tools to Buy in July 2026
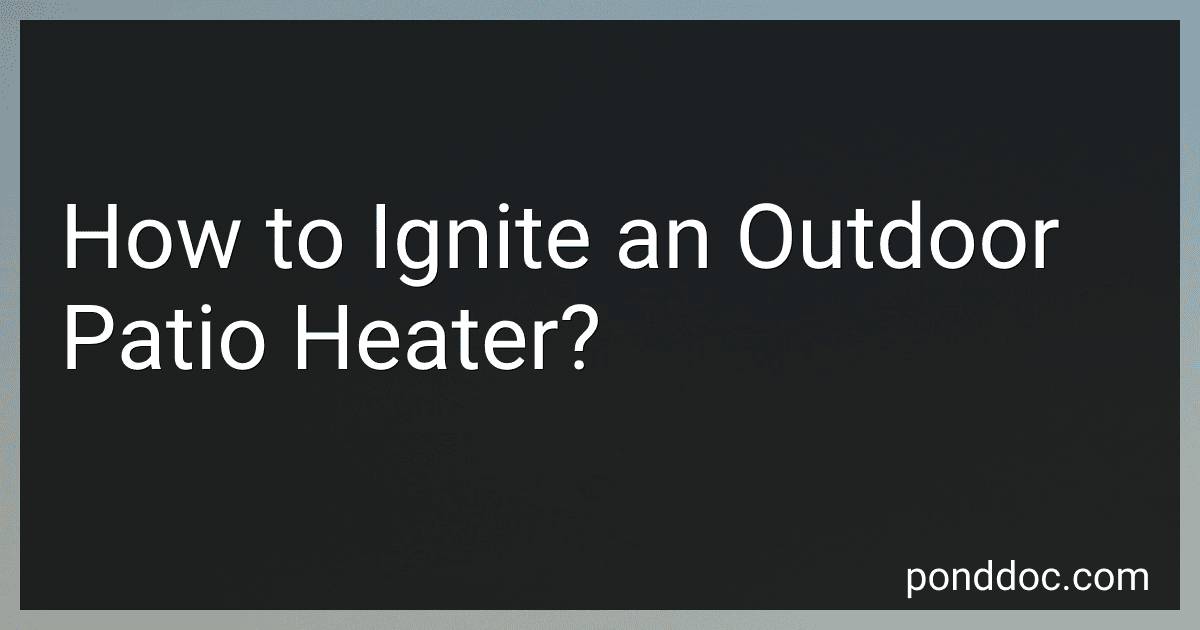
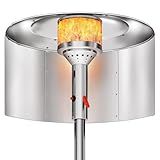
HQQ outdoor Patio Heater Reflector Shield, Aluminum Heat Reflector Shield Top for Propane Outdoor Heaters,Dome Replacement Parts(3-Hole Mount,33" Diameter Round)
-
MAXIMIZE HEAT EFFICIENCY: 33 REFLECTOR BOOSTS WARMTH & SAVES ENERGY.
-
DURABLE ALUMINUM BUILD: RUST-RESISTANT MATERIALS ENSURE LONG-LASTING USE.
-
HASSLE-FREE INSTALLATION: EASY SETUP WITH PRE-DRILLED HOLES AND TOOLS INCLUDED.


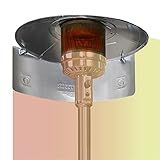
Smokitcen Adjustable Heat Focusing Reflector for Round Natural Gas and Propane Patio Heaters
- BOOST WARMTH AND EFFICIENCY WITH OUR EXTENDED HEAT REFLECTOR!
- VERSATILE DESIGN BLOCKS UNWANTED HEAT FOR OPTIMAL COMFORT.
- EASY INSTALLATION FOR HASSLE-FREE WARMTH IN ANY OUTDOOR SPACE!
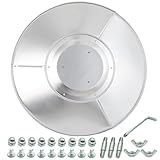
EAST OAK Patio Heater Sand Box/Water Box as Patio Heater Accessory, Maximum Capacity 26.45 lbs. Used to Increase the Stability of Umbrella Patio Heaters, Such as EAST OAK Patio Heater UR48BN1, Black
-
ENHANCE PATIO HEATER STABILITY WITH ADDED WEIGHT FOR WIND RESISTANCE.
-
UPGRADE FEATURES PREVENT LEAKS AND ENSURE LONG-LASTING DURABILITY.
-
QUICK ASSEMBLY WITH CLEAR INSTRUCTIONS FOR HASSLE-FREE SETUP.

Kisworm Patio Heater Reflector Shield, Propane Outdoor Heaters Replacement Part - Top Dome, 3-Hole Mount, 33" Dia Round
-
UNIVERSAL FIT: ADAPTS TO MOST PATIO HEATERS WITH EASE.
-
DURABLE ALUMINUM: FLAME-RESISTANT, RUST-PROOF FOR LONG-LASTING USE.
-
COST-EFFECTIVE: ECONOMICAL REPLACEMENT FOR RESTAURANTS AND CAFES.
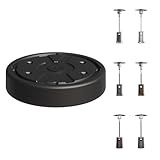
Patio Heater Covers with Zipper and Storage Bag,Waterproof,Dustproof,Wind-Resistant,Sunlight-Resistant,Snow-Resistant,Black,89'' Height x 33" Dome x 19" Base
-
WEATHER PROTECTION: SHIELDS HEATER FROM WIND, DUST, SNOW, AND SUNLIGHT.
-
DURABLE MATERIAL: TEAR-RESISTANT FABRIC ENSURES LONG-LASTING USE.
-
EASY ACCESS & MAINTENANCE: ZIPPER DESIGN FOR QUICK COVER AND CLEANING.
Patio Heater Reflector Shield, Heat Focusing Reflector for Round Natural Gas and Propane Patio Heaters Outdoor, Heating Reflector 15" Height (2023 Upgraded)
-
UPGRADE YOUR HEATER: ENHANCED 3-PANEL DESIGN FITS MOST PATIO HEATERS.
-
MAXIMIZE ENERGY EFFICIENCY: CONCENTRATE HEAT WHERE NEEDED, SAVE ON FUEL COSTS.
-
BOOST SAFETY: PROTECTIVE BARRIER MINIMIZES ACCIDENT RISKS FROM HEAT.
![QH.HOME Winter Patio Heater Covers, [2025 Upgraded Tear-Resistant Fabric] Waterproof with Robust Zipper ,Height fit 87"-92",Dustproof/Wind/Sunlight/Snow-Resistant, Black](https://cdn.blogweb.me/1/318tc_Kwbq_WL_SL_160_db2bb045f8.jpg)
QH.HOME Winter Patio Heater Covers, [2025 Upgraded Tear-Resistant Fabric] Waterproof with Robust Zipper ,Height fit 87"-92",Dustproof/Wind/Sunlight/Snow-Resistant, Black
- TEAR-RESISTANT 500D OXFORD CLOTH ENSURES YEAR-ROUND DURABILITY.
- WIND-RESISTANT VELCRO DESIGN PREVENTS DAMAGE IN GUSTY WEATHER.
- YKK ZIPPER GUARANTEES LONGEVITY, OUTLASTING TYPICAL CLOSURES FIVEFOLD.
The Original and Best Reflector for Patio Heaters - Sweet Heat
- SATELLITE DISH DESIGN BOOSTS PERFORMANCE AND HEAT COVERAGE.
- SAVE UP TO 60% ON PROPANE-SWITCH TO NATURAL GAS FOR MORE SAVINGS.
- SCIENTIFICALLY OPTIMIZED SIZE ENSURES EFFICIENT HEAT DISTRIBUTION.
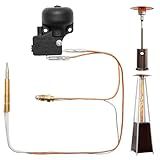
Outdoor Heater Replacement Parts Thermocouple & Tilt Switch, Repair kit Dump Switch & Thermocouple Used for Round Stand Up Heater and Pyramid patio heater, Safety Protection System Thermistor kit
-
SAFETY FIRST: AUTOMATIC SHUT OFF FOR TIP-OVER AND FLAME-OUT PROTECTION.
-
WIDE COMPATIBILITY: FITS MOST OUTDOOR PROPANE & PYRAMID HEATERS.
-
EASY INSTALLATION: QUICK REPLACEMENT WITH CLEAR, SIMPLE INSTRUCTIONS.
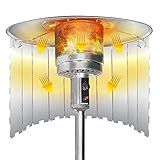
Patio Heater Reflector Shield, Upgraded 12" Height Heat Focusing Reflector for Round Natural Gas and Propane Patio Heaters - for Extra Heat Reflecting Power(10 Panels)
-
DURABLE ALUMINUM DESIGN: RUST-RESISTANT & HEAT-RESISTANT FOR LONG LIFE.
-
EFFICIENT HEAT REDIRECTING: TARGET WARMTH & REDUCE ENERGY USAGE EASILY.
-
QUICK DIY SETUP: INSTALL IN JUST 3-5 MINUTES FOR INSTANT COMFORT!
To ignite an outdoor patio heater, follow these steps:
- Read the manufacturer's instructions: Before attempting to ignite the patio heater, it is important to carefully read and understand the manufacturer's instructions and safety precautions.
- Check the fuel source: Verify the type of fuel the patio heater uses. It can be either propane or natural gas. Ensure that you have the correct fuel and that there is an adequate supply.
- Turn off the gas supply: If the patio heater was previously in use, make sure to turn off the gas supply before attempting to ignite it. The gas valve should be in the off position.
- Locate the ignition knob: Depending on the model, the ignition knob may be located on the front, side, or back of the patio heater. It is typically marked with an ignition symbol.
- Push and turn the knob: With one hand, push and turn the ignition knob to the "pilot" or "start" position. Hold the knob in this position.
- Locate the pilot light button: The pilot light button is often a separate knob, located near the ignition knob. Press and hold this button.
- Ignite the pilot light: While still holding the pilot light button, use your other hand to ignite the pilot light. This can be done either with an electric ignition button or by using a long-stemmed lighter/match and carefully inserting it near the pilot light opening.
- Continue holding the pilot light button: After igniting the pilot light, keep holding the pilot light button for about 30 seconds. This allows the thermocouple (a heat-sensitive device) to heat up and signal the gas valve to remain open.
- Release the pilot light button: After the thermocouple has heated up, release the pilot light button. The pilot light should stay lit. If it doesn't, repeat the process from step 5.
- Set the desired heat level: Once the pilot light is successfully lit, turn the ignition knob from the "pilot" or "start" position to the desired heat level. This will cause the main burner to ignite, providing heat to the outdoor patio area.
- Monitor the patio heater: Keep an eye on the patio heater to ensure that the flame remains steady, and there are no signs of gas leaks or other issues. If you notice any problems, turn off the gas supply and consult the manufacturer's instructions or contact a professional for assistance.
Always prioritize safety when working with gas-powered patio heaters. If you are unsure or uncomfortable with the process, it is best to seek professional assistance.
How can I ensure a steady and consistent flame once an outdoor patio heater is ignited?
To ensure a steady and consistent flame once an outdoor patio heater is ignited, follow these steps:
- Properly place the patio heater: Ensure that your patio heater is on a stable and level surface, away from any flammable materials or obstructions. Make sure it is positioned in an area where there is proper ventilation and minimal wind disturbance.
- Check the fuel supply: Ensure that you have enough fuel in the tank (propane or gas) for the chosen duration of use. Make sure the tank is securely attached to the heater and that the valve is fully opened.
- Light the ignition: Depending on the type of patio heater, you may have either a pilot light or an electric ignition switch. Follow the manufacturer's instructions to ignite the heater. If using a pilot light, ensure it is lit before proceeding.
- Let the heater warm up: Once the heater is ignited, give it a few minutes to warm up. This allows the fuel to fully flow and stabilize within the heating elements.
- Adjust the controls: Most patio heaters come with controls for adjusting the flame height, such as a control knob or lever. Gradually increase the heat output until you achieve the desired flame height and intensity.
- Keep the area clear: Ensure there are no obstructions near the heater that could disrupt the flame, such as curtains, tablecloths, or other flammable objects. Keep a safe distance between the heater and any combustible materials.
- Protect from wind: Wind can affect the flame and cause it to fluctuate or extinguish. Consider using windbreakers or strategically positioning the patio heater to shield it from strong gusts.
- Regular maintenance: Keep the patio heater properly maintained by cleaning it regularly, removing any debris or blockages that may affect the flame. Store the patio heater properly when not in use.
- Supervision: Never leave the patio heater unattended while it is in use. Keep an eye on the flame to ensure its stability and extinguish it properly when finished.
By following these steps, you can ensure a steady and consistent flame for your outdoor patio heater, providing a comfortable outdoor heating experience. However, always refer to the manufacturer's instructions for your specific patio heater model, as different heaters may have slight variations in operating procedures.
Can I use an outdoor patio heater indoors if I ensure proper ventilation?
No, you cannot use an outdoor patio heater indoors even with proper ventilation. Outdoor patio heaters are specifically designed for outdoor use, where there is adequate ventilation and fresh air circulation. Indoor spaces have different requirements for heating appliances, and using outdoor patio heaters indoors can lead to a variety of safety hazards, including the release of carbon monoxide, which can be toxic and potentially fatal. It is always best to use indoor-specific heating appliances that are designed for safe indoor use.
What should I do if the ignition button on my outdoor patio heater isn't working?
If the ignition button on your outdoor patio heater isn't working, here are a few steps you can take:
- Check the Gas Supply: Ensure that your gas supply is connected and turned on. Make sure the propane tank has enough gas or the natural gas line is properly connected.
- Verify the Pilot Light: Check if the pilot light is lit. If it's not, you may need to relight it. Follow the manufacturer's instructions to safely relight the pilot light.
- Clean the Igniter: Over time, dirt, debris, or corrosion may affect the spark ignition system. Clean the igniter or electrode with a soft brush or sandpaper to remove any buildup.
- Replace Batteries: If your ignition button is battery-powered, check if the batteries are working correctly. Replace them if necessary.
- Call for Professional Help: If none of the above steps work or if you're uncomfortable troubleshooting the issue yourself, it's best to contact a professional technician or the manufacturer's customer support for assistance. They will have the expertise to diagnose and fix the problem safely.
Remember, always prioritize your safety when dealing with gas appliances.
What are the common signs that an outdoor patio heater's ignition system needs repair or replacement?
There can be several signs indicating that an outdoor patio heater's ignition system needs repair or replacement. Some common signs include:
- Difficulty Lighting: If you are experiencing difficulties in lighting the patio heater, such as having to repeatedly press the ignition button or it takes multiple attempts to ignite, it may be a sign that the ignition system is faulty.
- Weak Flame or Low Heat Output: If you notice a weak or low flame even when the heater is turned on to high, it could indicate a problem with the ignition system. The ignition system ignites the fuel, and if it is not functioning optimally, it can result in diminished heat output.
- Delayed Ignition: If you hear a clicking sound from the ignition system but there is a significant delay in the flame actually igniting, it may be an indication that the ignition system is worn out or defective.
- No Spark or Ignition: If the ignition system fails to produce a spark or ignite the fuel altogether, it is a clear sign that the ignition system has a problem. This could be due to a faulty igniter or other issues within the ignition system.
- Physical Damage: Any visible physical damage on the ignition system, such as broken or frayed wires, cracked or corroded components, or loose connections, can also indicate the need for repair or replacement.
It is important to note that these signs might also be caused by other factors, so it is recommended to consult a professional technician or refer to the manufacturer's instructions for a proper diagnosis and repair.