Best Outdoor Cooler Seals Cleaner to Buy in July 2026
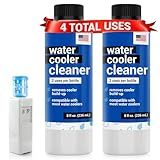
Water Cooler Cleaning Kit,Water Dispenser Cleaning,Water Dispenser Cleaner for Bottom or Top Loading Water Cooler Cleaner and More Models,Virtually Every Style Is Covered Ice Makers (5.07Fl Oz)
- ENJOY FRESH-TASTING WATER WITH OUR EASY-TO-USE CLEANER.
- COMPATIBLE WITH ALL WATER COOLERS-NO STYLE LEFT BEHIND!
- EXTEND YOUR DISPENSER'S LIFE AND SAVE ON COSTLY REPAIRS!


30 SECONDS Outdoor Cleaner 2 Pack with Hose End Sprayer - Cleans Stains from Algae, Mold and Mildew on Vinyl Siding, Deck, Patio, Brick and More
- RAPIDLY ELIMINATES STAINS FROM ALGAE, MOLD, AND MILDEW IN 30 SECONDS!
- SAFE FOR LAWNS AND PLANTS-PROTECT YOUR GARDEN WHILE YOU CLEAN!
- SIMPLE SPRAY-ON AND RINSE-OFF APPLICATION-NO PRESSURE WASHING NEEDED!
Dial 5218 Pt 1step Cooler Cleaner
- FAST-ACTING CLEANER FOR CONSTRUCTION TOOLS AND EQUIPMENT.
- IDEAL FOR CONCRETE, METAL, AND SOLDERING APPLICATIONS.
- PROUDLY MADE IN THE USA FOR QUALITY ASSURANCE.
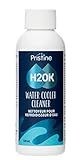
H2OK Water Cooler Cleaner
IMPRESA Water Dispenser Cleanser & Cooler Cleaner & Descaler - 2 x 8 Fl Oz - Top & Bottom Loading Water Coolers & Dispensers - Active Cleaning Solution for Reservoir Cleaning & Buildup Removal
- PURE CONFIDENCE: ELIMINATES BUILD-UP, ENSURING CLEAN, SAFE WATER.
- FAMILY HEALTH FOCUSED: RESIDUE-FREE, UNSCENTED, AND USA-MADE.
- EXTEND APPLIANCE LIFE: 4 USES PER PACK PROTECT YOUR COOLER INVESTMENT.

Citrusafe Cooler Cleaner, Eco-Friendly, For Coolers, Freezers, Refrigerators & More
- REFRESHING CITRUS SCENT KEEPS COOLERS AND FRIDGES SMELLING GREAT!
- POWERFUL CLEANER BLASTS AWAY DIRT, MOLD, AND TOUGH STAINS EASILY.
- EASY SPRAY APPLICATION FOR SPARKLING SURFACES IN MINUTES!
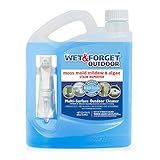
Wet & Forget Outdoor Moss, Mold, Mildew, & Algae Stain Remover Multi-Surface Cleaner, Ready to Use, 64 Ounce
-
EFFORTLESS CLEANING: NO SCRUBBING, RINSING, OR PRESSURE WASHING NEEDED!
-
VERSATILE APPLICATION: PERFECT FOR VARIOUS SURFACES, INDOORS AND OUT.
-
LONG-LASTING RESULTS: CLEANS OVER TIME, LASTING UP TO 1 YEAR OR MORE!
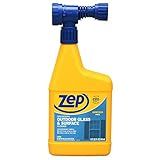
Zep Hose-End Outdoor Cleaner - 32 Ounces - U49910 - Great for Outdoor Glass and Surfaces
- EFFORTLESS CLEANING: ATTACHES EASILY TO ANY GARDEN HOSE!
- STREAK-FREE SHINE: ENJOY CRYSTAL-CLEAR WINDOWS EVERY TIME!
- VERSATILE USE: SAFE ON GLASS, FIBERGLASS, VINYL, AND MORE!
Cleaning and maintaining the seals on an outdoor cooler is essential to ensure effective insulation and prolong the lifespan of the cooler. Here are some steps to help you:
- Start by opening the cooler and inspecting the seals. Look for any signs of dirt, debris, or mold on them.
- To remove loose dirt and debris, wipe the seals with a dry cloth or use a soft brush. Be gentle to avoid damaging the seals.
- For stubborn dirt or mold, create a cleaning solution by mixing mild soap or detergent with warm water. Dip a cloth or sponge into the soapy water and gently clean the seals.
- Pay extra attention to the crevices and corners where dirt tends to accumulate. Use a toothbrush or a cotton swab to reach these harder-to-clean areas.
- Rinse the seals thoroughly with clean water to remove any soap residue. Make sure the seals are completely dry before moving on to the next step.
- Inspect the seals for any signs of cracking, splitting, or deterioration. If you notice any damage, consider replacing the seals to maintain the cooler's effectiveness.
- To keep the seals in good condition, prevent exposure to direct sunlight, extreme temperatures, and harsh weather conditions when not in use. Long exposure to these elements can degrade the seals over time.
- Apply a seal conditioner or silicone lubricant to the seals occasionally. This helps to maintain their flexibility, preventing them from drying out or cracking.
- Store the cooler properly when not in use. Clean and dry the seals, and keep the cooler in a dry, cool place, away from direct sunlight.
Remember, maintaining the seals on your outdoor cooler is crucial for keeping your cooler functioning optimally and extending its lifespan. Regular cleaning and inspections will help ensure that your cooler remains in good condition and provides reliable insulation for years to come.
How to remove mold and mildew from outdoor cooler seals?
To remove mold and mildew from outdoor cooler seals, follow these steps:
- Prepare a cleaning solution: Mix equal parts of water and white vinegar in a spray bottle. Alternatively, you can use a solution of one part bleach and four parts water.
- Put on protective gloves and eye goggles to prevent any irritation or harm to your skin and eyes.
- Spray the cleaning solution directly onto the affected areas of the cooler seals. Ensure that the solution covers the mold and mildew completely.
- Allow the solution to sit on the cooler seals for about 10-15 minutes. This will help loosen the mold and mildew.
- Use a soft-bristle brush or a toothbrush to scrub away the mold and mildew. Scrub in circular motions to effectively remove the buildup.
- Rinse the cooler seals thoroughly with water to remove any remaining cleaning solution and mold residue. Ensure that all traces of the cleaning solution are washed away.
- Dry the seals completely with a clean towel or allow them to air dry naturally.
- Once the seals are dry, inspect them to ensure that all mold and mildew has been removed. If any residue remains, repeat the cleaning process.
- To prevent future mold and mildew growth, regularly clean the cooler seals and keep them dry after each use. Store the cooler in a well-ventilated area to discourage mold and mildew growth.
Additionally, consider using a mold and mildew inhibitor or a silicone-based sealant to protect the cooler seals and prevent future growth.
How to check the integrity of outdoor cooler seals?
To check the integrity of outdoor cooler seals, you can follow these steps:
- Clean the seals: Use a mild soap or detergent solution and a soft cloth or sponge to clean the seals. Remove any dirt, dust, or debris that may be present on the surface of the seals. Ensure that the seals are completely dry before proceeding to the next step.
- Close the cooler properly: Close and secure the cooler lid or door tightly. Ensure that it is closed correctly and that the seals are properly aligned.
- Perform the dollar bill test: Take a dollar bill (or any similar-sized paper currency) and close it between the cooler lid/door and the body of the cooler where the seals are located. Make sure the bill is inserted along the entire length of the seal.
- Gently pull the dollar bill: While holding one end of the bill, try to pull it out along the cooler seal. If you encounter resistance and the bill does not easily slide out, the seals are intact. However, if the bill slides out without any resistance, it indicates that the seals are not properly sealed.
- Check for visible gaps or damage: Inspect the seals visually for any cracks, gaps, or tears. Pay close attention to the corners and edges of the seals as they are often the most vulnerable areas.
- Test the cooler's cooling efficiency: If you suspect that the seals are compromised, you can put some ice or cold water inside the cooler and observe if there is a noticeable decrease in the cooling efficiency. If the temperature inside the cooler rises more quickly than it would with intact seals, it suggests that the seals may need to be replaced.
If you find any issues with the seals during this inspection, it is recommended to replace them to ensure the cooler's performance and to prevent cool air leakage.
What is the recommended technique to clean outdoor cooler seals?
The recommended technique to clean outdoor cooler seals is as follows:
- Start by unplugging or turning off the cooler to ensure your safety.
- Mix a solution of warm water and mild dish soap in a bucket or basin.
- Dip a soft cloth or sponge into the soapy water and gently scrub the seals. Be careful not to use excessive force or abrasive materials that can damage the seals.
- Pay close attention to any areas with built-up dirt or debris and give them extra attention.
- If the seals are particularly dirty or stained, you can also use a mixture of vinegar and water or a mild bleach solution (one part bleach to ten parts water) to help remove stubborn stains or mold.
- Once you have thoroughly cleaned the seals, rinse the cloth or sponge and wipe away any remaining soap residue.
- Afterward, wipe the seals with a clean, damp cloth to ensure all the soap or cleaning agents have been removed.
- Allow the seals to air dry completely before plugging in or turning on the cooler.
It is important to regularly clean and inspect the seals of an outdoor cooler to maintain their efficiency and prevent any potential issues.
What is the recommended temperature for cleaning outdoor cooler seals?
The recommended temperature for cleaning outdoor cooler seals is usually between 60°F (15°C) to 120°F (49°C). It is important to avoid extremely high temperatures as it can damage the seals.