Best Vertical Indoor Garden Systems to Buy in July 2026
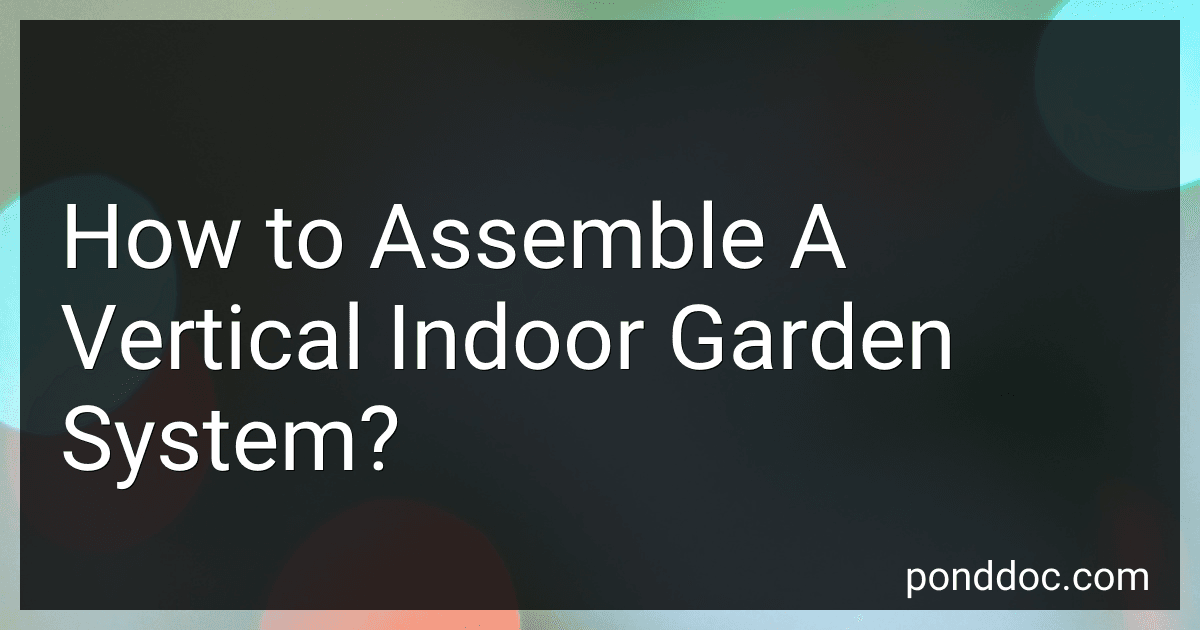
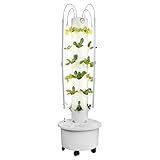
VECELO 5 Tier Vertical Garden Planter, Self Watering Stackable Planters with Wheels for Strawberries, Herbs, Flowers, Vegetables, White
- MAXIMIZE GARDEN SPACE: STACK 5 LAYERS FOR COMPACT, EFFICIENT PLANTING.
- EASY TRANSPORT: MOVABLE WHEELS LET YOU OPTIMIZE SUN EXPOSURE EFFORTLESSLY.
- VERSATILE PLANTING: GROW HERBS, FLOWERS, AND VEGGIES IN ONE SLEEK PLANTER!


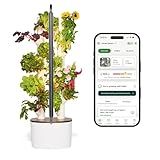
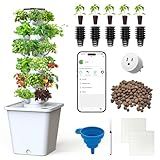
Gardyn Home 4 Vertical Hydroponics Growing System Kit - 30 Non-GMO Plants, Herbs, Vegetables - Smart Tower Garden Hydroponic Herb Garden Planter Indoor Kit - Indoor Gardening System w/LED Grow Lights
- GROW 30 PLANTS IN 2 SQ. FT. USING 95% LESS WATER-MAXIMIZE SPACE!
- ENJOY 30 YCUBES OF NON-GMO SEEDS FOR A FRESH HERB GARDEN START.
- AUTOMATIC WATERING & AI COACH MAKE INDOOR GARDENING EFFORTLESS!
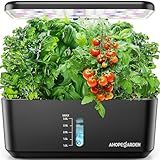
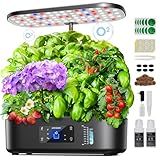
Ahopegarden Indoor Garden Hydroponics Growing System: 10 Pods Plant Germination Kit Herb Vegetable Growth Lamp Countertop with LED Grow Light - Hydrophonic Planter Grower Harvest Lettuce
- BOOST YOUR INDOOR GARDENING WITH 10 GROWING STATIONS!
- HEIGHT-ADJUSTABLE LIGHT FOR PLANTS UP TO 14.5 INCHES TALL!
- TWO GROWING MODES: VEGGIES, FRUITS, AND FLOWERS FOR EVERY TASTE!
Gardyn Studio 1 Vertical Hydroponics Growing System Kit - 16 Non-GMO Plants, Herbs, Vegetables - Tower Garden - Hydroponic Herb Garden Planter Indoor Kit - Indoor Gardening System with LED Grow Lights
- GROW 16 PLANTS IN JUST 1.4 SQ. FT.-PERFECT FOR SMALL SPACES!
- EFFORTLESS CARE WITH AI COACH AND AUTOMATIC NUTRIENT MANAGEMENT.
- SUSTAINABLE DESIGN-95% LESS WATER, NO PESTICIDES, AND ECO-FRIENDLY!
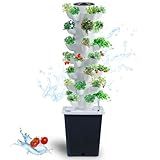
JPWDDWYT Hydroponics Tower Indoor Growing System Vertical Garden Planter Indoor Smart Garden Kit with Pump and Movable Water Tank Vegetable Plant Gift for Gardening Lover (35-Plants)
- MAXIMIZE WATER EFFICIENCY WITH INNOVATIVE HYDROPONIC TECHNOLOGY.
- ENJOY EFFORTLESS GARDENING, PERFECT FOR ANY INDOOR SPACE!
- GROW 30+ FRESH FRUITS AND VEGGIES WITH OUR VERTICAL TOWER SYSTEM.

Hydroponics Growing System Kit,30-Plants Indoor Outdoor Vertical Garden System with Hydroponic Tower,Gardening Gift
-
SOIL-FREE GROWING: ENJOY FRESH VEGGIES INDOORS, NO DIRT REQUIRED!
-
QUICK SETUP: ASSEMBLE IN JUST 15 MINUTES-NO TOOLS NEEDED!
-
ECO-FRIENDLY: SAVE UP TO 95% WATER AND GROW SUSTAINABLY AT HOME!
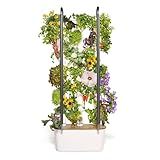
Ahopegarden Hydroponics Growing System Kit Indoor Herb Garden with Grow Light 12 Pods, with LCD Touch Panel Hydroponic Planter, Planting Height Up to 17", Grower Harvest Fresh Veggie Lettuce, Black
- MODERN DESIGN WITH LCD TOUCHSCREEN: PERFECT FOR TECH-SAVVY GARDENERS.
- GROW 12 HERBS YEAR-ROUND: SPACE-SAVING SOLUTIONS FOR URBAN LIVING.
- EFFICIENT WATER MANAGEMENT: QUIET, EASY, AND ENERGY-SAVING OPERATION.
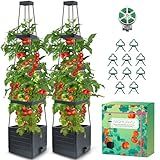
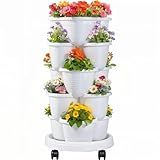
MQHUAYU 2Pack Raised Garden Bed Planter Box with Trellis, 57" Self-Watering Tomato Cage Planters for Climbing Plants Vegetable Vine Flowers Outdoor & Indoor (57x9.8x9.8IN)
- OPTIMAL MOISTURE & OXYGEN FLOW FOR THRIVING PLANT HEALTH.
- ELEVATED DESIGN BOOSTS SOIL CAPACITY FOR ROBUST ROOT GROWTH.
- VERSATILE FOR INDOOR/OUTDOOR USE; PERFECT FOR ANY GARDEN STYLE.
ALTO GARDEN GX Hydroponic Tower | Vertical Planter Tower | Hydroponics Growing System Kit | Food Grade with 24 Net Pots (with LED Grow Lights)
-
GROW 24 PLANTS IN 3 SQ FT: MAXIMIZE SPACE WITH VERTICAL GARDENING!
-
100% ORGANIC, CHEMICAL-FREE: ENJOY FRESH, HOMEGROWN PRODUCE WITHOUT GMOS.
-
FAST HARVESTS, NO FEES: 3X FASTER YIELDS AND ZERO SUBSCRIPTION COSTS!
sjzxuv Vertical Hydroponics Growing System Kit, Indoor Outdoor Gardening System Kits, Herb & Fruits Growing Tower, 6 Layer 30 Pods
- YEAR-ROUND FRESH PRODUCE: GROW UP TO 30 PLANTS IN 1 SQ. FT.
- AUTOMATIC WATERING: LOW MAINTENANCE WITH ENERGY-EFFICIENT PUMP SYSTEM.
- ECO-FRIENDLY GARDENING: SAVE 90% WATER VS. TRADITIONAL FARMING!
Assembling a vertical indoor garden system can be a great way to maximize your gardening space and bring some greenery into your home. Here are the steps to assemble a vertical indoor garden system:
- Evaluate the available space: Start by identifying the area where you want to install your vertical garden system. Consider factors like sunlight, humidity levels, and ease of access.
- Choose a suitable wall or structure: Look for a sturdy wall or structure that can support the weight of the vertical garden system. Make sure it is clean and properly prepared for installation.
- Install a backing or frame: Depending on the type of system you are using, you may need to install a backing or frame to attach the plant containers. This could be in the form of a wooden frame, metal grid, or even a premade modular system.
- Install irrigation system: Consider adding an irrigation system to ensure proper watering and nourishment of your plants. This can be a drip irrigation system or even a hydroponic system, depending on your preferences.
- Attach plant containers: Securely attach the plant containers to the backing or frame. Each container should have sufficient drainage holes to prevent waterlogging.
- Prepare the growing medium: Fill the plant containers with a suitable growing medium. This could be a potting mix, coco coir, or even a soilless mix like rockwool or perlite.
- Choose your plants: Consider the lighting conditions in your indoor space and choose plants that thrive in such an environment. Opt for a mix of plants with different heights, shapes, and colors to create an appealing visual display.
- Plant your chosen plants: Carefully plant each chosen plant into its respective container. Ensure they are properly spaced and have enough room to grow without encroaching on each other.
- Water and maintain: Create a regular watering schedule for your plants and ensure they receive enough light and nutrients. Regularly prune and fertilize the plants as needed.
- Monitor and adjust: Keep an eye on the health of your plants and make any necessary adjustments. Rotate the containers occasionally to ensure uniform growth and prevent any overcrowding.
Remember, the specific steps may vary depending on the type of vertical garden system you choose. Always refer to the manufacturer's instructions for assembly guidelines and take proper safety precautions during installation.
How to choose the right location for a vertical indoor garden system?
When choosing the right location for a vertical indoor garden system, there are several factors to consider. Here are some important considerations:
- Light Availability: Ensure that the chosen location receives sufficient natural light or is close to a source of artificial light. Most plants require at least 6-8 hours of light each day. If relying on artificial light, make sure the location allows for the installation of appropriate lighting fixtures.
- Temperature and Humidity: The selected location should have a suitable temperature and humidity for the plants you wish to grow. Different plants thrive in different environmental conditions, so it's important to choose a spot where the temperature and humidity can be easily controlled.
- Accessibility to Water and Drainage: The vertical indoor garden system will require a water source for irrigation or a system that allows for easy watering. Consider the proximity to a water source and whether any drainage arrangements can be made to prevent water accumulation.
- Space: Ensure that the chosen location has enough space to accommodate the vertical garden system and allows for the growth and spreading of plants. Consider the height and width requirements of the system as well as the potential for expansion.
- Structural Support: Make sure the location provides adequate structural support to hold the weight of the vertical garden system when fully loaded with plants, soil, and water. Consider the weight of the system and consult a professional if needed to ensure safety.
- Aesthetics and Accessibility: Choose a location that complements the overall aesthetics of your living or work space. Consider if the system will be easily accessible for planting, pruning, and harvesting. If the garden is meant to be a decorative feature, select a prominent location that enhances the visual appeal of the space.
- Air Circulation: Good air circulation is essential for the health of plants, as it helps prevent the growth of mold, mildew, and pests. Ensure the selected location offers adequate ventilation or install fans to ensure adequate airflow.
Remember to assess each of these factors before deciding on a specific location for your vertical indoor garden system to ensure the best conditions for your plants' growth and overall success.
What are the benefits of having a vertical indoor garden system?
There are several benefits of having a vertical indoor garden system, including:
- Space optimization: Vertical gardens make efficient use of limited space. By utilizing vertical space, you can grow more plants in a smaller area, making it ideal for small apartments, balconies, or urban settings.
- Increased plant diversity: Vertical gardens allow you to grow a greater variety of plants simultaneously. You can mix and match different species, including herbs, flowers, and vegetables, to create a visually appealing and productive garden.
- Improved air quality: Plants naturally filter the air by absorbing pollutants and releasing oxygen. With a vertical indoor garden, you can significantly increase the number of plants in your living space, enhancing air quality and creating a healthier environment.
- Noise reduction: Plants have the ability to absorb and reduce noise pollution. A vertical garden can act as a sound barrier, helping to dampen noise and create a more tranquil atmosphere indoors.
- Aesthetic appeal: Vertical gardens are visually striking and can enhance the overall aesthetics of any indoor space. They provide a unique and eye-catching focal point that adds beauty and greenery to your home or office.
- Year-round gardening: With an indoor garden system, you can grow plants year-round, regardless of the outdoor weather conditions. This allows you to enjoy fresh herbs, vegetables, or flowers throughout the year, regardless of the season.
- Easy maintenance: Vertical gardens are relatively easy to maintain. With a well-designed system, you can minimize watering, nutrient needs, and pest control efforts. Additionally, the elevated height makes it more accessible for tending to plants without bending over.
- Reduced energy consumption: Indoor vertical gardens can help to regulate indoor temperatures by providing insulation. They can reduce the energy required for heating or cooling, thus contributing to energy savings.
- Educational and therapeutic benefits: Vertical indoor gardens provide opportunities for learning and bonding with nature. They can be used as educational tools for teaching children about plant growth and sustainability. Additionally, gardening has therapeutic benefits, reducing stress and promoting relaxation.
Overall, a vertical indoor garden system offers numerous advantages, from maximizing space to improving air quality and aesthetics. It provides an enjoyable and sustainable way to incorporate green living into your indoor spaces.
How to expand or modify a vertical indoor garden system over time?
Expanding or modifying a vertical indoor garden system over time can be done in a few simple steps:
- Evaluate the available space: Assess the additional space you have for expanding the vertical garden system. Consider the dimensions, lighting conditions, and any potential limitations or obstacles in the area.
- Plan the expansion: Decide how you want to expand the system – whether vertically or horizontally. Consider factors such as the number of plants you'd like to add, their types, and their space requirements.
- Secure the structure: Ensure that the existing vertical garden structure is sturdy enough to support the additional weight of more plants. Reinforce or upgrade the framework if necessary.
- Adjust the irrigation system: If your vertical garden relies on an automated irrigation system, you may need to modify it to accommodate the additional plants. Adjust the watering schedule, install additional drippers or sprayers, or consider upgrading to a larger water reservoir if needed.
- Install new planting pockets: If you have a pocket-style vertical garden, you'll need to add new pockets or panels to accommodate extra plants. Attach them securely to the existing structure, ensuring proper alignment and stability.
- Add new plants: Choose appropriate plants for the expanded system based on factors like light availability, humidity, and your personal preferences. Ensure that each plant's requirements are compatible with the vertical garden system and neighboring plants.
- Monitor and adjust: After adding the new plants, closely monitor their growth and health. Adjust the lighting, watering, and nutrient levels as necessary to ensure optimal conditions for all the plants in the system.
- Regular maintenance: Continue to maintain the vertical garden system as before, including pruning, fertilizing, and removing any diseased or dying plants. Regularly assess the overall health and growth of the garden and make adjustments as needed.
By following these steps, you can successfully expand or modify your vertical indoor garden system over time, allowing for continuous growth and customization.
How to prune and trim plants in a vertical indoor garden system?
Pruning and trimming in a vertical indoor garden system is essential for maintaining plant health and encouraging proper growth. Here's a step-by-step guide on how to prune and trim plants in such a system:
- Identify the plants requiring pruning: Typically, plants that become too bushy, grow excessively tall, or display signs of infestation or disease need pruning.
- Gather the necessary tools: You will need sharp, clean pruning shears or scissors, gloves to protect your hands, and a clean cloth or disinfectant spray to sterilize your tools before and after use.
- Choose the right time: Pruning is best done during the plant's active growing season when it can quickly recover and regenerate. Avoid pruning during periods of stress or when the plant is flowering heavily.
- Assess and plan: Start by assessing the plant's overall health and shape. Identify the areas that need pruning, such as dead or damaged branches, excessive growth, or crowded areas that hinder air circulation or light penetration.
- Remove dead or damaged branches: Begin by pruning away any dead, brown, or diseased branches. Cut them off near the main stem, making a clean cut just above the node or branching point.
- Thinning excess growth: For vertical systems, it's crucial to thin out excessive growth to maintain proper spacing between plants. Identify crowded areas or branches that hinder air circulation and remove them. Trim branches from the outside-in, preserving a balanced shape.
- Maintain plant size: If a plant becomes too tall, prune the top to encourage bushier growth. Identify the desired height and make a diagonal cut above a node or leaf junction to encourage new growth below the cut.
- Shape the plants: Depending on your preference, you can shape the plants by pruning them into a specific form, such as a pyramid or ball shape. Carefully trim the outer edges to achieve the desired shape while still maintaining the plant's overall health.
- Clean up debris: Remove any fallen leaves, branches, or plant material to prevent disease or pests from spreading.
- Monitor plant response: After pruning, closely monitor the plants for any signs of stress or disease. Ensure they are receiving adequate light, water, and nutrients for optimal recovery.
It's important to note that each plant species may have specific pruning requirements. Researching the specific needs of your plants will help you make informed decisions and maintain a healthy indoor garden system.
What are the best plants for a beginner's vertical indoor garden system?
Here are some of the best plants for a beginner's vertical indoor garden system:
- Herbs: Easy-to-grow herbs like basil, parsley, mint, and rosemary are great choices for a vertical garden. They require moderate sunlight and can be harvested frequently.
- Leafy greens: Lettuce varieties such as spinach, arugula, and kale grow well in vertical gardens. They need less space and mature quickly.
- Succulents: Succulents like aloe vera, snake plant, and jade plant are low-maintenance and tolerate indoor conditions well. They thrive in bright light and require infrequent watering.
- Pothos: Pothos is a trailing plant with beautiful, cascading vines. It's forgiving and suitable for beginners. It can thrive in low-light conditions and needs minimal care.
- Spider plant: Spider plants have long, arching leaves that make them visually appealing. They are adaptable and can grow in various conditions, including low to medium light levels.
- Philodendron: Philodendrons are low-maintenance plants that can tolerate low light levels. They come in various shapes and sizes, from trailing vines to large-leafed varieties.
- English ivy: English ivy is a popular choice for vertical gardens due to its ability to climb and trail. It prefers bright, indirect light and slightly moist soil.
- ZZ plant: ZZ plants are known for their ability to thrive in low-light conditions. They have glossy leaves and require minimal care, making them ideal for beginners.
- Pothos: Pothos are excellent trailing plants that can be trained to grow upwards on a vertical garden. They are versatile, easy to care for, and can tolerate various light levels.
- Peace lily: Peace lilies are known for their beautiful white flowers and ability to purify indoor air. They prefer bright, indirect light and moist soil.
Remember to consider factors such as lighting conditions, watering needs, and space requirements when choosing plants for your indoor vertical garden system.
How to harvest vegetables and herbs grown in a vertical indoor garden system?
Harvesting vegetables and herbs from a vertical indoor garden system is relatively simple and can be done in a few steps:
- Identify readiness: It's essential to know when your vegetables and herbs are ready for harvest. Each plant has different maturity times, so familiarize yourself with the expected harvest time for each type.
- Prepare tools: Gather the necessary tools such as pruning shears or scissors for cutting the herbs and vegetables.
- Harvesting herbs: Harvest herbs by cutting the stems just above a leaf node or set of leaves. This encourages new growth and ensures the plant continues to thrive. Avoid cutting more than one-third of the plant during harvesting to maintain its health.
- Harvesting vegetables: Harvest vegetables when they have reached the desired size and color. Depending on the vegetable, you may need to gently twist the fruit or use a sharp knife or scissors to cut it from the plant. Be careful not to damage the plant or other nearby crops.
- Collect and clean: Once you've harvested the vegetables and herbs, carefully collect them in a container. Ensure to remove any dirt or debris from them before storage or consumption.
- Maintain the system: After harvesting, it's crucial to continue caring for the indoor garden system. This includes providing sufficient light, water, and nutrients for the remaining plants to continue growing.
By following these steps, you can successfully harvest vegetables and herbs from your vertical indoor garden and enjoy the fresh produce.