
Best Treadmill Incline Adjustments to Buy in July 2026
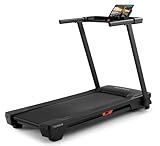
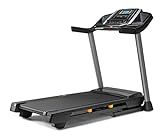
NordicTrack T Series 5 Starter Treadmill for Real Results
-
TRAIN SMARTER WITH 10,000+ IFIT WORKOUTS & AUTO-ADJUSTING FEATURES!
-
EXPERIENCE JOINT-FRIENDLY RUNNING WITH KEYFLEX CUSHIONING SYSTEM.
-
STAY MOTIVATED; SYNC WITH FITNESS APPS & ENJOY PERSONALIZED COACHING!


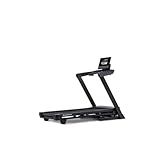
NordicTrack T Series 10 Treadmill with 10" Tilting Touchscreen and Compact Design
-
ACCESS 10,000+ IFIT WORKOUTS, TAILORED TO YOUR PACE AND TERRAIN!
-
10 TILTING TOUCHSCREEN FOR WORKOUTS, SHOWS, AND OPTIMAL VIEWS.
-
FOLDABLE DESIGN SAVES SPACE; SMOOTH LOWERING FOR EASY STORAGE.
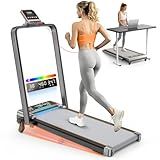
TRAILVIBER Walking Pad Treadmill with 12% 9-Level Auto Incline, 450 lbs Capacity RGB LED Screen, Bluetooth Speaker Under Desk Treadmill, Compact Treadmills for Home Hiking, Black
-
BOOST CALORIE BURN: 12% AUTO INCLINE FOR EFFICIENT WORKOUTS!
-
STURDY DESIGN: SUPPORTS UP TO 450 LBS FOR STABLE PERFORMANCE!
-
IMMERSIVE AUDIO: BUILT-IN BLUETOOTH SPEAKER ENHANCES EVERY SESSION!
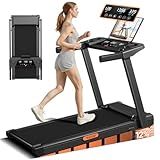
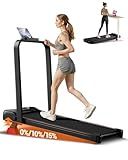
12% Incline Treadmill with Handle, 3-in-1 Portable Treadmills for Home and Office, Foldable Treadmills with 300 Lbs Weight Capacity, 3.0HP Quiet Walking Pad Treadmill, Three Touch Screen
- BURN MORE CALORIES WITH 12% MANUAL INCLINE FOR INTENSE WORKOUTS!
- TRIPLE DISPLAY & FOLDABLE DESIGN FOR CONVENIENCE AND REAL-TIME STATS!
- ENJOY A QUIET RUN WITH A POWERFUL MOTOR & SPACIOUS SHOCK-ABSORBING BELT!
NordicTrack T 6.5 S; Treadmill for Running and Walking with 5” Display and SpaceSaver Design
-
LIVE STATS ON 5 LCD & DEVICE SHELF FOR ULTIMATE WORKOUT CONTROL!
-
PERSONALIZED AI COACHING FOR TAILORED WORKOUTS AND RECOVERY TIPS!
-
FOLDABLE DESIGN & SMARTADJUST FOR COMPACT CONVENIENCE AND PROGRESS!
Walking Pad Treadmill with 12% Incline & Dual LED Display, 4 in 1 Walking Pad with Handle Bar, 3.5HP Foldable Under Desk Treadmill, Portable Treadmills for Home 350LBS, 4 Adjustable Incline, RGB Light
-
DUAL LED DISPLAY FOR REAL-TIME TRACKING & CUSTOM CONTROL MODES!
-
BURN UP TO 150% MORE CALORIES WITH ADJUSTABLE INCLINE LEVELS!
-
DYNAMIC RGB LIGHTING MAKES EVERY WORKOUT ENERGIZING & FUN!
4-in-1 Walking Pad with 10% Incline, Portable Under Desk Treadmill, Foldable Treadmills for Home and Office, 2.5 HP Quiet Walking Pad Treadmill with 300 LBS Capacity
-
ADJUSTABLE INCLINE: UP TO 15% FOR A HIGHER INTENSITY WORKOUT!
-
COMFORTABLE 6-LAYER NON-SLIP BELT: PROTECT JOINTS AND ENHANCE SAFETY.
-
QUIET 2.5HP MOTOR: SMOOTH OPERATION FOR HOMES OR SHARED SPACES.
Adjusting the incline on a treadmill is a simple process that can help you tailor your workout to your fitness level and goals. Most treadmills have options to modify the incline, allowing you to simulate various terrains and intensify your workout. Here's how you can adjust the incline on a treadmill:
- Start by locating the incline buttons on the console. They are usually labeled with arrows pointing up and down or have symbols indicating incline adjustment.
- If your treadmill has a digital display, you may see the current incline level, while some models use a series of lights to represent the incline position.
- To increase the incline, press the incline button with the upward arrow or the corresponding symbol. Depending on the treadmill, you may need to press the button multiple times to reach your desired level.
- To decrease the incline, press the incline button with the downward arrow or the corresponding symbol. Similarly, you may need to press it multiple times to lower the incline to your desired level.
- Pay attention to the increments of incline adjustment on your treadmill. Some models increase or decrease the incline in small increments, such as 0.5 or 1-degree intervals, while others have more significant changes.
- As you adjust the incline, the treadmill deck will start to rise or lower accordingly. Take note of your body's response to the incline change and adjust it to a level that challenges but does not strain you.
- Remember to listen to your body and adjust the incline appropriately. If you feel any discomfort or excessive fatigue, lower the incline to reduce the intensity of your workout.
- Consult your treadmill manual if you are unsure about the specific incline adjustment process for your machine. The manual should provide detailed instructions on how to modify the incline and may include additional features specific to your treadmill model.
By adjusting the incline on a treadmill, you can add variety to your workout routine, target different muscle groups, and increase the overall intensity of your exercise session.
How to adjust the incline on a treadmill?
The process of adjusting the incline on a treadmill may vary depending on the model and brand. However, here is a general guide on how to adjust the incline on most treadmills:
- Locate the incline adjustment buttons: Look for the incline buttons on the console or handlebars. They are usually labeled with a plus (+) and minus (-) sign or an arrow pointing up and down.
- Position yourself on the treadmill: Stand on the side footrails of the treadmill and ensure that you are away from the walking or running belt.
- Start the treadmill: Turn on the treadmill and let it begin operating at a low speed.
- Press the incline increase button: Press the plus (+) or up arrow button to raise the incline. Depending on the model, you may need to hold down the button until the desired incline level is reached, or you can press it incrementally to increase the incline step by step.
- Check the display: Many treadmills have a digital display that shows the current incline level. Monitor the display to ensure that the incline is adjusting as desired.
- Adjust the incline decrease button: To lower the incline, press the minus (-) or down arrow button. Again, depending on the model, you may need to hold it down or press it incrementally to decrease the incline level.
- Test the incline adjustment: Once you've set the desired incline level, step onto the walking or running belt to see if it feels comfortable. If needed, further adjust the incline to your preference.
Note: It's important to refer to the user manual specific to your treadmill model for detailed instructions on adjusting the incline.
How to maintain proper treadmill incline motor function?
There are a few steps you can take to maintain proper treadmill incline motor function. Here are some tips:
- Regular cleaning: Dust and dirt can accumulate on the motor over time, which may affect its performance. Wipe down the motor regularly using a soft, dry cloth or a vacuum cleaner with a brush attachment to remove any debris.
- Lubrication: Some treadmill models have incline motors that require lubrication. Consult your treadmill's manual to determine if your incline motor requires lubrication and, if so, follow the instructions provided by the manufacturer.
- Belt alignment: Ensure that the treadmill belt is properly aligned with the incline motor. If it is misaligned or off-center, it could put undue strain on the motor. Consult your treadmill's manual for specific instructions on how to adjust the belt alignment, or contact the manufacturer for assistance.
- Weight capacity: Be mindful of the weight capacity of your treadmill. Exceeding the recommended weight limit can put excessive strain on the incline motor and other components, potentially leading to premature wear and tear.
- Regular maintenance: Follow the maintenance schedule outlined in your treadmill's manual. This may involve tasks such as tightening screws, checking for loose connections, and inspecting other components related to the incline motor.
- Avoid sudden incline changes: When using the treadmill, avoid making sudden or drastic incline changes. Gradually adjust the incline level to reduce the strain on the motor.
- Professional servicing: If you notice any unusual noises, vibrations, or issues with the incline motor, consider contacting a professional for servicing or repair. They will have the expertise to diagnose and fix any underlying problems.
Remember, always refer to your treadmill's manual for specific instructions and recommendations regarding maintenance and care of the incline motor.
How to calibrate the incline on a treadmill?
To calibrate the incline on a treadmill, follow these steps:
- Start by making sure the treadmill is level and placed on a flat surface. Adjust the leveling feet as needed to ensure stability.
- Turn on the treadmill and let it go through the initial start-up process. Allow it to stabilize and come to a complete stop.
- Find the calibration settings on the treadmill. This could be a button, a touch screen option, or a combination of buttons on the console. Refer to the owner’s manual if unsure about the location of the calibration option.
- Press the calibration button or option to initiate the calibration process. The treadmill will typically display a message indicating that it is calibrating.
- During the calibration process, the treadmill will adjust its incline to the highest and lowest positions. This helps the treadmill determine the correct range of motion for the incline function.
- Once the calibration process is complete, the treadmill will display a message or indicator to let you know it has finished.
- Test the incline by manually adjusting it to various levels and monitoring the accuracy. If you notice any issues or discrepancies, repeat the calibration process.
It is important to note that not all treadmills have a calibration feature, as many modern treadmills are designed to self-calibrate automatically. If your treadmill does not have a calibration option or if you are unsure, refer to the owner’s manual or contact the manufacturer for guidance.
How to customize the incline settings on a treadmill?
To customize the incline settings on a treadmill, follow these steps:
- Locate the incline buttons or controls on the console panel of the treadmill. These buttons are typically labeled with up and down arrows indicating incline increase or decrease.
- Stand on the treadmill and start it at a low speed to ensure safety while adjusting the incline.
- Determine the desired incline level. Most treadmills offer a range of incline options, usually from 0% (flat) to 15% or higher. Refer to your treadmill's manual to know the specific incline range.
- Press the incline increase button to raise the incline. Press it multiple times if you want to reach a specific level gradually. The treadmill will automatically adjust the incline accordingly.
- Alternatively, some treadmills have direct incline selection buttons. Look for buttons that are labeled with specific incline levels such as 5%, 10%, etc. Pressing one of these buttons will instantly set the incline to the selected level.
- To decrease the incline, press the incline decrease button. Again, press it multiple times if you want to gradually lower the incline.
- Pay attention to the treadmill's console display or the built-in incline indicator to see the current incline level as you make adjustments.
- Experiment with different incline settings to find the level that suits your workout goals, whether you want a more intense uphill workout or a flatter, easier workout.
Remember to always exercise caution and follow the manufacturer's instructions when adjusting the incline settings on a treadmill.