
Best Under Cabinet LED Lights to Buy in July 2026
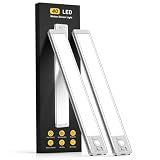
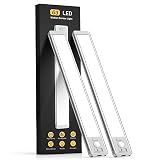
MCGOR 10inch Under Cabinet Lighting, 2 Pack Rechargeable Motion Sensor Light Indoor, 5 Levels Dimmable Magnetic Closet Lights, Wireless Under Counter Lights for Kitchen, Stairs
-
AUTO-ON DETECTION WITHIN 10FT ENSURES SAFETY IN THE DARK.
-
DIMMABLE SETTINGS FOR VERSATILE USE: TASK LIGHTING OR NIGHT LIGHT.
-
USB-C RECHARGEABLE, HASSLE-FREE SETUP, LASTS UP TO 45 DAYS!


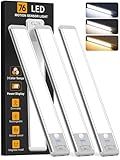
Under Cabinet Lighting Wireless, Rechargeable 10inch Motion Sensor Light Indoor, 3 Color Closet Light Battery Operated with LED Power Display, Magnetic Under Counter Lights for Kitchen, Home (3Pack)
-
SMART MOTION SENSOR: LIGHTS UP AUTOMATICALLY, ENHANCING CONVENIENCE.
-
VERSATILE LIGHTING OPTIONS: CHOOSE FROM 3 COLOR TEMPS AND ADJUSTABLE BRIGHTNESS.
-
EASY INSTALLATION: MAGNETIC DESIGN FOR INSTANT SETUP OR RECHARGING!
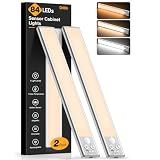
Under Cabinet Lighting, 14.7" Rechargeable Motion Sensor Light Indoor, 2 Pack Magnetic Dimmable Closet Lights, Wireless Under Counter Lights for Kitchen, Stairs,Hallway
-
AUTO-ON MOTION DETECTION FOR SAFETY IN DARK SPACES-TRIPPING NO MORE!
-
SET TO ALWAYS-ON FOR VERSATILE LIGHTING DURING DAY OR TASKS!
-
USB-C RECHARGEABLE WITH 7-45 DAY BATTERY LIFE-NO WIRES NEEDED!
Gritin 10.2inch Under Cabinet Lighting Rechargeable 2 Pack
- MOTION SENSOR MAGIC: EFFORTLESS HANDS-FREE LIGHTING WITH WIDE DETECTION.
- VERSATILE BRIGHTNESS & COLOR: CHOOSE FROM 3 COLORS AND 5 BRIGHTNESS LEVELS.
- EASY INSTALLATION ANYWHERE: MAGNETIC OR ADHESIVE SETUP FOR VERSATILE USE.
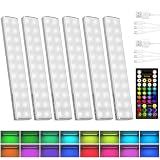
EZVALO 80RGB Color Changing Under Cabinet Lighting Wireless, 1800mAh Rechargeable Led Strip Shelf Lights, Timer & Dimmable Bar Light with Remote for Kitchen, Bedroom, Display Case, 6Pack
-
80 LIGHTING COMBINATIONS: CUSTOMIZE WITH 16 COLORS & 5 BRIGHTNESS LEVELS!
-
RECHARGEABLE & WIRELESS: ENJOY 10 HOURS OF HASSLE-FREE LIGHTING BLISS!
-
TWO CONTROL OPTIONS: MANUAL BUTTONS OR REMOTE FOR ULTIMATE CONVENIENCE!
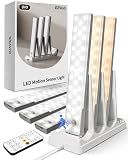
EZVALO 6-Pack Under Cabinet Lighting with Charging Station, 2000mAh Rechargeable Wireless Motion Sensor Lights, 3 Color Temps, Dimmable, Timer, Magnetic, with Remote Control for Kitchen, Closet, Stair
-
VERSATILE MODES FOR EVERY OCCASION: INSTANT LIGHT WHERE YOU NEED IT!
-
CHARGE 3 LIGHTS AT ONCE: SIMPLIFY YOUR SETUP WITH A COMPACT HUB.
-
EASY INSTALLATION: NO TOOLS NEEDED, JUST PEEL, STICK, AND SHINE!

MCGOR 10inch Under Cabinet Lighting, 2 Pack Rechargeable Motion Sensor Light Indoor, 5 Levels Dimmable Magnetic Closet Lights, Wireless Under Counter Lights for Kitchen, Stairs
- AUTO-ACTIVATION IN LOW LIGHT FOR SAFE, HANDS-FREE USE.
- 5 BRIGHTNESS LEVELS FOR VERSATILE LIGHTING IN ANY SITUATION.
- EASY INSTALLATION; NO TOOLS NEEDED FOR INSTANT PLACEMENT.
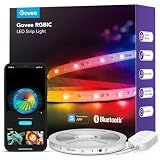
Govee RGBIC LED Strip Lights, Smart LED Lights for Bedroom, Bluetooth LED Lights APP Control, DIY Multiple Colors on One Line, Color Changing LED Strip Lighting Music Sync, Home Decor, 16.4ft
-
VIBRANT RGBIC EFFECTS FOR STUNNING VISUALS CREATE DYNAMIC MULTI-COLOR DISPLAYS THAT TRANSFORM YOUR SPACE.
-
INNOVATIVE APP CONTROL FOR CUSTOMIZATION PERSONALIZE LIGHTING WITH EASE USING THE GOVEE HOME APP.
-
ENGAGING MUSIC SYNC FOR ULTIMATE EXPERIENCE SYNC LIGHTS TO MUSIC FOR AN ELECTRIFYING HOME CONCERT FEEL.
MCGOR 14.7inch Under Cabinet Lighting, 2 Pack Rechargeable Motion Sensor Light Indoor, 5 Levels Dimmable Magnetic Closet Lights, Wireless Under Counter Lights for Kitchen, Stairs,Hallway
-
AUTO-ACTIVATION: LIGHTS ON WHEN YOU NEED THEM, HANDS-FREE!
-
DIMMABLE BRIGHTNESS LEVELS FOR ANY TASK OR AMBIANCE YOU DESIRE.
-
EASY INSTALLATION: NO ELECTRICIAN NEEDED, JUST STICK AND GO!
Under cabinet LED lights work by using light-emitting diodes (LEDs) to provide illumination beneath cabinets, usually in kitchens or workspaces. These LEDs are semiconductor devices that emit light when an electric current passes through them. The lights are connected to a power source, often through direct wiring or plug-in adapters, allowing them to function efficiently with lower energy usage compared to traditional lighting options. These lights often come with features such as dimming capabilities and adjustable color temperatures to suit various needs and preferences. The setup can be controlled via switches, remote controls, or smart home systems, enabling users to customize the lighting according to their requirements. The compact and energy-efficient nature of LED technology makes these lights a popular choice for providing unobtrusive, yet effective, task lighting.
What is the ideal placement for under cabinet LED lights?
The ideal placement of under cabinet LED lights is crucial for both aesthetics and functionality. Here are some guidelines to help you achieve optimal results:
- Front of the Cabinet: Position the LED lights toward the front edge of the cabinet. This minimizes shadows on your workspace and maximizes the light distribution over the counter.
- Avoid Direct View: Ensure the lighting fixture is not directly visible when you are standing or sitting. This reduces glare and ensures a clean look.
- Spacing: If using individual puck lights, space them evenly every 8-12 inches. This creates uniform lighting without dark spots. For strip lights, ensure they cover the entire length of the cabinet for continuous illumination.
- Distance from Backsplash: Install the lights approximately 1-2 inches from the backsplash to ensure the light spreads evenly over the workspace and avoid over-reflection.
- Consider Cabinet Lip: If your cabinets have a lip or trim, make sure the lights are set back enough to be concealed by it. This helps hide the light strip or fixtures from direct view.
- Task vs. Accent Lighting: Decide if the primary purpose is task lighting or accent lighting. For task lighting, prioritize functionality; for accent lighting, you might focus on highlighting specific areas or features.
- Power Source: Plan the placement in relation to available power sources. The positioning should be convenient for wiring, especially if you're hard-wiring the lights.
- Dimming Options: Consider installing dimmable lights or include a dimmer switch. This allows you to adjust the brightness according to your needs and create the desired ambiance.
Following these guidelines should help you achieve effective and aesthetically pleasing under cabinet lighting that enhances your kitchen or workspace functionality and style.
How can under cabinet lighting be used in other rooms besides the kitchen?
Under cabinet lighting is quite versatile and can be used effectively in various rooms throughout the home to enhance both functionality and aesthetics. Here are some ideas:
- Bathroom: Use under cabinet lighting beneath vanity cabinets to provide soft illumination that helps during nighttime visits without the need for harsh overhead lights. It can also highlight decorative details on your vanity.
- Home Office: Install under cabinet lights beneath shelves or cabinets to ensure your desk area is well-lit. This setup reduces eye strain and creates a focused light source for tasks without lighting up the entire room.
- Living Room: Add subtle lighting under shelves or inside entertainment units to highlight decor, books, or media equipment. It creates a warm atmosphere and can serve as ambient lighting during movie nights.
- Bedroom: Use under cabinet lighting in closets or wardrobes to make it easier to see clothing and accessories. It can also be installed under floating nightstands to provide soft, ambient light.
- Hallways and Entryways: Install under cabinet lighting along baseboards or under console tables to softly illuminate these areas. This can create a welcoming glow and improve safety without overpowering the space.
- Laundry Room: Enhance task lighting by adding under cabinet lights above counters or under shelves. This can make sorting and folding clothes easier and more efficient.
- Dining Room: If you have built-in cabinets or a buffet in the dining area, under cabinet lighting can be used to highlight these features or provide subtle lighting during dinners and gatherings.
- Workshop or Garage: Use under cabinet lighting to illuminate workbenches, making detailed tasks easier and safer by improving visibility without relying on overhead fixtures alone.
- Bar Area: In home bars or beverage stations, under cabinet lighting can highlight liquor collections or glassware and enhance the ambiance.
Installing under cabinet lighting in these areas can improve both utility and mood, making spaces more functional and enjoyable.
How do you troubleshoot under cabinet LED light issues?
Troubleshooting under cabinet LED light issues involves a step-by-step approach to identify and resolve the problem. Here’s a general guide to help you:
- Check the Power Source: Ensure that the power supply is connected and working. Check if the outlet is functional by plugging in another device. Verify that the switch controlling the lights is in the "on" position.
- Inspect the LED Driver or Transformer: If your LED lights are connected to a driver or transformer, ensure it is operational. Look for any indicator lights on the driver that might signal a problem. Use a multimeter to check the output voltage from the driver or transformer to ensure it’s delivering the correct voltage.
- Examine Connections and Wiring: Inspect all connectors and wires for loose connections, frayed wires, or corrosion. Re-secure any loose connections. Pay special attention to the connections at the LED strips or bars themselves.
- Check the LED Strips or Bars: Look for any visible damage to the LED strips, such as burnt or broken LEDs. Test sections of the strip individually if possible. Sometimes just a portion of the strip might be damaged, affecting the whole chain.
- Test with a Multimeter: Use a multimeter to check the continuity of the wiring and confirm there are no open circuits. Measure the voltage at different points in the circuit to confirm power is reaching the LEDs.
- Replace Faulty Components: If you identify a faulty LED driver or transformer, replacing it may solve the issue. For damaged or burnt-out LED strips, consider replacing the entire strip or section.
- Check for Overheating: Ensure that the installation has not blocked ventilation around the lights, as excessive heat can degrade LED lights. Verify that the correct voltage and wattage are being used to prevent overheating.
- Dimmer Switch Issues: If the lights are connected to a dimmer switch, ensure it's compatible with LED lighting. Incompatible dimmers can cause flickering or failure to operate. Try bypassing the dimmer to see if the lights work correctly without it.
- Look for Environmental Factors: Moisture or condensation might cause issues with under cabinet lighting in kitchens due to proximity to water sources. Ensure any moisture is addressed. Clean the lights and area around them to ensure there is no buildup of grease or dust that could affect functionality.
If after these steps your LED lights are still not working, you might need to consult with a professional electrician to assess more complex or hidden issues.
How do you install under cabinet LED lights?
Installing under-cabinet LED lights can be a great way to add both task and ambient lighting to your kitchen or workspace. Here’s a general guide on how to install them:
Materials and Tools Needed:
- Under-Cabinet LED Light Kit: Make sure you purchase a kit that suits your needs, whether it's plug-in or hardwired. Many kits include strips, puck lights, or bars.
- Measuring tape
- Screwdriver
- Drill and bits
- Adhesive strips or mounting clips
- Wire stripper/cutter (if installing hardwired lights)
- Screws and anchors (usually provided in the kit)
- Voltage Tester (if hardwiring)
- Pencil
Installation Steps:
- Plan the Layout: Determine where you want the LED lights installed by considering both the light coverage and power source. Choose locations that will effectively illuminate your workspace without direct visibility of the lights.
- Prepare the Surface: Clean the underside of the cabinets where the lights will be mounted. This ensures better adhesion for adhesive strips or mounting clips.
- Measure and Mark: Use a measuring tape and pencil to mark where the lights will be installed for even spacing and alignment.
- Mount the Lights: For Adhesive-backed strips: Peel off the backing and press the strips firmly onto the surface. For Mounting Clips: Attach the clips using screws; then snap the light bars into the clips. For Puck Lights: Usually mounted with screws or adhesive pads; follow the manufacturer’s instructions.
- Connect the Lights: If your lights are plug-in types, run the cords neatly and plug them into an outlet (use cord clips to manage cords). For hardwired installations, ensure the power is off using a voltage tester. Connect the wires according to the LED kit’s instructions-usually matching the color-coded wires (black to black, white to white). Secure the connections with wire nuts, then turn the power back on to test.
- Hide the Wiring: Use cable concealers or clips to neatly hide and secure any visible wires. This will improve aesthetics and prevent potential hazards.
- Test the Lights: Once installed, test the lights to ensure they function correctly and illuminate the intended areas adequately. Adjust the positioning slightly if necessary for optimal lighting coverage.
- Final Adjustments: If any lights are dimmable or come with remote controls, check their operation and make sure everything functions as expected.
Additional Tips:
- Consider using under-cabinet lighting with a dimmer for adjustable ambiance.
- If you're not comfortable with electrical tasks, or if hardwiring is involved, it may be best to hire a professional electrician.
- For a more refined installation, you can install an in-line switch or touch sensor for ease of use.
Ensure to carefully follow the manufacturer's instructions specific to your LED light kit for the best results.