
Best Outdoor Saunas to Buy in July 2026

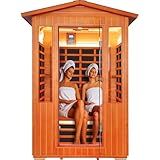
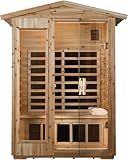
KUNSANA Outdoor Sauna 2 Person, Ceramic Infrared Saunas for Home, Ultra Low EMF Infrared Sauna, Mahogany Wood Home Sauna Room with Bluetooth Speakers, LED Reading Lamps, Chromotherapy Lights
-
PREMIUM MAHOGANY WOOD: DURABLE, WEATHER-RESISTANT FOR YEAR-ROUND USE.
-
2-IN-1 SAUNA: LOW EMF, FAST HEATING FOR SAFE, EFFECTIVE RELAXATION.
-
SPA EXPERIENCE: ENJOY LIGHTS, MUSIC, AND HEALTH BENEFITS FOR TWO!


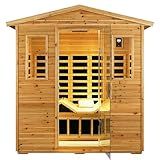
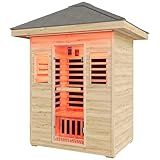
Outdoor Sauna 3 Person Infrared Sauna, Infrared Saunas for Home, 1950W Low EMF Far Infrared Sauna Old Fir Wooden Sauna with Beauty Red Light, Foldable Seat, Bluetooth, Chromotherapy Lamp, 20Amps
- ULTIMATE SAUNA UPGRADE: ENJOY MID INFRARED BEAUTY LIGHT FOR ENHANCED WELLNESS.
- SPACIOUS COMFORT: ACCOMMODATES 3; FLEXIBLE SEATING FOR OPTIMAL RELAXATION.
- DURABLE QUALITY: CRAFTED FROM OLD FIR FOR LONGEVITY AND CLIMATE RESISTANCE.
Outdoor Sauna 2 Person Sauna Infrared Saunas Dry Sauna Room Red Cedar and Canadian Fir Wood Wooden 120V Sauna Spa 2080W 48.8 * 38.19 * 81.89inch
- SPACIOUS DESIGN FOR TWO: ENJOY SAUNA SESSIONS WITH FAMILY OR FRIENDS.
- QUICK HEATING POWER: REACHES DESIRED TEMPERATURE FAST, FROM 68°F TO 149°F.
- ECO-FRIENDLY INFRARED PANELS: SAFE, ENERGY-EFFICIENT HEATING FOR ALL USERS.
LTCCDSS Low EMF Outdoor Sauna 2 Person, Far Infrared Sauna Room for Home, Soft Fir Wood, Chromotherapys | Bluetooth Speakers | 47.2 * 81.1 * 37.0 in
-
COST-EFFECTIVE CANADA FIR WOOD FOR DURABLE OUTDOOR SAUNA DESIGN.
-
COMPREHENSIVE 2-YEAR WARRANTY ENSURES WORRY-FREE OWNERSHIP.
-
SPACIOUS, STYLISH SAUNA WITH LIGHTS, MUSIC, AND COMFORTABLE SEATING.
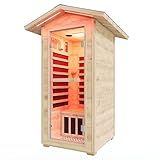
Albott Outdoor Sauna 1 Person, Infrared Saunas for Home, Low EMF 110V Spruce Wood Dry Sauna with Tourmaline Stone Foot Warmer, 7-Color Light Therapy & 2 Bluetooth Speakers, 33.5"x35.4"x78.7"
- YEAR-ROUND OUTDOOR DURABILITY WITH WATERPROOF ASPHALT SHINGLE ROOF.
- ENJOY FULL-BODY INFRARED HEAT AND FOOT ZONE WARMTH FOR ULTIMATE COMFORT.
- TRANSFORM YOUR SAUNA WITH MOOD-BOOSTING LIGHTS AND BLUETOOTH SPEAKERS.

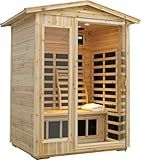
Albott Outdoor Sauna 4 Person, Infrared Saunas for Home, Low EMF 2850W/240V/20A Spruce Wood Dry Sauna with Tourmaline Stone Foot Warmer, 7-Color Light Therapy & 2 Bluetooth Speakers, 59.1"x59.1"x98.4"
-
ULTIMATE OUTDOOR PROTECTION: PREMIUM WEATHERPROOF DESIGN FOR YEAR-ROUND USE.
-
DEEP RELAXATION & COMFORT: FULL-BODY INFRARED HEAT WITH EXCLUSIVE FOOT WARMTH.
-
MOOD-BOOSTING ATMOSPHERE: 7-COLOR LIGHT THERAPY ENHANCES YOUR SAUNA EXPERIENCE.
LTCCDSS Low EMF Outdoor Far Infrared Sauna 2-Person, Hemlock Wood Sauna for Home, Withstand Outdoor Temp -5℉-104℉, Bluetooth Speakers, LED Reading Lamps, Chromotherapy Light
-
🌲 DURABLE QUEBEC FIR WOOD: IDEAL FOR A STABLE AND COST-EFFECTIVE SAUNA.
-
❤️ ELEGANT HILLSIDE ROOF: BETTER DRAINAGE AND WEATHER RESISTANCE FOR LONGEVITY.
-
❤️ ULTIMATE RELAXATION: INFRARED HEATING WITH 7-COLOR THERAPY AND BLUETOOTH!
Albott Outdoor Sauna 3 Person, Infrared Saunas for Home, Low EMF 2645W/240V/15A Spruce Wood Dry Sauna with Tourmaline Stone Foot Warmer, 7-Color Light Therapy & 2 Bluetooth Speakers, 60.2"x43.3"x98.4"
- YEAR-ROUND OUTDOOR DURABILITY WITH PREMIUM WATERPROOF MATERIALS.
- ENJOY SOOTHING FULL-BODY HEAT WITH NINE INFRARED PANELS AND FOOT ZONE.
- ENHANCE RELAXATION WITH MOOD-BOOSTING LED LIGHTS AND BLUETOOTH AUDIO.
When deciding on the size of an outdoor sauna, there are several factors to consider to ensure you select one that best fits your needs. First, think about how many people will typically use the sauna at the same time. For individual use or for a couple, a smaller sauna might suffice, but for larger groups or family gatherings, you'll need a larger unit. Consider the space available in your outdoor area, as this will limit the size you can accommodate. Also, think about whether you want room to fully recline while using the sauna, as this will require additional space. Besides capacity, consider the height of the sauna; enough clearance will be necessary for standing and for heat dispersion. Your budget will also play a role in determining the size, as larger saunas are generally more expensive. Lastly, think about future needs, as your usage might increase over time. Choosing a slightly larger sauna may provide greater flexibility for different scenarios.
How do I install an outdoor sauna heater?
Installing an outdoor sauna heater involves several steps to ensure it's done safely and effectively. Below is a general guide, but it's important to follow the specific instructions provided by the manufacturer of your sauna heater, and consult a professional if you're unsure about any steps:
Materials and Tools
- Outdoor sauna heater
- Sauna stones (if not included with the heater)
- Necessary electrical wiring and components
- Drill and screwdriver
- Level
- Heat-resistant tiles or materials (for mounting surface)
- Safety gear (gloves, goggles)
Steps for Installation
- Choose the Location: Ensure the location is suitable for an outdoor sauna and complies with local building codes. The surface should be level and stable. Ensure there is adequate ventilation.
- Prepare the Mounting Surface: If necessary, lay heat-resistant tiles or other suitable materials where the heater will be mounted. Ensure the surface is clean and dry.
- Install the Heater Mounting Bracket: Follow the manufacturer's instructions to attach any required mounting brackets to the wall. Use a level to ensure the bracket is straight.
- Wiring the Heater: Turn off the power supply at the main circuit breaker before starting any electrical work. Install the electrical wiring as per the manufacturer's instructions. This usually involves running a dedicated circuit from the breaker panel to the heater location. Follow local electrical codes for wiring. It is often mandatory to have a licensed electrician perform or verify this step.
- Mount the Heater: Carefully lift and mount the heater onto the bracket. Secure it using the screws provided, ensuring it is firmly attached and level.
- Connect the Electrical Supply: Connect the wiring to the heater, following the manufacturer's instructions for electrical connections. Ensure all connections are secure and safe.
- Install Sauna Stones: Rinse and place the stones according to the manufacturer's recommendations, allowing room for hot air circulation.
- Test the Heater: Turn the power back on and test the heater. Check for proper heating and ensure there are no electrical issues like tripping breakers or sparks. Allow the sauna to run for a short period to ensure it reaches the desired temperature.
- Final Safety Checks: Ensure there is a safe distance between the heater and any combustible materials. Install any necessary safety features, like a guardrail or heat shield, if required by the manufacturer. Confirm correct installation by checking that all controls and safety devices operate properly.
- Regular Maintenance: Regularly inspect the heater and wiring for any signs of wear or damage. Clean the sauna stones and heater surfaces periodically.
Important Notes:
- Safety First: Always prioritize safety by wearing appropriate gear and following electrical safety procedures. Ensure the installation complies with local building and electrical codes.
- Professional Help: If you are not confident in performing the installation, it’s best to hire a licensed contractor or electrician.
By carefully following these guidelines, you can enjoy a safe and functional outdoor sauna experience.
What is the difference between a traditional and an infrared outdoor sauna?
The primary difference between traditional and infrared outdoor saunas lies in how they generate heat:
- Heat Source: Traditional Sauna: Uses a stove or heater, which can be electric, wood-burning, or gas-powered, to heat the air within the room. Water can be poured over heated rocks to create steam, increasing humidity and overall heat. Infrared Sauna: Uses infrared heaters that emit infrared light, which is absorbed directly by the body, bypassing the air. This method does not heat the air to the same extent as traditional saunas.
- Temperature and Humidity: Traditional Sauna: Typically operates at higher temperatures, ranging from 150°F to 195°F (65°C to 90°C) with varying levels of humidity, especially when steam is added. Infrared Sauna: Generally operates at lower temperatures, usually between 120°F and 150°F (50°C to 65°C), with low humidity because there is no traditional steam.
- Heating Time: Traditional Sauna: Takes longer to heat up because the air and space need to reach a high temperature before use. Infrared Sauna: Heats up more quickly since the goal is not to warm the air but to directly heat the body.
- Experience: Traditional Sauna: Often provides a more intense sweating experience due to the high heat and option for steam, which can be therapeutic for those who enjoy a robust sauna session. Infrared Sauna: Offers a milder experience but claims to penetrate deeper into the skin, purportedly providing similar or greater health benefits at lower temperatures.
- Installation and Energy Usage: Traditional Sauna: Can be more complex to install, especially if it requires a chimney (like wood-burning options), and may use more energy to heat the space, depending on the type of heater. Infrared Sauna: Typically easier to install, with lower operational costs, because it uses less energy to reach operating temperatures.
- Health Benefits and Preferences: Both types of saunas are associated with various health benefits, such as improved circulation, detoxification, relaxation, and muscle recovery, but personal preference plays a significant role in choosing between the two, with some people favoring the traditional sauna experience while others prefer the gentle warmth of infrared saunas.
Ultimately, the choice between a traditional and an infrared outdoor sauna depends on personal preference regarding temperature, humidity, installation, and operational considerations, as well as the type of sauna experience desired.
What is a sauna stove, and how is it used in outdoor saunas?
A sauna stove is a critical component of a sauna, particularly in outdoor setups, where it serves as the primary source of heat. It is designed to generate and maintain the high temperatures necessary for a sauna bath, typically between 150°F to 195°F (65°C to 90°C). There are several types of sauna stoves, including wood-burning and electric stoves, each with its distinct features and benefits.
Wood-Burning Sauna Stoves
- Fuel Source: These stoves use wood as a fuel source, making them ideal for outdoor saunas located in areas where electricity might not be readily available.
- Operation: Wood is burned in a firebox located within the stove. The heat produced is transferred to the sauna room via the stove's body.
- Rocks: Sauna stones are often placed on top of or around the stove. When the stones are heated, water can be poured over them to create steam, which enhances the sauna experience by increasing humidity.
- Ventilation: Proper ventilation is crucial for safety and efficiency, as it ensures sufficient oxygen supply for combustion and expels smoke and exhaust gases.
Electric Sauna Stoves
- Fuel Source: These stoves use electricity to generate heat, providing a more convenient option where power supply is available.
- Operation: Electric stoves typically feature thermostatic controls that allow users to easily set and maintain desired temperatures.
- Rocks: Similar to wood-burning stoves, they also use sauna stones for steam generation, though the stones are heated electrically.
- Ease of Use: Electric stoves are generally easier to operate and require less maintenance compared to their wood-burning counterparts.
Use in Outdoor Saunas
- Installation: Outdoor sauna stoves should be installed following manufacturer guidelines to ensure safety and efficiency. For wood-burning stoves, this includes proper chimney installation and ensuring a sufficient distance from flammable materials.
- Lighting the Stove: For wood-burning stoves, build a fire using dry wood and kindling. For electric stoves, simply adjust the settings to your preferences.
- Heating: Allow enough time for the stove to heat the sauna to the desired temperature. This can take anywhere from 30 minutes to over an hour, depending on the stove type and sauna size.
- Adding Steam: Pour small amounts of water over the hot rocks to generate steam. This increases humidity and enhances the sauna experience.
- Maintenance: Regularly check and clean the stove to ensure optimal performance. For wood-burning stoves, this includes removing ash and inspecting the chimney.
Choosing the right sauna stove for an outdoor sauna involves considering factors such as energy availability, ease of use, and maintenance preferences. Both wood-burning and electric stoves can provide a satisfying sauna experience when properly installed and maintained.
How do I select the right outdoor sauna accessories?
Selecting the right outdoor sauna accessories involves considering several factors, including your sauna's design, your personal preferences, and your budget. Here are some key steps to help you choose the right accessories:
- Understand Your Needs: Identify what you hope to achieve with your sauna experience, such as relaxation, health benefits, or social activities. Consider how often you’ll use the sauna and by how many people.
- Prioritize Comfort and Safety: Opt for comfortable seating arrangements, like ergonomic benches, backrests, or cushions. Ensure all materials are safe for high temperatures and will not off-gas harmful substances.
- Consider Essential Accessories: Thermometer and Hygrometer: Monitor temperature and humidity levels for a safe and effective sauna experience. Buckets and Ladles: These are traditional tools for adding water to the sauna rocks to create steam. Sauna Stones: Essential for electric or wood-burning sauna heaters, selecting high-quality stones can improve heat retention and steam quality.
- Enhance the Ambiance: Choose soft, indirect lighting for a calming atmosphere. LED lights or wall sconces work well. Add aroma by including essential oils or a sauna aroma dispenser.
- Upgrade for Luxury and Convenience: Consider a sound system for relaxing music or nature sounds. Install a towel warmer or hooks for convenience. Add a small storage shelf for personal items like water bottles or reading materials.
- Maintain and Clean: Get cleaning kits and products designed specifically for saunas to ensure longevity and hygiene.
- Additional Comfort Items: Pillows and headrests designed for sauna use can enhance comfort. Consider a sauna timer to help you stay aware of time without disrupting relaxation.
- Climate-Specific Needs: If your climate has varied temperatures or humidity, you may need additional insulation, weatherproofing accessories, or ventilation solutions.
- Plan for Accessories That Suit Your Heater Type: Ensure your chosen accessories are compatible with an electric, gas, or wood-burning heater.
- Budget Considerations: Set your budget and prioritize which accessories are essential and which are optional. Look for high-quality materials that offer durability and longevity for best value.
It's advisable to read reviews or seek recommendations for particular brands or items to ensure quality and durability. By considering these factors, you can enhance your sauna experience with well-chosen accessories that match your personal preferences and practical needs.