
Best Tools to Buy in July 2026
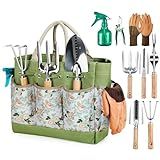
Gardening Tools 9-Piece Heavy Duty Garden Hand Tools with Fashion and Durable Garden Tools Organizer Handbag, Rust-Proof Garden Tool Set, Ideal Gardening Gifts for Women
-
DURABLE STAINLESS STEEL TOOLS RESIST RUST AND MAINTAIN SHAPE FOR YEARS.
-
COMPLETE 9-PIECE SET ENSURES ALL YOUR GARDENING NEEDS ARE COVERED.
-
ERGONOMIC HANDLES PROVIDE COMFORT, IDEAL FOR GARDENERS OF ALL AGES.


Kynup Garden Tools 7-Piece, Gardening Hand Tools, Gardening Tools Set Cultivators with Rust-Proof,Stainless Steel, Aluminum Alloy Material, Gardening Supplies Set Ideal Gift
-
ALL-IN-ONE SET SIMPLIFIES YOUR GARDENING TASKS EFFORTLESSLY!
-
DURABLE ALUMINUM TOOLS: RUST-RESISTANT, LIGHTWEIGHT, ECO-FRIENDLY!
-
ERGONOMIC DESIGN ENSURES COMFORT AND REDUCES HAND FATIGUE!
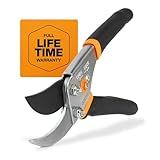
Fiskars Bypass Pruning Shears, 5/8-Inch Cut Capacity Garden Clippers, Gardening Scissors with Sharp, Rust Resistant Steel Blade
- STEEL BLADES WITH BYPASS ACTION FOR PRECISE, DAMAGE-FREE PRUNING.
- LOW-FRICTION COATING ENSURES SMOOTH CUTS AND LONG-LASTING DURABILITY.
- ERGONOMIC DESIGN WITH SELF-CLEANING GROOVE FOR EASY, CONTROLLED USE.
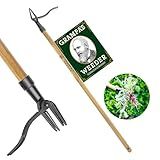
Grampa's Weeder - The Original Stand Up Weed Puller Tool with Long Handle - Made with Real Bamboo & 4-Claw Steel Head Design - Easily Remove Weeds Without Bending, Pulling, or Kneeling.
- VINTAGE DESIGN: TRUSTED SINCE 1913 FOR EFFORTLESS WEEDING!
- BACK & KNEE SAVER: 45 HANDLE FOR STAND-UP WEED REMOVAL!
- ECO-FRIENDLY: CHEMICAL-FREE WEEDING SAFE FOR FAMILY & PETS!
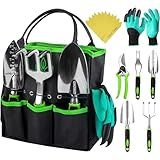
GROWIT Heavy Duty Gardening Tools - 22-Piece Gardening Gifts for Women, Men, Mom, Dad - Durable, Ergonomic Garden Tools Set
-
ULTIMATE GIFT FOR GARDEN LOVERS: 22 DURABLE, ERGONOMIC TOOLS INCLUDED.
-
RUST-PROOF ALUMINUM ALLOY ENSURES LONG-LASTING, RELIABLE PERFORMANCE.
-
CONVENIENT GARDEN BAG KEEPS TOOLS ORGANIZED FOR EASY ACCESS AND USE.
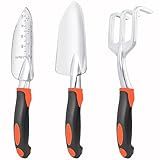
Garden Tools Set, 3 Pack Heavy Duty Gardening Tools Set Include Garden Shovel, Transplant Trowel and Hand Rake with Ergonomic Handle, Aluminum Alloy Lawn for Planting, Orange
- DURABLE ALUMINUM ALLOY ENSURES RUST-RESISTANCE AND LONG-LASTING USE.
- ERGONOMIC DESIGN REDUCES HAND FATIGUE FOR COMFORTABLE GARDENING.
- VERSATILE 3-PIECE SET MEETS ALL YOUR ESSENTIAL GARDENING NEEDS.
A spade and a shovel are both gardening tools used for digging, but they have distinct differences in design and function which cater to various tasks. A spade typically has a flat, rectangular blade with a straight edge, perfect for slicing through soil, cutting roots, and defining garden edges. Its handle is generally shorter, offering more control and precision for these detailed tasks. On the other hand, a shovel features a curved, broad blade with a pointed tip, which is better suited for moving materials like soil, gravel, or snow. Its handle is often longer, providing leverage for lifting and transferring material. While their uses can sometimes overlap, understanding the differences between a spade and a shovel can help in selecting the right tool for specific gardening and landscaping needs.
How to replace a shovel handle?
Replacing a shovel handle is a straightforward process if you have the right tools and materials. Here’s a step-by-step guide to help you replace a broken or worn-out shovel handle:
Materials Needed:
- Replacement shovel handle (choose one that fits your shovel's socket)
- Hammer
- Punch or screwdriver
- Drill with a drill bit (optional)
- Saw (if necessary)
- Sandpaper
- Wood glue (optional)
- Finish (such as boiled linseed oil or paint, optional)
Steps:
- Remove the Old Handle: Dislodge the Rivet or Bolt: If your shovel has a rivet or bolt securing the handle, use a drill to remove the rivet or unscrew the bolt. If it’s a rivet, drill it out carefully. Free the Handle: Place the shovel head in a vice or on a sturdy surface. Use a hammer and punch or screwdriver to knock out the old handle. You may need to drill out or saw through stubborn pieces.
- Prepare the New Handle: Fit the Handle: Slide the new handle into the socket of the shovel head. Ensure it fits snugly. You might need to sand down the end of the handle slightly for a perfect fit. Trim if Necessary: If the handle is too long, measure the required length and use a saw to cut it down to size.
- Secure the Handle: Drill a Hole: Align the handle properly in the socket and use the existing holes as a guide. Drill a hole through the handle where the old bolt or rivet was. Fasten the Handle: Insert a new rivet or bolt through the hole to secure the handle. Use a hammer to rivet or a wrench to tighten the bolt.
- Finish the Handle (Optional): Sand the Handle: Use sandpaper to smooth out rough edges and splinters. Apply Finish: For added protection and a comfortable grip, apply a coat of boiled linseed oil or paint. Allow it to dry thoroughly.
Additional Tips:
- Safety First: Wear safety goggles and gloves to protect yourself during the process.
- Check Fit Regularly: Make sure the handle is secure and comfortable to hold before finalizing your work.
- Check Integrity: Regularly check your shovel handle for any signs of wear or damage in the future to prevent accidents.
By following these steps, you can effectively replace your shovel handle and extend the life of your shovel.
How to improve your digging technique with a shovel?
Improving your digging technique with a shovel involves a combination of proper tools, body mechanics, and technique. Here are some tips:
- Choose the Right Shovel: Shovel Type: Use a digging shovel with a pointed blade for cutting into the soil. Handle Length: Choose a handle length that suits your height to avoid bending too much. Weight: Ensure the shovel is not too heavy for prolonged use.
- Prepare the Area: Clear Debris: Remove any rocks, roots, or obstacles. Moisten the Soil: If possible, water the area the day before you dig to make the soil easier to penetrate.
- Use Proper Body Mechanics: Stance: Stand with your feet shoulder-width apart for balance. Grip: Hold the shovel with one hand on the handle's end and the other hand about halfway down. Posture: Keep your back straight and bend at the knees instead of the waist.
- Digging Technique: Foot Placement: Press your dominant foot onto the step plate of the shovel to drive it into the ground. Leverage: Use your legs to lift the soil, not your back. Keep the shovel close to your body. Small Loads: Take smaller scoops of soil to reduce strain and make it easier to maneuver.
- Work Efficiently: Pacing: Take frequent breaks to avoid fatigue and injury. Alternate Tasks: Mix digging with other tasks to prevent overuse of certain muscle groups. Rotate: If making multiple digs, alternate sides to balance muscle use on both sides of your body.
- Safety: Footwear: Wear sturdy shoes or boots to protect your feet. Gloves: Use gloves to prevent blisters and improve grip. Awareness: Be aware of underground utilities and mark them if necessary before digging.
By combining these techniques and paying attention to ergonomics, you can improve your efficiency and reduce the risk of injury while using a shovel.
How to measure the durability of a shovel?
Measuring the durability of a shovel involves assessing its ability to withstand wear, pressure, and damage over time. Here are some steps and methods to evaluate the durability:
- Material Analysis: Blade and Handle Materials: Determine the materials used for both the blade and the handle. Steel is typically more durable for blades, while fiberglass or hardwood handles are sturdy. Coating and Finish: Check for rust-resistant coatings on the blade that could enhance durability.
- Physical Inspections: Visual Checks: Look for signs of wear, rust, cracks, or bends that could indicate compromised durability. Flexibility and Rigidity: Test the handle's flexibility; too much flex can result in snapping, while too rigid could mean it breaks under pressure.
- Load Testing: Apply weight or force to the blade to determine how much pressure it can withstand before showing signs of wear or bending. Measure both the breaking point and any deformations that occur under various loads.
- Fatigue Testing: Simulate repetitive use conditions to see how the shovel holds up over time. This could include digging into hard soil or chopping at roots. Evaluate wear on both the blade edge and handle grip for signs of deterioration.
- Environmental Testing: Expose the shovel to various environmental conditions such as moisture, extreme temperatures, and sunlight to assess how these factors affect its durability.
- Handle Grip Strength: Check the integrity and comfort of the grip. A secure and comfortable grip is crucial for long-term use.
- Joint and Weld Quality: If the shovel has a joint (between blade and handle), ensure it’s robust. Examine welds for signs of weakness or poor workmanship.
- User Feedback: Collect feedback from users regarding their experiences with the shovel over time. This qualitative data can provide insights into real-world durability.
- Comparative Testing: Compare the shovel with other models under similar conditions to see how it stands up in terms of durability.
Remember, while testing, safety precautions should be taken to avoid injury, and multiple shovels may be needed for comprehensive destructive testing.
What is a garden fork used for compared to a spade?
A garden fork and a spade are both essential tools for gardening but are used for different purposes due to their unique designs.
- Garden Fork: Design: A garden fork typically has four tines (prongs) that are usually made of metal. The tines are strong and slightly pointed. Uses: Loosening Soil: A garden fork is ideal for breaking up and aerating compacted soil. Its tines penetrate the soil easily without turning it over completely, which helps improve air and water penetration. Turning Compost: The fork’s design is perfect for turning and mixing compost heaps, allowing air to circulate through the material and speed up the decomposition process. Harvesting Root Vegetables: It's useful for lifting root crops, like potatoes and carrots, as the tines can lift the produce without causing as much damage as a spade might. Weeding: The tines can help loosen the soil around weeds, making them easier to remove.
- Spade: Design: A spade has a flat, rectangular blade made of metal and a long handle for leverage. Uses: Digging and Moving Soil: A spade is excellent for digging holes, edges, trenches, and moving soil from one area to another due to its flat, sturdy blade. Cutting Roots: The sharp edge of the spade is useful for cutting through roots and dividing plants. Creating Edges: Gardeners use spades for creating clean and straight edges along lawns or garden borders. Planting and Transplanting: Spades are also used for digging planting holes and lifting plants for transplanting.
In summary, while both tools are versatile and can have some overlapping uses, the garden fork is more suited for loosening and aerating soil, mixing compost, and harvesting, while the spade is ideal for cutting, digging, and moving soil.