
Best Round-Point Shovels to Buy in July 2026
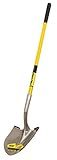
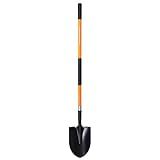
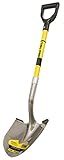
Truper 31198 Tru Pro Round Point Shovel, Fiberglass Handle, 10-Inch Grip, 48-Inch
- PRO-GRADE FIBERGLASS HANDLE ENSURES BALANCE AND COMFORT.
- HEAVY-DUTY 14-GAUGE STEEL BLADE FOR UNMATCHED TOUGHNESS.
- REINFORCED HANDLE SUPPORTS 400 LBS, ENSURING DURABILITY.


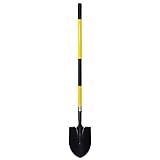
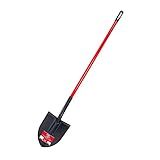
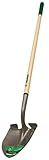
VNIMTI Heavy Duty Gardening Shovel, 56 Inch Round Blade with Fiberglass Handle (Yellow)
-
DURABLE STEEL BLADE: HEAVY-DUTY, SHARP, AND PRESSURE-RESISTANT FOR FAST DIGGING.
-
ERGONOMIC FIBERGLASS HANDLE: NON-SLIP DESIGN ENSURES GRIP IN ANY WEATHER.
-
EFFICIENT DESIGN: LARGER HEAD AND WIDE TREAD FOR QUICKER, EASIER DIGGING.
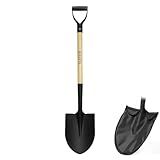
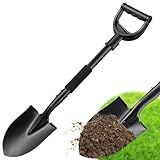
KOLEIYA 41 Inch Round Point Shovel for Digging,Heavy Duty Garden Shovel with D-Handle,Wooden Handle,Ideal for Gardening,Landscaping,Beach,and Snow Removal
- DURABLE STEEL HEAD HANDLES ROCKY SOIL WITHOUT BREAKING-BUILT TO LAST!
- LIGHTWEIGHT 3.3 LBS DESIGN PERFECT FOR ALL USERS, INCLUDING SENIORS.
- VERSATILE SHOVEL FOR GARDENING, ICE REMOVAL, AND MORE-YOUR BEST HELPER!
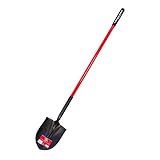
Bully Tools Round Point Heavy Duty Shovel - 14-Gauge Fiberglass Long Handle, Strong Metal Construction, Ideal for Gardening, Digging and Landscaping, Square and Flat Head Design - 100% Made in the USA
- 100% USA-MADE FOR UNMATCHED QUALITY AND DURABILITY IN EVERY DIG.
- TOUGH 14-GAUGE STEEL HEAD CONQUERS COMPACT SOIL AND ROOTS EASILY.
- LONG HANDLE DESIGN OFFERS ENHANCED GRIP AND LEVERAGE FOR PRECISION.
VNIMTI Heavy Duty Gardening Shovel, 56 Inch Round Blade with Fiberglass Handle (Orange)
- DURABLE HIGH-STRENGTH STEEL BLADE FOR QUICK, EFFICIENT DIGGING.
- FIBERGLASS HANDLE WITH NON-SLIP GRIP FOR ALL WEATHER CONDITIONS.
- LARGER HEAD DESIGN REDUCES EFFORT AND SPEEDS UP GARDEN TASKS.
Bully Tools Round Point Heavy Duty Shovel - 12-Gauge Fiberglass Long Handle, Strong Metal Construction, Ideal for Gardening, Digging and Landscaping, Square and Flat Head Design - 100% Made in the USA
- 100% AMERICAN-MADE FOR SUPERIOR QUALITY AND CRAFTSMANSHIP.
- HEAVY-DUTY 12-GAUGE STEEL CONSTRUCTION FOR TOUGH DIGGING TASKS.
- LONG HANDLE OFFERS ENHANCED GRIP AND LEVERAGE FOR PRECISION WORK.
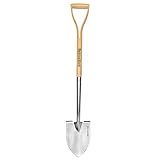
Berry&Bird Round Point Gardening Shovel with Wood D-Handle, 40.98" Stainless Steel Beach & Snow Shovel
-
LIFETIME DURABILITY: TRUSTED STAINLESS STEEL DESIGN LASTS OVER 10 YEARS!
-
ERGONOMIC COMFORT: NON-SLIP HANDLE REDUCES FATIGUE AND PREVENTS INJURIES.
-
MULTI-USE VERSATILITY: IDEAL FOR GARDENING, CAMPING, AND MORE TASKS!
Shovel, Garden Shovels for Digging Gardening Heavy Duty, 31 inch Small Short Metal Shovel with D-Handle, Sharp Round Point Blade, Comfort Grip, Camping, Off Road, Soil, Kids Sand Beach Mini Spade Tool
- HEAVY-DUTY, ANTI-RUST STEEL ENSURES LASTING PERFORMANCE IN GARDENS.
- LIGHTWEIGHT DESIGN: JUST 2.2 LBS FOR EASY MANEUVERING IN TIGHT SPACES.
- COMFORT GRIP AND D-HANDLE MAKE DIGGING EFFORTLESS AND EFFICIENT!
Truper 31200 Tru Pro 29-Inch Round Point Shovel with Fiberglass D-Handle
- PRO-GRADE FIBERGLASS HANDLE ENSURES BALANCE, CONTROL, AND COMFORT.
- HEAVY-DUTY 14-GAUGE STEEL BLADE DELIVERS UNMATCHED TOUGHNESS.
- 400-POUND HANDLE STRENGTH GUARANTEES DURABILITY AND RELIABILITY.
Truper 31184 Round-Point Shovel - Mid-Size Steps, 7'' Grips, 48" Handle
- DURABLE 48 ASH HANDLE FOR UNMATCHED STRENGTH AND LONGEVITY.
- COMFORT-FOCUSED 7 GRIP ENSURES BETTER CONTROL DURING USE.
- EZ DIGGER'S WIDE DESIGN BOOSTS SUPPORT AND STABILITY ON ANY SURFACE.
A round-point shovel is primarily used for digging and scooping tasks in gardening and construction. Its blade is rounded and slightly pointed, which makes it effective for breaking into soil. This design helps in cutting through sod, soil, and small roots, making it ideal for tasks such as planting, transplanting, and digging holes or trenches. The curved design of the blade also enables the shovel to effectively scoop and move loose materials like soil, compost, or gravel. Its versatility makes it a common tool for both professional landscapers and home gardeners.
What is the process of forging a shovel blade?
Forging a shovel blade is a detailed process that involves several key steps. The goal is to create a strong, durable, and functional tool through shaping and hardening metal. Here’s an overview of the process:
- Material Selection: Typically, high-carbon steel or other durable steel alloys are chosen for making shovel blades due to their strength and resilience.
- Cutting the Blank: Start by cutting a piece of the steel to the rough dimensions of the shovel blade. This piece is known as a "blank."
- Heating: The blank is heated in a forge until it becomes pliable. The temperature must be carefully controlled, usually reaching around 1,200 to 1,300 degrees Celsius (approx. 2,192 to 2,372 degrees Fahrenheit).
- Shaping: Once heated, the blank is placed on an anvil, and the shaping process begins. Using hammers or a power hammer, the metal is formed into the desired shape of the shovel blade. This typically involves tapering the edges and forming the socket or collar that will attach to the handle.
- Trimming and Punching: Excess material is trimmed away, and holes may be punched or drilled into the blade for attaching it to the handle or for additional shaping features.
- Cooling and Annealing: The roughly shaped blade is then allowed to cool slowly to relieve internal stresses, followed by an annealing process to soften the metal for any further detailed shaping or correcting any deformations.
- Hardening and Tempering: The blade is reheated to a specific temperature and then quickly cooled or quenched in oil or water. This hardens the steel. Next, the blade is tempered by reheating it to a lower temperature to reduce brittleness while maintaining hardness.
- Polishing and Finishing: The blade surface is polished, and any necessary coatings are applied to prevent corrosion. Some blades are coated with a protective paint or clear finish to help protect against rust.
- Assembly: Finally, the blade is attached to the handle. This may involve mounting into a pre-formed socket or collar on the blade and securing it with rivets, screws, or welding.
- Quality Control: The completed shovel undergoes inspection for any defects or irregularities in structure or finish to ensure it meets quality standards before being sold or used.
This process incorporates traditional blacksmithing techniques with modern enhancements to produce shovel blades that are efficient, reliable, and fit for their intended purpose.
How to replace a broken shovel handle?
Replacing a broken shovel handle is a relatively straightforward process. Here's a step-by-step guide to help you replace it:
Materials Needed:
- Replacement shovel handle (make sure it matches the size and type of your shovel)
- Hammer
- Screwdriver or chisel
- Pliers
- Saw (if applicable)
- Drill (optional)
- Wood screws or a rivet, depending on your shovel
- Wood glue (optional)
- Sandpaper (optional)
- Protective gear (gloves and safety glasses)
Steps:
- Choose the Right Handle: Purchase a replacement handle that matches your shovel's requirements in terms of length and material (wood or fiberglass).
- Remove the Old Handle: Remove the Shovel Head: If the shovel head is still attached to part of the broken handle, use pliers to remove any screws or rivets holding it in place. Clear the Socket: Use a screwdriver or chisel to chip away any remnants of the old handle from the socket of the shovel head. Be careful not to damage the metal socket.
- Prepare the New Handle: If the replacement handle is too long, use a saw to cut it to the correct size. Optionally, use sandpaper to smooth any rough edges on the cut end or along the grip of the handle.
- Attach the New Handle: Insert the new handle into the socket of the shovel head, ensuring it fits snugly. If the fit is loose, apply some wood glue around the handle before insertion for added stability.
- Secure the Handle: Screws: If your shovel uses screws, align the holes in the metal socket with the handle, then drill pilot holes and screw in the wood screws to secure the handle. Rivets: If using rivets, align the holes, insert the rivet, and use a hammer or rivet tool to secure it.
- Final Adjustments: Ensure the handle is securely fitted and doesn’t wobble. Tighten any loose screws or add additional glue if necessary. Let any applied glue dry completely before using the shovel.
- Test the Shovel: Check the stability of the handle by gently applying pressure. Make sure it is firmly attached.
Tips:
- Always wear protective gear, especially if using power tools.
- Consider using a fiberglass handle for more durability.
- Regularly check and maintain your tools to prevent future handle breakage.
By carefully following these steps, you should be able to successfully replace a broken shovel handle.
What is the purpose of the round-point design on a shovel?
The round-point design on a shovel serves several purposes, making it a versatile tool for various digging tasks. The rounded point helps to:
- Penetrate Soil Easily: The pointed shape allows the shovel to cut into the soil more efficiently, especially in hard or compacted ground. It concentrates the force of the user's downward thrust, making it easier to break through tough surfaces.
- Versatility: The round-point shovel is suitable for a wide range of tasks, including digging holes, moving loose material like sand or gravel, and edging.
- Scooping and Lifting: The curved shape of the blade also aids in scooping and lifting materials. It helps in gathering soil and other materials onto the shovel for transportation, making it ideal for gardening or landscaping tasks.
- Cutting Roots and Turf: The pointed tip can be used to cut through small roots or sod when digging, which is often necessary when planting or landscaping.
Overall, the round-point shovel is designed to be a multi-purpose tool that can handle a variety of digging and moving tasks efficiently.
How to clean a round-point shovel after use?
Cleaning a round-point shovel after use is important to maintain its longevity and effectiveness. Here's a step-by-step guide on how to clean it:
- Remove Excess Dirt: Start by tapping the shovel on the ground or against a hard surface to loosen and remove large clumps of dirt or debris. You can also use a stiff brush or a stick to scrape off caked-on soil.
- Rinse with Water: Use a garden hose to wash away any remaining dirt. Make sure to spray both the blade and the handle. If necessary, use a sponge or rag for further cleaning.
- Scrub with Soap: For stubborn dirt or if the shovel was used in sticky soil, mix a solution of water and mild dish soap. Use a scrub brush or stiff wire brush to scrub the shovel's blade and handle. This can help remove sap or any dried-on material.
- Rinse Thoroughly: After scrubbing, rinse the shovel thoroughly with clean water to remove any soap residue.
- Dry the Shovel: Wipe down the shovel with a clean, dry cloth, or leave it out in the sun to air dry. Make sure it's completely dry before storage to prevent rust or rot.
- Oil the Blade: Once the shovel is dry, apply a thin coat of light machine oil, WD-40, or another rust-preventative product to the metal parts of the shovel to prevent rusting. Wipe off any excess with a rag.
- Inspect for Damage: Check the shovel for any signs of wear or damage, such as cracks in the handle or a dull blade. If needed, sharpen the edge of the blade with a file or grinder.
- Store Properly: Store the shovel in a dry place, ideally hanging it up or placing it off the ground to prevent moisture accumulation.
Regular cleaning and maintenance will extend the life of your shovel and keep it ready for use.