
Best Cordless Hedge Trimmers Troubleshooting Tips to Buy in July 2026
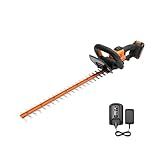
WORX WG261 22" 20V Cordless Hedge Trimmer, Battery & Charger Included
-
LIGHTWEIGHT POWER: ERGONOMIC DESIGN FOR COMFORT AND EFFICIENCY.
-
22 CUTTING REACH: PERFECT LENGTH FOR EFFORTLESS TRIMMING, ROUND CORNERS TOO.
-
VERSATILE POWERSHARE: ONE BATTERY FOR 75+ TOOLS-LIMITLESS GARDENING!


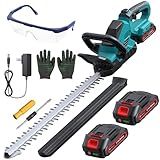
20'' Hedge Trimmer Cordless with Battery, Electric Handheld Bush Clipper with 2 Pack Rechargeable Batteries, 3000RPM 180° Rotatable Head, 2/3'' Blade Gap
- POWERFUL 1000W MOTOR: FAST, EFFICIENT CUTS WITH 3000RPM SPEED.
- LIGHTWEIGHT DESIGN: AT JUST 4.4 LBS, IT'S EASY FOR ANYONE TO USE.
- CORDLESS CONVENIENCE: 120 MIN RUN TIME; SAY GOODBYE TO TANGLED CORDS!
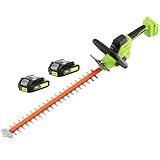
SUNCHERS 20V Max Hedge Trimmer Cordless, 22 Inch Tree Trimmer with 2 Batteries and Charger, Handheld Electric Trimmers, Grass Shrub Pruning Cutter, Lightweight & Compact Hedge Shear for Garden, Lawn
-
EFFICIENT TRIMMING: 22 DUAL-ACTION BLADE WITH 2800SPM FOR FAST RESULTS.
-
LONG RUNTIME: TWO LITHIUM BATTERIES FOR 60 MINUTES OF CONTINUOUS USE.
-
ENHANCED SAFETY: DUAL SWITCH DESIGN PREVENTS ACCIDENTAL START-UPS.
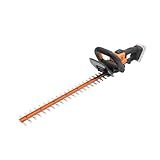
WORX WG261.9 22" 20V Cordless Hedge Trimmer, Battery & Charger Not Included
-
POWERFUL, LIGHTWEIGHT DESIGN ENSURES ERGONOMIC COMFORT FOR TRIMMING.
-
22” CUTTING REACH PERFECTS BOTH FLAT TOPS AND ROUNDED EDGES.
-
CORDLESS CONVENIENCE WITH EXPANDABLE BATTERY FOR 75+ TOOLS!
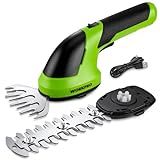
WORKPRO Cordless Grass Shear & Shrubbery Trimmer - 2 in 1 Handheld 7.2V Electric Grass Trimmer Hedge Shears/Grass Cutter Rechargeable Lithium-Ion Battery and Type-C Cable Included
-
IDEAL GIFT FOR ANY OCCASION: CHRISTMAS, BIRTHDAYS & MORE!
-
LIGHTWEIGHT DESIGN: EASY FOR EVERYONE, INCLUDING SENIORS!
-
USB-C CHARGING: POWER ANYWHERE FOR EXTENDED USAGE!
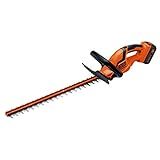
BLACK+DECKER 40V MAX Hedge Trimmer, Cordless, 24-Inch Blade, Battery and Charger Included (LHT2436)
- POWERFUL 40V BATTERY ENSURES TOP PERFORMANCE FOR TOUGH JOBS.
- 24 DUAL-ACTION BLADES CUT FAST WITH MINIMAL VIBRATION.
- EXTENDED REACH FOR EFFICIENT TRIMMING OF UP TO 6000 SQ FT PER CHARGE.
Troubleshooting common issues with a cordless hedge trimmer can help you identify and resolve problems that may arise during its operation. Here are some steps to troubleshoot various issues:
- Check the Power Source: Ensure that the battery is properly charged and securely inserted in the trimmer. If you are using a removable battery, try using a different one to see if the problem persists.
- Inspect the Blades: Examine the blades for any visible damage or debris that may be causing the trimmer to malfunction. Clean the blades and remove any twigs, leaves, or other obstructions.
- Verify Safety Features: Cordless hedge trimmers often have safety features such as a blade guard or a switch that needs to be engaged before the trimmer can start. Make sure these safety features are functioning correctly.
- Clean or Replace Air Filter: If the trimmer is struggling to start or losing power, check the air filter. If it is dirty or clogged, clean it according to the manufacturer's instructions. If the filter is damaged, replace it with a new one.
- Check for Loose Connections: Inspect all connections, including the battery terminals, power switch, and blades. If any connections are loose or damaged, tighten or replace them as necessary.
- Lubricate Moving Parts: Apply a small amount of lubricant (if recommended by the manufacturer) to the moving parts of the trimmer, such as the blades and pivot points. This can help reduce friction and ensure smooth operation.
- Monitor Battery Life: If the trimmer is losing power too quickly or not holding a charge, it may indicate a problem with the battery. Consider replacing the battery if it is old or damaged.
- Consult the User Manual: Always refer to the manufacturer's user manual for specific troubleshooting advice or information about your particular trimmer model.
If the problem persists or you are unsure how to proceed, contact the manufacturer's customer service or take the trimmer to a professional repair center for further assistance.
How to troubleshoot if my cordless hedge trimmer's power switch malfunctions?
If your cordless hedge trimmer's power switch malfunctions, you can follow these steps to troubleshoot the issue:
- Check the battery: Ensure that the battery is fully charged or replace it with a freshly charged one. Sometimes, a low battery can cause power issues.
- Clean the power switch: Dust and debris can accumulate over time and cause the power switch to become stuck or unresponsive. Use a clean cloth or compressed air to remove any dirt or debris from the power switch.
- Inspect the power switch for damage: Check the power switch for any signs of physical damage, such as cracks or loose connections. If you notice any damage, it may require replacement.
- Check the wiring: Inspect the wiring connecting the power switch to the motor for any loose or disconnected wires. If you find any issues, securely reconnect or repair the wiring.
- Test the power switch with a multimeter: If you have access to a multimeter, set it to the continuity or resistance mode and check if the power switch is functioning properly. If the switch doesn't show any continuity or resistance when pressed, it may need to be replaced.
- Consult the user manual: If none of the above steps resolve the issue, refer to the user manual that came with your hedge trimmer. It may have specific troubleshooting steps or information on how to contact the manufacturer for assistance.
- Seek professional help: If you are unable to troubleshoot the issue on your own, it's best to contact the manufacturer or a professional repair service to evaluate and fix the problem.
What is the recommended maintenance schedule for a cordless hedge trimmer?
The recommended maintenance schedule for a cordless hedge trimmer may vary depending on the specific model and manufacturer. However, here is a general guideline:
- Before each use: Inspect the trimmer for any visible damage or loose parts. Make sure the battery is charged and properly inserted.
- After each use: Clean the trimmer: Remove any debris or clippings from the blades and body of the trimmer. A soft brush or cloth can be used for this. Check the blades: Inspect the blades for any signs of damage or wear. If necessary, sharpen or replace them following the manufacturer's instructions.
- Monthly or after several uses: Grease the moving parts: Apply a small amount of lubricating oil or grease to the hinge and pivot points. Check the battery: Inspect the battery for any damage or corrosion. Clean the terminals if needed. Refer to the manufacturer's guidelines for specific battery maintenance.
- Annually or as suggested by the manufacturer: Have the trimmer serviced: Depending on the specific model, it may be recommended to have the trimmer serviced by a professional once a year. They can perform more in-depth maintenance and ensure the trimmer is in optimal working condition.
Always refer to the user manual or manufacturer's guidelines for the specific maintenance requirements of your cordless hedge trimmer.
What is the correct procedure to replace a damaged blade on a cordless hedge trimmer?
The specific procedure may vary depending on the model and manufacturer of the cordless hedge trimmer, but here is a general step-by-step guide to replace a damaged blade:
- Ensure the hedge trimmer is turned off and disconnected from the power source.
- Locate the blade retaining screws or bolts that hold the damaged blade in place. These are usually located on the blade guard or housing.
- Use a suitable screwdriver or wrench to loosen and remove the screws or bolts. Keep these screws or bolts in a safe place.
- Carefully remove the damaged blade, taking note of the orientation and position.
- Clean the area where the blade was attached to remove any debris or accumulated dirt.
- Take the replacement blade and ensure it matches the size and shape of the damaged blade.
- Align the replacement blade with the blade mounting area on the hedge trimmer.
- Insert and secure the retaining screws or bolts for the blade. Tighten them securely, but do not over-tighten, as it may damage the blade or housing.
- Ensure the replacement blade is properly aligned with the other blade, ensuring they are parallel to each other.
- Test the newly installed blade by turning on the hedge trimmer and observing its movement. If it is functioning properly without any unusual sounds or vibrations, you have successfully replaced the damaged blade.
Always refer to the manufacturer's instructions and guidelines for your specific model to ensure safe and correct blade replacement.
What is the best way to clean the air vents of a cordless hedge trimmer?
Cleaning the air vents of a cordless hedge trimmer is important to maintain its performance and prolong its lifespan. Here are the steps to effectively clean the air vents:
- Ensure the trimmer is turned off and the battery removed to avoid any accidents.
- Use a soft-bristle brush or a toothbrush to gently brush away loose debris from the air vents. Be careful not to push the debris further into the vents.
- Dampen a cloth or sponge with mild soap and water. Wring out any excess moisture to prevent liquid from entering the vent.
- Gently wipe the air vents to remove dirt, grease, or grime. Take care not to introduce moisture into the internal components.
- For stubborn dirt or debris, use a toothpick or a soft bristle brush to carefully dislodge and remove it.
- Dry the vents thoroughly with a clean, dry cloth.
- Once the vents are clean and dry, you may consider applying a silicone-based lubricant to keep the vent flaps or grilles functioning smoothly.
- Re-attach the battery and ensure it is fully charged before operating the trimmer.
It is essential to regularly inspect and clean the air vents as a part of routine maintenance. Following these steps will help keep the air vents clean and ensure optimal performance of your cordless hedge trimmer.
How to troubleshoot if my cordless hedge trimmer isn't cutting properly?
If your cordless hedge trimmer isn't cutting properly, here are some troubleshooting steps you can follow:
- Check the blade: Ensure that the blade is sharp and free from any debris or sap build-up. If necessary, clean the blade with a brush and lubricate it with a blade oil.
- Inspect the battery: Make sure the battery is charged fully and securely connected to the trimmer. If the battery is old or damaged, it may need to be replaced.
- Check for jammed blades: Turn off the trimmer and inspect the blades for any plant material, branches, or other obstructions that may be jamming the cutting action. Clear any blockages using a wand, brush, or a thin piece of wood.
- Adjust the blade tension: If the blades are loose or wobbly, tighten the tension screw according to the manufacturer's instructions. Be cautious not to overtighten, as this may cause damage to the trimmer.
- Inspect the teeth and guides: Check for bent or damaged teeth on the blade and ensure that the hedge trimmer's tooth guides are properly aligned. Align or replace damaged teeth or guides if necessary.
- Clean the trimmer: Clean any dirt or debris from around the blade area, as it can affect the cutting performance. Use a soft brush or a cloth to remove the build-up.
- Maintain proper technique: Make sure you are using the right technique while cutting hedges. Hold the trimmer at an appropriate angle, use steady movements, and avoid forcing the trimmer through thick branches, as it may strain the motor and affect the cutting performance.
If the troubleshooting steps above do not resolve the issue, it may be necessary to contact the manufacturer's customer service or take the trimmer to a professional for inspection or repair.