
Best Garden Shovel Sharpening Tools to Buy in July 2026
Corona Sharpening Tool, Garden Tool Blade Sharpener, AC 8300
- SHARPENS ALL STRAIGHT BLADES EFFORTLESSLY-PORTABLE AND HANDY.
- COMPACT DESIGN FITS EASILY IN POCKETS OR TOOL BAGS FOR CONVENIENCE.
- NON-SLIP RUBBER GRIP ENSURES SAFETY AND COMFORT WHILE SHARPENING.


Smith’s 50910 Edge Eater Sharpening Stone – Coarse Grit – Lawn & Garden Tools – Axes, Machetes, Mower Blades, Clippers, Shovels – Handheld Sharpening Puck
- SHARPEN TOOLS QUICKLY – RESTORE EDGES IN MINUTES FOR OPTIMAL PERFORMANCE!
- COMPACT & PORTABLE – FITS EASILY IN YOUR TOOLBOX OR ON-THE-GO!
- PERFECT GIFT – IDEAL FOR GARDEN ENTHUSIASTS ON ANY SPECIAL OCCASION!
DDF IohEF Axe/Hatchet Sharpening Stone 180/320 Grit, Professional Whetstone & Tool Sharpener, Axe Sharpener with Portable Bag
- DUAL-SIDE DESIGN: SHARPEN QUICKLY AND ACHIEVE A PERFECT FINISH.
- MULTIPURPOSE TOOL: VERSATILE STONE FOR ALL YOUR CUTTING NEEDS.
- PORTABLE & CONVENIENT: EASY TO CARRY IN A LEATHER TOOL BAG.
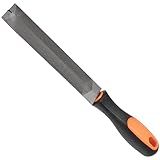
WORKPRO W051002 10 In. Flat File – Durable Steel File to Sharpen Tools and Deburr, Comfortable Anti-Slip Grip, Double Cut – Tool Sharpener for Professionals and DIY (Single Pack)
- ERGONOMIC ANTI-SLIP GRIP FOR MAXIMUM CONTROL AND COMFORT.
- DURABLE DOUBLE-CUT TEETH FOR EFFICIENT AND PRECISE FILING.
- VERSATILE TOOL FOR SHARPENING, DEBURRING, AND DIY PROJECTS.
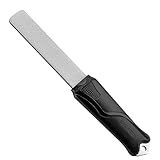
Hand Saw Sharpening Tool Feather Shaped Taper Files Tool Sharpener for Professionals File for Hand Saws Pruning Mill Taper
- QUICKLY SHARPEN TOOLS: EFFORTLESS SAW SHARPENING IN JUST MINUTES!
- VERSATILE USE: IDEAL FOR SAWS, KNIVES, AXES, AND GARDEN TOOLS!
- DURABLE DESIGN: T12 BEARING STEEL FOR LONG-LASTING PERFORMANCE!
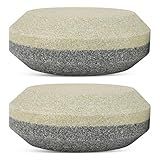
IMPRESA Knife Sharpener Stone Disc - Dual Grit 120/280 Coarse & Fine - Tool Sharpening Stone for Lawn Mower Blades & Shovels - Ax & Machete Sharpener - 3 in x 1 in, Gray, Pack of 2
- DUAL GRIT PUCKS FOR VERSATILE SHARPENING OF KNIVES AND TOOLS.
- PORTABLE DESIGN FITS IN TOOL BAGS FOR EASY FIELD ACCESS.
- ACHIEVE OPTIMAL SHARPNESS WITH EFFICIENT SHARPENING SOLUTIONS.
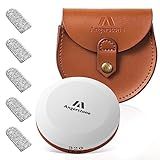
Angerstone Axe Sharpener - Multipurpose Axe/Hatchet Sharpening Stone - Whetstone Blade & Tool Sharpener, Dual Grit 180/320 Sharpening Puck with Leather Sheath
-
QUICK BLADE RESTORATION: SHARPENS AXES IN MINUTES FOR EFFICIENCY.
-
DUAL GRIT DESIGN: COARSE AND FINE SIDES FOR OPTIMAL EDGE FINISHING.
-
DURABLE LEATHER POUCH: STYLISH STORAGE WITH REINFORCED STITCHING.
SHARPAL 121N Dual-Grit Diamond Sharpening Stone File Garden Tool Knife Sharpener with Angle Guide Coarse 325 / Extra Fine 1200 Grit for Lawn Mower Blade, Axe, Hatchet, Hedge Shears, Chisels, Drills
-
DURABLE DIAMOND COATING SHARPENS TOOLS TO LIKE-NEW CONDITION!
-
DUAL GRIT SURFACES FOR QUICK EDGING AND FINE HONING!
-
ERGONOMIC DESIGN ENSURES EFFORTLESS, COMFORTABLE SHARPENING!

Dual Grit Knife Stone Sharpener, Axes/Hatchets and Garden Tools Sharpening Puck, 180/320 Professional Whetstone & Tool Sharpener with Portable Leather Bag
-
DUAL-GRIT DESIGN FOR FAST, PRECISE SHARPENING OF ALL BLADES.
-
BUILT TO LAST WITH PREMIUM CORUNDUM FOR RELIABLE, SHARP RESULTS.
-
ERGONOMIC AND SAFE; JUST ADD WATER FOR EASY, EFFECTIVE SHARPENING.
To sharpen a garden shovel, you start by cleaning the shovel thoroughly to remove any dirt or rust. After drying the shovel, secure it in a vise or on a stable surface, making sure the blade is easily accessible. Using a metal file or a sharpening stone, follow the edge of the shovel blade at a consistent angle, generally about 30 to 45 degrees. Move the file in one direction along the edge-typically, away from the body in long, sweeping strokes. After you have sharpened one side, turn the shovel over and give a few light strokes to the opposite side to remove any burrs. Once done, wipe the blade clean of any metal filings and, if desired, apply a light coat of oil to protect against rust.
How to distinguish different types of shovels?
Distinguishing different types of shovels involves looking at key features such as the shape of the blade, the length and material of the handle, and the overall design. Here’s a guide to help you identify some common types of shovels:
- Digging Shovel: Blade Shape: Round-point blade, which is slightly curved. Purpose: Ideal for digging and lifting soil. Features: Often has a footrest on top of the blade for applying downward force using the foot.
- Trenching Shovel: Blade Shape: Long and narrow blade. Purpose: Designed for digging trenches. Features: The blade may have a pointed tip for cutting into the soil.
- Scoop Shovel: Blade Shape: Large, flat, and square or rounded blade. Purpose: Used for moving large quantities of material like coal, gravel, or snow. Features: Not ideal for digging. Typically has high sides to help hold materials.
- Spade: Blade Shape: Flat, square blade. Purpose: Primarily for edging, cutting sod, and lifting or moving soil. Features: Shorter handle compared to a digging shovel. Suitable for precision work.
- Edging Shovel: Blade Shape: Flat, semicircular blade. Purpose: Specifically designed for edging garden beds or lawns. Features: Often has a T-shaped handle for better control.
- Post Hole Digger: Blade Shape: Two curved, pointed scoops that can pinch together. Purpose: Used to dig narrow, deep holes for fence posts. Features: Operated by opening and closing the handles.
- Snow Shovel: Blade Shape: Wide, rectangular or flared blade with a slight curve. Purpose: Specifically for shoveling snow. Features: Often lightweight with a large blade surface.
- Garden Shovel/Trowel: Blade Shape: Small, handheld with a pointed or rounded blade. Purpose: For small garden tasks such as planting or weeding. Features: Short handle for detailed work.
- Roof Shovel: Blade Shape: Usually has a rectangular, flat blade. Purpose: Used for removing snow from rooftops safely. Features: Often includes a long handle and wheels or rollers to prevent damage to the roof.
When selecting a shovel, consider the task at hand, the material you are working with, and the specific environment or conditions. Differentiating shovels based on these characteristics can enhance efficiency and effectiveness in gardening, landscaping, or construction tasks.
How to use a sharpening stone?
Using a sharpening stone is an effective way to keep your knives and tools sharp. Here's a step-by-step guide on how to use one:
- Choose the Right Stone: Sharpening stones come in different grits. Coarse grit (around 200-600) is used for reshaping blades or sharpening very dull knives. Medium grit (around 800-1500) is for general sharpening. Fine grit (around 4000-8000) is used for honing and achieving a razor-sharp edge.
- Prepare the Stone: Some stones need to be soaked in water for about 5-10 minutes before use. Water stones typically require this. Oil stones, on the other hand, need a few drops of honing oil applied to their surface.
- Secure the Stone: Place the stone on a non-slip surface. You can use a damp towel underneath the stone to prevent it from moving during sharpening.
- Determine the Sharpening Angle: Most kitchen knives are sharpened at a 15-20 degree angle. To estimate this, tilt the knife so it's about halfway between laying flat and perpendicular to the stone.
- Sharpening Process: Hold the knife by the handle, with your other hand on the top part of the blade. Place the blade against the stone at your desired angle and push it across the stone, like slicing a thin layer off the top. Move from tip to heel, or heel to tip, depending on your preference. Apply gentle pressure and ensure the whole blade comes into contact with the stone over each pass.
- Alternate Sides: Alternate the side of the blade you are sharpening every few strokes to maintain an even edge. For a symmetrical edge, sharpen both sides for an equal number of strokes.
- Check Your Progress: Periodically examine the blade for sharpness. You can carefully check by slicing through a piece of paper or gently running your thumb across (not along) the edge to feel for burrs.
- Refine the Edge: If you started with a coarse grit, move to a finer grit stone to refine and hone the knife edge. Repeat the sharpening process with the finer stone.
- Clean the Knife and Stone: Once sharpened, clean the knife thoroughly with water and dry it. Also, clean your stone by rinsing it under water, scrubbing off any metal particles, and letting it dry.
- Store Properly:
- Store your sharpening stones dry and clean to prevent damage or wearing unevenly.
Remember, practice makes perfect. Sharpening takes some time and experience to master, so don't rush the process. Be careful and attentive to maintain both your tools and your safety.
What is the best material for a shovel blade?
The best material for a shovel blade depends on its intended use. Here are some common materials used and their pros and cons:
- Steel: Pros: Highly durable and strong, suitable for heavy-duty tasks like digging in tough soil or breaking up compacted ground. Cons: Can be heavy and may rust if not maintained properly.
- Stainless Steel: Pros: Offers the strength of steel with added resistance to rust and corrosion, maintaining a good appearance and lasting longer without maintenance issues. Cons: Generally more expensive than plain steel.
- Aluminum: Pros: Lightweight, making it easy to handle, and resistant to rust and corrosion. Cons: Not as strong as steel, making it less ideal for heavy-duty tasks; can bend or dent with heavy use.
- Plastic or Polycarbonate: Pros: Very lightweight and resistant to rust and corrosion; suitable for lighter tasks like snow shoveling or moving loose materials like mulch. Cons: Not suitable for heavy-duty digging, as it can crack or break under pressure.
- Fiberglass: Pros: Lightweight like plastic, but stronger and more flexible, offering decent durability for moderate tasks. Cons: More expensive than plastic and not as widely available for shovel blades.
When choosing a shovel, consider the specific tasks you need it for, the weight you are comfortable handling, and your willingness to maintain it. For versatile use in gardening and landscaping, a steel or stainless steel blade is often a well-balanced choice.
How to maintain garden tools?
Maintaining garden tools is essential to ensure they remain effective, safe, and long-lasting. Here are some tips on how to maintain them:
- Cleaning: After each use, clean tools with water to remove dirt and plant debris. For stubborn residue, use a stiff brush or a scrub pad. Dry thoroughly to prevent rust. For metal parts, use a cloth to wipe them dry and consider applying a light coat of oil for protection.
- Sharpening: Tools such as pruners, shears, and hoes should be regularly sharpened to ensure efficient cutting and reduce strain on plants. Use a sharpening stone or a file, and follow the original bevel of the blade. Be cautious and wear protective gloves when sharpening.
- Rust Prevention: Regularly check for signs of rust. Use sandpaper or a wire brush to remove it, followed by application of a rust-preventative lubricant like WD-40 or linseed oil.
- Oiling and Lubrication: Moving parts, such as the joints of pruners and shears, should be lubricated periodically using oil to maintain smooth operation.
- Storage: Store tools in a dry, covered area to protect them from the elements. Hanging them on a wall or organizing them in a tool shed can prevent accidental damage and extend their lifespan. Consider using a bucket of sand mixed with a bit of oil to stick metal tools in for rust prevention.
- Handle Maintenance: Inspect wooden handles for splinters or cracks. Sand them down as needed and apply linseed oil to keep the wood conditioned. Check and tighten any loose screws or bolts.
- Inspection: Regularly inspect tools for damage. If a tool is beyond repair, consider replacing it, as using damaged equipment can be unsafe.
- Winterizing: Before winter, give tools a thorough cleaning and oiling. Store them indoors if possible to avoid moisture or extreme temperatures causing damage.
By following these maintenance tips, your garden tools will remain in good condition, helping you keep your garden in great shape as well.