Best Bulb Planters for Fall Blooms to Buy in July 2026
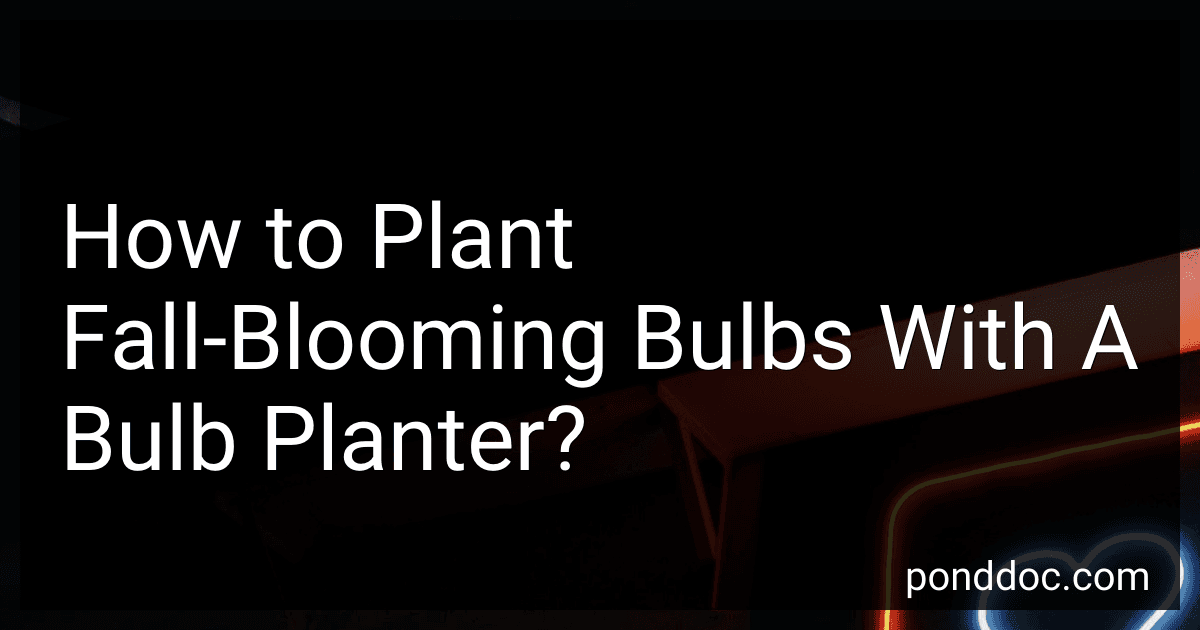
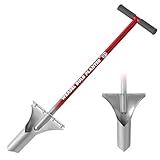
Edward Tools Bulb Planter - Bend Free Tool for Planting Bulbs - Automatic Soil Release for Digging/refilling Hole - Depth Marker for More consistent Planting Tulips, Daffodils, Dahlias
- QUICK PLANTING WITH AUTOMATIC SOIL RELEASE MECHANISM.
- DURABLE REINFORCED STEEL FOR EASY DIGGING IN HEAVY SOILS.
- DEPTH MARKER ENSURES CONSISTENT PLANTING FOR PERFECT BLOOMS.


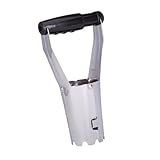
Toresano Bulb Planter, Bulbs Transplanter Designed for Automatic Soil Release with Depth Marker for Dgging Holes and Planting Tool for Tulips, Daffodils, Dahlias
- HEAVY-DUTY DESIGN: REINFORCED STEEL ENSURES DURABILITY FOR TOUGH SOILS.
- PRECISE PLANTING: DEPTH SCALE GUARANTEES UNIFORM PLANTING EVERY TIME.
- EFFORTLESS DIGGING: AUTOMATIC SOIL RELEASE SPEEDS UP YOUR PLANTING PROCESS.
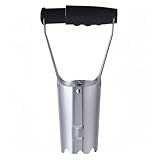
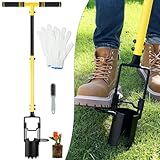
5-in-1 ProPlugger Bulb Planter - Long Handle, Sod Plugger, Weeding Tool - Made in USA
- EFFORTLESSLY PLANT IN MOIST SOIL-SAVE YOUR BACK AND KNEES!
- DIG PERFECT HOLES AT DEPTHS OF 2, 4, OR 6 WITH EASE!
- VERSATILE TOOL FOR PLANTING, WEEDING, AND FERTILIZING!
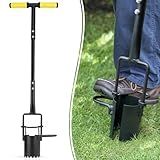
Garden Weasel Bulb Planter - Long Handle | Annuals, Ground Cover, Vegetables, Spring and Fall Bulbs | Sod Cutter, Remover, and Plugger, Grass Planter, Bulb Planting Tool | 91350
- EFFORTLESS PLANTING: NO BENDING OR STOOPING-JUST STEP AND PLANT!
- PRO-GRADE QUALITY: TOP-SELLING TOOL GUARANTEES UNMATCHED PERFORMANCE!
- LIFETIME SUPPORT: ENJOY OUR NO-HASSLE GUARANTEE AND EXPERT SERVICE!
Fabulas Bulb Planter Tool Long Handle, Plant Hole Digger with Soft Grip and Serrated Base, Heavy Duty 5-in-1 Sod Lawn Grass Plugger Tool Planting Digger Garden Transplanter for Tulips Iris Flower
-
VERSATILE 5-IN-1 TOOL: DIG, AERATE, WEED, AND PLANT WITH EASE!
-
ERGONOMIC COMFORT: ADJUSTABLE HANDLE PROTECTS YOUR BACK AND KNEES.
-
DURABLE DESIGN: HEAVY-DUTY METAL CONSTRUCTION FOR LONG-LASTING USE.
Haliaeetus Bulb Planter Tool, 6 inches Depth Mark Hand Bulb Planter, Non-Bending Stainless Steel Bulb Planter Digger, Garden Bulb Transplanter with Comfortable Wood Handle for Planting Tulip, Daffodil
- 10X EFFICIENCY: PLANT 150 BULBS/HOUR WITH EASE AND SPEED!
- EASY DEPTH CONTROL: BUILT-IN MEASUREMENTS FOR PERFECT PLANTING!
- DURABLE DESIGN: STURDY STAINLESS STEEL ENSURES LONG-LASTING USE!

FLORA GUARD Bulb Planter with Depth Markers - Automatic Soil Releasing Seed Bulb Transplanter for Planting/Digging Tulips, Daffodils, Dahlias and More
- ERGONOMIC HANDLES REDUCE STRAIN, MAKING PLANTING EFFORTLESS.
- AUTOMATIC SOIL RELEASE SPEEDS UP PLANTING EFFICIENTLY.
- LIFETIME WARRANTY ENSURES DURABILITY FOR ALL YOUR GARDENING NEEDS.
Colwelt Bulb Planter Tool Long Handle, Serrated Base Gardening Bulb Transplanter with Soft Grip, Heavy Duty Long Handled Bulb Planter Sod Plugger for Digging Holes to Plant Tulips, Iris, Daffodils
-
EFFORTLESSLY PLANT BULBS WITH OUR LONG HANDLE, MINIMIZING BACK STRAIN!
-
QUICK, EASY SETUP: STEP, TWIST, PULL, AND DIG PERFECT PLANTING HOLES.
-
DURABLE, RUST-RESISTANT DESIGN ENSURES YEARS OF RELIABLE GARDENING USE!
Planting fall-blooming bulbs with a bulb planter is a relatively simple process that can yield beautiful flowers in the autumn. Here are the steps to follow:
- Choose the right bulbs: Select fall-blooming bulbs that thrive in your climate zone and prefer the planting time during late summer or early fall. Common options include autumn crocuses, colchicums, and certain varieties of lilies.
- Prepare the soil: Ensure the planting area is well-drained and amend the soil with organic matter like compost or peat moss to improve its fertility. Remove any weeds or debris from the designated planting area.
- Dig holes with a bulb planter: Use a bulb planter, which is a specially designed tool for planting bulbs. It typically has a cylindrical shape with a hollow center and sharp, pointed edges. Insert the bulb planter into the soil and twist it slightly to create a round hole.
- Adjust the depth: The depth at which you plant the bulbs will depend on the specific species. Consult the packaging or guidelines for each type of bulb to determine the appropriate planting depth. Generally, bulbs should be planted at a depth two to three times their own height.
- Place the bulbs: Gently place the bulbs into the hole, ensuring they are positioned with the pointed end facing upwards. Avoid damaging the bulb by handling it carefully while placing it in the hole.
- Cover the bulbs: Use the bulb planter to push the soil back into the hole, covering the bulbs completely. Firmly press down on the soil to eliminate air pockets. Ensure the soil surface is level and even, so it's not prone to water pooling or sinking.
- Water the area: After planting, give the newly planted bulbs a thorough watering. This will help settle the soil and ensure the bulbs receive enough moisture to establish their roots. However, avoid over-watering as excessive moisture can lead to rot.
- Mulch the area: Apply a layer of mulch over the planting area. Mulch helps retain moisture and regulate soil temperature, providing an ideal environment for the bulbs to grow.
- Monitor and care for the bulbs: Keep an eye on the bulbs as they grow, and water them consistently to maintain adequate moisture. Remove any weeds that may compete for nutrients and sunlight. If necessary, protect the bulbs from pests or extreme weather conditions.
By following these steps and utilizing a bulb planter, you can effectively plant fall-blooming bulbs and enjoy their colorful display once autumn arrives.
How to protect fall-blooming bulbs from pests and diseases?
To protect fall-blooming bulbs from pests and diseases, here are some steps you can take:
- Choose healthy bulbs: Inspect the bulbs before planting and select ones that are firm, plump, and free from signs of decay or damage.
- Proper planting depth: Plant the bulbs at the recommended depth to minimize exposure to pests and diseases. This will also help ensure they receive adequate nutrients and moisture.
- Clean gardening tools: Use clean tools when planting and working around the bulbs to prevent the transfer of pests and diseases. Disinfect tools with a household disinfectant or a solution of water and bleach.
- Good drainage: Provide well-drained soil by adding organic matter to improve the soil structure. Bulbs are prone to rot and diseases when planted in overly wet soil.
- Mulch: Apply a layer of organic mulch around the bulbs to deter pests and help retain moisture. Mulch also acts as a barrier between the bulbs and potential soil-borne diseases.
- Pest control: Monitor for any signs of pests such as aphids, slugs, or snails. Handpick them off the plants or use organic pest control methods, like insecticidal soaps or companion planting with pest-repellent plants.
- Disease prevention: Implement good garden hygiene practices such as removing any decaying plant material from the area around the bulbs. This reduces the risk of diseases from spreading.
- Watering: Water the bulbs at their base to avoid wetting the foliage, as this can increase the chances of fungal diseases. Water when the top inch of soil feels dry to the touch.
- Regular inspection: Regularly inspect the bulbs and surrounding plants for any signs of pests or diseases. Early detection can help prevent the spread and minimize damage.
- Soil sterilization: If you have had recurring problems with diseases, you can consider solarizing the soil. Cover the planting area with clear plastic during the hottest months to raise the soil temperature and kill pathogens and pests.
Remember, each type of bulb may have specific pest and disease concerns, so it's always helpful to research the specific bulbs you are planting for any additional precautions.
How to space fall-blooming bulbs properly using a bulb planter?
To space fall-blooming bulbs properly using a bulb planter, follow these steps:
- Choose the right bulbs: Select fall-blooming bulbs that are suitable for your climate and garden conditions. Popular fall-blooming bulbs include tulips, daffodils, crocuses, hyacinths, and alliums.
- Prepare the soil: Ensure the soil is well-draining and rich in organic matter. Use a garden fork or tiller to loosen the soil and remove any weeds or debris.
- Determine the spacing: Consider the recommended spacing for the specific bulbs you are planting. This information can usually be found on the packaging or from reliable gardening resources. Bulbs are generally spaced two to three times their width apart.
- Mark the planting spots: Use garden stakes, flags, or any other markers to indicate the spots where you will be planting the bulbs. This will help you maintain proper spacing.
- Use a bulb planter: A bulb planter is a specialized tool designed for bulb planting. It typically has a cylindrical shape with a sharp, circular blade at the bottom and a handle for easy use. To use the bulb planter: a. Position the bulb planter over the marked spot on the ground, ensuring it is perpendicular to the soil surface. b. Push the bulb planter into the soil by applying downward pressure on the handle. Twist the planter slightly if needed to create a clean hole without compacting the soil. c. Remove the bulb planter from the hole, leaving the soil plug inside the planter. d. Place the bulb into the hole, with the pointed side up or as directed by the specific bulb's planting instructions. e. Repeat the process for each marked spot, repositioning the bulb planter as necessary.
- Fill the holes: Use the soil plugs removed by the bulb planter or additional soil to fill the holes around the bulbs. Gently firm the soil to eliminate air pockets and ensure good bulb-to-soil contact.
- Water and mulch: After planting, water the area thoroughly to help settle the soil and provide moisture for the newly planted bulbs. Applying a layer of mulch around the bulbs can help conserve moisture, regulate soil temperature, and suppress weeds.
Remember to follow the specific planting depth, sunlight, and watering requirements for each type of bulb you are planting. With proper spacing using a bulb planter, your fall-blooming bulbs should have enough room to grow and create a beautiful display in your garden.
What is the average blooming duration of fall-blooming bulbs?
The average blooming duration of fall-blooming bulbs can vary depending on the specific type of bulb. However, on average, fall-blooming bulbs tend to have a blooming duration of around 2 to 4 weeks. Some bulbs may have slightly shorter or longer blooming periods, so it is important to research the specific bulb you are interested in planting for more accurate information.
How to prepare the soil for fall-blooming bulbs?
Preparing the soil for fall-blooming bulbs is essential to ensure their proper growth and blooming. Here are some steps to follow:
- Choose the right location: Select a spot that receives at least six hours of direct sunlight per day. Avoid areas prone to waterlogging as bulbs dislike wet feet.
- Clear the area: Remove any existing weeds, vegetation, or debris from the planting area. This will prevent competition for nutrients and reduce the risk of diseases.
- Test the soil: It's a good idea to test your soil to understand its pH level and nutrient content. Bulbs generally prefer a slightly acidic to neutral pH, around 6.0 to 7.0. This can be done using a soil testing kit or by sending a sample to a local agricultural extension office. Based on the results, you may need to amend the soil.
- Improve drainage: Make sure your soil drains well. If it retains excessive moisture, you can amend it with organic matter like compost, aged manure, or peat moss. These organic materials will improve aeration and drainage.
- Loosen the soil: Use a garden fork or tiller to break up compacted soil and remove any large clumps. Bulbs need loose soil to establish their roots easily.
- Add nutrients: Before planting, add a slow-release fertilizer or bone meal to the soil following the manufacturer's instructions. This will provide the bulbs with essential nutrients for healthy growth and blooming.
- Dig proper holes: Dig individual holes for each bulb or, if planting multiple bulbs, dig a larger hole to accommodate them all at once. The general rule is to dig a hole that is about three times the height of the bulb.
- Place the bulbs: Once the holes are prepared, place the bulbs with the pointed side facing up. Make sure to follow the recommended planting depth for each specific type of bulb, as it may vary.
- Backfill and cover: Gently cover the bulbs with soil, ensuring there are no air pockets around them. Press the soil lightly to secure the bulbs in place.
- Mulch: Apply a layer of organic mulch, such as straw or bark chips, to insulate the bulbs during winter and retain moisture. However, avoid placing the mulch directly on top of the bulbs.
- Water thoroughly: After planting, water the area thoroughly to settle the soil and provide initial moisture. Be cautious not to overwater, as this may cause rotting.
- Monitor and maintain: Monitor the soil moisture regularly and water as needed to keep it slightly moist, but not overly saturated. Remove any weeds that emerge and provide additional nutrients if required.
By following these steps, you can ensure that your fall-blooming bulbs have the best chance of thriving and producing beautiful blooms when the time comes.