
Best Air Mattress Repair Kits to Buy in July 2026
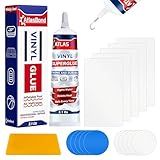
Air Mattress Patch Kit, Heavy Duty Inflatable Patch Repair Kit, Safe, Gentle, and All-in-One Vinyl PVC Glue for Blow Up Bed, Above Pool, Underwater Liners, Bounce House, Hot Tub and More
- STRONG, LASTING SEAL FOR ALL AIR MATTRESSES-SLEEP LEAK-FREE!
- WATERPROOF, HEAT-RESISTANT PATCHES STAY FIRM-EVEN IN EXTREME CONDITIONS!
- QUICK & EASY REPAIRS: JUST SQUEEZE, APPLY, AND WAIT AN HOUR!


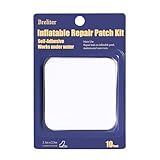
Breliter Inflatable Patch Repair Kit - Waterproof TPU Pool Repair Tape, Heavy Duty Repair Patch for Air Mattress, Bounce House, Inflatable Toys, Tent, Swimming Ring - 10 Packs of 2.5in x 2.5in, Square
- SAVE TIME AND MONEY WITH OUR WATERPROOF BRELITER REPAIR PATCH KIT!
- PREMIUM TPU MATERIAL ENSURES DURABILITY AND EXCELLENT ADHESION!
- VERSATILE USE FOR INFLATABLES, TENTS, AND MORE-EASY TO APPLY!
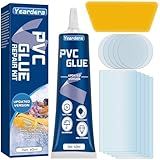
Yeardera Air Mattress Patch Kit, Waterproof Vinyl Repair Kit, High Strength PVC Adhesive for Inflatables, PVC Boats, Vinyl Glue (60ml/1 Pack)
- DURABLE REPAIRS: HIGH-STRENGTH ADHESIVE FOR A LONG-LASTING, AIR-TIGHT SEAL.
- WATERPROOF & VERSATILE: EFFECTIVE FOR UNDERWATER USE AND VARIOUS MATERIALS.
- USER-FRIENDLY: SIMPLE APPLICATION-NO PROFESSIONAL SKILLS REQUIRED!
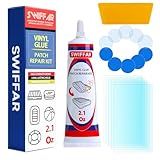
Air Mattress Patch Kit, Heavy Duty Underwater Pool Liner Patch Kit, Effective Vinyl Glue for Above Ground Pool, Paddle Board, Float, PVC Boat, Raft, Air Bed, Bounce House, Hot Tub, Gentle Formula
- ULTIMATE ADHESION: STRONG GRIP PREVENTS SLIPS AND LEAKS FOR LASTING REPAIRS.
- EFFORTLESS USE: APPLY PATCHES EASILY-JUST STICK AND SEAL IN MINUTES!
- LONG-LASTING DURABILITY: FLEXIBLE, WATERPROOF REPAIRS WITHSTAND SALT, SUN, AND USE.
PVC Stitch Liquid Patch – Air Mattress Patch Kit Heavy Duty, Inflatable Patch Glue for PVC & PU, Inflatable Boats, Rafts, Kayaks, SUP, Hot Tubs, Waterbeds, Bounce Houses. Waterproof, 3-hr Cure, 20 ml
- PERMANENT, WATER-RESISTANT PATCHING SOLUTION IN JUST 2 HOURS!
- HIGHLY ADHESIVE; PERFECT FOR ALL TYPES OF INFLATABLE REPAIRS.
- DURABLE FORMULA WITHSTANDS HEAT, COLD, AND UV EXPOSURE!
EPN Air Mattress Patch Kit, Waterproof Vinyl Pool Liner Repair Kit for Inflatables, Air Mattress, Swimming Ring, Tent, Bounce House, Inflatable Toys, Hot Tub, PVC Boat, Raft, Kayak (80 ML)
- STRONG, AIRTIGHT BOND: RELIABLE FIX FOR PUNCTURES WITH DURABLE ADHESIVE.
- VERSATILE FOR ALL: FIX INFLATABLES, TRAMPOLINES, AND WATERPROOF CLOTHING.
- USER-FRIENDLY: SIMPLE APPLICATION FOR QUICK, LASTING REPAIRS.
To patch an air mattress, start by locating the puncture or hole in the mattress. Inflate the mattress fully so that it is easier to find the leak. Once you have found the hole, mark it with a pen or marker so you can easily locate it later.
Next, clean the area around the puncture with rubbing alcohol to ensure that the patch will adhere properly. Use the patch kit that came with your air mattress or purchase a vinyl repair kit designed for inflatables. Cut a patch from the kit that is slightly larger than the hole.
Apply a small amount of adhesive to the patch and place it over the hole. Press down firmly to ensure that the patch adheres completely to the mattress. Allow the adhesive to dry according to the manufacturer's instructions before deflating and reinflating the mattress to test the patch.
If the leak is still present, repeat the process with a new patch. Once the patch is secure and the leak is fixed, you can use your air mattress as usual.
How to check for additional leaks after patching an air mattress?
- Inflate the air mattress completely using a pump or by blowing air into it manually.
- Inspect the patched area for any signs of air leakage, such as bubbles or hissing sounds.
- Run your hand around the edges of the patch to feel for any escaping air.
- If there are no apparent leaks in the patched area, check the rest of the mattress by running your hand along the seams, corners, and surface of the mattress to feel for any escaping air.
- If you do find additional leaks, mark them with a pen or tape and repeat the patching process on those areas.
- Once you have patched all the leaks, reinflate the air mattress and leave it inflated for several hours to ensure that the patches are holding and there are no more leaks.
How to inflate an air mattress without a pump?
There are a few alternative methods for inflating an air mattress without a pump:
- Use your lungs: This may take some time and effort, but you can inflate the air mattress by using your own breath. Start by opening the valve and blowing air into the mattress. Make sure to take breaks and not overexert yourself.
- Use a vacuum cleaner: If you have a vacuum cleaner with a reverse function, you can use it to blow air into the mattress. Simply attach the hose to the valve on the mattress and turn on the vacuum in reverse mode to blow air into the mattress.
- Use a hairdryer: A hairdryer can also be used to inflate an air mattress. Set the hairdryer to the cool setting and hold it close to the valve while the mattress inflates. Be careful not to overheat the mattress or the hairdryer.
- Use a plastic bag: Fill a plastic bag with air and seal it tightly. Place the bag over the valve on the mattress and compress the bag to push the air into the mattress. Repeat this process until the mattress is fully inflated.
- Use a hand pump: If you don't have a pump specifically designed for inflating air mattresses, you can use a hand pump designed for inflating inflatable toys or pool floats. Simply attach the pump to the valve on the mattress and pump air into the mattress manually.
How do you find a leak in an air mattress?
- Remove all the bedding and pillows from the air mattress. Clean and deflate the mattress to make it easier to work with.
- Inflate the mattress fully and listen carefully for the sound of air escaping. Concentrate on different sections of the mattress to locate the source of the leak.
- Use a mixture of dish soap and water and apply it to the surface of the mattress with a sponge or cloth. Look for air bubbles forming at a specific spot which indicates a leak.
- If you are unable to find the leak using the above methods, submerge the air mattress in water and look for air bubbles coming out of the mattress. This may require filling a bathtub or a large container with water and carefully placing the air mattress inside.
- Once you have identified the location of the leak, mark it with a pen or marker so you can easily find it again when repairing.
- Patch the leak using a repair patch or patch kit specifically designed for air mattresses. Follow the instructions provided with the patch kit for proper application.
- Allow the patch to dry completely before inflating the mattress again and testing for any remaining leaks.
How to properly seal a leak in an air mattress?
- Identify the leak: Inflate the air mattress and listen for any hissing noise or visually inspect for any visible holes or tears. You can also try submerging the mattress in water and looking for air bubbles to locate the leak.
- Clean and dry the area around the leak: Use a clean cloth or towel to wipe the area around the leak to remove any dirt, dust, or moisture.
- Apply a patch or sealant: If the leak is small, you can use a vinyl repair kit or a patch specifically designed for air mattresses. Follow the instructions on the patch kit to properly apply it over the leak.
- Allow the sealant to dry: Make sure to let the patch or sealant dry completely before reinflating the air mattress. This may take a few hours, so be patient.
- Reinflate and test: Once the sealant has dried, reinflate the mattress and check for any further leaks. If the mattress holds air without any issues, then the leak has been successfully sealed.
- Monitor for any reoccurrence: Occasionally check the air mattress for leaks to ensure that the patch or sealant is holding up over time. If the leak reoccurs, you may need to repeat the sealing process or consider replacing the mattress.
What is the importance of patching an air mattress promptly?
Patching an air mattress promptly is important for several reasons:
- Prevents further damage: A small hole or tear in an air mattress can quickly become larger if left unaddressed. By patching it promptly, you can prevent the damage from getting worse and potentially rendering the mattress unusable.
- Maintains comfort: A patched air mattress will provide a more comfortable sleeping surface than one with a leak. By addressing the issue right away, you can ensure that you have a restful night's sleep.
- Saves money: Patching a small hole in an air mattress is typically quick and inexpensive. Ignoring the issue and needing to replace the entire mattress can be much more costly.
- Environmental impact: Repairing a leaky air mattress helps reduce waste and promotes sustainability. By patching it promptly, you can extend the life of the mattress and prevent it from ending up in a landfill prematurely.
Overall, addressing a leak in an air mattress promptly is important for maintaining comfort, preventing further damage, saving money, and reducing environmental impact.
What is the most durable patch for an air mattress?
There are several options for durable patches for an air mattress, but one of the most recommended is using a vinyl repair kit. These kits typically include patches made of heavy-duty vinyl that are designed to adhere well to the material of the air mattress and provide a long-lasting seal. Other options include using a bicycle repair patch or specialized air mattress repair patches that are specifically designed for this use. It is important to follow the instructions carefully when applying the patch to ensure a secure and durable seal.