
Best Outdoor Shed Painting Tools to Buy in July 2026
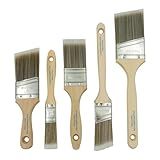
Pro Grade, Paint Brushes, 5-Piece, Paint Brush Set: Flat & Angle Brushes for Latex and Oil Paints, Stains, Interior & Exterior Home Improvement
- ACHIEVE PROFESSIONAL RESULTS WITH PREMIUM QUALITY PAINT BRUSHES!
- VERSATILE SET FOR VARIOUS INTERIOR AND EXTERIOR PAINTING PROJECTS.
- SRT FILAMENT BLEND ENSURES FEWER STREAKS AND SAVES PAINTING TIME.


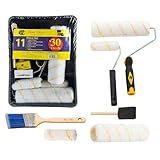
Bates - Paint Tray Set, Paint Rollers, Paint Brushes for Wall, Tray, Roller Brush, 11 Piece Home Painting Supplies, Foam Brush, House Painting Supplies, Painting Tools, Interior, Exterior
- ALL-IN-ONE SOLUTION: 11-PIECE SET FOR EVERY PAINTING NEED AND SURFACE.
- PROFESSIONAL QUALITY: DURABLE TOOLS ENSURE A FLAWLESS FINISH, EVERY TIME.
- BUDGET-FRIENDLY: EXCEPTIONAL VALUE FOR LONG-LASTING, HIGH-QUALITY RESULTS.
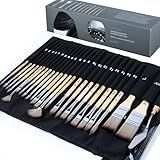
ARTIFY 25-Piece Professional Paint Brush Set – Expert Series Synthetic Nylon Brushes for Acrylic, Oil, Watercolor, Gouache – No Shedding, Canvas Roll Case & Palette Knife, Artist Gifts Art Supplies
-
SECURE FERRULES: CHROME-PLATED FERRULES ENSURE LONGEVITY AND NO SHEDDING.
-
PREMIUM NYLON BRISTLES: HIGH-QUALITY BRISTLES ENHANCE WATER ABSORPTION AND SHAPE RETENTION.
-
DIVERSE BRUSH COLLECTION: 24 UNIQUE SHAPES INSPIRE CREATIVITY FOR ANY PROJECT.
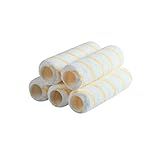
Bates- Paint Roller Covers, 1/2" x 9" Roller Covers, Pack of 5, Covers for Paint Rollers, Naps for Paint Roller Brush, Roller Naps, House Painting Supplies, Nap for Roller Frame
-
HIGH-DENSITY MICROFIBER FOR SUPERIOR PAINT COVERAGE AND FINISH!
-
REUSABLE & EASY TO CLEAN, SAVING YOU TIME AND MONEY!
-
COMPATIBLE WITH ALL STANDARD 9 FRAMES FOR ULTIMATE CONVENIENCE!

66 Pcs Small Paint Brushes Set - Slurrivate Round & Flat Brush Bulk for Detail Painting, Perfect for Acrylic, Watercolor, Canvas & Face Painting | Classroom, Kids & Artist Craft Supplies
-
COMPLETE SET FOR ALL CREATIVES: 66 BRUSHES PERFECT FOR ARTISTS, KIDS & STUDENTS!
-
PRECISION DETAILING: FLAT AND POINTED BRUSHES FOR FINE ART AND DETAILED WORK.
-
VERSATILE USE: IDEAL FOR VARIOUS PAINTING STYLES & PROJECTS-UNLEASH CREATIVITY!
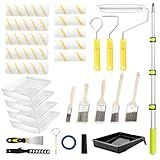
29 PCS Paint Roller Kit-Rocfinity Paint Roller with 4ft Extension Pole,Microfiber Paint Rollers 9 inch 4inch,Pro House Painting Supplies with Adhesive Tape, Non-Slip Tray for Painting Walls & Ceilings
- COMPLETE 29-PIECE KIT FOR EFFORTLESS DIY & PRO PAINTING PROJECTS.
- ADJUSTABLE 4FT POLE REACHES HIGH SPOTS, ELIMINATING LADDERS NEEDED.
- DRIP-FREE FINISH WITH TEXTURED TRAYS; SLEEK, SMOOTH APPLICATION GUARANTEED.

King Origin 20 Piece Paint Roller Kit, 9" & 6" Paint Rollers, Paint Brushes, Paint Trays & Accessories | Professional Painting Supplies for Walls & Ceiling
- ALL-IN-ONE KIT: 20 PROFESSIONAL TOOLS FOR FLAWLESS PAINTING RESULTS.
- VERSATILE FINISHES: 9 & 6 ROLLERS FOR SMOOTH OR TEXTURED SURFACES.
- SMART STORAGE: NON-SLIP TRAY WITH LINERS KEEPS COLORS ORGANIZED.
Microfiber Paint Roller Covers 4 Inch,1/3" Nap Mini Roller Covers,Pack of 24,Roller Covers for Painting,Home Painting Supplies
- VERSATILE COVERS FOR ALL PAINTS, PERFECT FOR SMALL JOBS INDOORS & OUT!
- EASILY WASHABLE, REUSABLE COVERS SAVE YOU MONEY AND TIME!
- HIGH-QUALITY FIBER ENSURES A SMOOTH, PROFESSIONAL FINISH EVERY TIME!
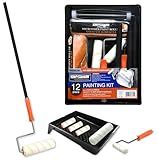
King Origin Paint Roller Kit 12-Piece Professional Painting Supplies Set - 9" & 4" Rollers, Frame, Tray & Extension Pole for Smooth/Textured Walls, Interior Home Painting
-
COMPLETE SET FOR ALL PROJECTS: 12-PIECE KIT, PERFECT FOR DIY AND PROFESSIONALS.
-
EFFORTLESS COVERAGE: 9 ROLLERS FOR QUICK, MESS-FREE PAINT APPLICATION.
-
PRECISION EDGING: 4 ROLLERS FOR FLAWLESS CUTS AROUND TRIM AND CORNERS.
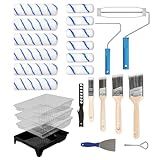
LAANPOLE Paint Roller Kit, 25 Piece Paint Supplies, 9"4" Paint Rollers, Paint Brushes for Walls, Microfiber Roller Covers for Professional Painting, Blue
- COMPLETE KIT: ALL-IN-ONE SOLUTION FOR LARGE AND DETAILED PAINTING NEEDS.
- TIME-SAVING EFFICIENCY: REDUCES PROJECT TIME WITH DUAL ROLLER SIZES.
- DURABLE DESIGN: LONG-LASTING, HIGH-QUALITY MATERIALS FOR A PERFECT FINISH.
To best paint or stain an outdoor storage shed, there are a few essential steps you need to follow:
- Prepare the surface: Begin by thoroughly cleaning the shed's exterior. Remove any dirt, dust, debris, or loose paint using a pressure washer or a brush and soapy water. Allow the shed to dry completely before proceeding.
- Sand the surface: To ensure that the paint or stain adheres properly, use sandpaper to lightly sand the shed's surface. This will also help to remove any remaining loose paint and create a smooth finish.
- Repair and patch: Inspect the shed for any damaged areas or holes. Use wood filler or putty to repair any cracks or imperfections. Allow the filler to dry and then sand it down to match the surrounding surface.
- Apply a primer (if necessary): If the shed has bare wood or previously unpainted surfaces, it is recommended to apply a suitable primer. This will provide a better base for the paint or stain to adhere to and improve its durability.
- Choose your paint or stain: Select an outdoor paint or stain that is specifically designed for exterior use and suitable for wood. Consider the shed's surroundings and your preferred color scheme.
- Start painting or staining: Use a brush, roller, or sprayer to apply the paint or stain onto the shed's surface. Begin with the trim and corners, working your way towards larger surfaces. Apply thin and even coats, allowing each coat to dry completely before applying the next one. Follow the manufacturer's instructions for drying times.
- Protect and seal: Once the desired color and finish are achieved, apply a clear protective sealer to shield the paint or stain from UV rays, moisture, and other outdoor elements. The sealer will help extend the lifespan of the shed's exterior.
- Clean up: Properly clean your brushes, rollers, or sprayers according to the manufacturer's guidelines. Ensure that any remaining paint or stain is disposed of responsibly.
Remember, it's crucial to wear appropriate protective gear like gloves and goggles during the entire process. Following these steps will help you successfully paint or stain your outdoor storage shed, enhancing its appearance and protecting it from the elements.
What is the role of a drop cloth in the painting or staining process for an outdoor shed?
A drop cloth plays a crucial role in the painting or staining process for an outdoor shed. Its primary purpose is to protect the surrounding area or ground from paint splatters, stains, or any other potential damages caused by the painting or staining process.
Here are some specific roles and benefits of using a drop cloth in this context:
- Surface Protection: A drop cloth creates a protective layer between the shed surface and the ground, preventing any accidental paint spills, drips, or stains from permanently damaging the concrete, grass, or any other surface below.
- Clean and Tidy Workspace: By using a drop cloth, you can maintain a clean and organized workspace. It helps to catch any spills, drips, or paint debris, saving you time and effort on cleaning up afterwards.
- Easy Cleanup: Drop cloths are usually made of washable and reusable materials like canvas or plastic. Once you finish the painting or staining process, you can simply fold and remove the drop cloth, eliminating the need for extensive cleaning.
- Safety Measures: In addition to protecting the shed surrounding area, a drop cloth also ensures your safety. It minimizes the risks of slips caused by wet or slippery surfaces, reducing the chances of accidents during the painting or staining process.
Overall, a drop cloth acts as a barrier between the shed and the ground, safeguarding the surroundings, maintaining cleanliness, facilitating easy cleanup, and ensuring a safe painting or staining experience for both the shed and the painter.
How to achieve a rustic or weathered look when staining an outdoor shed?
To achieve a rustic or weathered look when staining an outdoor shed, you can follow these steps:
- Prepare the surface: Make sure the shed is clean and free from any debris or loose paint. Remove any existing stain or paint by sanding or using a paint stripper if necessary.
- Choose the right stain: Select a stain color that will give you the desired rustic or weathered effect. Earthy tones like gray, brown, or weathered wood colors work well. Semi-transparent stains or wood tinting products are usually the best choices.
- Test the stain: Before applying the stain to the entire shed, it's a good idea to do a test sample on a small inconspicuous area or a scrap piece of wood to see if you achieve the desired effect.
- Apply the stain: Use a brush or a stain applicator to apply the stain evenly to the shed's surface. Follow the manufacturer's instructions for application guidelines and drying times. Make sure to work in small sections to avoid drying or lap marks.
- Create a distressed look: To create a weathered or rustic appearance, you can use various techniques such as staining unevenly, wiping off excess stain in some areas, or using a dry brush to apply the stain in a random pattern. You can also lightly sand the wood after staining to give it a worn or weathered texture.
- Add additional layers or accents: Once the first layer of stain has dried completely, you can add additional layers to deepen the color or achieve the desired effect. You can also consider adding accents like darker or lighter colors or even applying a glaze or wash to give it a more aged look.
- Seal the stained surface: After achieving the desired rustic or weathered look, it's important to seal the stained surface with a clear protective finish. Choose a sealer that is specifically designed for outdoor use to protect the wood from the elements and maintain the desired appearance.
Remember to always follow safety precautions, wear protective gear like gloves and goggles, and work in a well-ventilated area when staining.
What is the importance of sealing or varnishing after painting or staining an outdoor shed?
Sealing or varnishing after painting or staining an outdoor shed is important for several reasons:
- Protection from the elements: Sealing or varnishing provides a protective layer that helps prevent damage from moisture, sunlight, and other weather conditions. This is particularly important for outdoor structures like sheds that are constantly exposed to the elements.
- Preventing rot and decay: Outdoor wood structures are prone to rot and decay if left untreated. Sealing or varnishing helps seal the wood and prevent moisture from penetrating, thereby reducing the risk of rot and decay.
- Longevity and durability: A proper sealing or varnishing application helps increase the lifespan of the shed by providing an additional layer of protection against wear and tear. It helps maintain the structural integrity of the wood and minimizes the need for repairs or replacement.
- Enhancing appearance: Sealing or varnishing can enhance the appearance of the shed by adding a glossy or satin finish, bringing out the natural beauty of the wood grain, or providing a desired color. It helps keep the shed looking fresh and well-maintained.
- Ease of cleaning: Sealed or varnished surfaces are easier to clean and maintain. They are more resistant to dirt, stains, and mildew, making it easier to keep the shed clean with regular maintenance.
Overall, sealing or varnishing after painting or staining an outdoor shed is crucial to protect the wood, extend its lifespan, and maintain its appearance. It is an investment in the durability and aesthetics of the structure.
What is the recommended type of brush for painting or staining an outdoor shed?
The recommended type of brush for painting or staining an outdoor shed is a bristle brush. Bristle brushes are typically made from natural bristles or synthetic filaments, and they are ideal for applying oil-based paints, stains, and other coatings on both rough and smooth surfaces. Bristle brushes provide good coverage and help to evenly distribute the paint or stain over the shed's surface. It is advisable to choose a brush with medium to stiff bristles for better control and durability.
How to determine the amount of paint or stain needed for an outdoor storage shed?
To determine the amount of paint or stain needed for an outdoor storage shed, you can follow these steps:
- Calculate the surface area: Start by measuring the length, width, and height of each side of the shed. Multiply the length by the width to get the area of each side, then add up the areas of all sides together. Subtract any openings like doors or windows from the total surface area.
- Determine the paint or stain coverage: Check the label on the paint or stain can to find out the coverage per gallon. It is usually mentioned in square feet or square meters. For example, if the can says it covers 400 square feet per gallon (37 square meters), note down this value.
- Divide the surface area by the coverage: Divide the total surface area of the shed by the coverage per gallon to determine the number of gallons needed. Round up to the nearest Whole number.
- Consider applying multiple coats: If you plan to apply multiple coats for better protection or a different color, you may need to multiply the number of gallons needed by the number of coats desired.
- Adjust for porous surfaces: If the shed has a rough or porous surface, it may require more paint or stain than normal. In such cases, it's recommended to consult the manufacturer's guidelines or add an additional 10-20% of the estimated amount.
Remember, it's always better to have slightly more paint or stain than not enough to ensure complete coverage.