
Best Outdoor Paints for Adirondack Chairs to Buy in July 2026
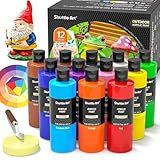
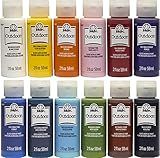
Shuttle Art Outdoor Acrylic Paint Set, 12 Colors Waterproof Paint, 8.45oz/250ml Large Bottles, Rich Pigmented Bulk Painting Supplies for Artists, Beginners on Rocks, Wood, Wall, Crafts, Garden Statues
- VIBRANT, WEATHER-RESISTANT COLORS FOR OUTDOOR ART
- GENEROUS 8.45 OZ BOTTLES PERFECT FOR LARGE PROJECTS
- VERSATILE FOR MULTIPLE SURFACES AND CREATIVE OCCASIONS


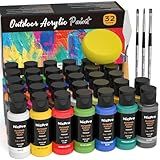
Nicpro 32 Colors Outdoor Acrylic Paint Bulk with Brush and Sponge, Knife, Non-Toxic Paint for Multi-surface Rock, Wood, Fabric, Leather, Crafts, Canvas, Shoes and Wall Painting
-
32 COLORS FOR ENDLESS OUTDOOR CREATIVITY & SEASONAL FUN!
-
FADE-RESISTANT & WATERPROOF FOR LONG-LASTING OUTDOOR USE!
-
SAFE, NON-TOXIC PAINT FOR FAMILY PROJECTS & ART CLASSES!
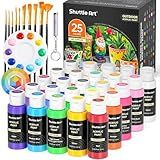
Shuttle Art 25 Colors Outdoor Acrylic Paint Set, 2oz/60ml Waterproof Acrylic Paint with 10 Brushes 1 Palette, Rich Pigmented Paints for Artists, Beginners on Rocks, Wood Crafts, Garden Statues
-
VIBRANT 25-COLOR SET: 20 CLASSICS, 3 GLOW, AND 2 METALLIC FINISHES.
-
SUPERIOR OUTDOOR PERFORMANCE: WATER-RESISTANT, UV-PROTECTED, VIBRANT ART.
-
VERSATILE FOR ANY SURFACE: PERFECT FOR OUTDOOR CRAFTS, GIFTS, AND FUN!
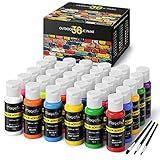
Magicfly Outdoor Acrylic Paint, Set of 30 Colors/Tubes (60 ml, 2 oz.) with Storage Box, Rich Pigments, Multi-Surface Paints for Rock, Wood, Fabric, Leather, Paper, Crafts, Canvas and Wall Painting
- PERFECT GIFT SET FOR ARTISTS AND HOBBYISTS OF ALL AGES!
- LONG-LASTING, WEATHER-RESISTANT COLORS FOR OUTDOOR PROJECTS.
- VERSATILE PAINT FOR CANVAS, WOOD, GLASS, AND MORE SURFACES!
FolkArt Outdoor Gloss Acrylic Craft Paint Set Designed for Beginners and Artists, Non-Toxic Formula Perfect for Rock Designing, Twelve Bottles, 2 oz, 24 Fl Oz
- 12 VIBRANT COLORS IN CONVENIENT 2 OZ BOTTLES FOR DIVERSE PROJECTS!
- DURABLE, WEATHER-RESISTANT FINISH PERFECT FOR OUTDOOR APPLICATION.
- EASY CLEANUP WITH SOAP AND WATER FOR HASSLE-FREE PAINTING!
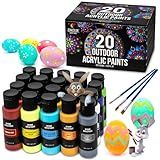
Outdoor acrylic paint set (2 fl oz)- 20 Tubes 2 with Glow in the Dark Effect - Art supplies for Adults - For multiple use- Woods, Leather, Metal & Fabric Paint & Paint for rocks Outdoor/Craft paint
- WEATHER-RESISTANT ACRYLICS FOR LASTING OUTDOOR & INDOOR PROJECTS.
- INCLUDES 20 VIBRANT COLORS PLUS UNIQUE GLOW, METAL, & MIXING EFFECTS.
- PERFECT GIFT FOR ARTISTS, COMPLETE WITH BRUSHES FOR ALL SKILL LEVELS.
Painting an Adirondack chair can be a great way to breathe new life into an old or weathered chair or to customize a new one to your desired color scheme. Here are the steps involved in painting an Adirondack chair:
Prepare the chair: Start by preparing the chair for painting. If the chair is old or has existing paint, scrape off any loose or peeling paint using a paint scraper. Sand the chair to create a smooth surface for painting. Use medium-grit sandpaper to remove any rough patches or splinters. Once sanded, wipe down the chair with a damp cloth to remove any dust or debris.
Choose the paint: Select an exterior-grade paint suitable for outdoor use, as Adirondack chairs are often placed outside. This type of paint is designed to withstand different weather conditions and provide long-lasting durability. Consider using a high-quality brand that offers good coverage and protection against UV rays and fading.
Prime the chair (optional): If desired or needed, apply a primer to the chair before painting. Priming helps to create a stable surface for the paint to adhere to, especially when painting over bare wood or repairing damaged areas. Follow the instructions on the primer for the recommended drying time.
Paint the chair: Begin by painting the hard-to-reach areas first, such as the backrest slats and the underside of the chair. Use a small brush or foam brush to carefully apply the paint, ensuring even coverage. Then, move on to the larger, more accessible areas of the chair. Use a larger brush, roller, or spray paint for these sections. Apply the paint in long, smooth strokes, following the grain of the wood. Be sure to cover all surfaces, including the back, arms, and legs.
Allow drying time: After the first coat of paint, allow the chair to dry completely based on the paint manufacturer's instructions. Typically, this could range from a few hours to overnight. If a second coat of paint is desired for better coverage or a more vibrant color, apply it after the first coat is completely dry.
Touch-ups and finishing: Inspect the painted chair for any missed spots or uneven areas. Use a small brush to touch up these areas with additional paint. Once all touch-ups are complete, allow the chair to dry fully. Consider adding a protective coat of clear, outdoor-grade polyurethane to protect the paint and extend its lifespan. Follow the instructions for drying time and the number of recommended coats.
As a final step, clean up your painting supplies according to the instructions provided by the paint and primer manufacturers. Enjoy your newly painted Adirondack chair in your outdoor space!
Can you paint an Adirondack chair that has been exposed to the elements for a long time?
Yes, you can paint an Adirondack chair that has been exposed to the elements for a long time. However, it is important to properly prepare the chair before painting to ensure the best results. Here are the steps you can follow:
- Clean the chair: Start by thoroughly cleaning the chair to remove any dirt, grime, or mildew. Use a mixture of mild detergent or dish soap and warm water, along with a scrub brush or sponge, to clean the surface. Rinse with water and allow the chair to dry completely.
- Sanding: Next, gently sand the entire surface of the chair to remove any loose or peeling paint, as well as any roughness caused by weathering. Use a medium-grit sandpaper and sand in the direction of the grain. Sanding helps create a smooth and uniform surface for the paint to adhere to.
- Repair: Inspect the chair for any cracks, splits, or damaged sections. If you find any, use wood filler or epoxy to fill and repair these areas. Follow the product instructions for application and drying times. Sand the repaired areas once they are fully dry to make them smooth and blend with the rest of the chair.
- Prime: Applying a primer before painting is essential for better adhesion and to provide a consistent base for the paint. Choose a primer specifically designed for outdoor use, preferably one suitable for wood surfaces. Apply the primer following the manufacturer's instructions and allow it to dry completely.
- Paint: Select an exterior-grade paint suitable for outdoor furniture. You can choose any color you desire. Apply the paint evenly using a brush or sprayer, following the manufacturer's guidelines regarding application and drying times between coats. Apply multiple thin coats for better coverage and durability.
- Seal: Once the paint is fully dry, consider applying a clear sealant or varnish specifically formulated for outdoor use. This will provide an extra layer of protection against the elements and further extend the life of the paint and the chair.
Remember to work in a well-ventilated area and follow safety precautions mentioned on the product labels. Following these steps will help restore and protect your Adirondack chair, giving it a fresh and renewed appearance.
How do you prepare an Adirondack chair for painting?
To prepare an Adirondack chair for painting, follow these steps:
- Start by cleaning the chair: Use a mild detergent mixed with water to scrub the chair thoroughly. This will remove any dirt, grime, or grease that may prevent the paint from adhering properly. Rinse the chair with clean water and allow it to dry completely.
- Sand the chair: Use sandpaper or a sanding block to gently sand the entire chair, including all the surfaces and edges. This will create a slightly rough texture, which helps the paint to adhere better. Sanding also helps to remove any existing finish or rough spots on the wood. Be sure to sand in the direction of the wood grain.
- Fill any holes or cracks: If there are any noticeable holes or cracks in the chair, fill them with wood filler. Apply the wood filler with a putty knife, smoothing it evenly across the surface. Allow it to dry according to the product instructions.
- Sand again: After the wood filler is completely dry, sand the filled areas to make them flush with the rest of the chair. Use a fine-grit sandpaper to ensure a smooth, even surface.
- Wipe off the dust: Use a tack cloth or a clean, damp cloth to wipe off any dust or debris left from sanding. This will ensure a clean surface for painting.
- Prime the chair (optional): Applying a primer is not always necessary, but it can be beneficial for a better finish and improved durability. If you choose to prime the chair, select an appropriate primer for outdoor use and apply it following the manufacturer's instructions. This step also helps to prevent the wood from absorbing too much paint.
- Paint the chair: Once the primer is dry (if applied), you can proceed to paint the chair. Select a paint suitable for outdoor use and choose your desired finish (matte, satin, or glossy). Apply thin, even coats of paint using a paintbrush or a paint sprayer. Allow each coat to dry completely before applying the next one. Apply multiple coats for better coverage and durability.
- Seal the paint (optional): To protect the painted surface and extend its lifespan, you can consider applying a clear sealant or varnish. Make sure the paint is thoroughly dry before applying the sealant according to its instructions.
Following these steps will help to prepare your Adirondack chair for painting and ensure a professional-looking and long-lasting finish.
Should you paint the Adirondack chair indoors or outdoors?
Adirondack chairs are typically designed for outdoor use, so it is recommended to paint them outdoors. This will provide better ventilation and help prevent any potential fumes or odors from lingering in an enclosed space. Additionally, outdoor painting allows for easier cleanup and minimizes the risk of any accidental spills or damage to indoor surfaces.