
Best Tools and Materials for Garden Statues to Buy in July 2026
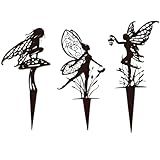
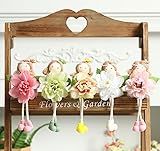
Decorative Garden Stakes, Fairy Garden Statues for Home and Garden (3)
- WHIMSICAL DESIGNS ADD ENCHANTMENT TO ANY OUTDOOR SPACE.
- VERSATILE FOR GARDENS, POTS, AND INDOOR FAIRY-THEMED DECOR.
- DURABLE MATERIALS ENSURE LONG-LASTING MAGIC IN ALL ELEMENTS.


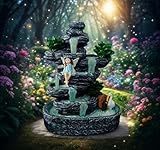
QCF Fairy Garden Houses Fairies Pond Landscape Solar Statues, Whimsical Accessories Yard Decor Outdoor Art Sculpture for Lawn Patio Porch Backyard, Gardening Birthday Gift for Women Kids
-
MAGICAL ILLUMINATION: WHIMSICAL GLOWING WATERFALL ENHANCES NIGHT DECOR.
-
DURABLE DESIGN: WEATHERPROOF RESIN KEEPS VIBRANT DETAILS FOR YEARS.
-
EFFORTLESS OPERATION: SOLAR-POWERED AND EASY TO PLACE ANYWHERE!
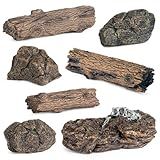
EOIVSH 7pcs Diorama Supplies Fake Rocks, Artificial Garden Figurines Tree Stump, Scene Accessories Stone Stumps Statue Ornaments for Micro Train Railway Sand Table Landscape
-
REALISTIC DESIGN: NATURE-INSPIRED TEXTURES FOR EYE-CATCHING APPEAL.
-
COMPLETE SET: 3 TREE STUMPS & 4 STONES FOR ENDLESS CREATIVE POSSIBILITIES.
-
SAFE & DURABLE: HIGH-QUALITY, WASHABLE MATERIALS ENSURE CHILD SAFETY.
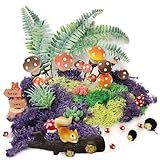
QuarenDen 37 Pcs Fairy Wild Garden Supplies, Miniature Mushrooms Statues with Fake Moss for Fairy Outdoor Garden Micro Landscape Terrarium Plant Pots Bonsai Decor
-
VERSATILE 37PCS SET: TRANSFORM ANY SPACE WITH ENCHANTING MINIATURES!
-
DURABLE QUALITY: CRAFTED FROM PREMIUM, WATERPROOF RESIN FOR LASTING BEAUTY.
-
PERFECT GIFT: COLLABORATE ON DELIGHTFUL DIY GARDENS FOR FAMILY FUN!
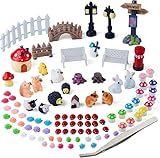
Zealor 100 PCS Mini Fairy Garden Accessories Kit Outdoor Mushroom Tiny Animal Miniatures Garden Figurines Landscape Ornaments for Bonsai Terrarium House Plant Party Decoration Supplies
-
100-PIECE SET FOR ULTIMATE DIY FAIRY GARDEN CREATIVITY!
-
DURABLE, WATERPROOF RESIN FOR LONG-LASTING OUTDOOR DÉCOR!
-
BRIGHT COLORS & MINI SIZE ENHANCE ANY GARDEN OR CRAFT PROJECT!
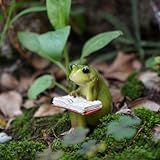
picocosmxiruo Miniature Small Frog and Rabbit Figurines Fairy Garden Supplies Terrarium Accessories DIY Miniature Garden
- DURABLE POLYRESIN FOR WEATHER-RESISTANT OUTDOOR DISPLAY.
- PERFECT FOR ENHANCING GARDENS, PATIOS, AND OUTDOOR SPACES.
- UNIQUE DESIGNS ADD CHARM AND PERSONALITY TO ANY OUTDOOR AREA.
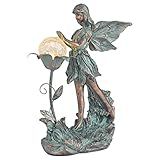
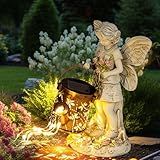
TERESA'S COLLECTIONS Garden Fairy Large Bronze Garden Sculptures & Statues Resin with Solar Outdoor Light, Valentines Decorations Lawn Ornaments for Outdoor Decor, Gifts for Women Mom, 10.6"
- ENCHANTING GLOW: ILLUMINATE GARDENS WITH OUR UNIQUE FAIRY STATUE!
- DURABLE DESIGN: HAND-PAINTED, WEATHER-RESISTANT FOR LASTING BEAUTY.
- PERFECT GIFT: IDEAL FOR ANY OCCASION, SPREADING MAGIC AND JOY!
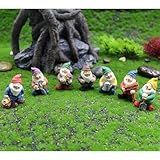
HONEYSHOW Fairy Garden Accessories, 7PCS Gnome Figurines-Mini Gnomes kit/Seven Dwarfs Statue for Fairy Garden/Flower Pot/Home Decoration.
-
ADD MAGIC TO ANY SPACE WITH OUR CHARMING 7-PIECE GNOME SET!
-
THOUGHTFUL GIFT OF UNITY AND KINDNESS FOR FRIENDS AND FAMILY.
-
DURABLE, HANDCRAFTED DECOR PERFECT FOR GARDENS OR HOME OFFICES!
Enanal Spring Fairy Figurines, 5pcs 7.3inch Pastel Color Fairy Statue Holding Artificial Flowers for Spring Floral Party Decor, Easter Home Tabletop Ornaments, Fairy Garden Party Supplies
-
CHARMING PASTEL DESIGNS: ENHANCE ANY PARTY WITH CUTE, COLORFUL FAIRIES!
-
VERSATILE DECOR: PERFECT FOR SPRING EVENTS, BIRTHDAYS, AND GIFTS!
-
QUALITY YOU CAN TRUST: DURABLE MATERIALS FOR LONG-LASTING DISPLAYS!
Solar Garden Outdoor Angel Statues with Watering Can String Lights Outdoor Garden Decor 36 Warm White LEDs for Patio, Balcony, Yard, Lawn Ornament, Gift Idea for Housewarming (Angel Flower)
- WHIMSICAL SOLAR ANGEL BRIGHTENS GARDENS DAY AND NIGHT EFFORTLESSLY.
- ENERGY-EFFICIENT SOLAR PANEL OFFERS 6-10 HOURS OF RADIANT LIGHTING.
- PERFECT GIFT FOR LOVED ONES ON ANY SPECIAL OCCASION OR CELEBRATION!
To make a garden statue in the Merger Mansion, you will need the following materials: cement mix, water, a large plastic container, a mold (such as a statue mold or a plastic container of the desired shape), sandpaper, and paint (optional).
- Start by preparing the area where you want to place the garden statue. Ensure that it is clean and free from debris.
- Mix the cement according to the instructions on the cement mix package. Typically, this involves combining cement mix with water until you achieve a thick and smooth consistency. Use a large plastic container to mix the cement.
- Once the cement is thoroughly mixed, pour it into the mold or plastic container of the desired shape. Make sure to fill it completely and level the surface.
- Let the cement dry and harden for the recommended time. This usually takes at least 24 to 48 hours, depending on the weather conditions and the size of your statue.
- Once the cement has hardened, carefully remove the mold or plastic container. If using a plastic container, gently cut or tear it away from the cement.
- Use sandpaper to smooth any rough edges or surfaces on the statue. This will give it a polished and finished look.
- If desired, you can apply paint to the statue to add color and enhance its appearance. Choose outdoor paint that is weather-resistant and suitable for use on cement surfaces.
- Allow the paint to dry completely before placing the garden statue in its designated spot.
Remember to follow safety guidelines while working with cement mix, wear protective gloves and eyewear, and work in a well-ventilated area. Additionally, it's important to check local regulations and guidelines regarding the placement of garden statues in your area.
Can I repurpose old materials to make the garden statue?
Yes, you can definitely repurpose old materials to make a garden statue. It's a creative and eco-friendly approach to upcycling and giving new life to unwanted items. Some ideas for repurposed materials could include:
- Broken ceramics or pottery: Use broken pieces of plates, mugs, or other ceramics to create a mosaic-style statue.
- Scrap metal or old tools: Weld together old metal objects such as wrenches, nuts, bolts, or car parts to create a metal sculpture.
- Driftwood or fallen branches: Arrange and fix together pieces of driftwood or fallen branches to create a natural and rustic statue.
- Old tires: Cut and shape old tires into various forms, such as animals or abstract shapes, and paint them to add color and character.
- Used glass bottles: Stack and glue painted or clear glass bottles to create a unique glass sculpture. Lighting them from within can create interesting effects.
- Reclaimed stone or bricks: Stack or carve reclaimed stones or bricks to create a sculpture with a more traditional or rustic appearance.
- Discarded plastic containers: Cut and shape discarded plastic containers to create a contemporary and colorful sculpture.
- Broken or outdated household items: Repurpose broken household items like old lamps, clocks, or kitchenware to create a whimsical or avant-garde sculpture.
Remember to consider the weather resistance and durability of the materials you choose, especially if they will be placed outdoors. Additionally, ensure that any materials you use are safe for the environment and won't harm any animals or plants in your garden.
How do I attach the garden statue securely to the ground?
To securely attach a garden statue to the ground, you may follow these steps:
- Determine the location: Select an appropriate spot in your garden where you want to place the statue.
- Dig a hole: Use a shovel to dig a hole that is about 8-10 inches deep and wide enough to fit the base of the statue.
- Prepare the base: If the statue already has a base or a pedestal, ensure it is clean and stable. If not, consider placing it on a sturdy concrete base.
- Place the statue: Lower the statue into the hole, ensuring it is level and in the desired position.
- Mix and pour concrete: Prepare a bag of quick-setting concrete mix as per the instructions on the packaging. Slowly pour dry mix into the hole around the base of the statue while adding water gradually. Ensure the mix fills the hole and covers the base of the statue sufficiently.
- Align and level: While the concrete is still wet, use a level to make sure the statue is aligned vertically and horizontally. Make necessary adjustments if required.
- Allow to set: Follow the recommended drying time for the concrete as mentioned on the packaging. Generally, it takes a few hours to set, but it is best to wait at least 24 hours to ensure a strong bond.
- Backfill and finish: Once the concrete is completely set, backfill the remaining hole with soil or ground cover. Smooth and blend the surrounding area so that it looks natural.
- Additional security: For extra stability, you can consider driving metal stakes into the ground at a slight angle on opposite sides of the statue base and attach them to the statue using stainless steel wires. However, this step may vary depending on the design and weight of the statue.
Remember to take safety precautions while working with concrete and follow the manufacturer's instructions for the specific products you use.
Can I make a garden statue that changes appearance depending on the time of day?
Yes, it is possible to create a garden statue that changes appearance depending on the time of day. There are various ways you can achieve this effect:
- Solar-powered lights: You can install solar-powered lights in or around the statue, which automatically turn on or change color as the sun sets or rises. This can create a beautiful visual transformation as the statue appears differently during daylight and nighttime.
- Reflective or interactive materials: Incorporate materials that have reflective or interactive properties. For example, using a mirrored surface on specific parts of the statue can give the impression of it changing appearance according to the surrounding environment and lighting conditions.
- Movable components: Design the statue with movable or rotating components that react to daylight or darkness. For instance, using wind-driven mechanisms, such as rotating blades or shifting panels, can create different patterns or displays depending on the time of day.
- Plant integration: Planting certain types of flowers or vines around the statue can create a changing appearance as they bloom or open during certain times of the day. This can add a dynamic element to the statue and the surrounding garden.
Remember, implementing these ideas would require careful planning and craftsmanship, and you may need to consult with professionals or experts in the field of sculpture and design to bring your vision to life.
What materials do I need to make a garden statue in the Merger Mansion?
To make a garden statue in the Merger Mansion, you will need the following materials:
- Sculpting clay or plaster of Paris: Select a clay or plaster material that is suitable for sculpting. These can be easily molded and shaped to create the desired statue.
- Sculpting tools: Various sculpting tools such as chisels, knives, wire loop tools, shaping tools, and smoothing tools are essential for shaping the clay or plaster.
- Armature: An armature is a supportive structure that provides stability to the sculpture. Depending on the desired size and structure of the statue, you may need different types of armature materials such as wire, wooden dowels, or PVC pipes.
- Protective gear: Wearing gloves and eye protection is advisable when working with sculpting materials, especially if you opt for materials like plaster that may generate dust particles.
- Reference materials: Gather reference materials or images of the garden statue you wish to create. These will help you visualize and shape the sculpture accurately.
- Base or pedestal: Depending on the design, you may need a base or pedestal to display the garden statue. This can be made from materials like stone, concrete, wood, or metal, depending on your preferences.
- Painting or finishing supplies: If you intend to paint or finish the statue, gather suitable paints, brushes, and any other materials required for the desired aesthetics.
Remember to read and follow the instructions provided with the sculpting materials you select, and ensure that your workspace is well-ventilated and appropriate for the sculpting process.
What tools will I need to make the garden statue?
The tools you will need for making a garden statue may vary depending on the specific materials and design you choose. However, here are some common tools that you might need:
- Sculpting tools: These can include chisels, rasps, files, and different types of sculpting knives. They are used to shape and carve the material of your statue.
- Mallet or hammer: Required to strike the sculpting tools and create impact necessary for shaping the statue.
- Safety equipment: Various safety equipment like goggles, gloves, and dust masks are important to protect yourself during the sculpting process.
- Sandpaper: Used for smoothing and refining the surface of the statue after sculpting.
- Sculpting armature: Depending on the size and materials used, you might need an armature or framework to support your statue during the creation process.
- Welding equipment: If your statue involves metal components, you may need welding equipment such as a welding machine, protective gear, and appropriate welding rods.
- Painting supplies (optional): If you plan to paint or apply a finish to your statue, you will need paintbrushes, spray paints, primer, and sealants.
Keep in mind that these tools may vary depending on your chosen materials (e.g., clay, wood, stone, metal) and the level of detail you want to achieve. Always refer to the specific instructions or guidance for the material you are working with.