
Best DIY Candle Holder Ideas to Buy in July 2026
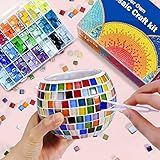
Glass Mosaic Candle Holder Kit – DIY Mosaic Kits for Adults & Crafts for Girls 8-12 – Arts and Crafts for Kids, Tealight Candle Holder for Home Decor, Toys Girls Birthday Christmas Gifts Ages 6 7 8-12
- COMPLETE DIY KIT: EVERYTHING INCLUDED FOR CREATIVE CANDLE HOLDER FUN!
- BONDING EXPERIENCE: FOSTER FAMILY CONNECTIONS THROUGH ART TOGETHER!
- PERFECT GIFT CHOICE: IDEAL FOR BIRTHDAYS, HOLIDAYS, AND SPECIAL MOMENTS!


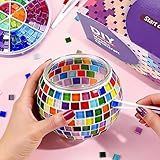
Joyclub DIY Mosaic Candle Holder Kit Mosaic Kits for Adults Stained Glass Tealight Candle Holder for Home Lighting Decor Girls Birthday Craft Gifts
-
PERFECT FOR BEGINNERS: UNLEASH CREATIVITY WITH OUR EASY MOSAIC KITS!
-
FAMILY FUN: ENGAGING FOR ALL AGES-FOSTER BONDS WHILE CRAFTING!
-
IDEAL DÉCOR & GIFTS: CREATE STUNNING PIECES FOR ANY OCCASION.
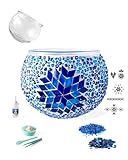
KRAFTSTORIES Turkish Mosaic DIY Candle Holder Kit Glass Decorative Tealight Holder for Living Dining Room Bedroom | Make Your Own Mosaic Candle Holder | Craft Kits for Adults (Blue)
-
DESIGN YOUR UNIQUE MOSAIC CANDLE HOLDER WITH ENDLESS POSSIBILITIES!
-
COMPLETE DIY KIT: EVERYTHING YOU NEED TO CREATE YOUR MASTERPIECE!
-
PERFECT GIFT FOR ANY OCCASION – SPARK CREATIVITY AND JOY!

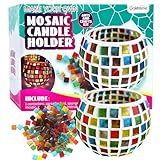
Remerry 2 Set Glass Mosaic Candle Holder Kit with Lights DIY Mosaic Arts and Crafts Gifts Decorative Handmade Flower Glass Vase Tealight Holder for Adults Home Lighting Decor
-
ALL-IN-ONE KIT: EVERYTHING NEEDED FOR A STUNNING DIY EXPERIENCE INCLUDED.
-
VERSATILE DESIGN: CREATE UNIQUE VASES OR GLOWING CANDLE HOLDERS EASILY.
-
PERFECT GIFT: IDEAL FOR HOLIDAYS OR SPECIAL OCCASIONS WITH A PERSONAL TOUCH.
Glass Mosaic Candle Holder Kit, DIY Stained Glass Kit for Adults Home Decor Fun Arts and Crafts Gifts for Teens Adults Valentine Birthday Mother’s Day Gifts
- COMPLETE KIT FOR CRAFTING UNIQUE CANDLE HOLDERS; NO EXTRA SUPPLIES NEEDED!
- FUN DIY PROJECT FOSTERS FAMILY BONDING AND CREATIVITY FOR ALL AGES.
- COLORFUL DÉCOR ADDS WARMTH TO ANY SPACE, PERFECT FOR MEANINGFUL GIFTS!

Luxetins 24 Pack Empty Candle Tins, 24 Designs Metal Tins,Candle Containers with Lids,Bulk Candle Jars,Wicks, Stickers, Wicks Holder for DIY Candle Crafting Small Businesses(2.5OZ×24PCS)
- CREATE UNIQUE CANDLES: 24 STYLISH TINS FOR ENDLESS DIY PROJECTS.
- PREMIUM QUALITY: DURABLE AND PERFECTLY SEALED FOR A LUXURIOUS TOUCH.
- TRAVEL-FRIENDLY SIZE: LIGHTWEIGHT TINS FOR ON-THE-GO CANDLE MAKING.
To make a DIY candle holder from household items, you can start by gathering materials such as empty glass jars, wine glasses, tin cans, or even old mugs. Next, you can personalize the holder by decorating it with paint, stickers, or ribbons. To hold the candle securely, you can fill the bottom of the container with sand or pebbles. Finally, place the candle in the holder and enjoy the warm glow of your homemade creation.
How to make a DIY candle holder with a modern design?
To make a DIY candle holder with a modern design, you can follow these steps:
- Gather materials:
- Wooden dowel or metal rod
- Wood or metal base
- Drill
- Candle holders (can be purchased or repurposed)
- Paint or stain
- Paintbrush
- Sandpaper
- Measure and cut the wooden dowel or metal rod to the desired height for your candle holder.
- Using a drill, create holes in the wooden base for the candle holders to fit into. Make sure the holes are slightly smaller than the diameter of the candle holder to ensure a snug fit.
- Sand down any rough edges on the wooden dowel or metal rod and base.
- Paint or stain the wooden dowel or metal rod and base in a color of your choice. Allow it to dry completely.
- Insert the candle holders into the holes on the base.
- Place the wooden dowel or metal rod in the center of the base, securing it in place.
- Place candles in the candle holders and light them to enjoy your modern DIY candle holder.
How to make a DIY candle holder that glows in the dark?
To make a DIY candle holder that glows in the dark, you will need the following materials:
- Glass or plastic jar
- Glow in the dark paint
- Paintbrush
- Tea light candle
Here's how you can make it:
- Ensure that the glass or plastic jar is clean and dry before starting the project.
- Use a paintbrush to apply a layer of glow in the dark paint to the inside of the jar. You can apply multiple layers if you want a stronger glow.
- Allow the paint to dry completely according to the instructions on the paint container.
- Once the paint is dry, place a tea light candle inside the jar.
- Light the candle and place the DIY candle holder in a dark room to see it glow.
- Enjoy the ambient glow of your homemade glow in the dark candle holder!
Note: Always exercise caution when using candles and never leave them unattended.
What is the best way to decorate a DIY candle holder?
There are many creative ways to decorate a DIY candle holder, depending on your personal style and preferences. Some ideas include:
- Paint or decorate the outside of the candle holder with acrylic paint, glitter, or metallic markers to add color and texture.
- Use decoupage to attach decorative paper or fabric to the outside of the candle holder for a unique and customized look.
- Wrap twine, ribbon, or lace around the candle holder and secure with glue for a rustic or elegant touch.
- Add embellishments like beads, sequins, rhinestones, or charms to the candle holder to create a glamorous and eye-catching design.
- Experiment with different techniques, such as stenciling, dip dying, or marbling, to create a one-of-a-kind finish on the candle holder.
Ultimately, the best way to decorate a DIY candle holder is to let your creativity run wild and personalize it to suit your taste and style.
How to make a DIY candle holder using seashells?
To make a DIY candle holder using seashells, you will need the following materials:
- Seashells of various shapes and sizes
- A small glass votive candle holder
- Hot glue gun
- Decorative ribbon or twine (optional)
Here's how to make the candle holder:
- Start by selecting seashells that are clean and in good condition. You can collect them from the beach or purchase them from a craft store.
- Using a hot glue gun, carefully glue the seashells onto the glass votive candle holder. You can arrange them in a random pattern or create a more structured design, depending on your preference.
- Continue gluing the seashells onto the candle holder until the entire surface is covered. Make sure to press each shell firmly in place to ensure they are securely attached.
- Once all the seashells are attached, let the glue dry completely before handling the candle holder.
- If desired, you can add a decorative ribbon or twine around the top of the candle holder for an extra touch.
- Place a small candle inside the votive holder and enjoy the beautiful glow created by the seashells when lit.
Your DIY seashell candle holder is now complete and ready to be displayed in your home or given as a thoughtful handmade gift.
How to make a DIY candle holder using cement?
To make a DIY candle holder using cement, you will need the following materials:
- Cement mix
- Water
- Mixing bucket
- Mold (can be a plastic cup, silicone mold, or any other shape you desire)
- Candle (to determine size of mold)
Here is a step-by-step guide to making the cement candle holder:
- Prepare the cement mix according to the instructions on the packaging. Mix the cement with water in a mixing bucket until it reaches a thick, pourable consistency.
- Place your mold on a flat surface and coat the inside with a thin layer of cooking spray or oil to help release the cement once it has dried.
- Pour the cement mixture into the mold, filling it up to about halfway. Tap the mold on the table a few times to remove any air bubbles.
- Insert the candle into the center of the cement mixture, making sure it is straight and centered.
- Allow the cement to dry and set for at least 24 hours, or longer if necessary.
- Once the cement has fully hardened, gently remove the candle holder from the mold. You may need to wiggle it or carefully cut away the mold if necessary.
- Smooth any rough edges or imperfections with sandpaper or a file.
- Place a candle in the holder and enjoy your handmade cement candle holder!
You can customize your candle holder by adding in colored dyes or mixing in other materials such as sand or small stones for a textured look. Be creative and experiment with different shapes and sizes to create a unique candle holder that fits your style.